
| 
| |
|
|
This page contains present day photos (Year 2000 to date) of Ontario's King's Highway 89, arranged by location from Mount
Forest easterly to Shelburne. All photographs displayed on this page were taken by the Webmaster (Cameron Bevers), unless specifically noted otherwise. Click on any
thumbnail to see a larger image!
Please note that all photographs displayed on this
website are protected by copyright. These photographs must not be reproduced, published,
electronically stored or copied, distributed, or posted onto other websites without
my written permission. If you want to use photos from this website, please
email me first for permission. Thank-you!
|
|---|
|
Page 3: Present Day King's Highway 89 Photographs (Mount Forest to Shelburne)
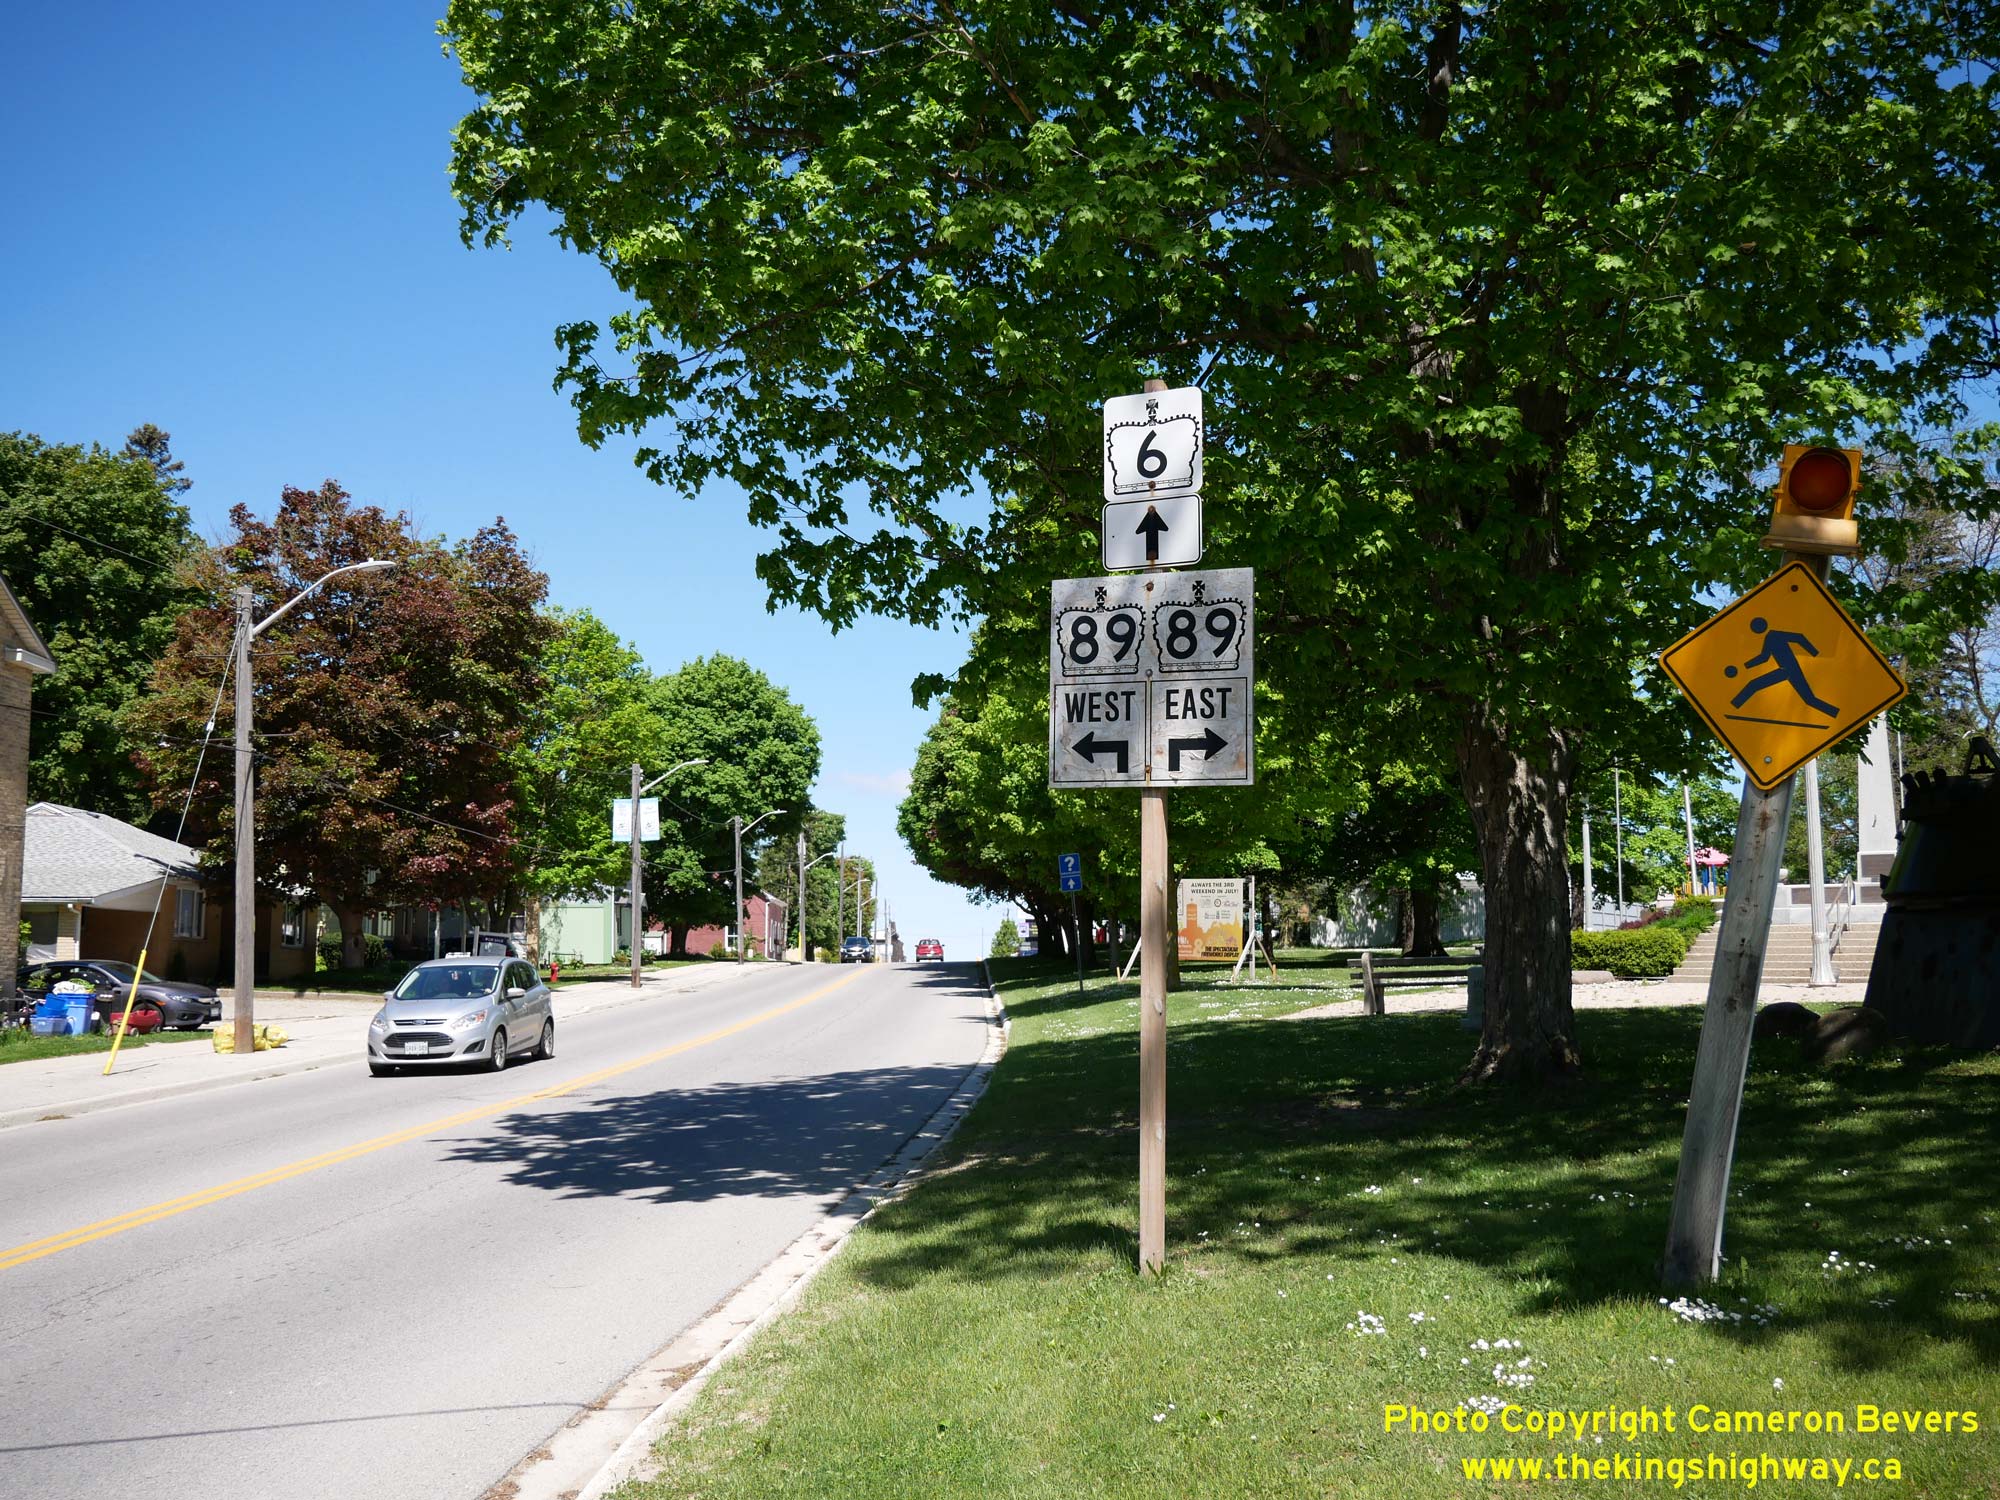
  Left - Junction sign assembly on northbound Hwy 6 (Main Street) approaching the Hwy 89 Junction at Queen Street in Mount Forest. See an
Enlarged Photo Here. Left - Junction sign assembly on northbound Hwy 6 (Main Street) approaching the Hwy 89 Junction at Queen Street in Mount Forest. See an
Enlarged Photo Here.(Photograph taken on June 1, 2025 - © Cameron Bevers) Right - Facing north along Hwy 6 (Main Street) approaching the Hwy 89 Junction at Queen Street in Mount Forest. These two highways intersect at the southern
end of Mount Forest's town centre. Motorists on Hwy 6 who continue straight through at this intersection will pass through Downtown Mount Forest and then continue
north towards Durham and Owen Sound. Motorists who turn left can follow Hwy 89 westerly to Harriston, while motorists who turn right can follow Hwy 89 easterly to
Shelburne. See an Enlarged Photo Here.(Photograph taken on June 1, 2025 - © Cameron Bevers) 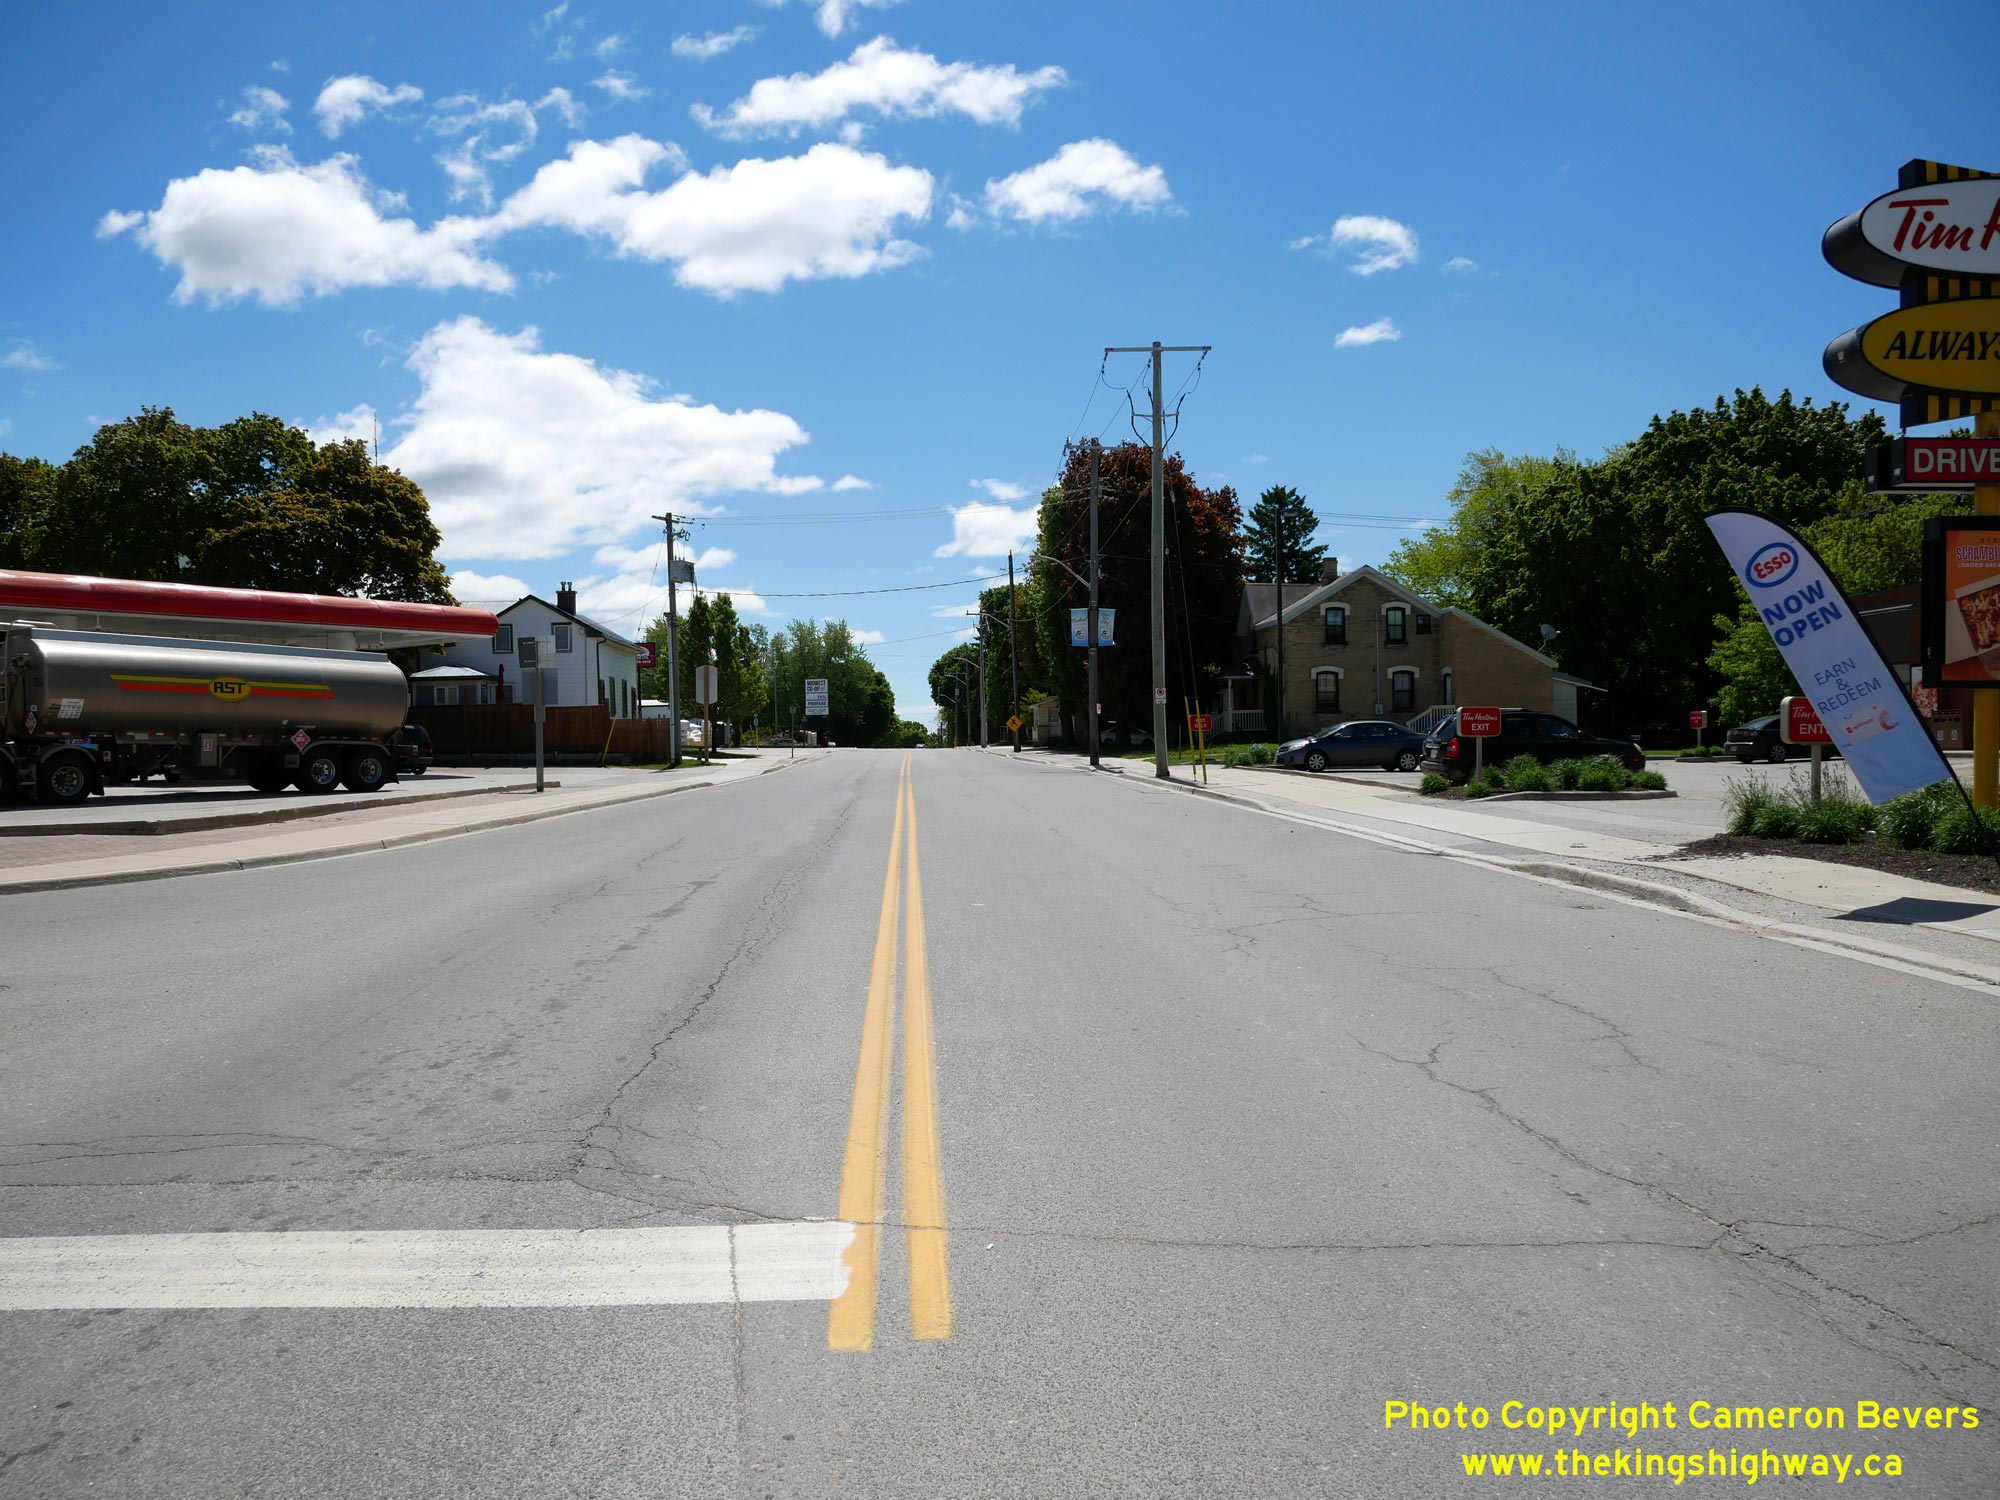
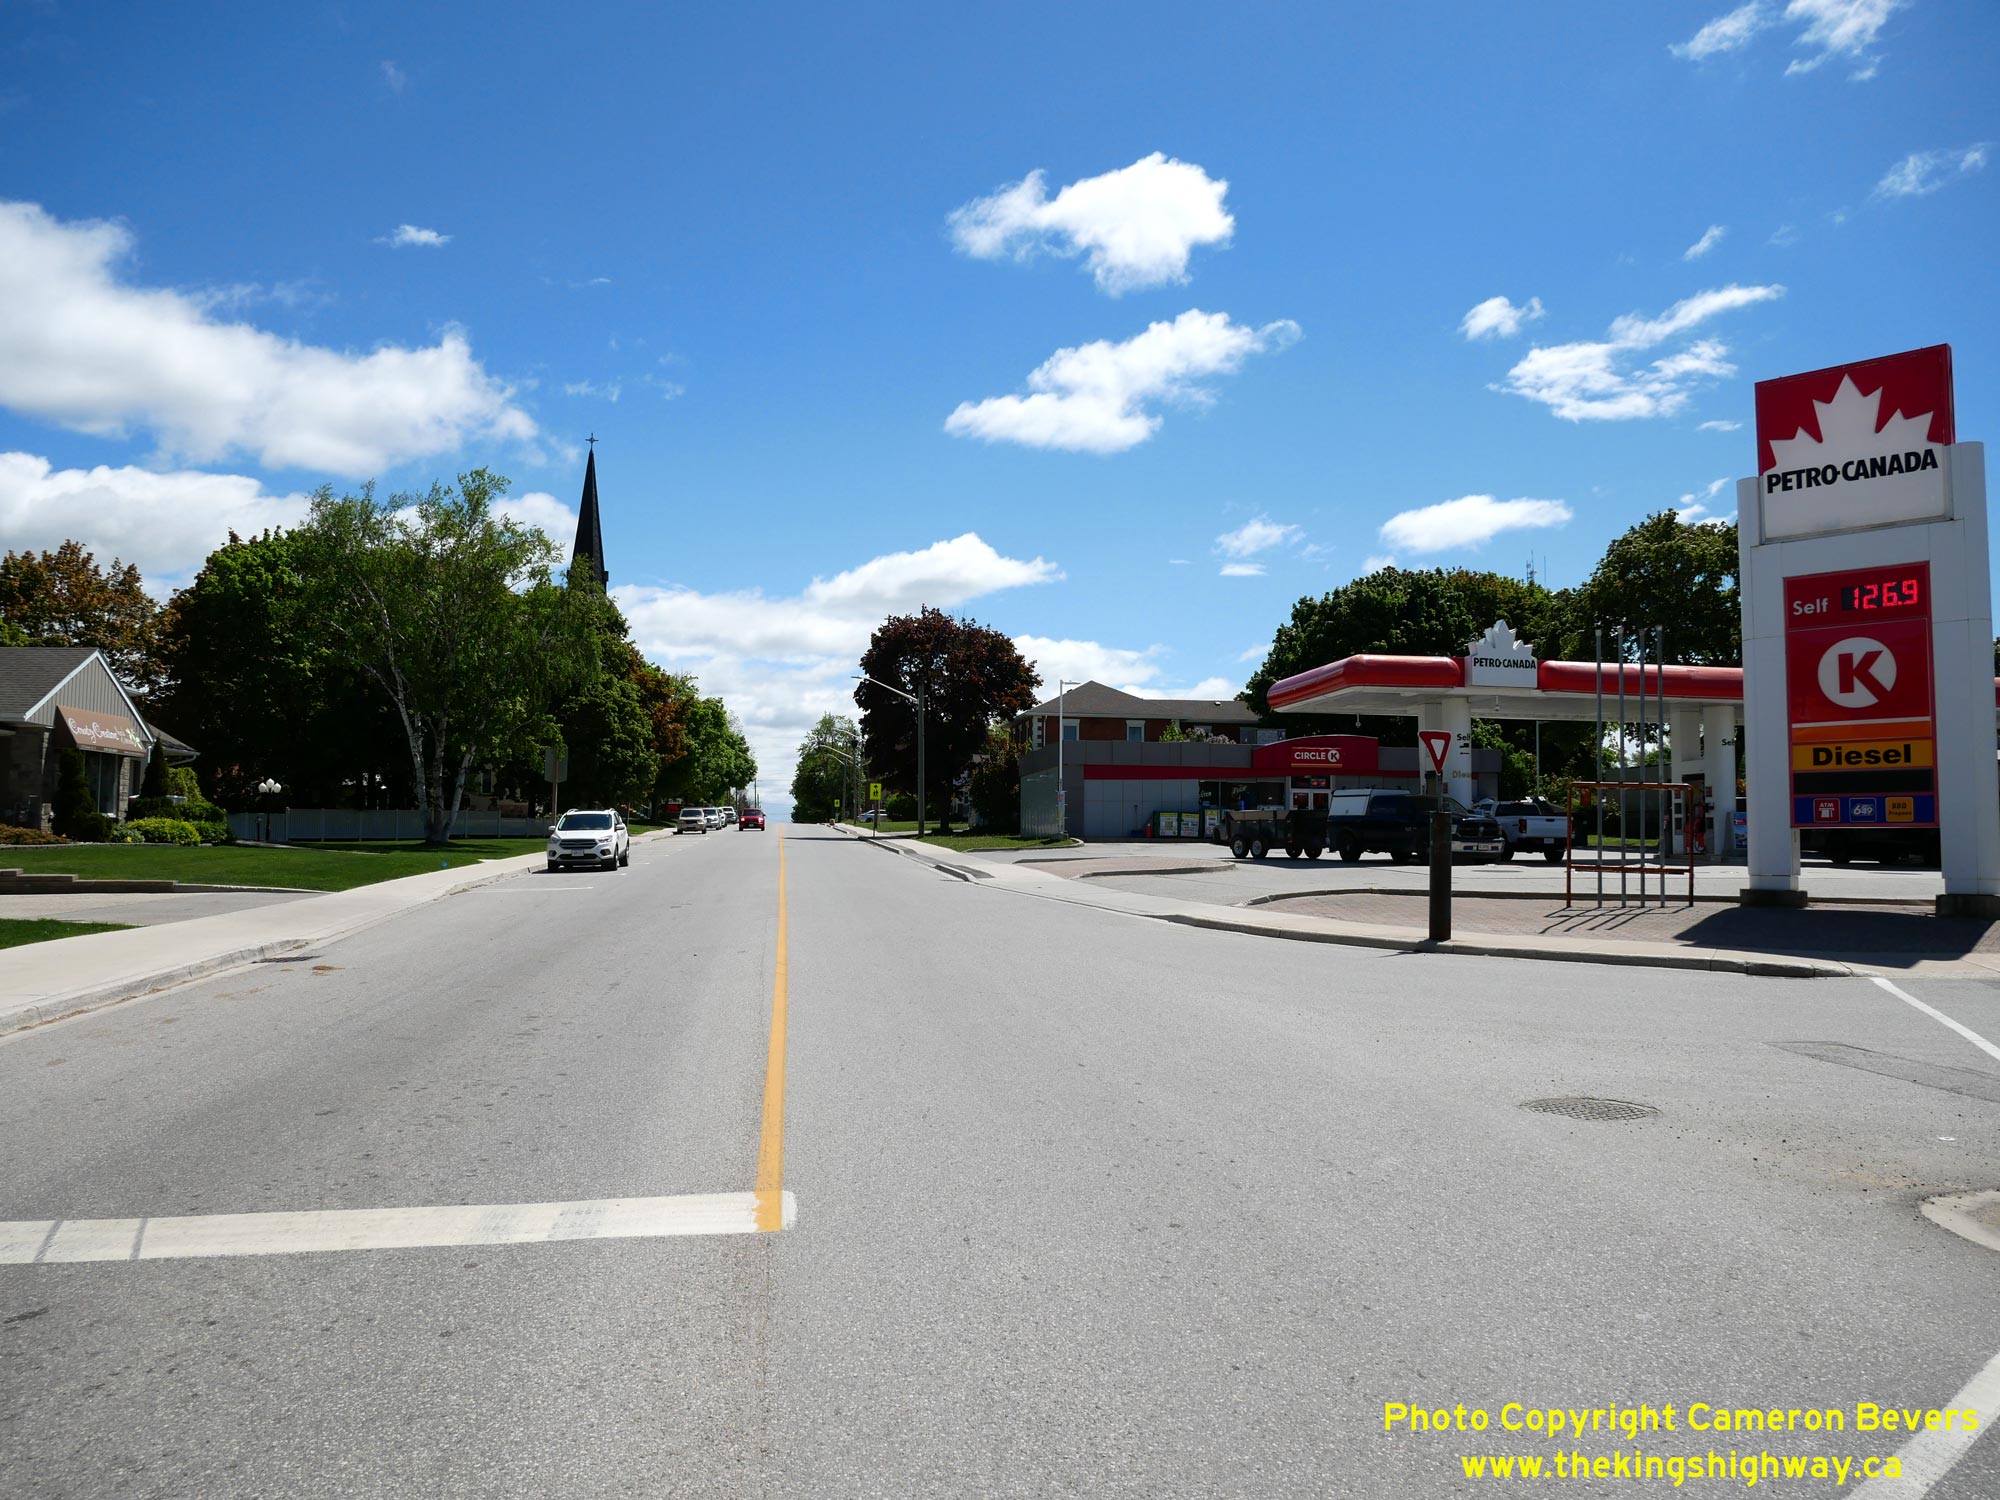
 Left - Facing south along Hwy 6 (Main Street) towards Arthur and Fergus from the Hwy 89 Junction at Queen Street. See an
Enlarged Photo Here. Left - Facing south along Hwy 6 (Main Street) towards Arthur and Fergus from the Hwy 89 Junction at Queen Street. See an
Enlarged Photo Here.(Photograph taken on June 1, 2025 - © Cameron Bevers) Right - View of Hwy 89 (Queen Street) facing west towards Harriston from the Hwy 6 Junction in Mount Forest. See an
Enlarged Photo Here.(Photograph taken on June 1, 2025 - © Cameron Bevers) 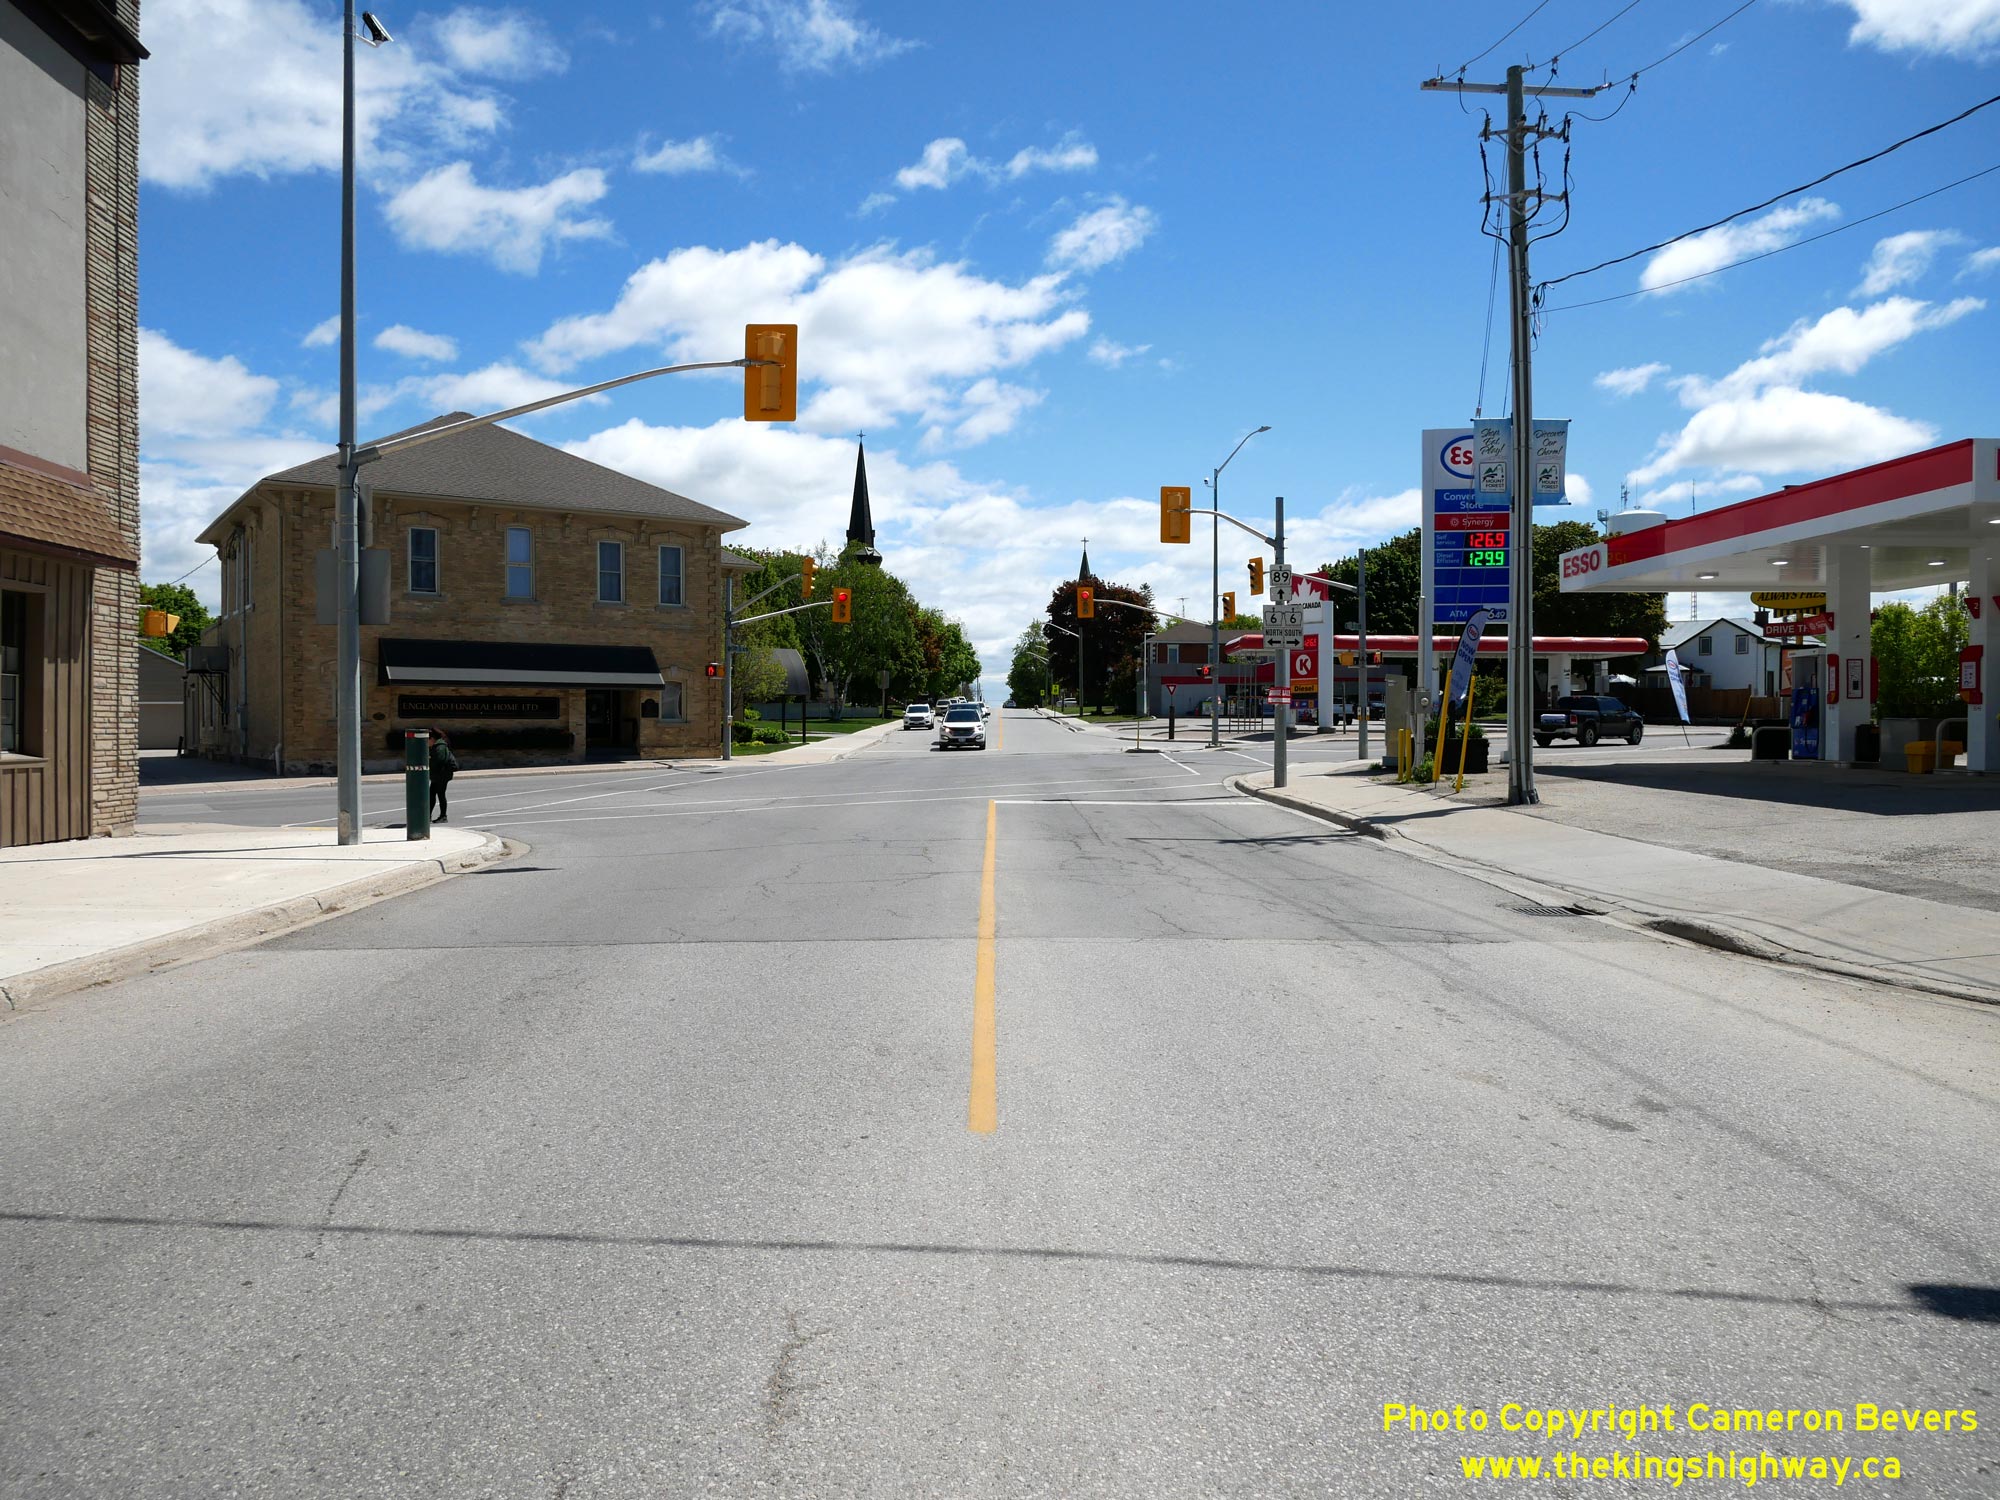
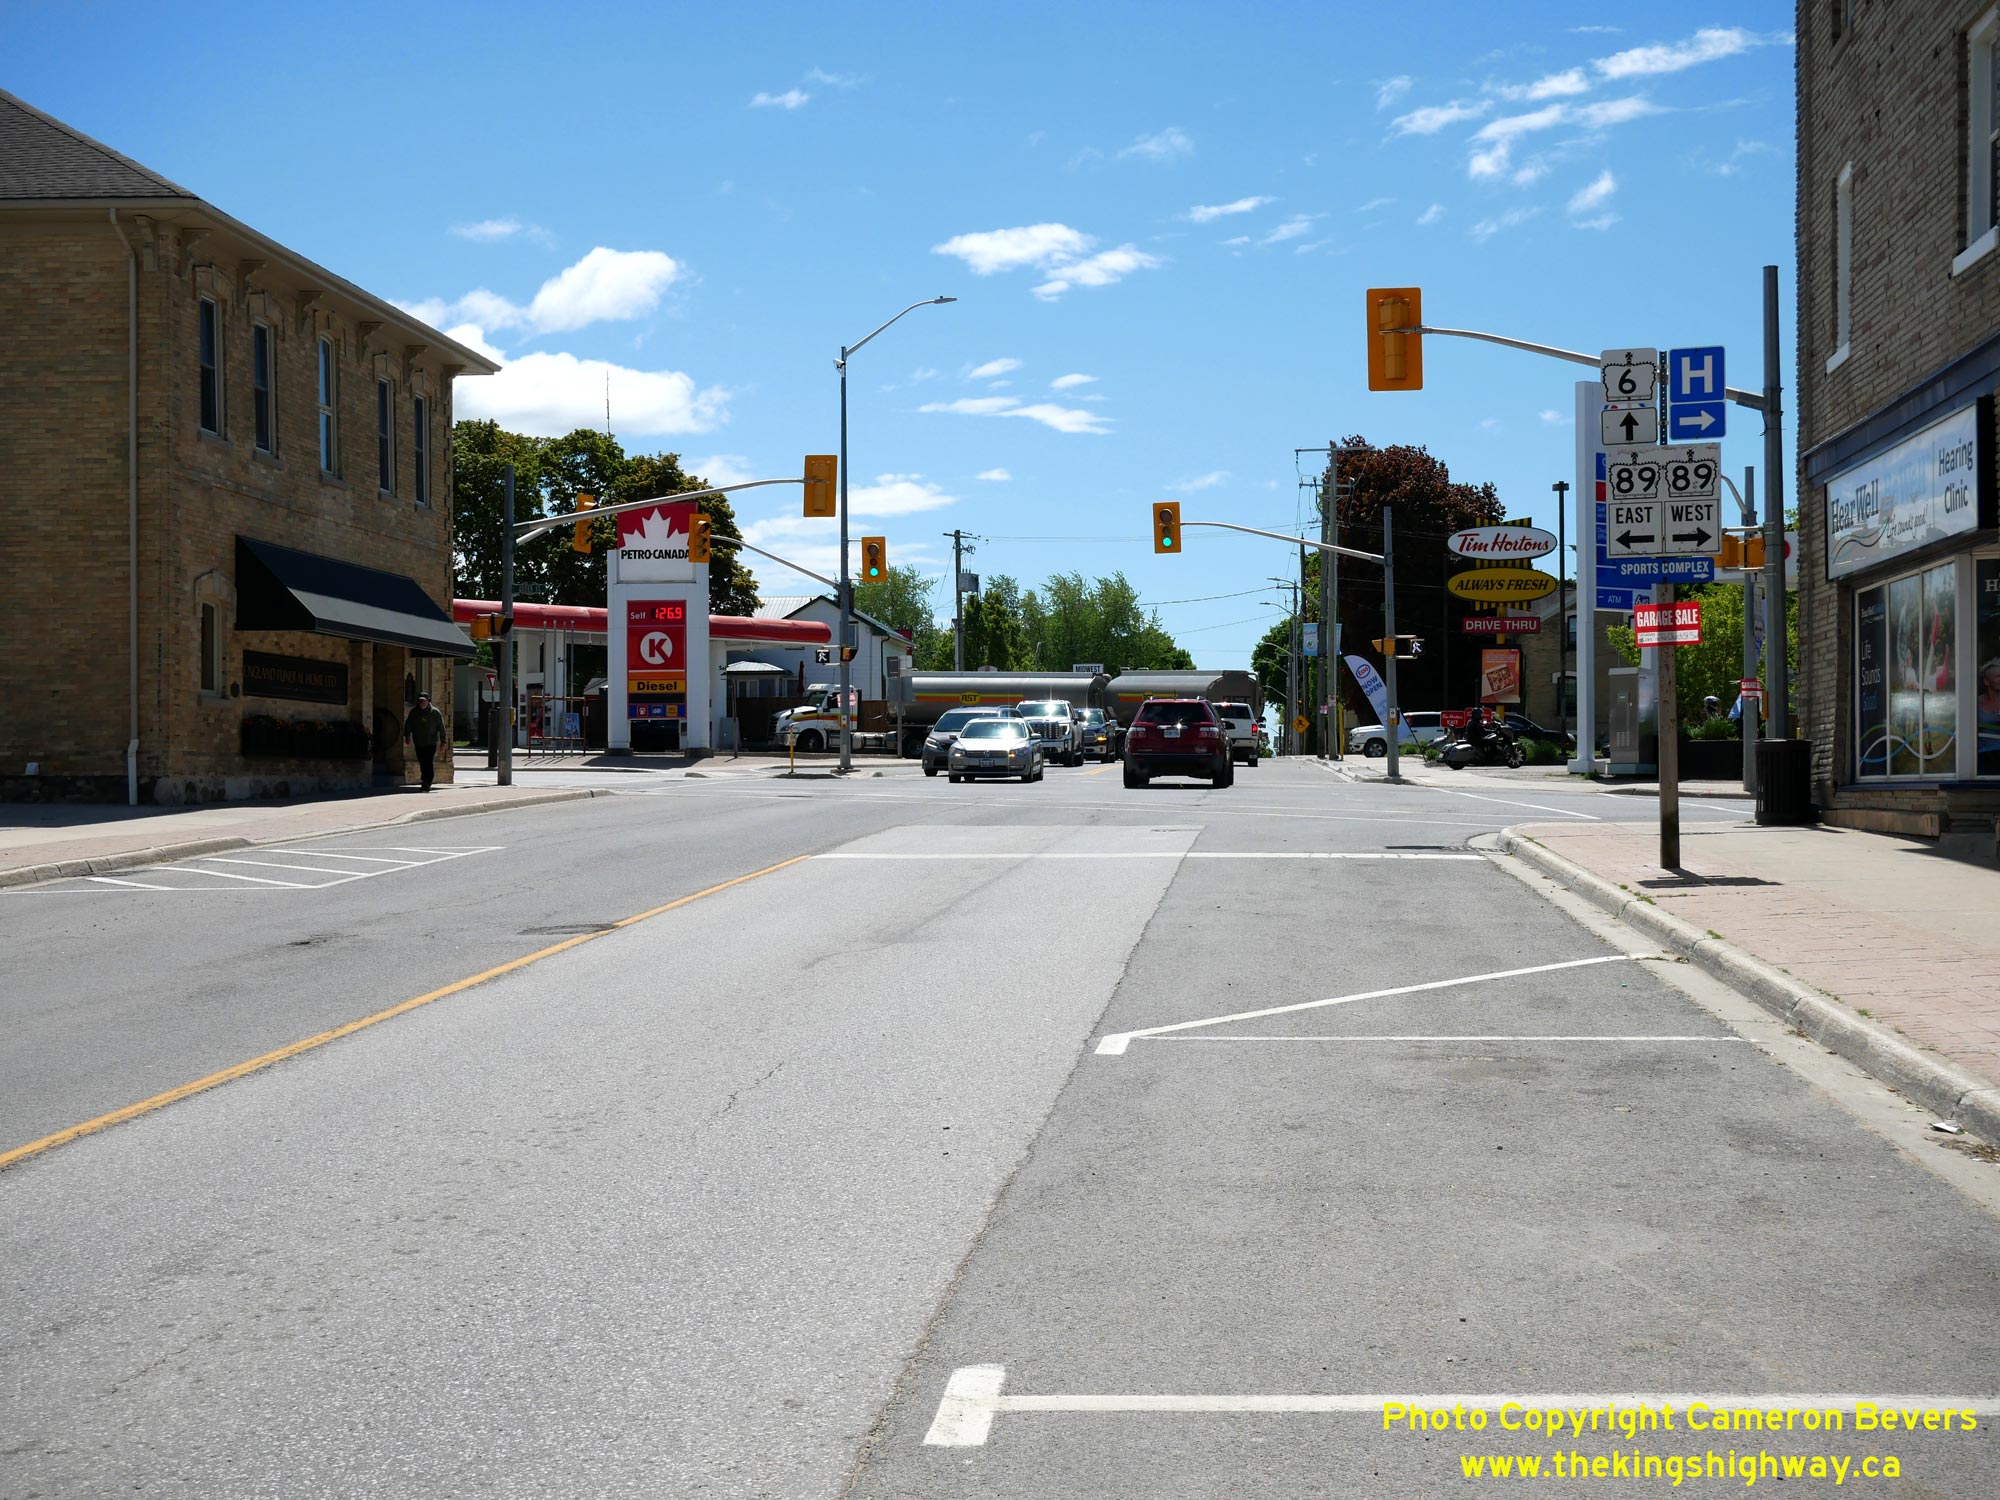
 Left - Facing east along Hwy 89 (Queen Street) approaching the Hwy 6 Junction in Mount Forest. At this highway junction, motorists can continue straight ahead
via Hwy 89 to Shelburne, turn left and head north along Hwy 6 towards Durham and Owen Sound or turn right and head south along Hwy 6 towards Arthur and Fergus. See an
Enlarged Photo Here. Left - Facing east along Hwy 89 (Queen Street) approaching the Hwy 6 Junction in Mount Forest. At this highway junction, motorists can continue straight ahead
via Hwy 89 to Shelburne, turn left and head north along Hwy 6 towards Durham and Owen Sound or turn right and head south along Hwy 6 towards Arthur and Fergus. See an
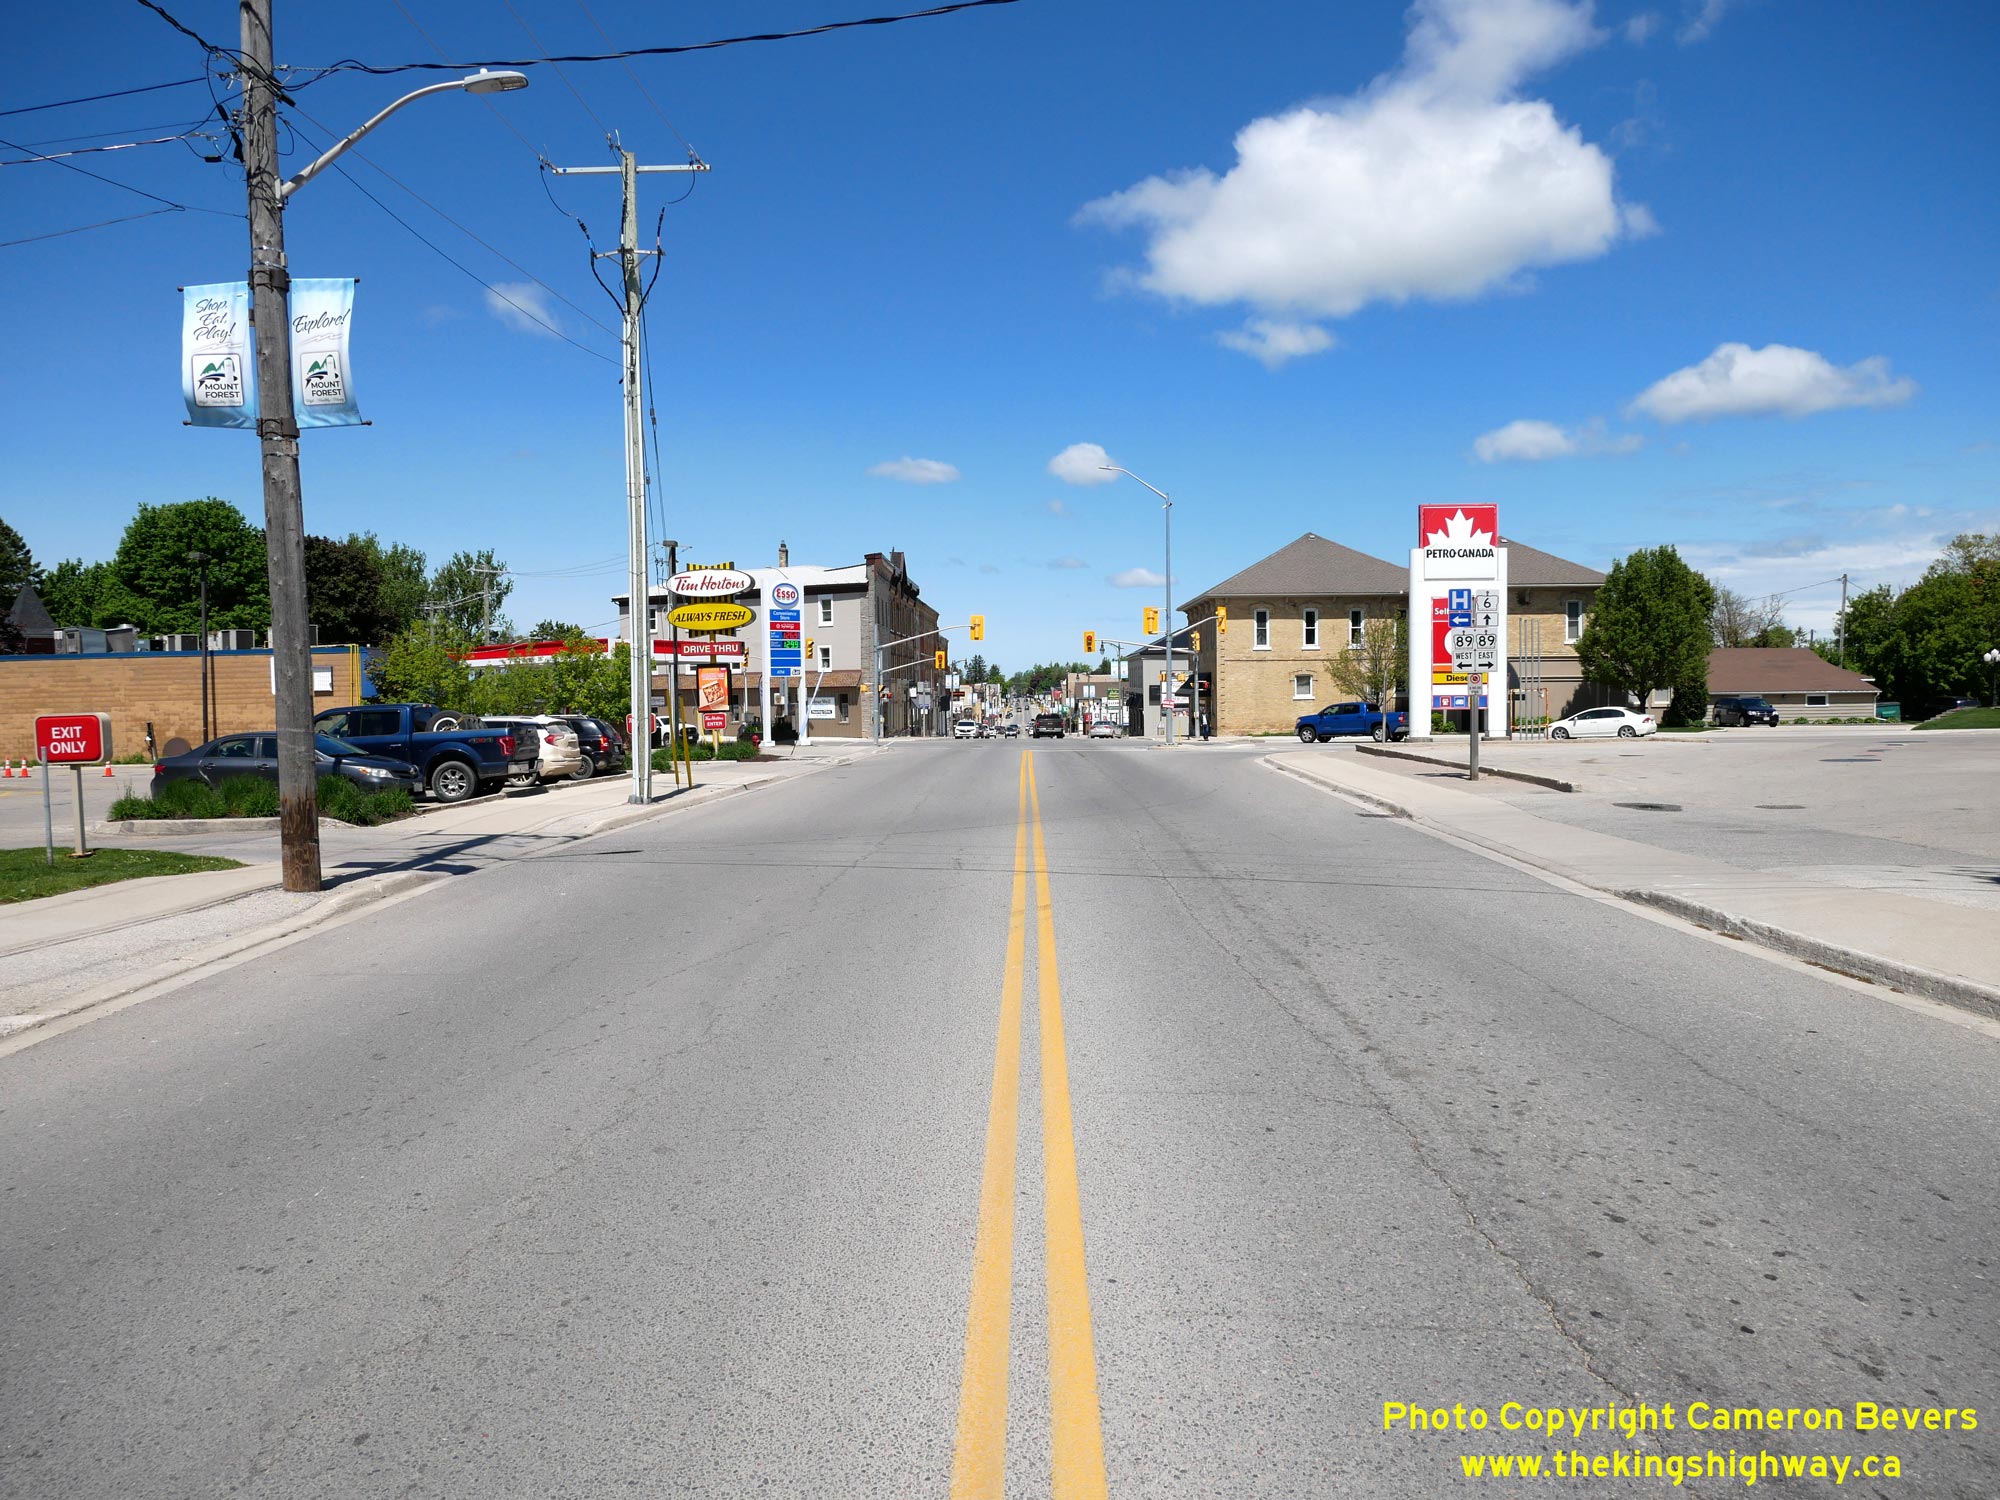
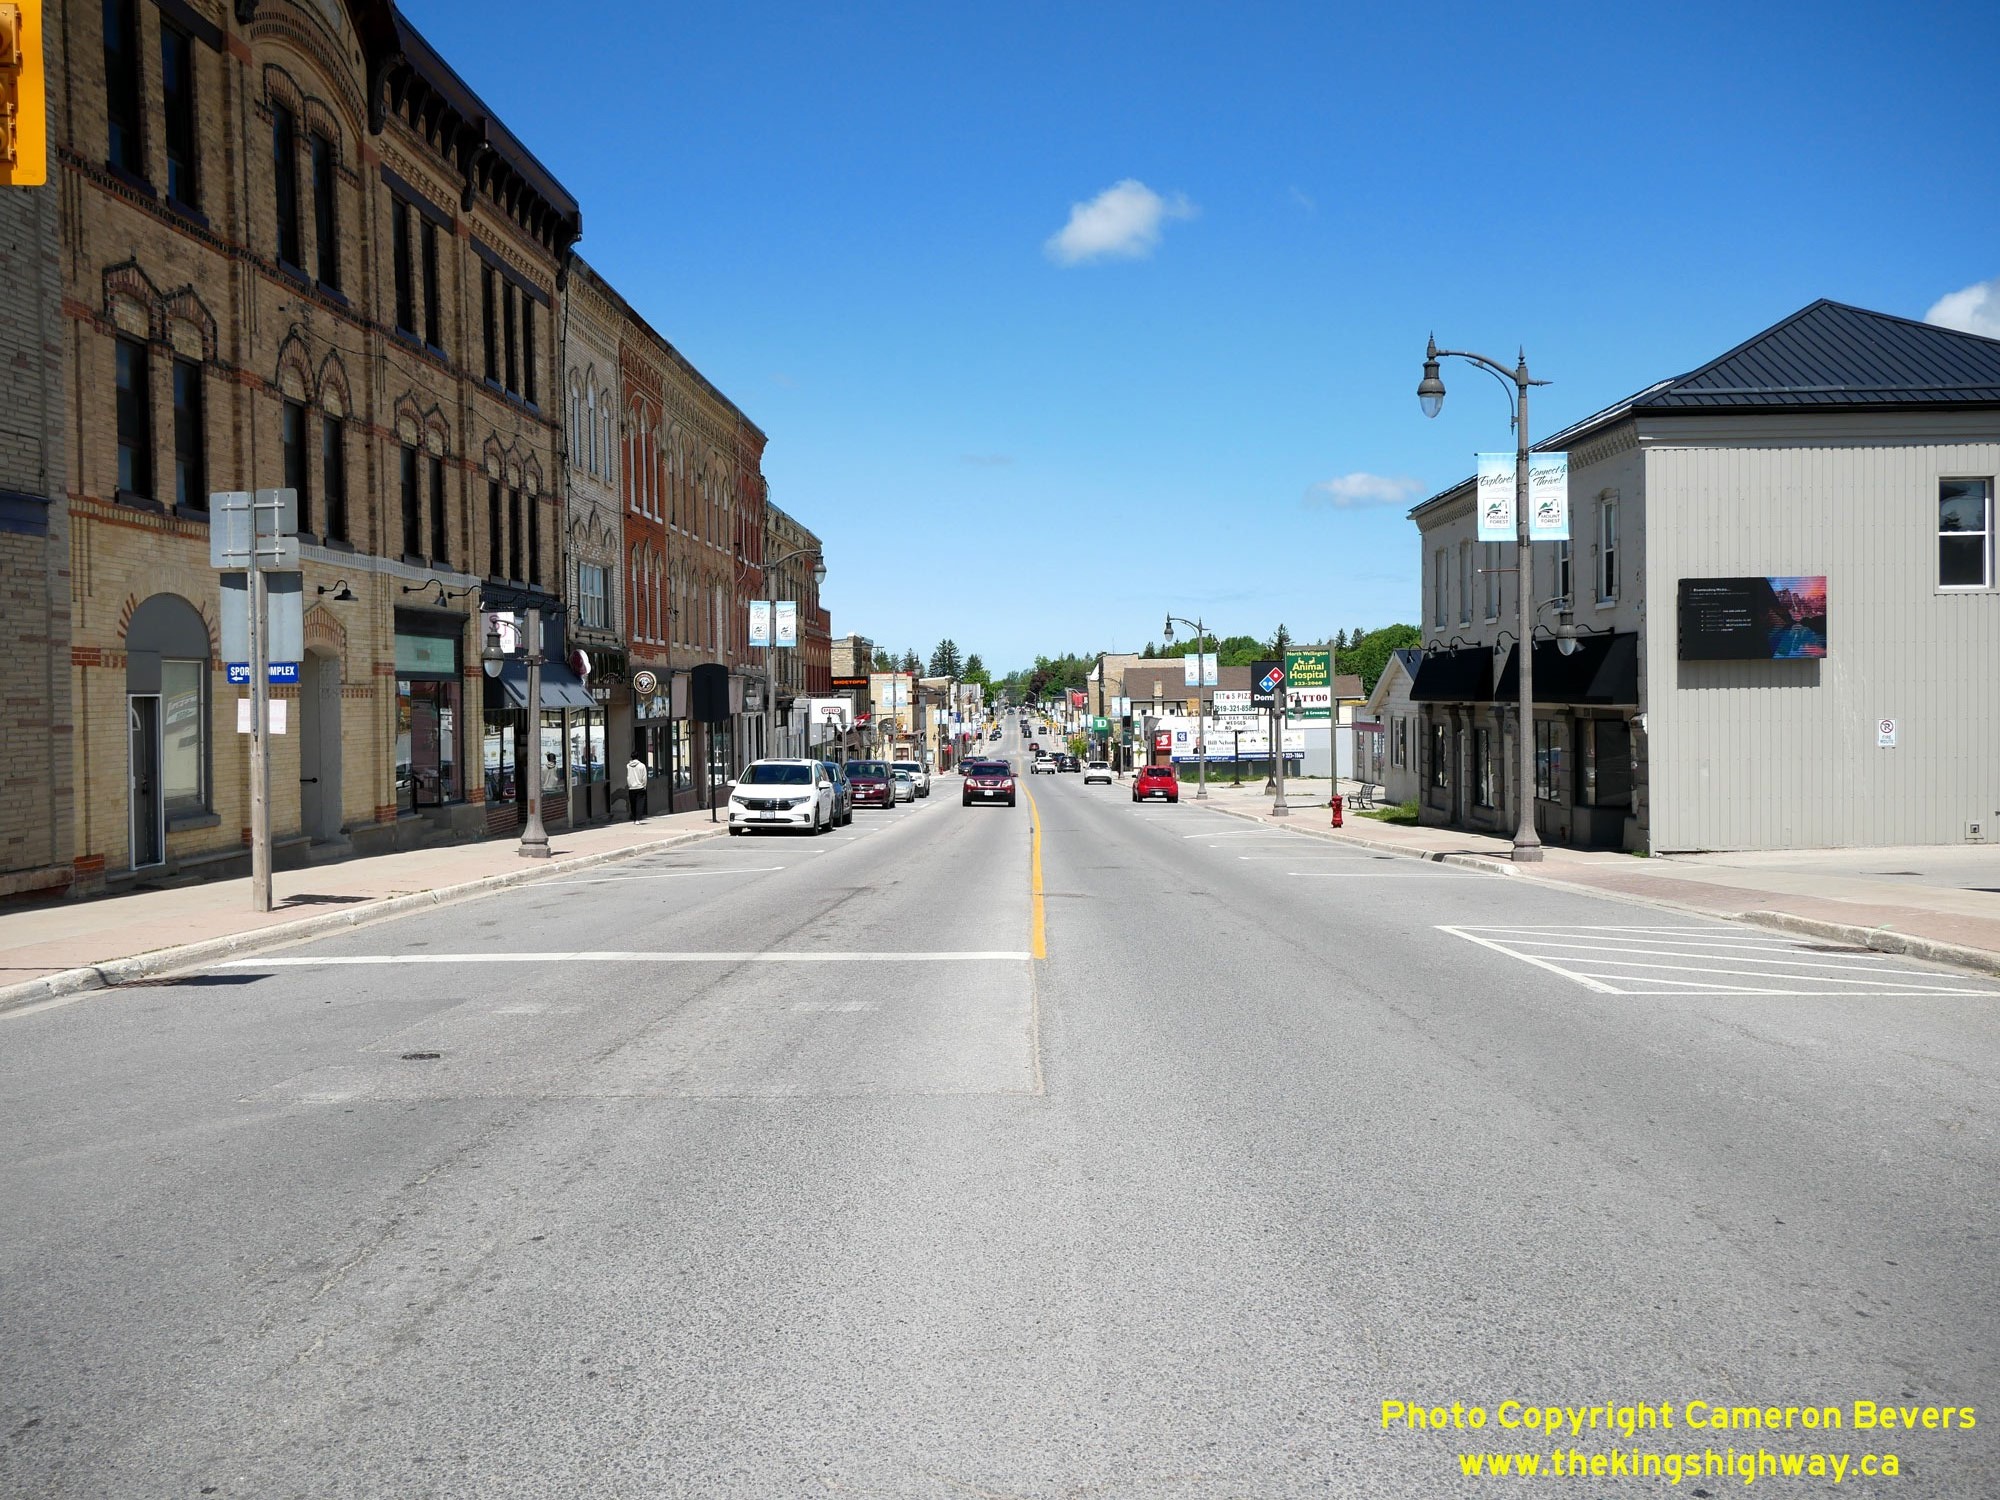
Enlarged Photo Here.(Photograph taken on June 1, 2025 - © Cameron Bevers) Right - View of Mount Forest's Main Street (Hwy 6), facing north from the Hwy 89 Junction at Queen Street. See an
Enlarged Photo Here.(Photograph taken on June 1, 2025 - © Cameron Bevers) 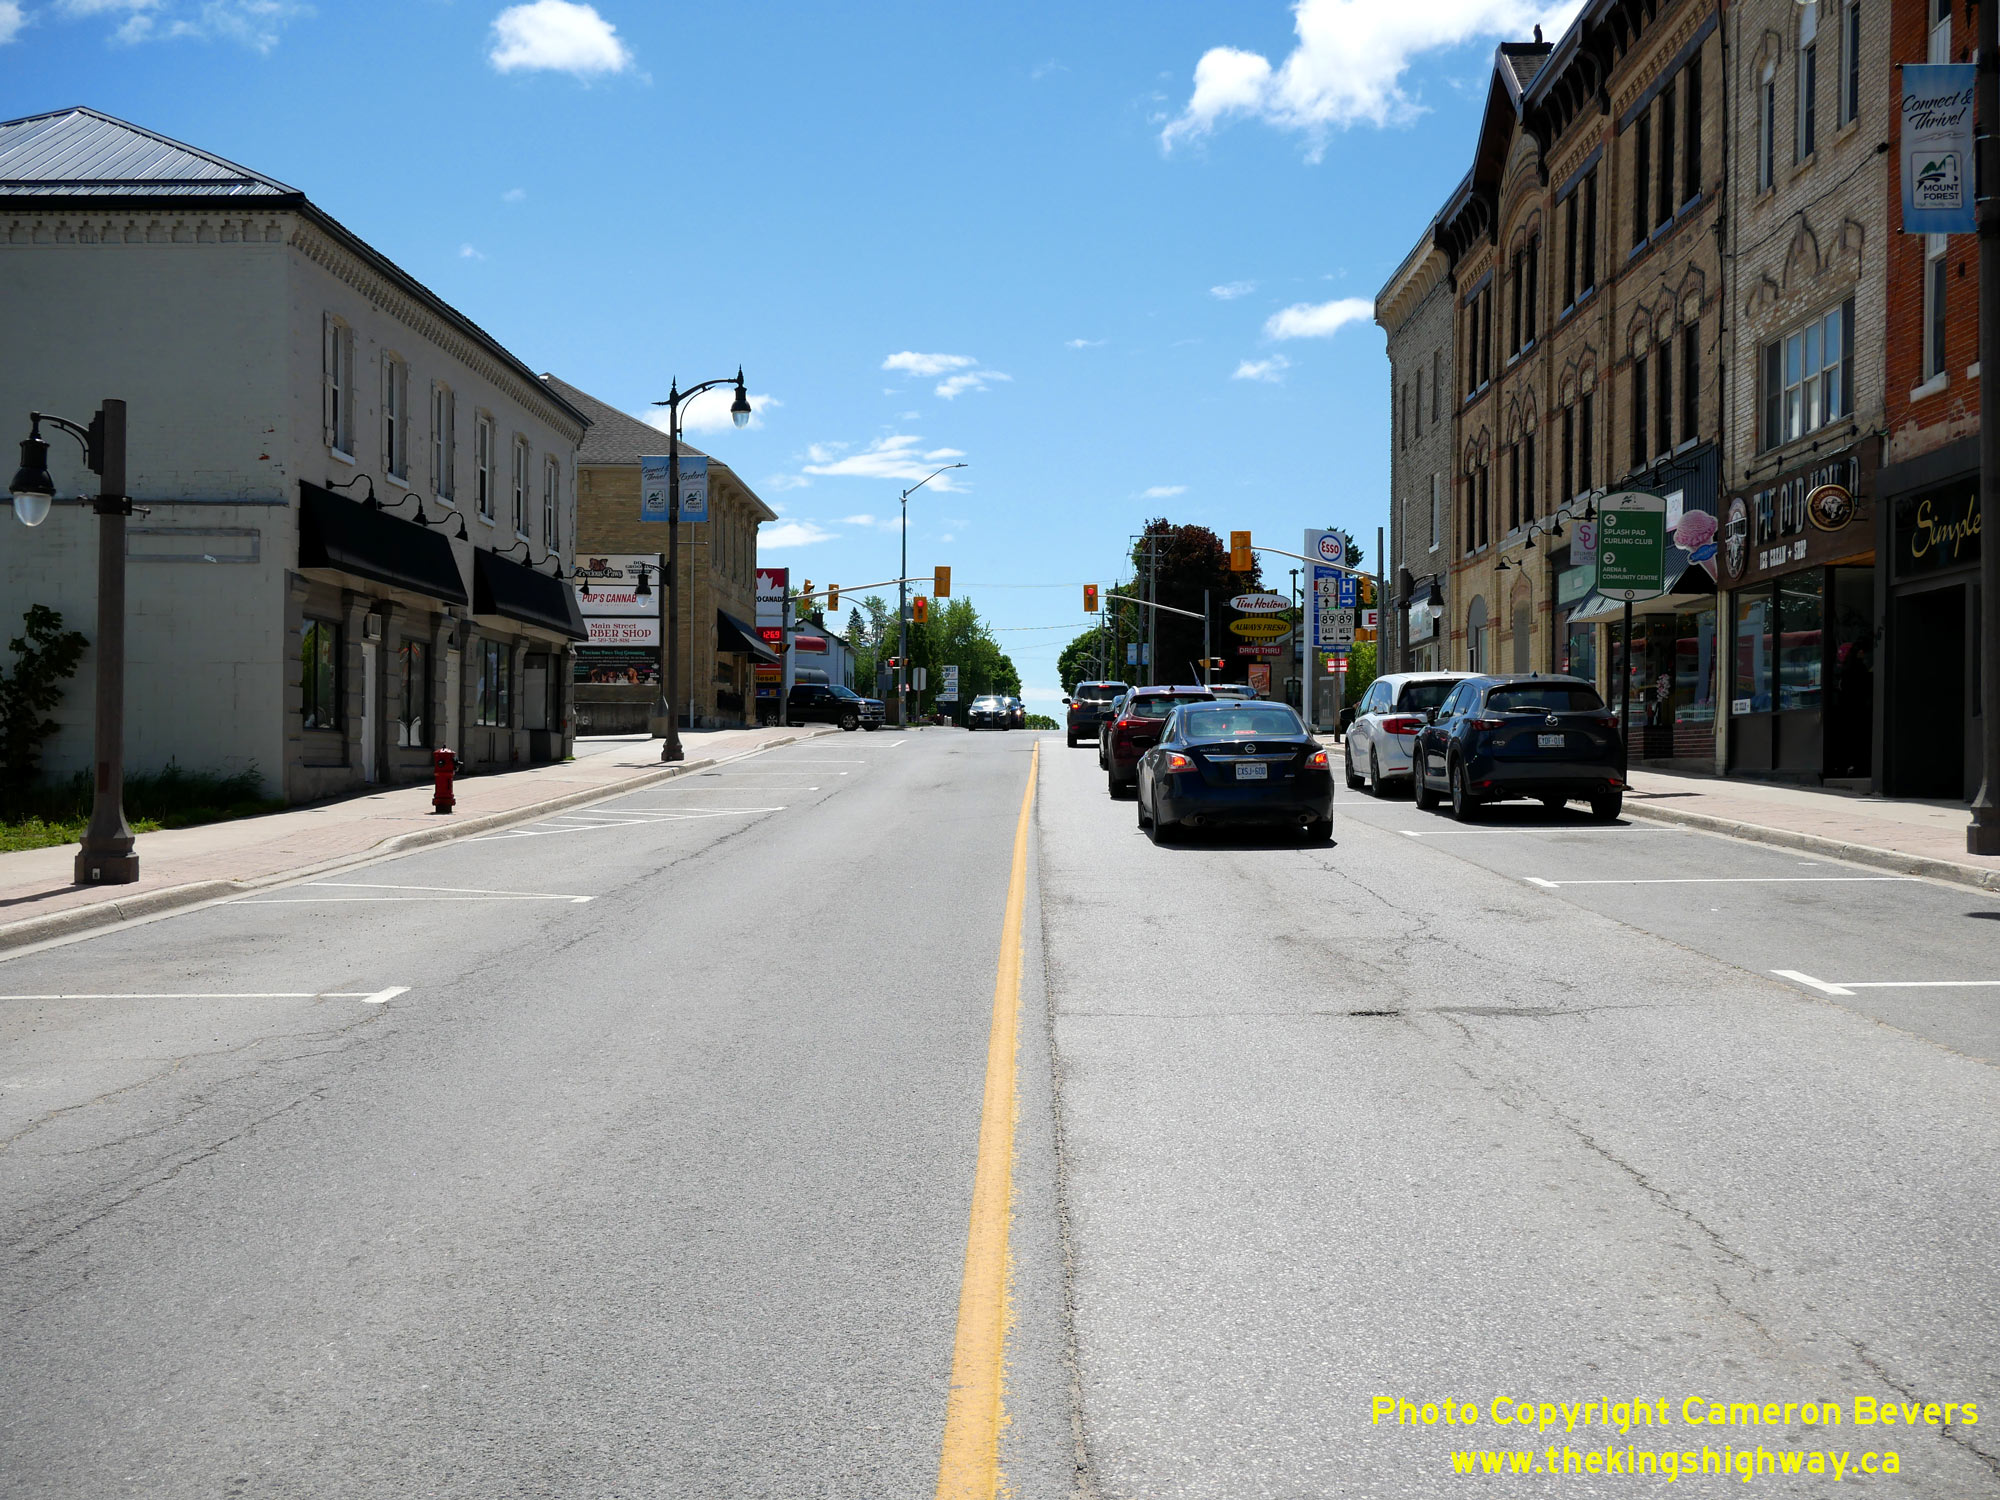
 Left - Approaching the Hwy 89 Junction at Queen Street, facing south along Hwy 6 (Main Street) in Mount Forest. See an
Enlarged Photo Here. Left - Approaching the Hwy 89 Junction at Queen Street, facing south along Hwy 6 (Main Street) in Mount Forest. See an
Enlarged Photo Here.(Photograph taken on June 1, 2025 - © Cameron Bevers) Right - Junction sign assembly on southbound Hwy 6 (Main Street) approaching the Hwy 89 Junction at Queen Street in Mount Forest. See an
Enlarged Photo Here.(Photograph taken on June 1, 2025 - © Cameron Bevers) 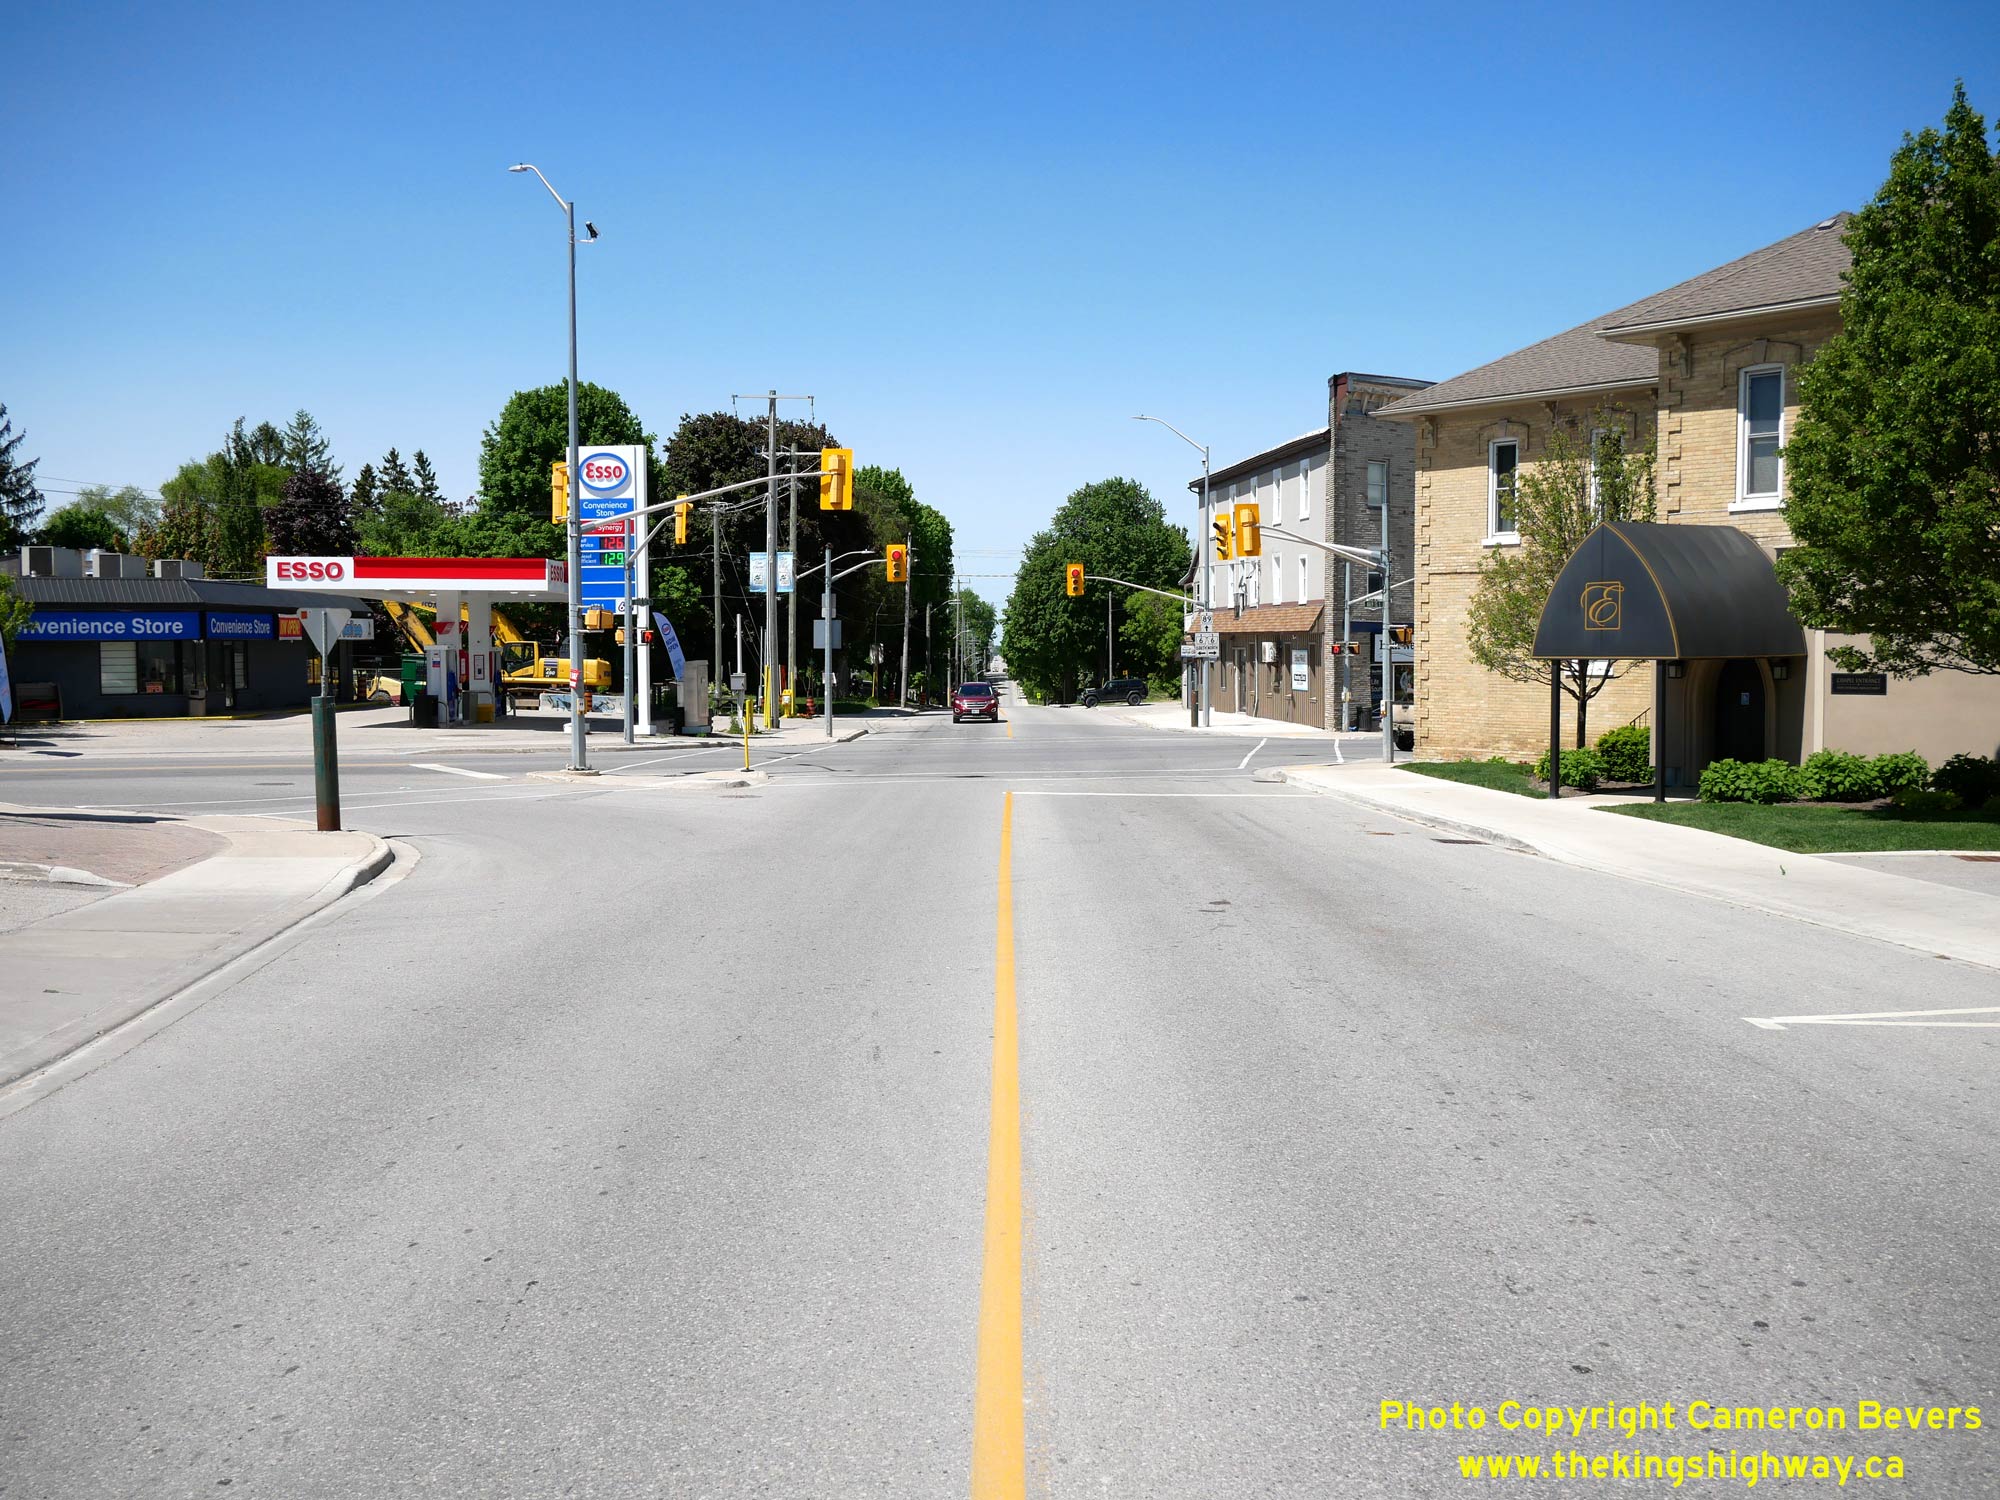
 Left - Facing west along Hwy 89 (Queen Street) approaching the Hwy 6 Junction at Main Street in Mount Forest. See an
Enlarged Photo Here. Left - Facing west along Hwy 89 (Queen Street) approaching the Hwy 6 Junction at Main Street in Mount Forest. See an
Enlarged Photo Here.(Photograph taken on June 1, 2025 - © Cameron Bevers) Right - View of Queen Street (Hwy 89) facing east towards Shelburne from the Hwy 6 Junction in Mount Forest. Eastbound motorists who are low on fuel should
take this opportunity to fill up before leaving this highway junction, as there are no gas stations along Hwy 89 for almost 45 km east of this junction. See an
Enlarged Photo Here.(Photograph taken on June 1, 2025 - © Cameron Bevers) 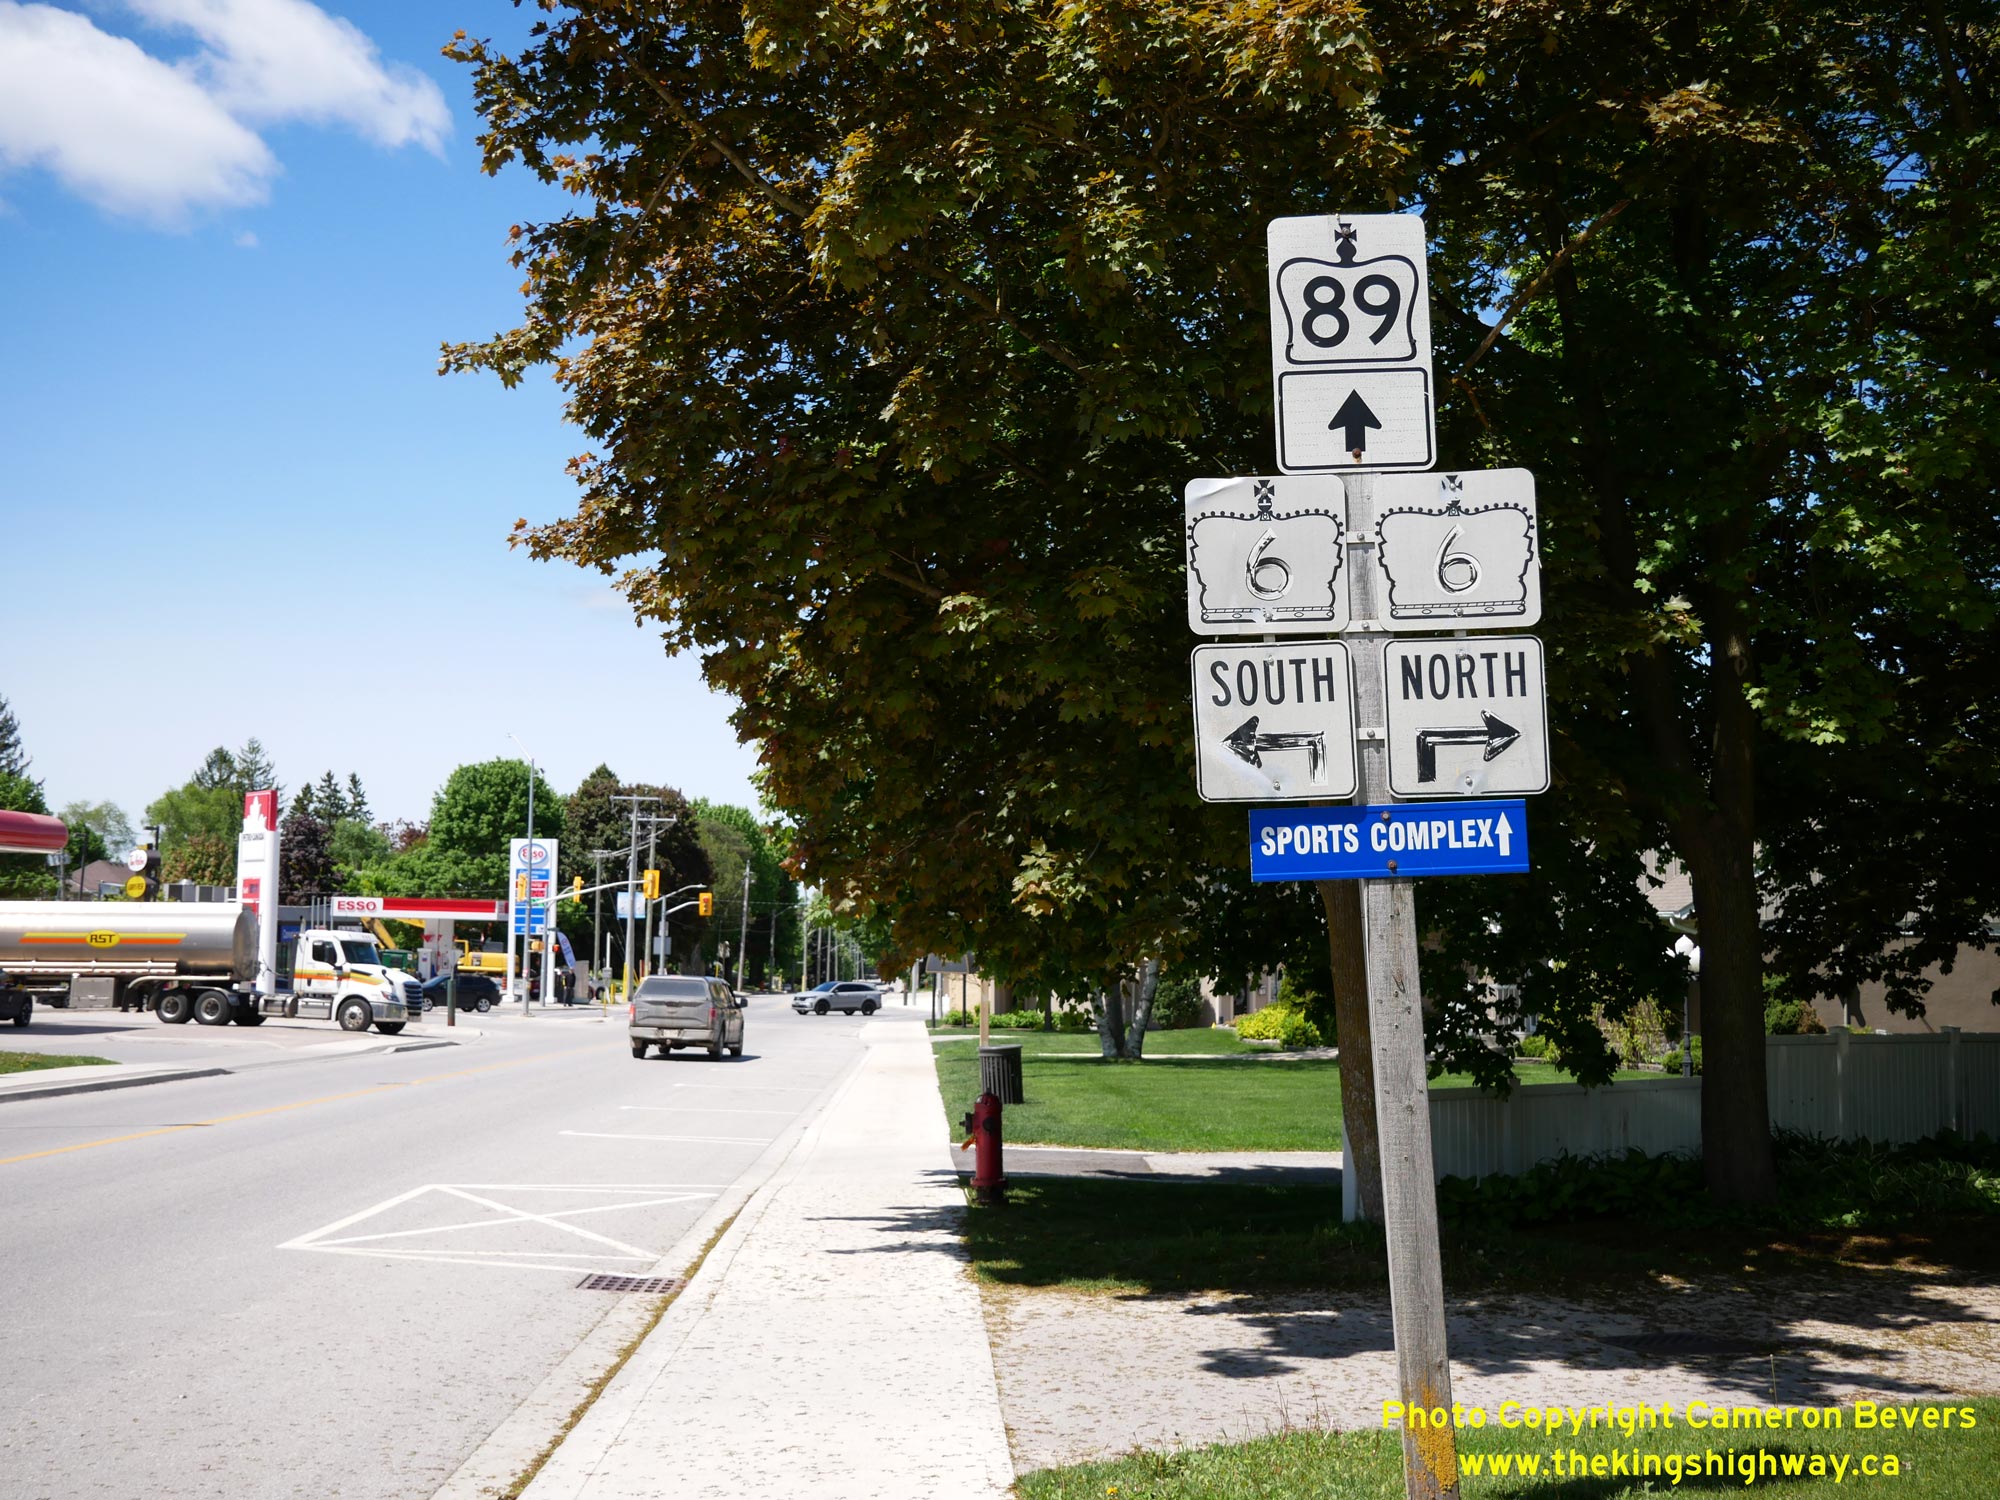
 Left - Junction sign assembly on westbound Hwy 89 (Queen Street) approaching the Hwy 6 Junction at Main Street in Mount Forest. See an
Enlarged Photo Here. Left - Junction sign assembly on westbound Hwy 89 (Queen Street) approaching the Hwy 6 Junction at Main Street in Mount Forest. See an
Enlarged Photo Here.(Photograph taken on June 1, 2025 - © Cameron Bevers) Right - Facing east along Hwy 89 (Queen Street) from York Street in Mount Forest. East of the town centre, Hwy 89 descends into a valley where it crosses the
South Saugeen River. Although Mount Forest was amalgamated into a much larger municipality (Wellington North) in the 1990s, the former Town of Mount Forest limits
actually extended well beyond the urbanized area. See an Enlarged Photo Here.(Photograph taken on June 1, 2025 - © Cameron Bevers) 
 Left - Approaching York Street on Hwy 89 (Queen Street), facing west towards Downtown Mount Forest. See an
Enlarged Photo Here. Left - Approaching York Street on Hwy 89 (Queen Street), facing west towards Downtown Mount Forest. See an
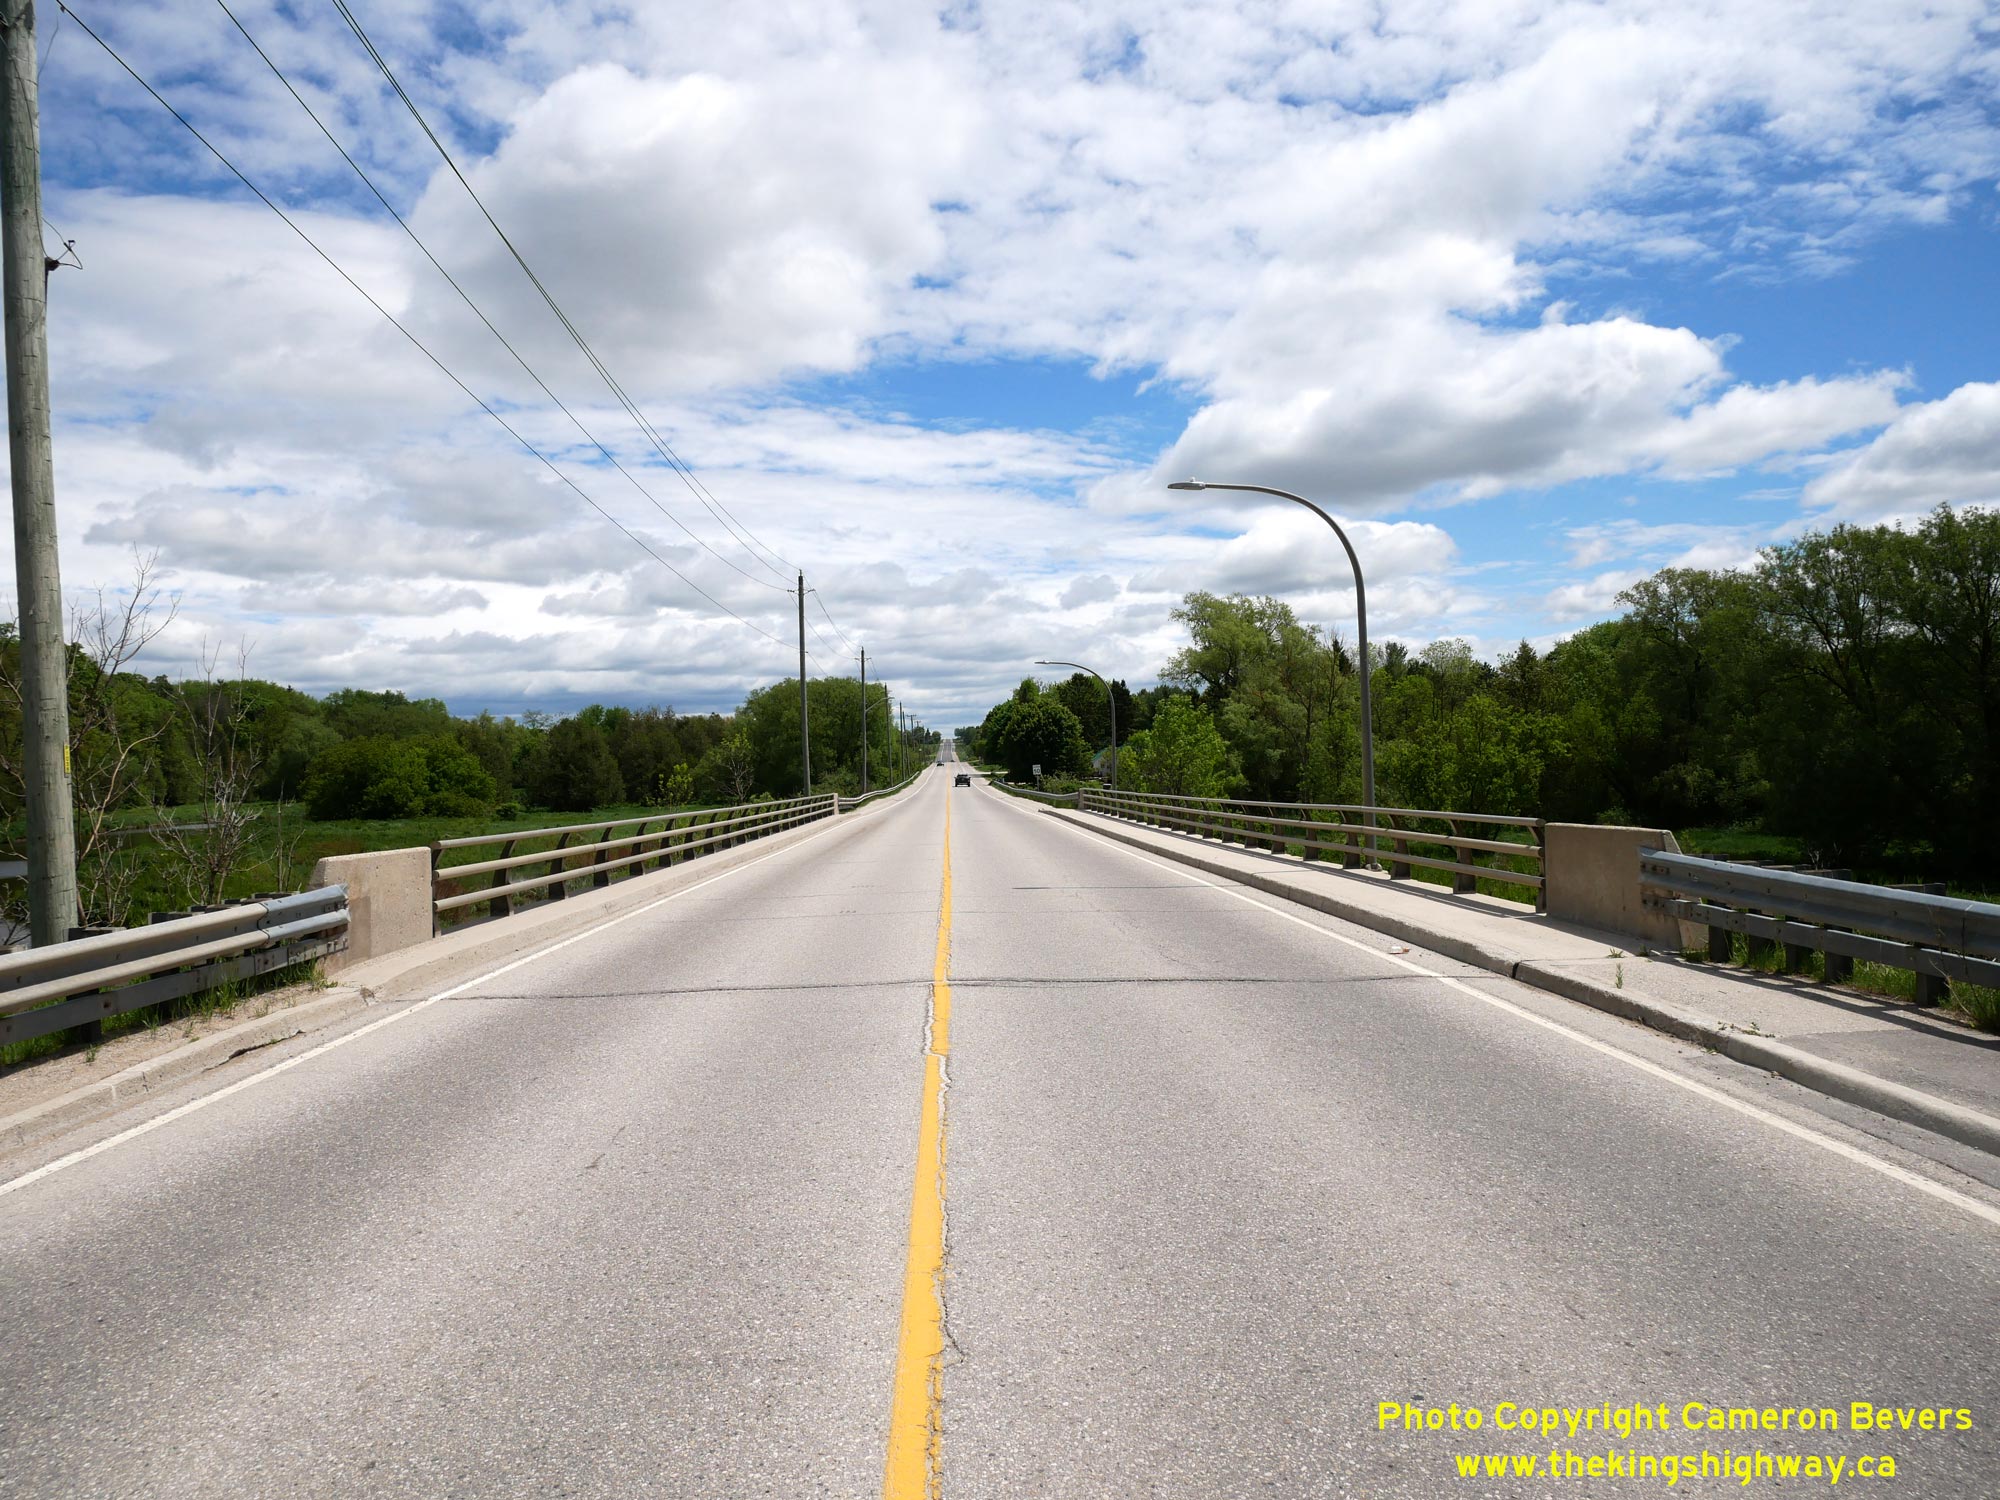
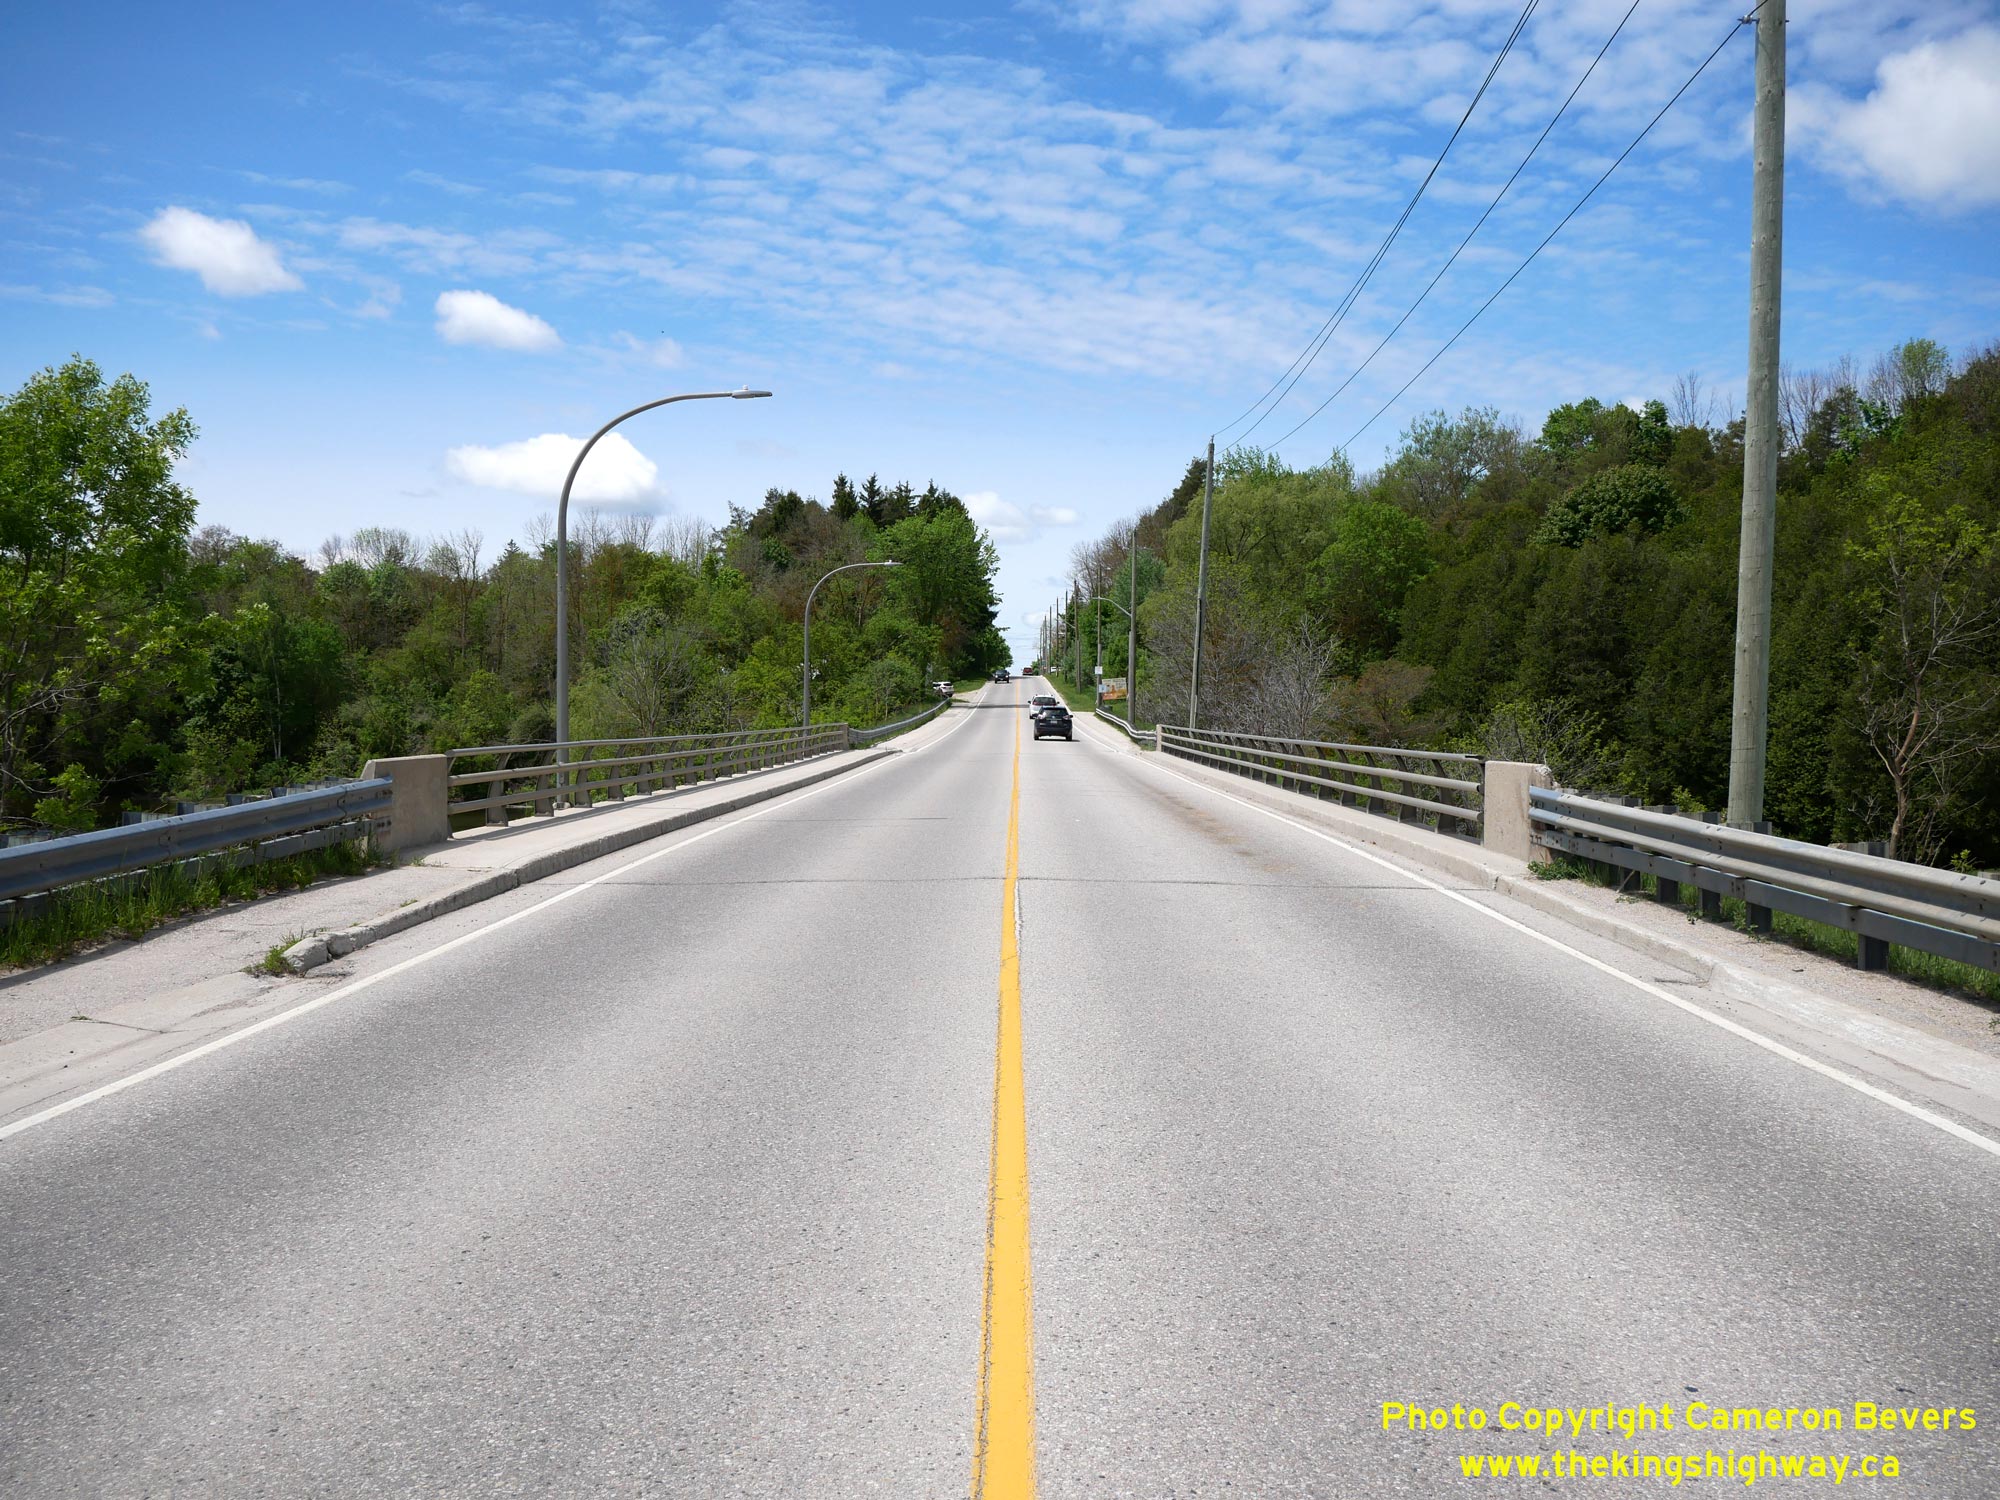
Enlarged Photo Here.(Photograph taken on June 1, 2025 - © Cameron Bevers) Right - Facing east along Hwy 89 (Queen Street) towards Shelburne at the South Saugeen River Bridge in Mount Forest. See an
Enlarged Photo Here.(Photograph taken on June 1, 2025 - © Cameron Bevers) 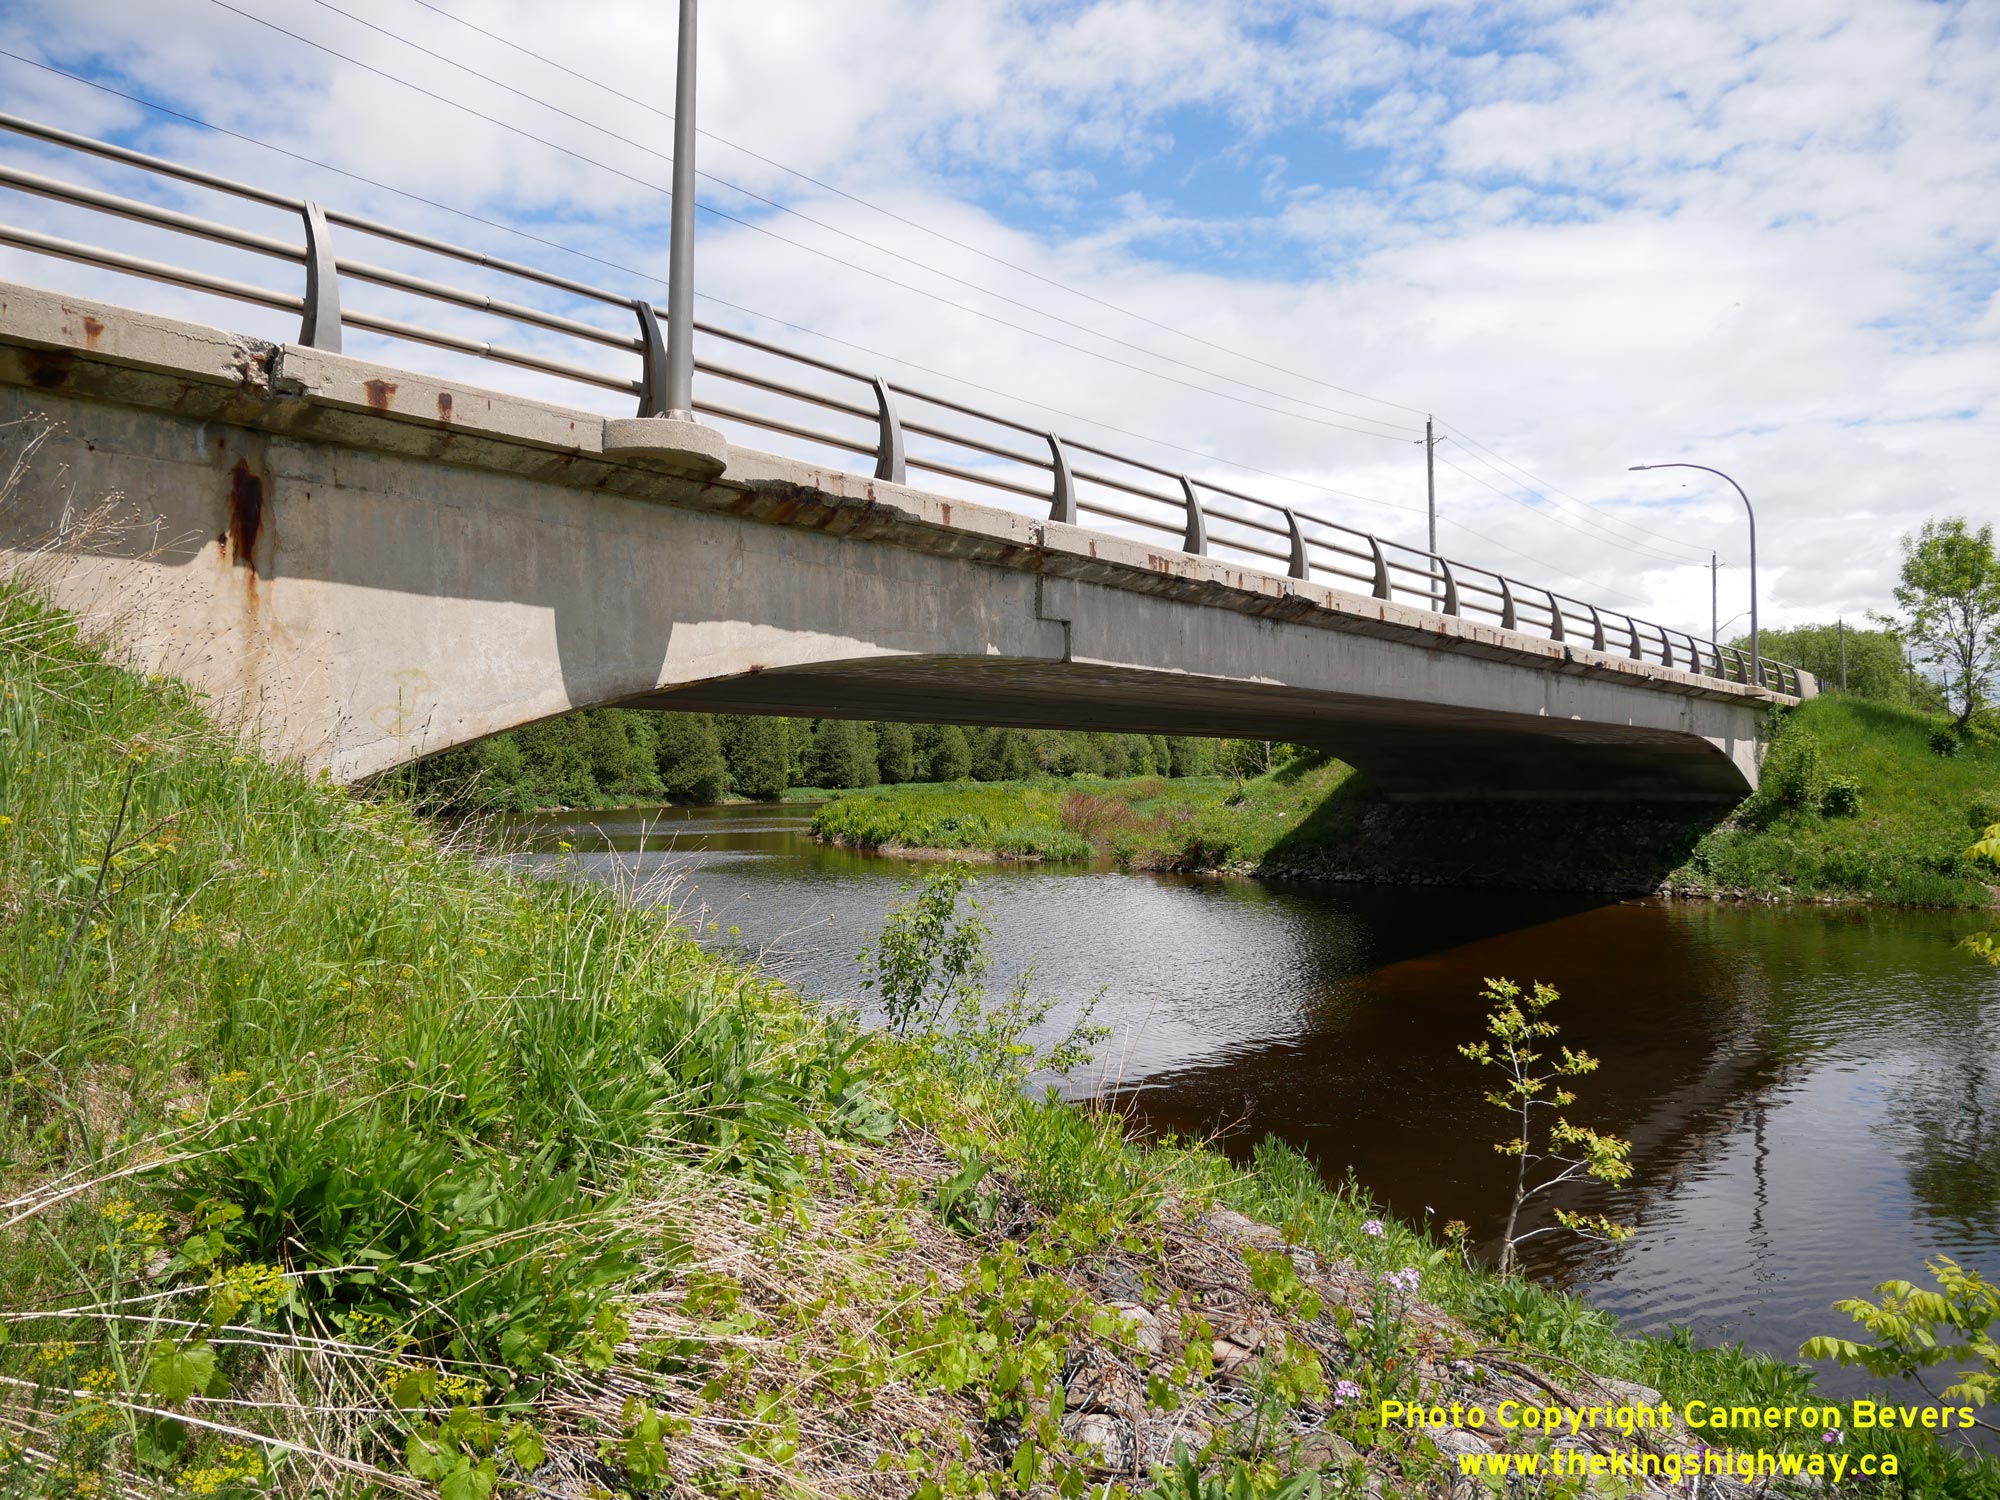
 Left - Southern side of the South Saugeen River Bridge on Hwy 89 (Queen Street) just east of Mount Forest. This interesting structure was built by the Town of
Mount Forest in 1968. The bridge is effectively a single-span concrete deck arch bridge, but it was built using a cantilevered concrete girder mid-section, supported
by two arched approach sections on either side which lock the centre girder section in place. The result was an attractive low-profile arch design without the need
for any central piers in the river. See an Enlarged Photo Here. Left - Southern side of the South Saugeen River Bridge on Hwy 89 (Queen Street) just east of Mount Forest. This interesting structure was built by the Town of
Mount Forest in 1968. The bridge is effectively a single-span concrete deck arch bridge, but it was built using a cantilevered concrete girder mid-section, supported
by two arched approach sections on either side which lock the centre girder section in place. The result was an attractive low-profile arch design without the need
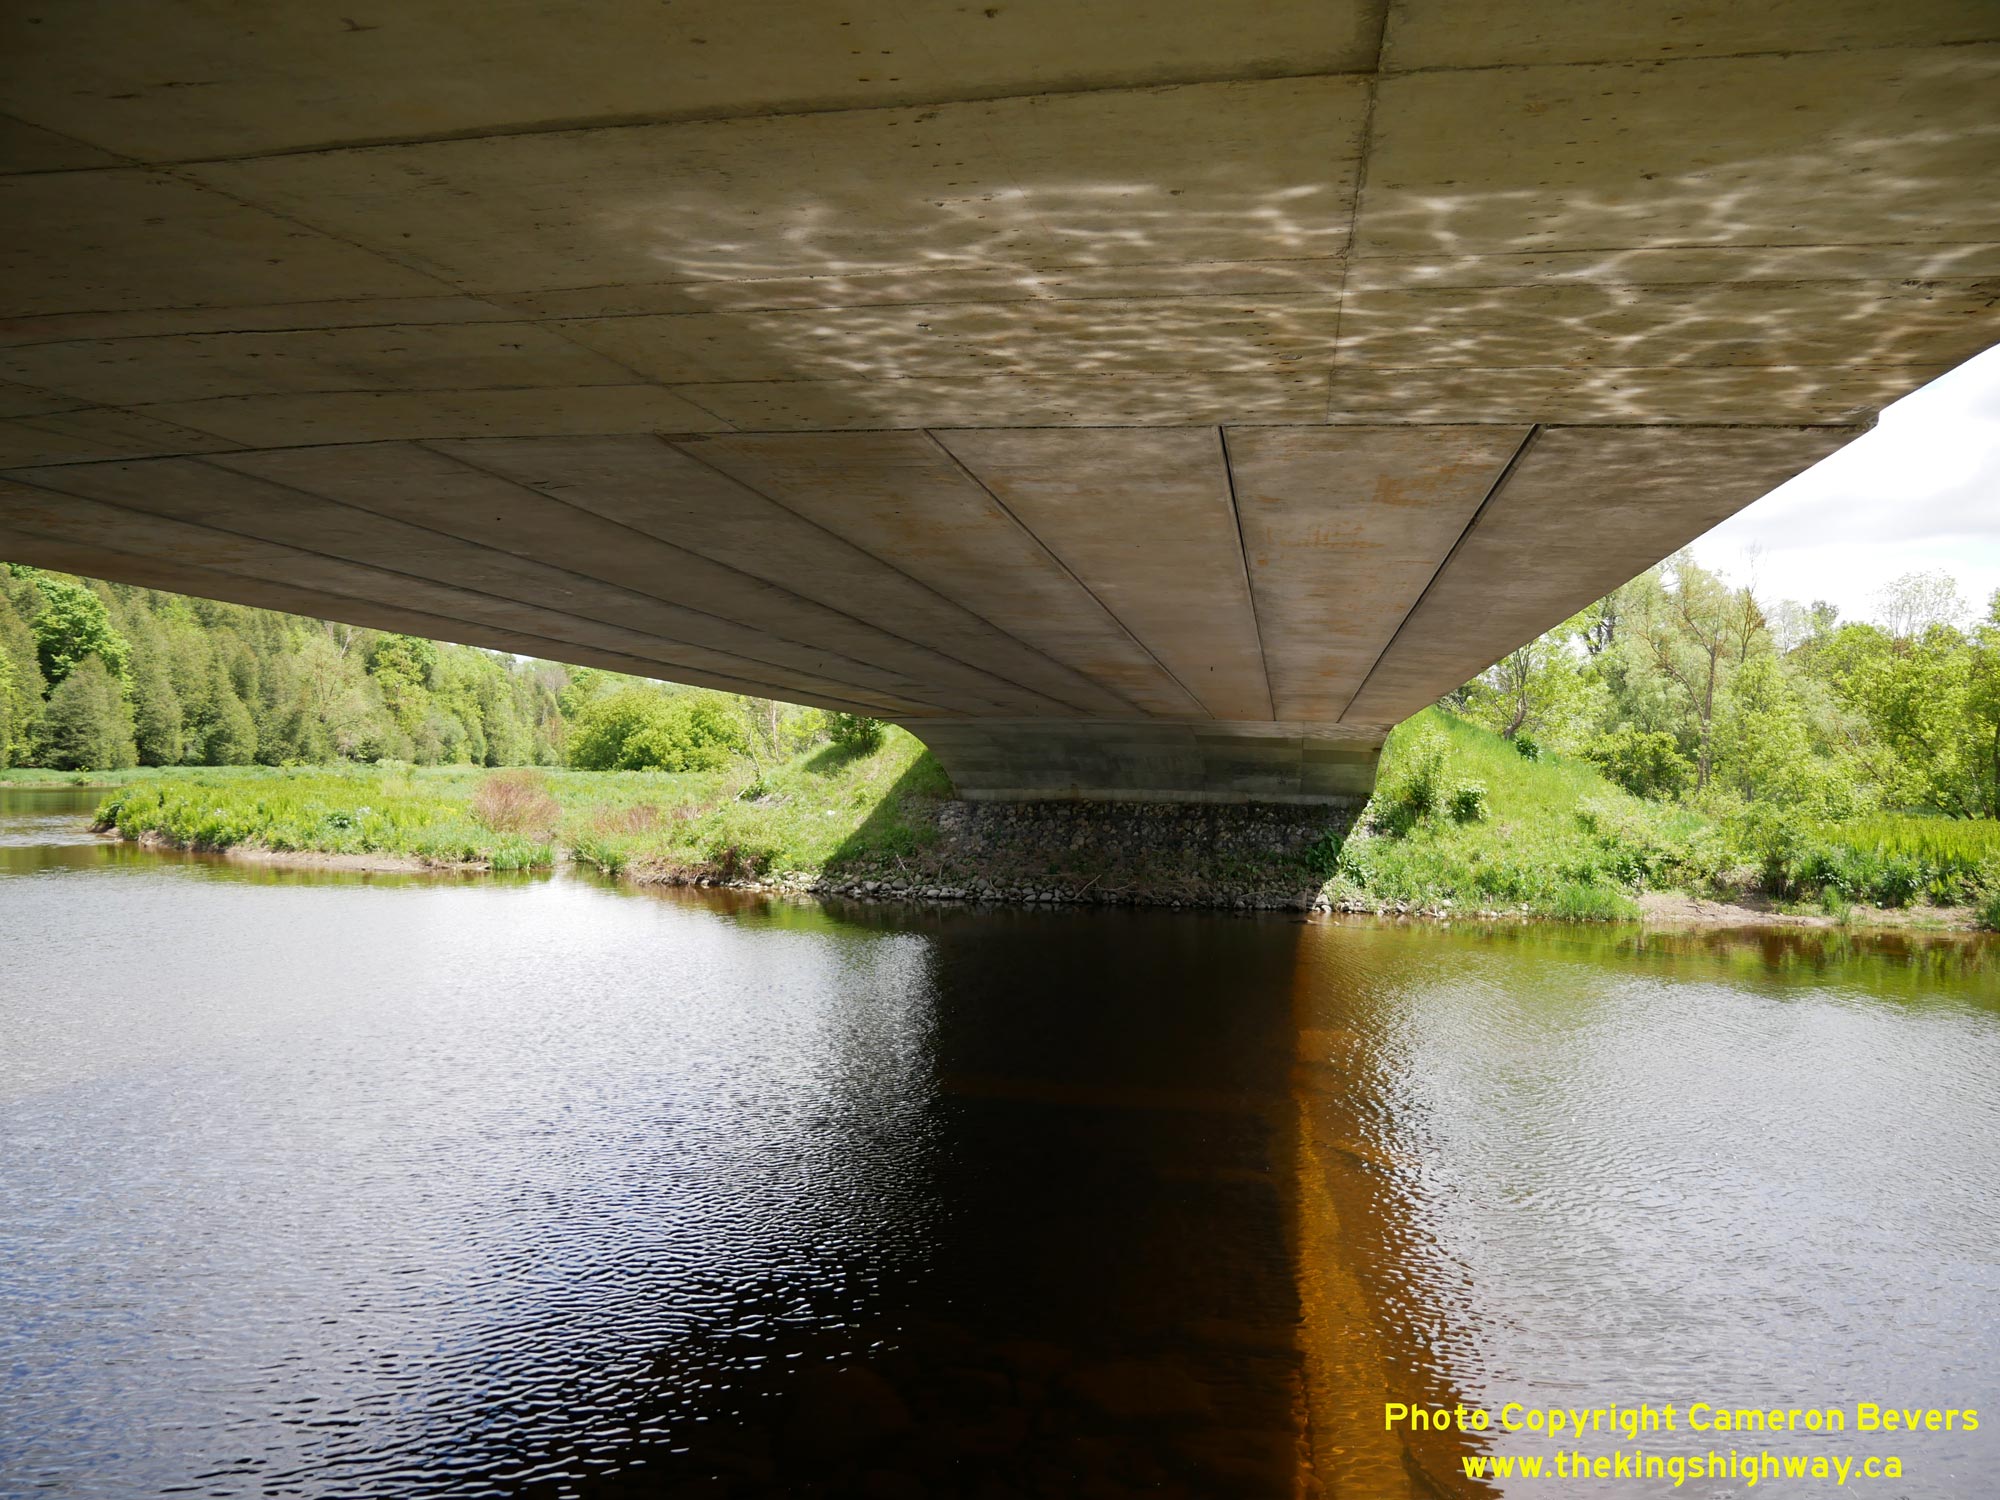
for any central piers in the river. See an Enlarged Photo Here.(Photograph taken on June 1, 2025 - © Cameron Bevers) Right - View underneath the deck of the South Saugeen River Bridge on Hwy 89 (Queen Street). From below, the concrete girder centre section can easily be
discerned from the approaches. In the river, traces of old foundations can be seen - presumably left over from the construction of this bridge in the late 1960s. See
an Enlarged Photo Here.(Photograph taken on June 1, 2025 - © Cameron Bevers) 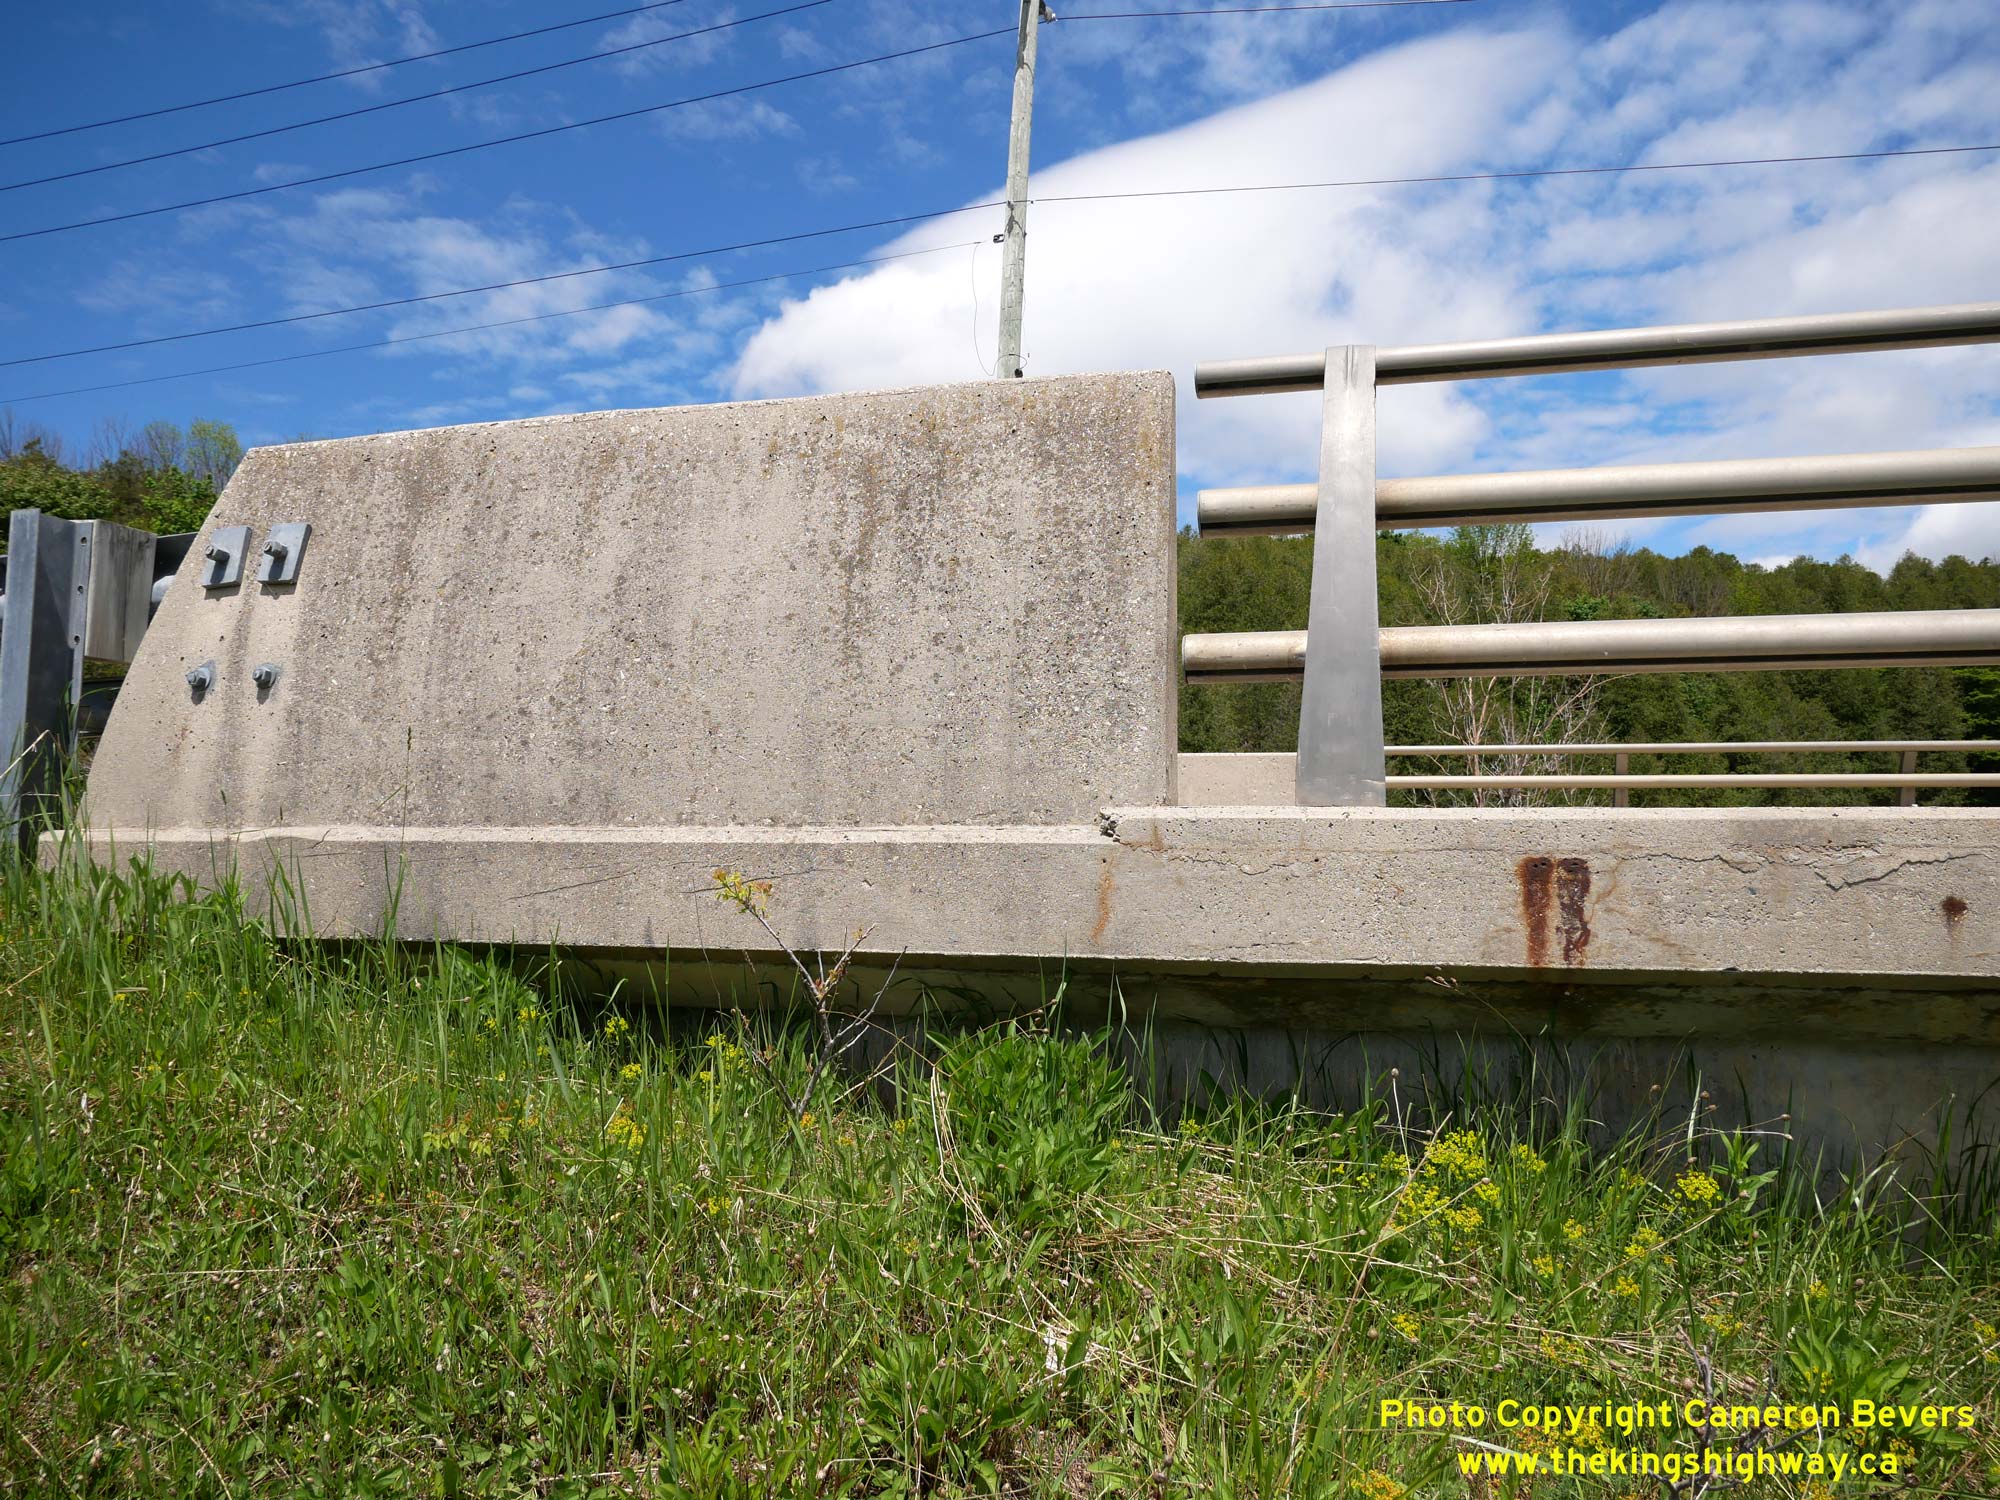
 Left - Close-up view of the curved concrete handrail and the aluminum tube handrail design on the South Saugeen River Bridge. Designed at a time when highway
bridges had generally become rather plain and unremarkable, the South Saugeen River Bridge was designed with aesthetics in mind and offers a streamlined appearance.
See an Enlarged Photo Here. Left - Close-up view of the curved concrete handrail and the aluminum tube handrail design on the South Saugeen River Bridge. Designed at a time when highway
bridges had generally become rather plain and unremarkable, the South Saugeen River Bridge was designed with aesthetics in mind and offers a streamlined appearance.
See an Enlarged Photo Here.(Photograph taken on June 1, 2025 - © Cameron Bevers) Right - Facing west along Hwy 89 (Queen Street) towards Downtown Mount Forest at the South Saugeen River Bridge (Site #35-369). See an
Enlarged Photo Here.(Photograph taken on June 1, 2025 - © Cameron Bevers) 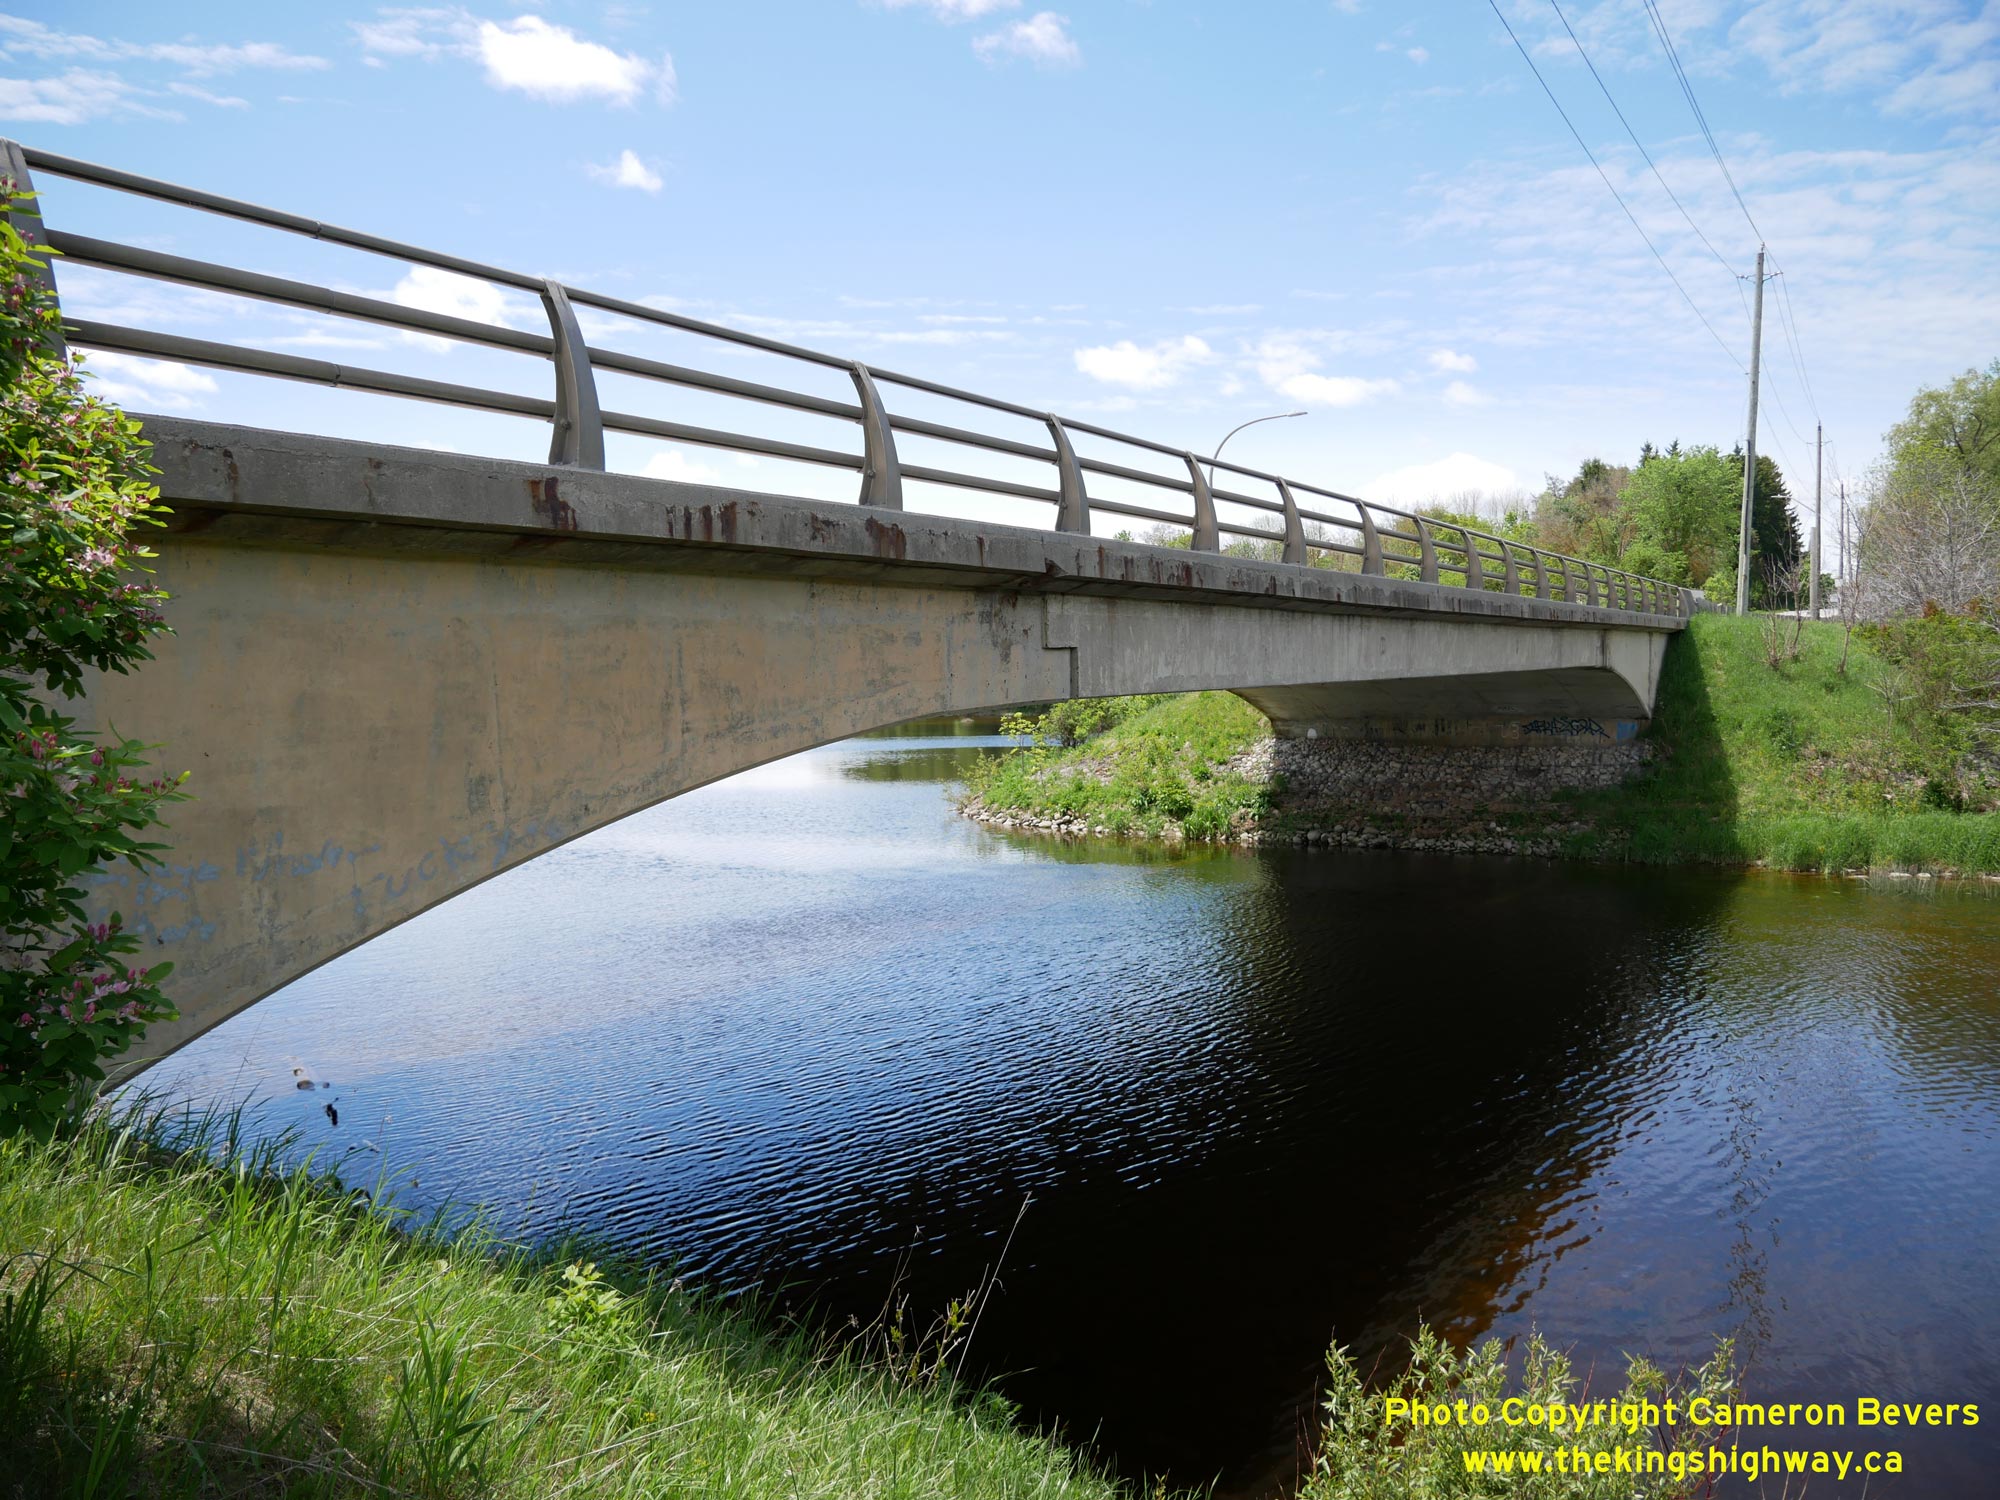
 Left - Northern side of the South Saugeen River Bridge on Hwy 89 (Queen Street) in Mount Forest. This structure replaced a narrow concrete bowstring truss
bridge, which was built at this location in 1923. The old bridge had a total roadway width of only 23 feet and very little room for pedestrians. Although the old
bridge had sidewalks on both sides, the sidewalks were only 18 inches in width. See an
Enlarged Photo Here. Left - Northern side of the South Saugeen River Bridge on Hwy 89 (Queen Street) in Mount Forest. This structure replaced a narrow concrete bowstring truss
bridge, which was built at this location in 1923. The old bridge had a total roadway width of only 23 feet and very little room for pedestrians. Although the old
bridge had sidewalks on both sides, the sidewalks were only 18 inches in width. See an
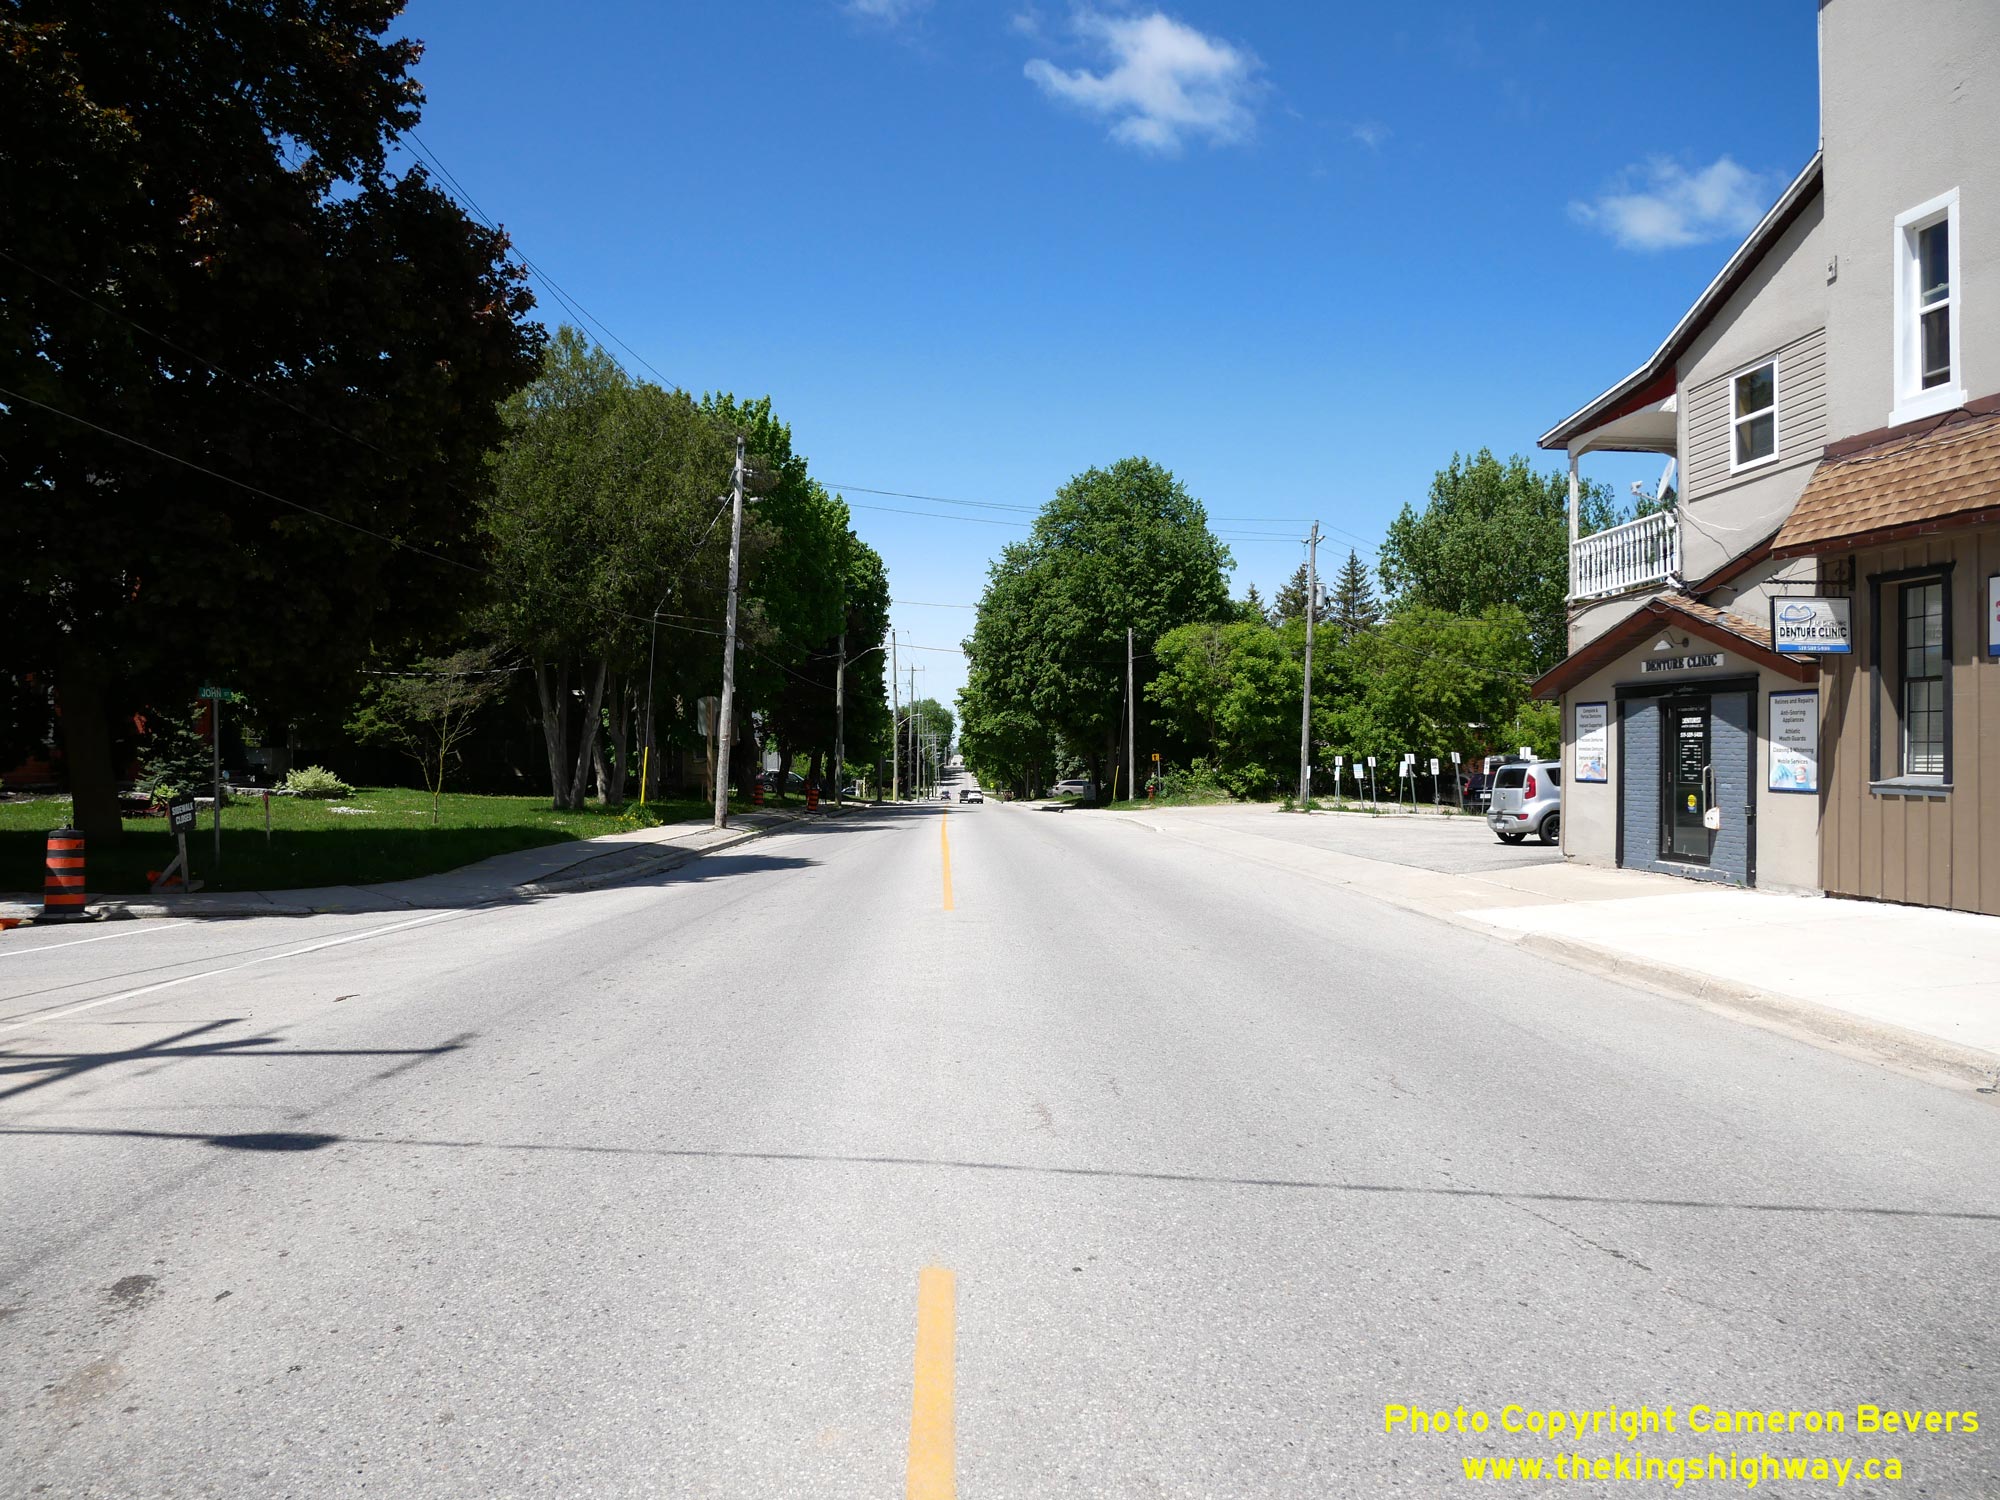
Enlarged Photo Here.(Photograph taken on June 1, 2025 - © Cameron Bevers) Right - Facing west along Hwy 89 at the eastern entrance to Mount Forest. The route of Hwy 89 through Mount Forest is designated as a Municipal Connecting Link,
where the day-to-day operations and maintenance of the highway are looked after by the municipality. See an
Enlarged Photo Here.(Photograph taken on June 1, 2025 - © Cameron Bevers) 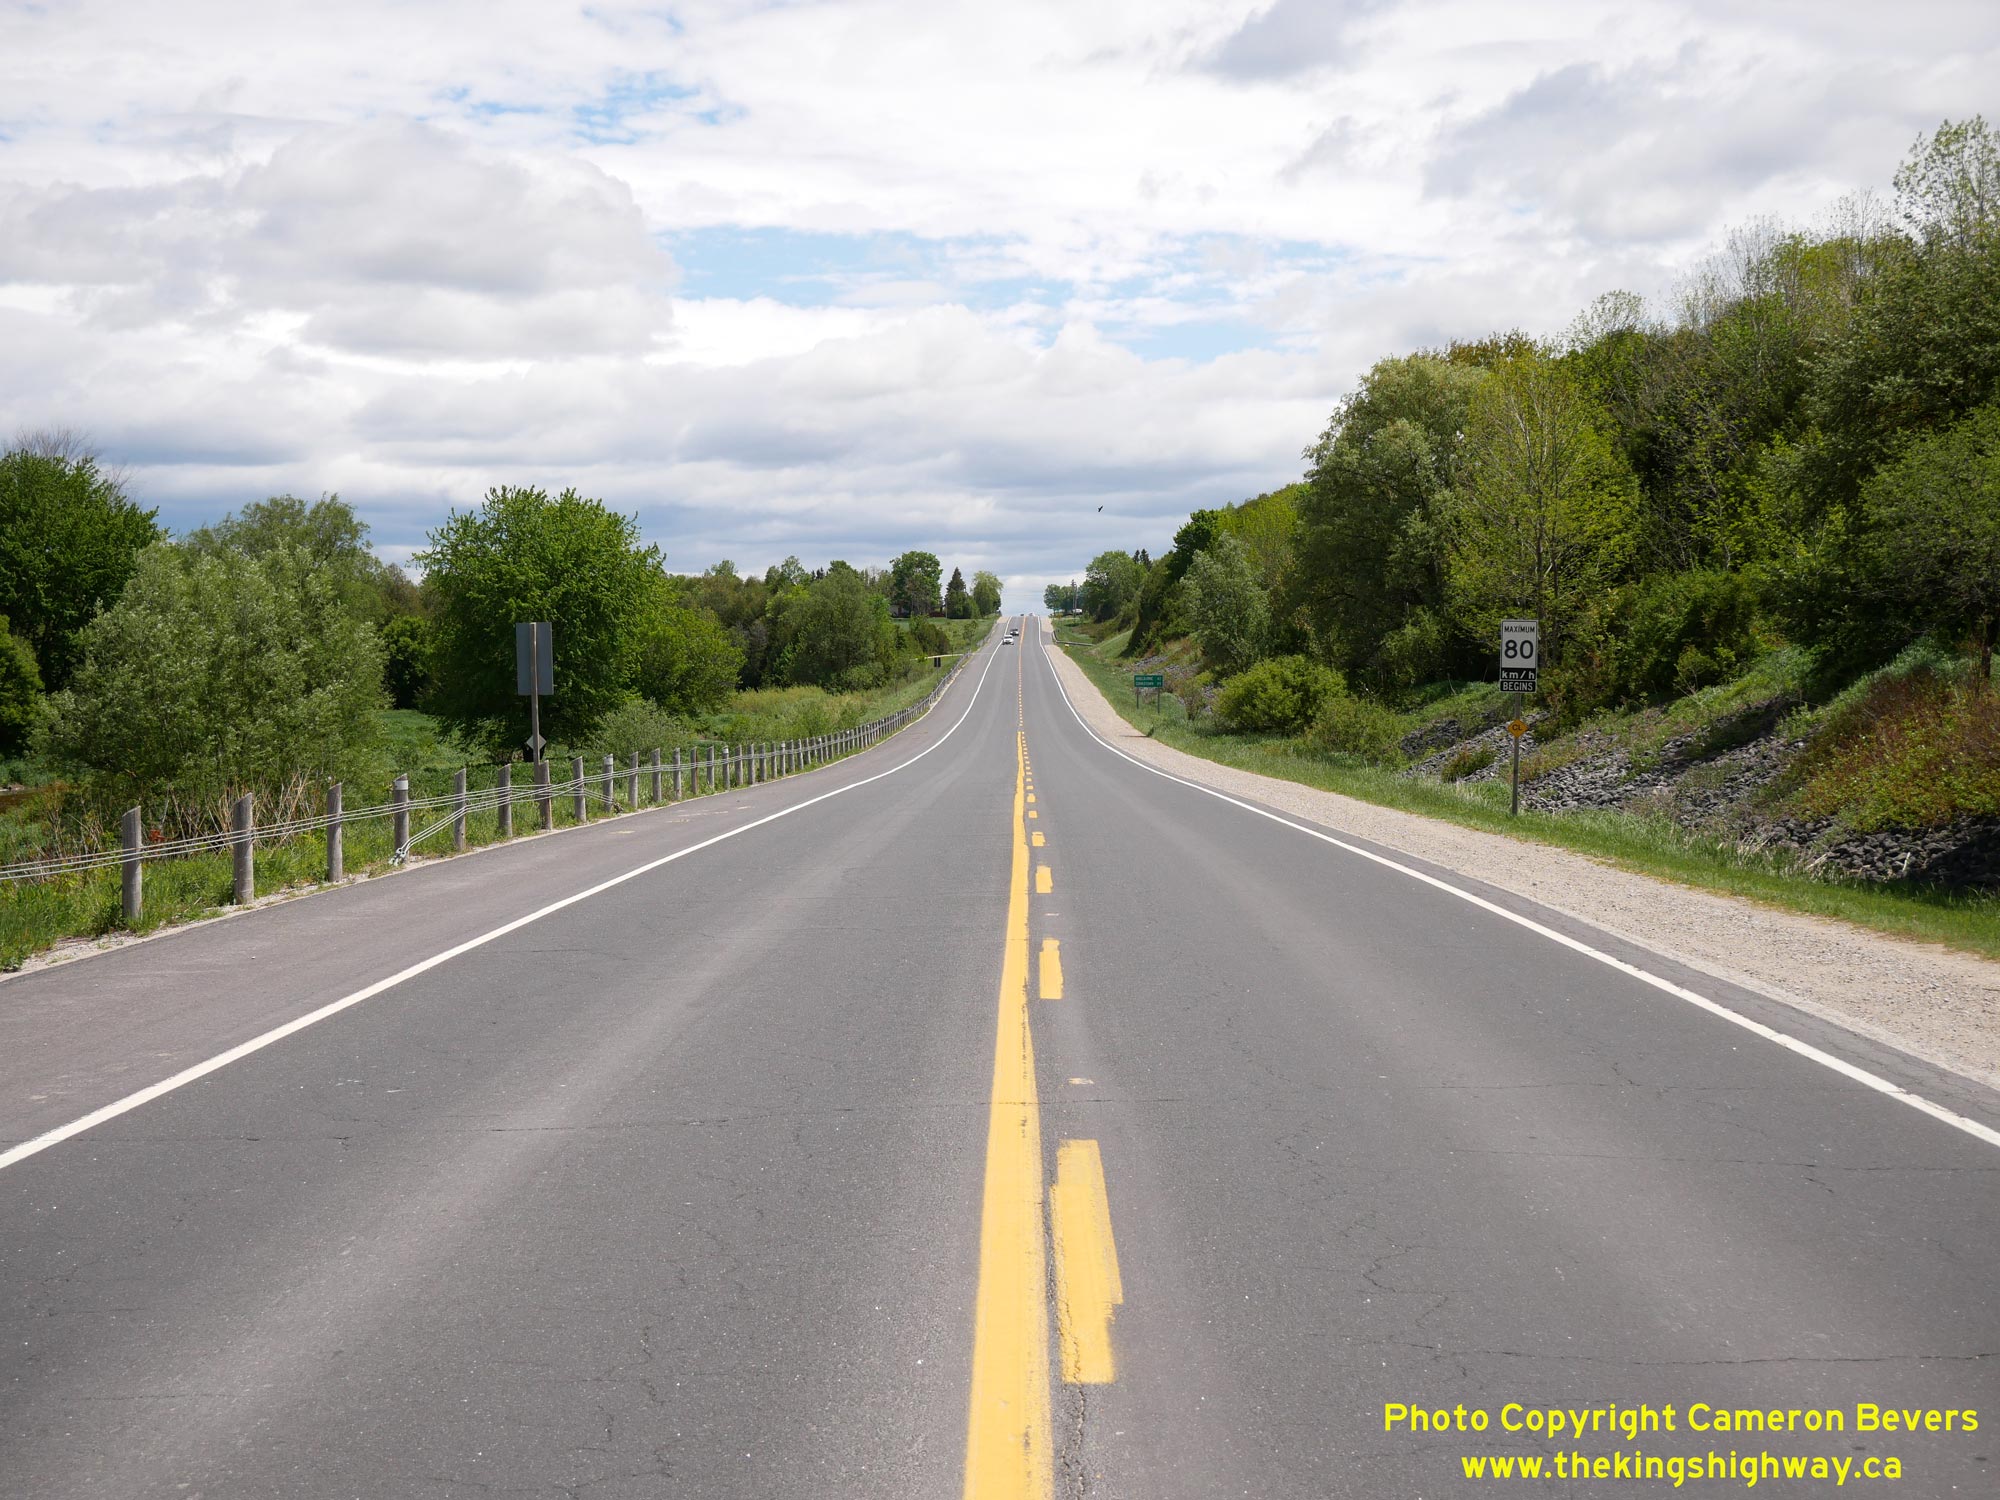
 Left - View of Hwy 89 facing east towards Shelburne from the eastern limits of Mount Forest. Note the small yellow "CL" sign at left, which indicates the end
of the Municipal Connecting Link. Provincial jurisdiction over Hwy 89 resumes at this point, after briefly ceasing as the highway passes through Mount Forest. See an
Enlarged Photo Here. Left - View of Hwy 89 facing east towards Shelburne from the eastern limits of Mount Forest. Note the small yellow "CL" sign at left, which indicates the end
of the Municipal Connecting Link. Provincial jurisdiction over Hwy 89 resumes at this point, after briefly ceasing as the highway passes through Mount Forest. See an
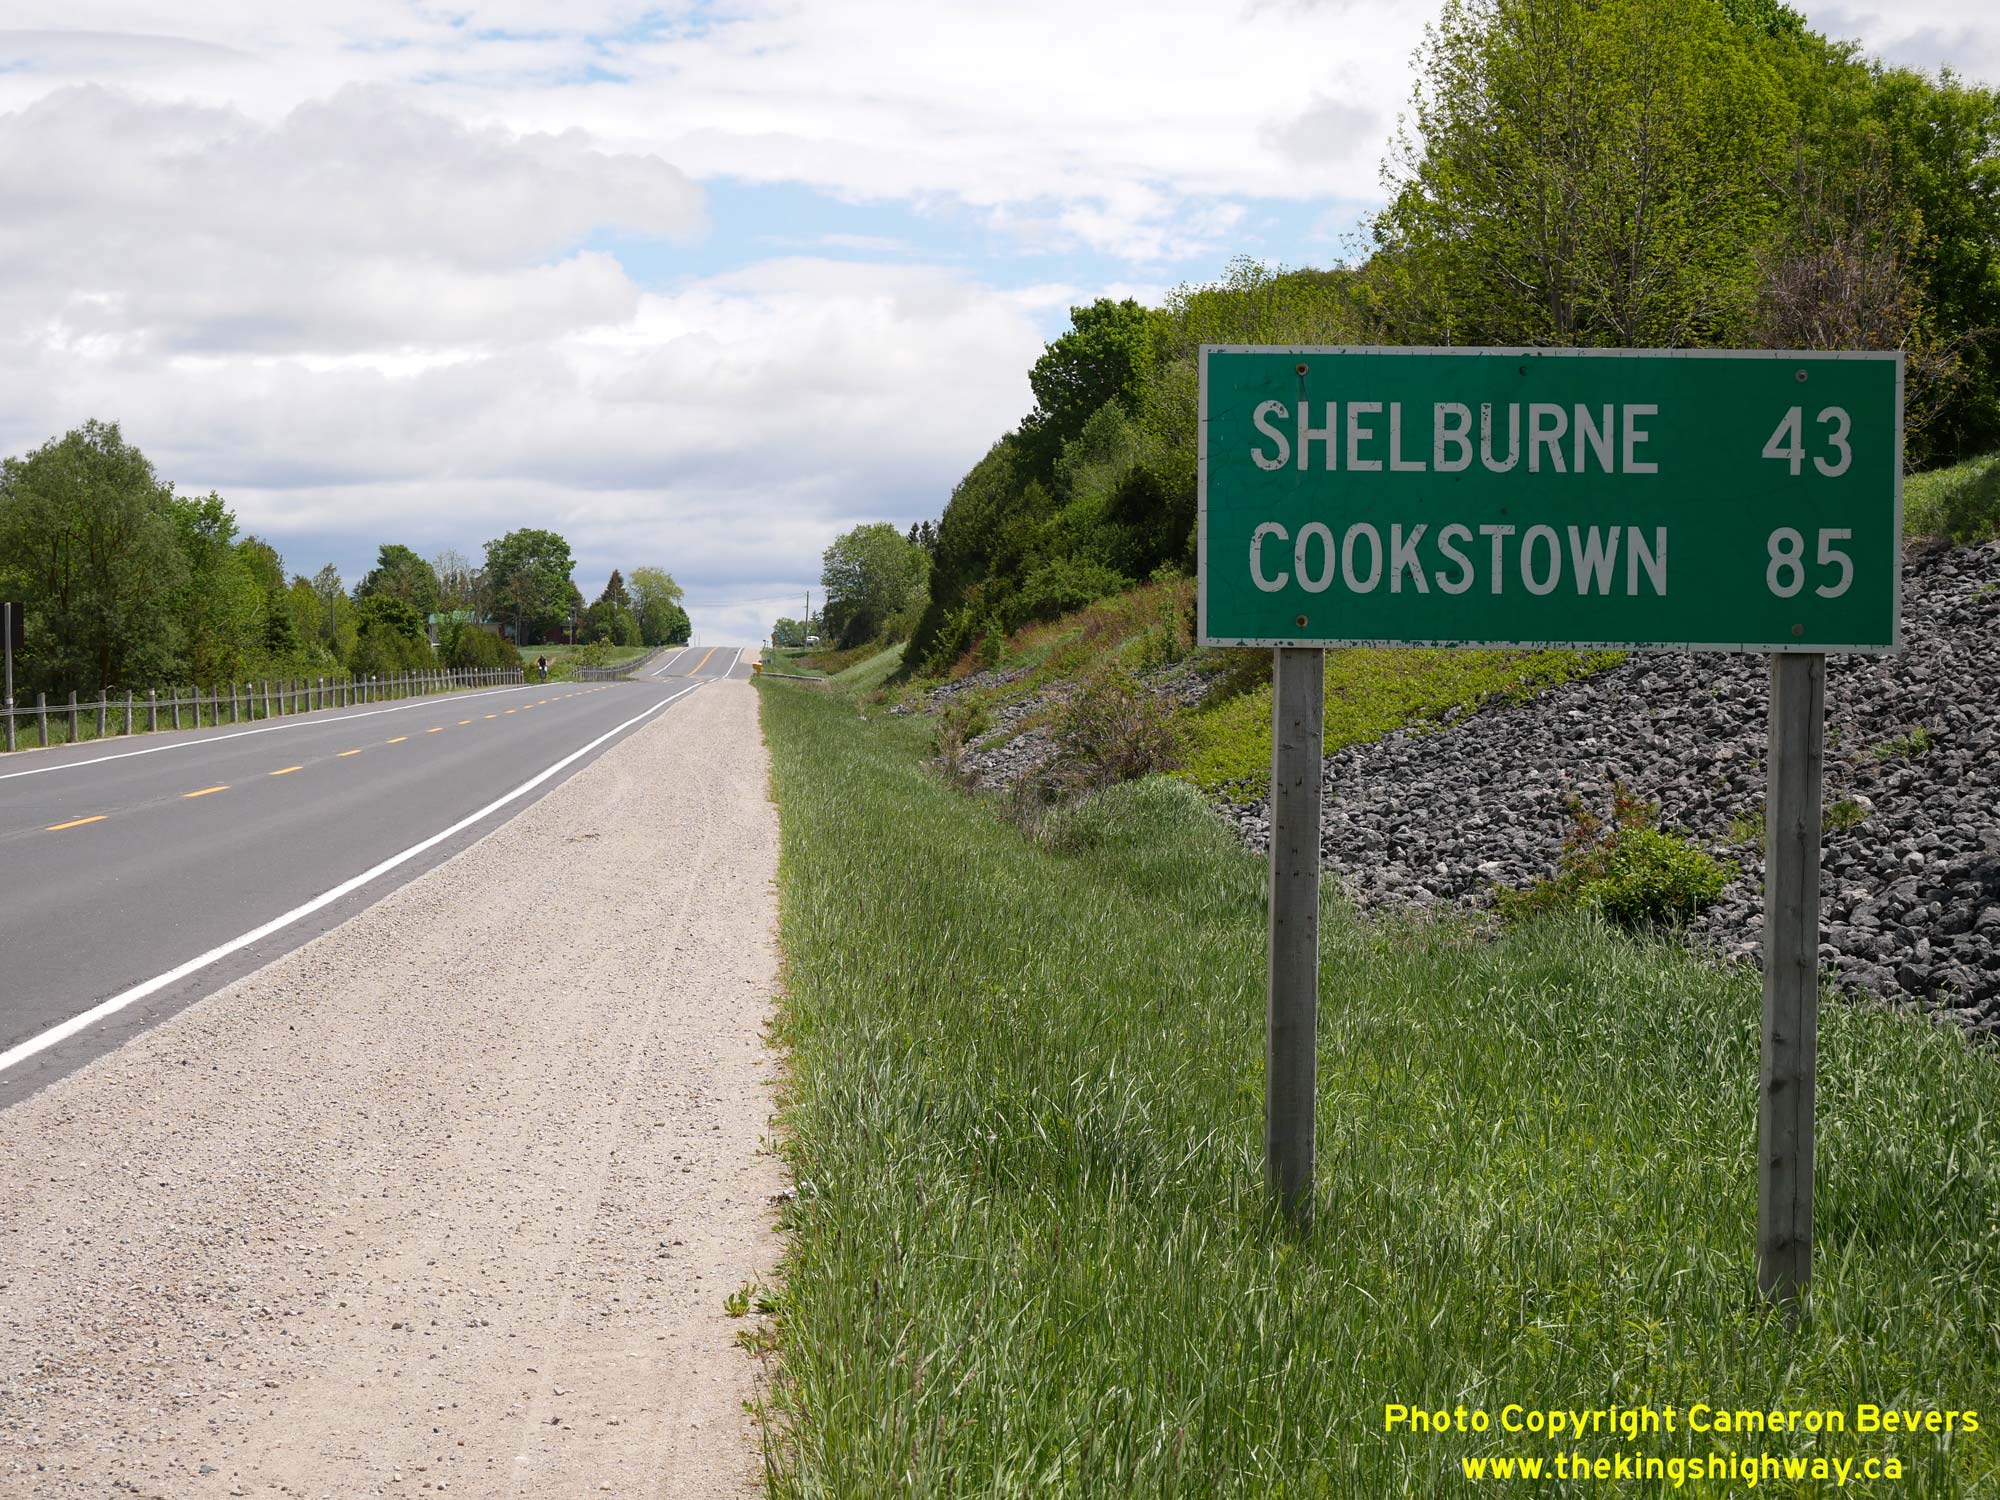
Enlarged Photo Here.(Photograph taken on June 1, 2025 - © Cameron Bevers) Right - Distance guide sign on eastbound Hwy 89 departing from Mount Forest. See an
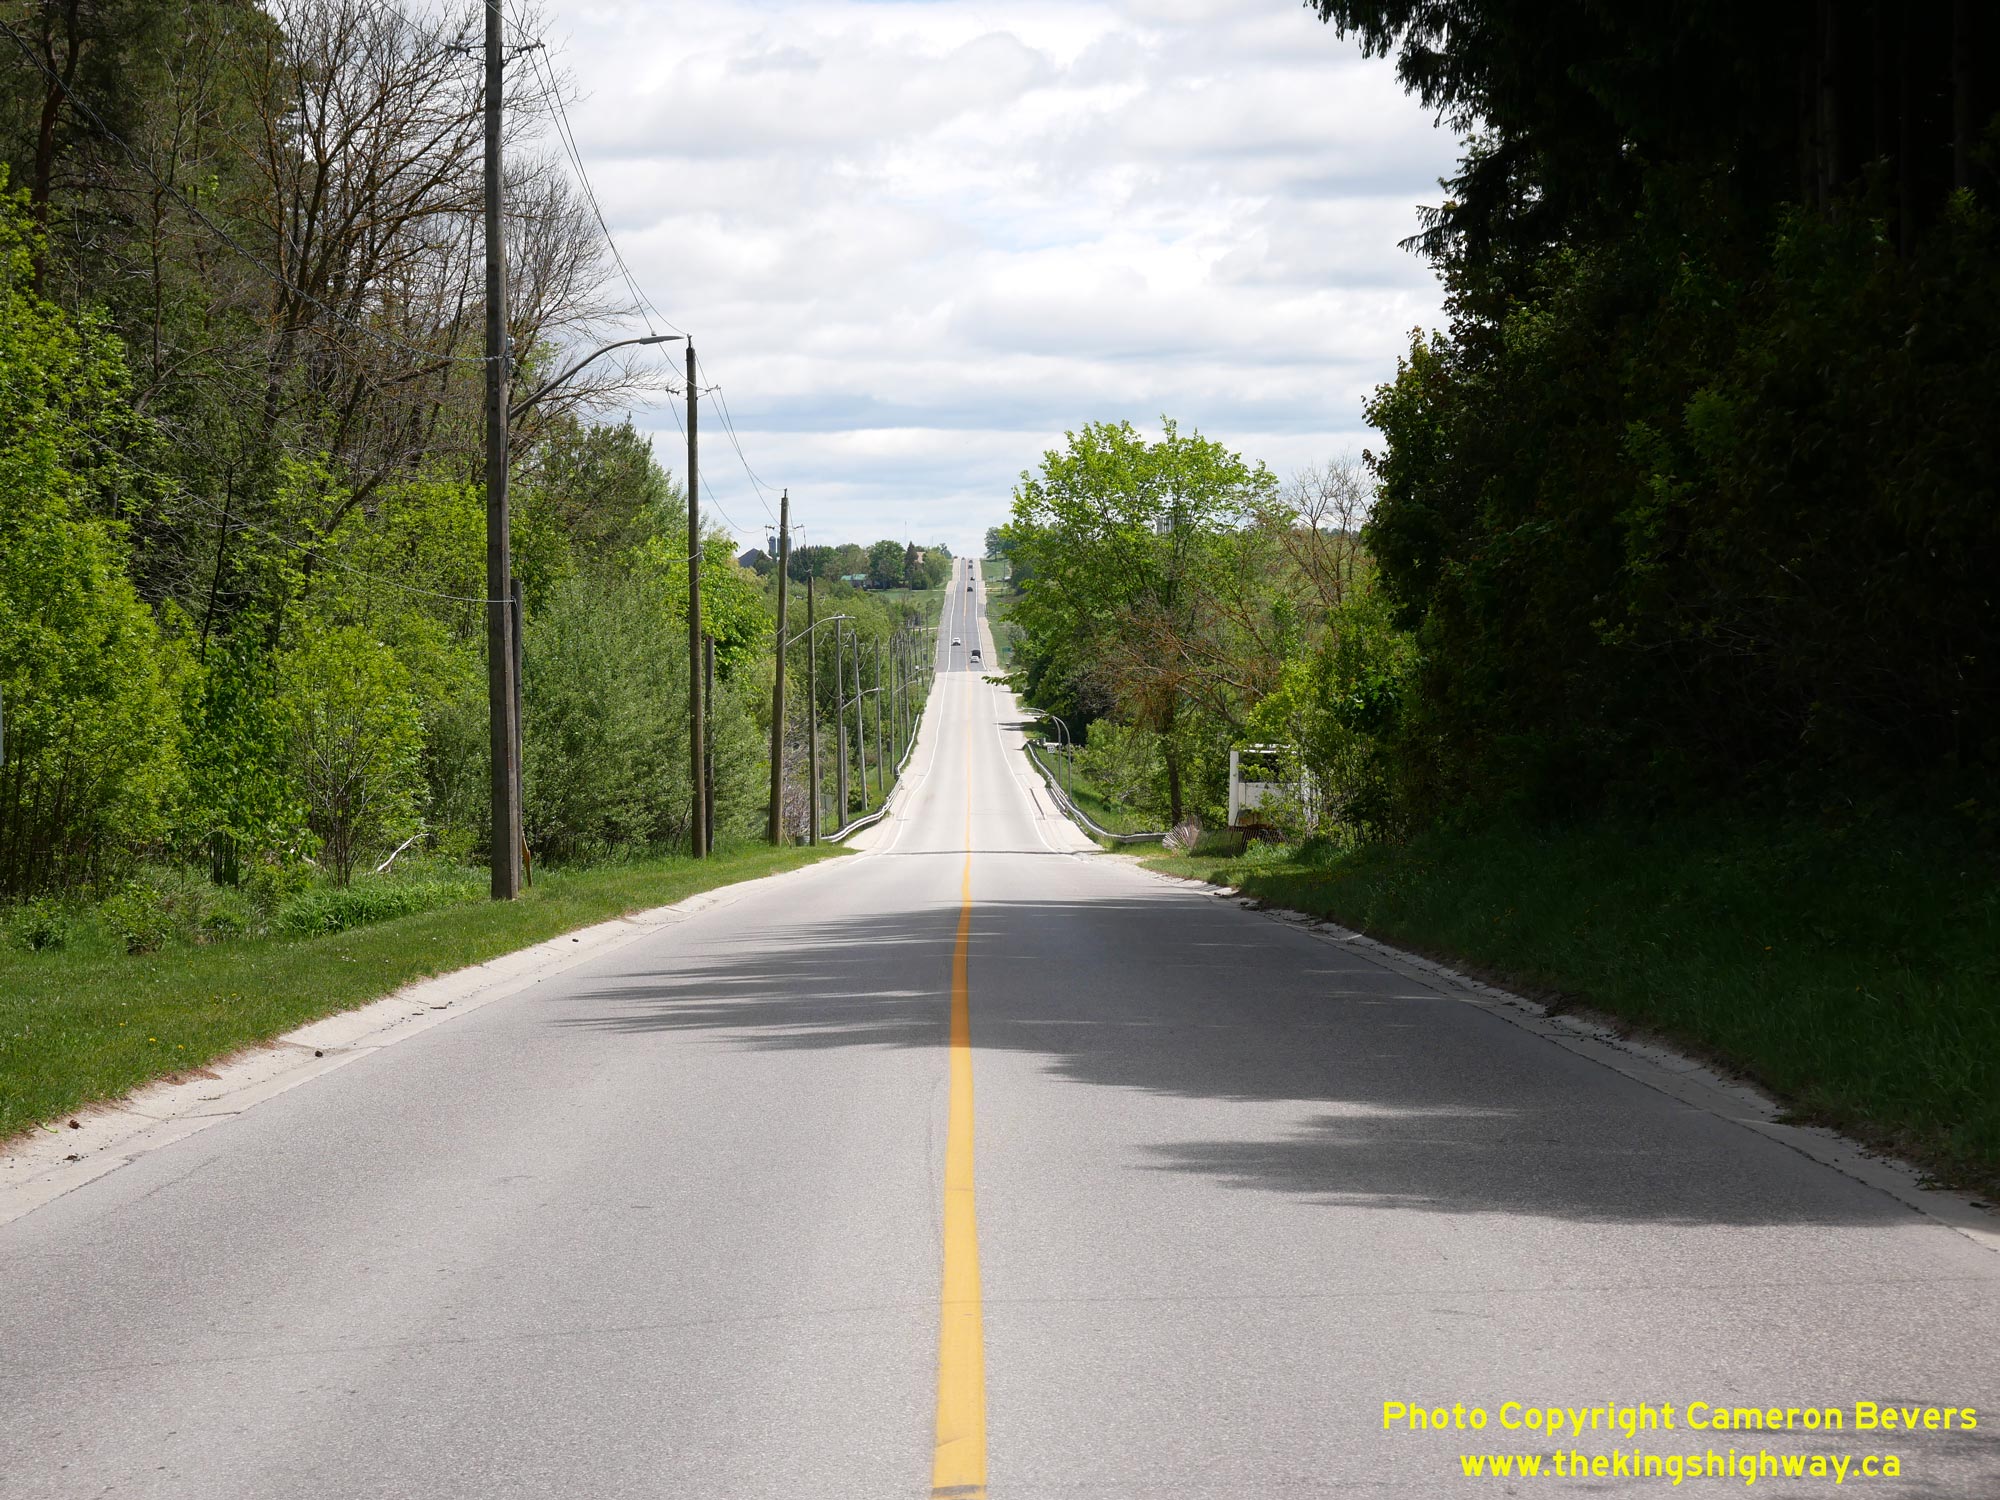
Enlarged Photo Here.(Photograph taken on June 1, 2025 - © Cameron Bevers) 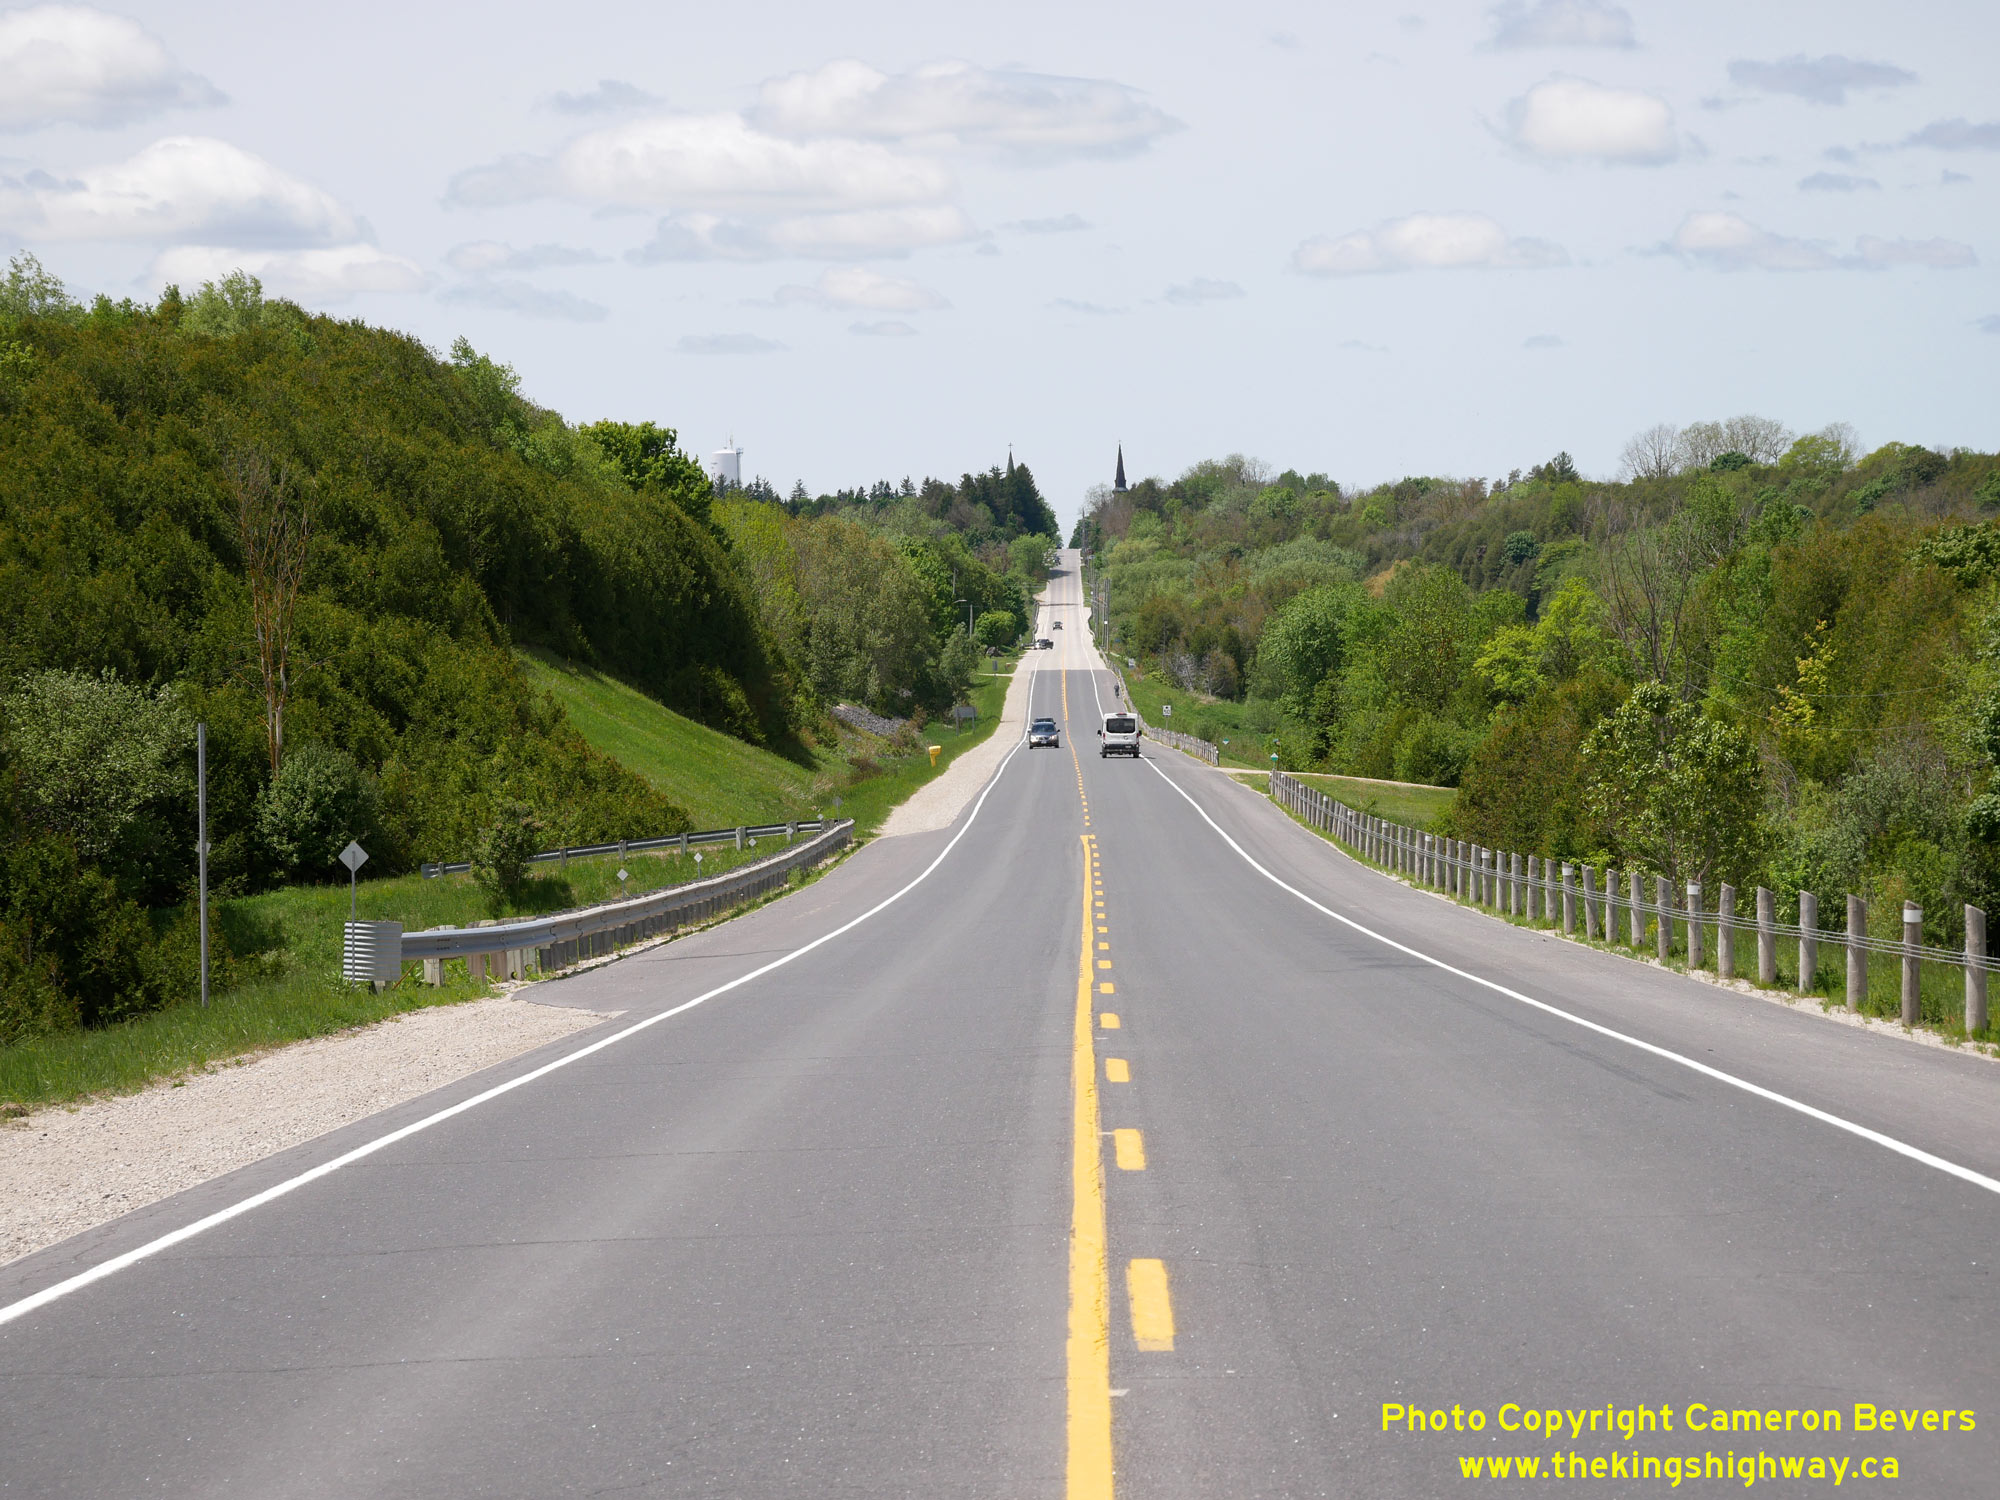 Above - View of Hwy 89 about 1 km east of Mount Forest, facing west towards the South Saugeen River Bridge. See an
Enlarged Photo Here. Above - View of Hwy 89 about 1 km east of Mount Forest, facing west towards the South Saugeen River Bridge. See an
Enlarged Photo Here.(Photograph taken on June 1, 2025 - © Cameron Bevers) 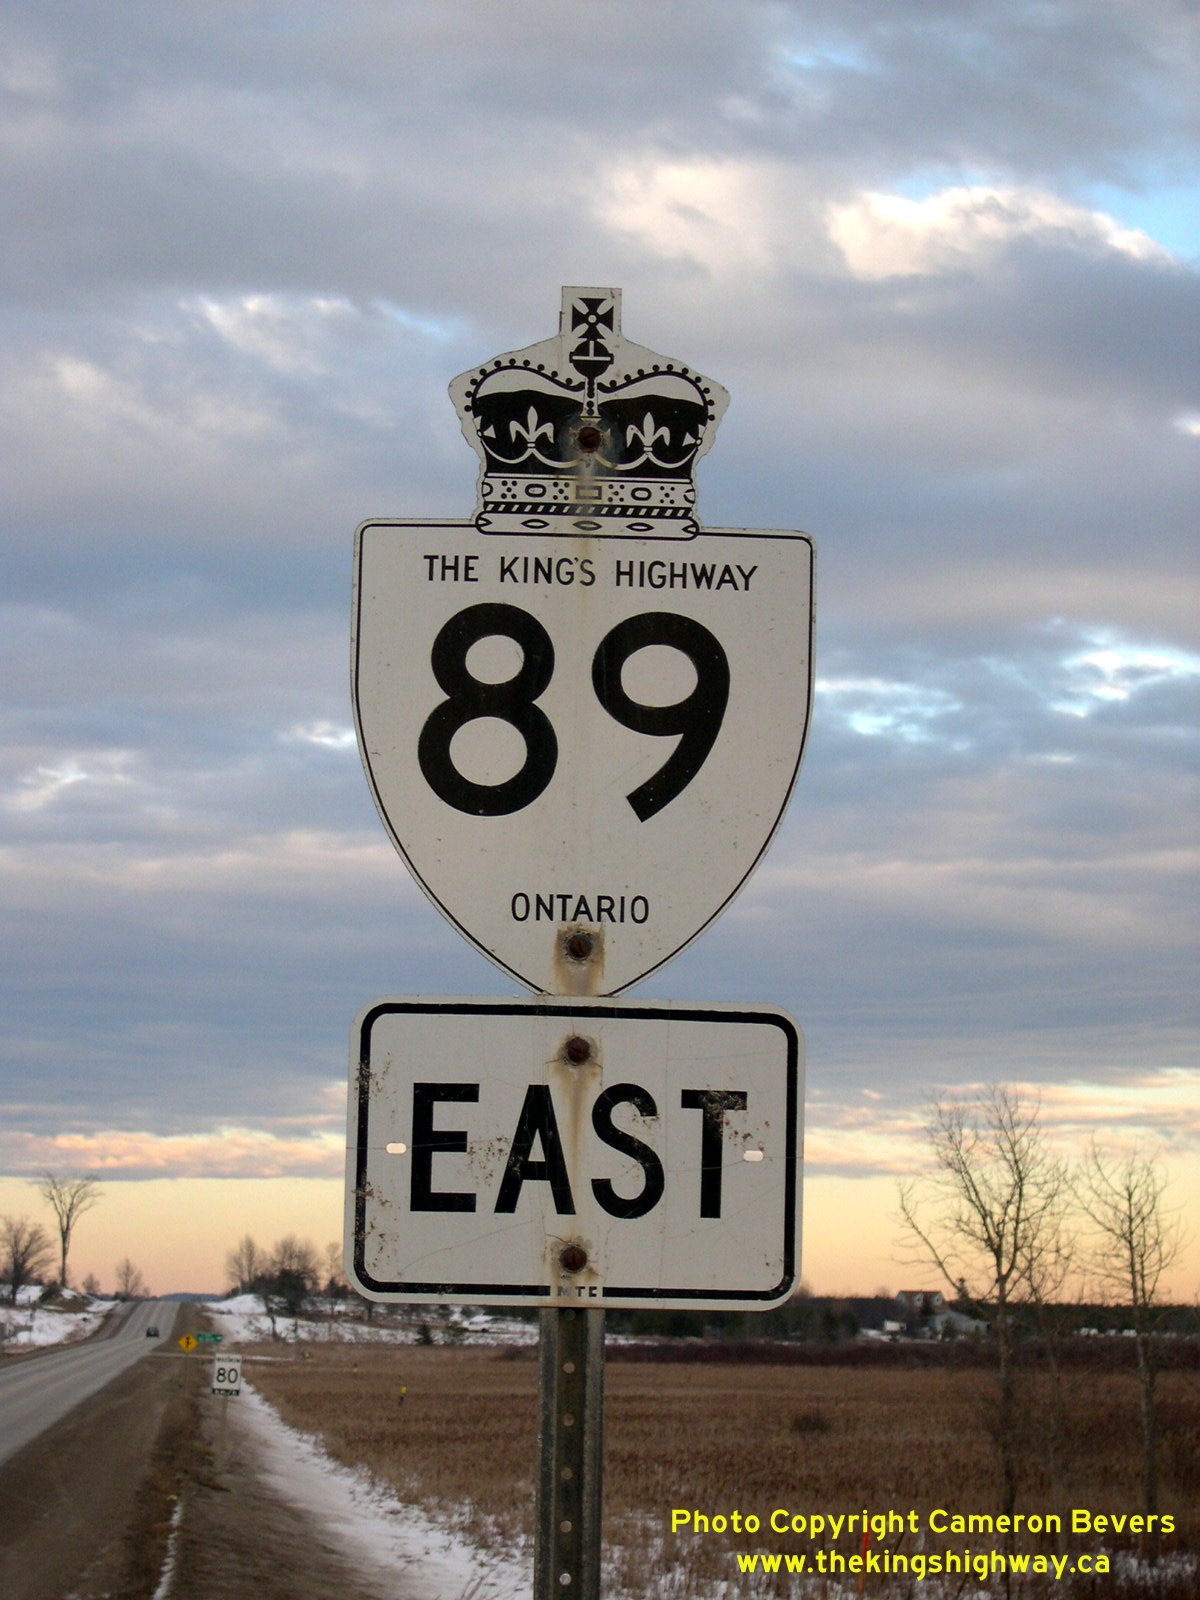 Above - An older King's Highway 89 route marker east of Mount Forest. See an
Enlarged Photo Here. Above - An older King's Highway 89 route marker east of Mount Forest. See an
Enlarged Photo Here.(Photograph taken on December 28, 2003 - © Cameron Bevers) 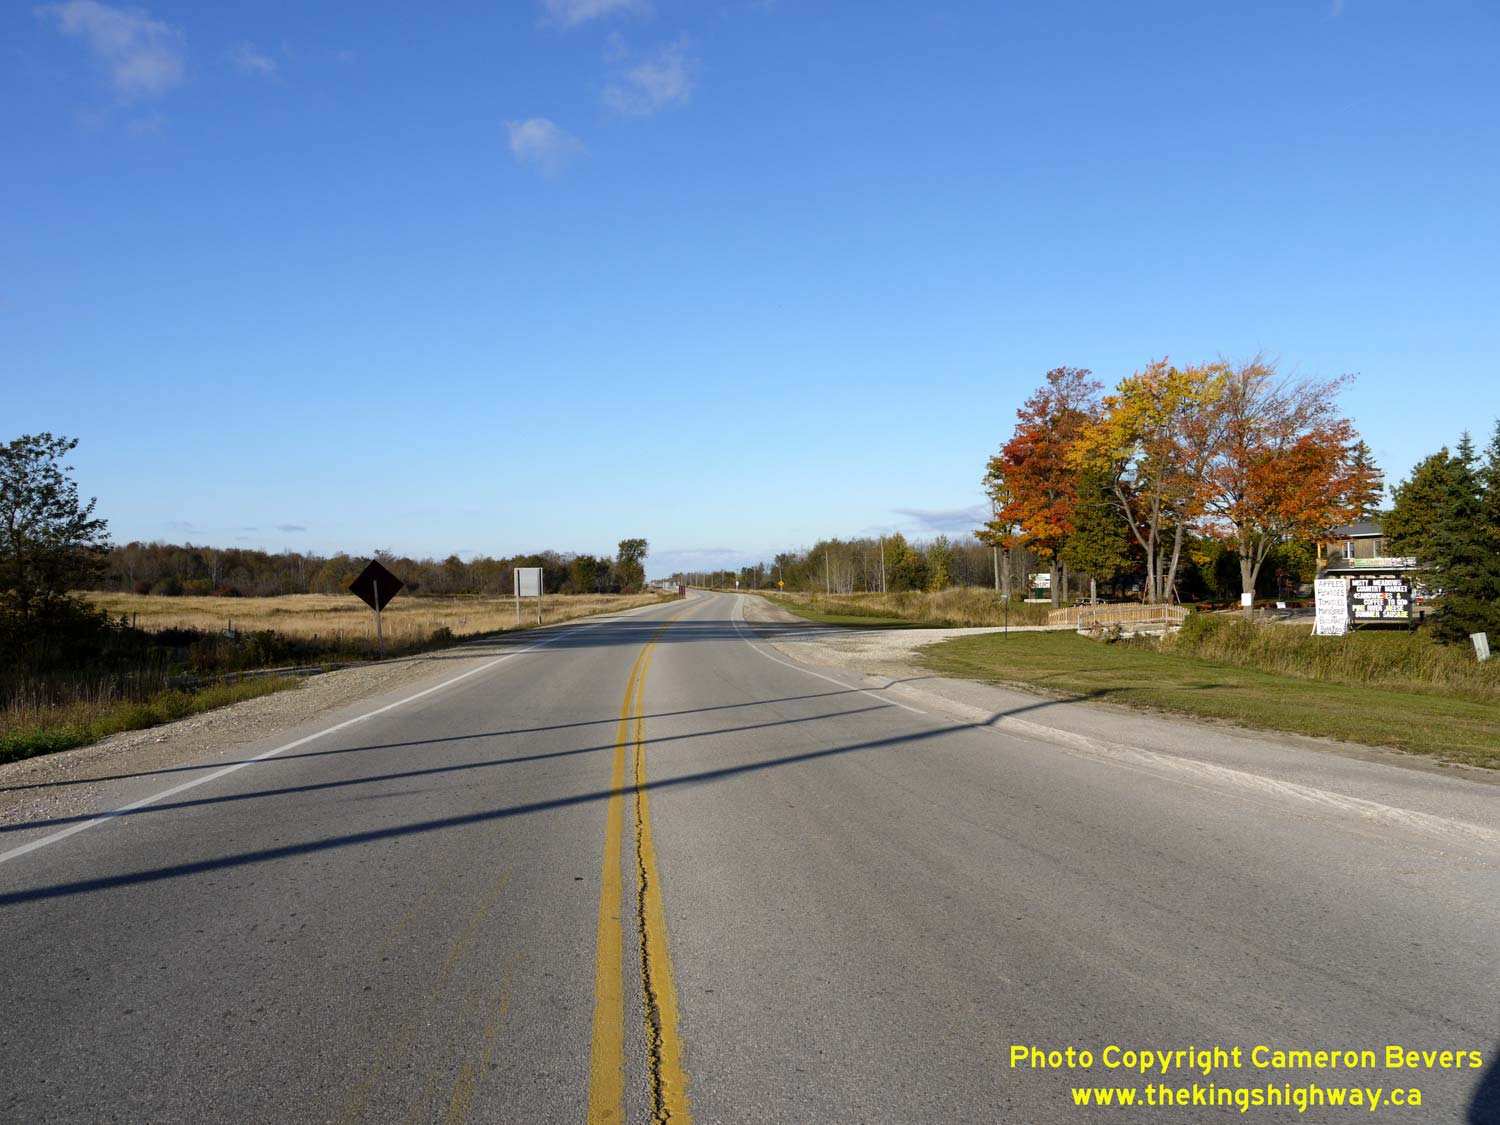

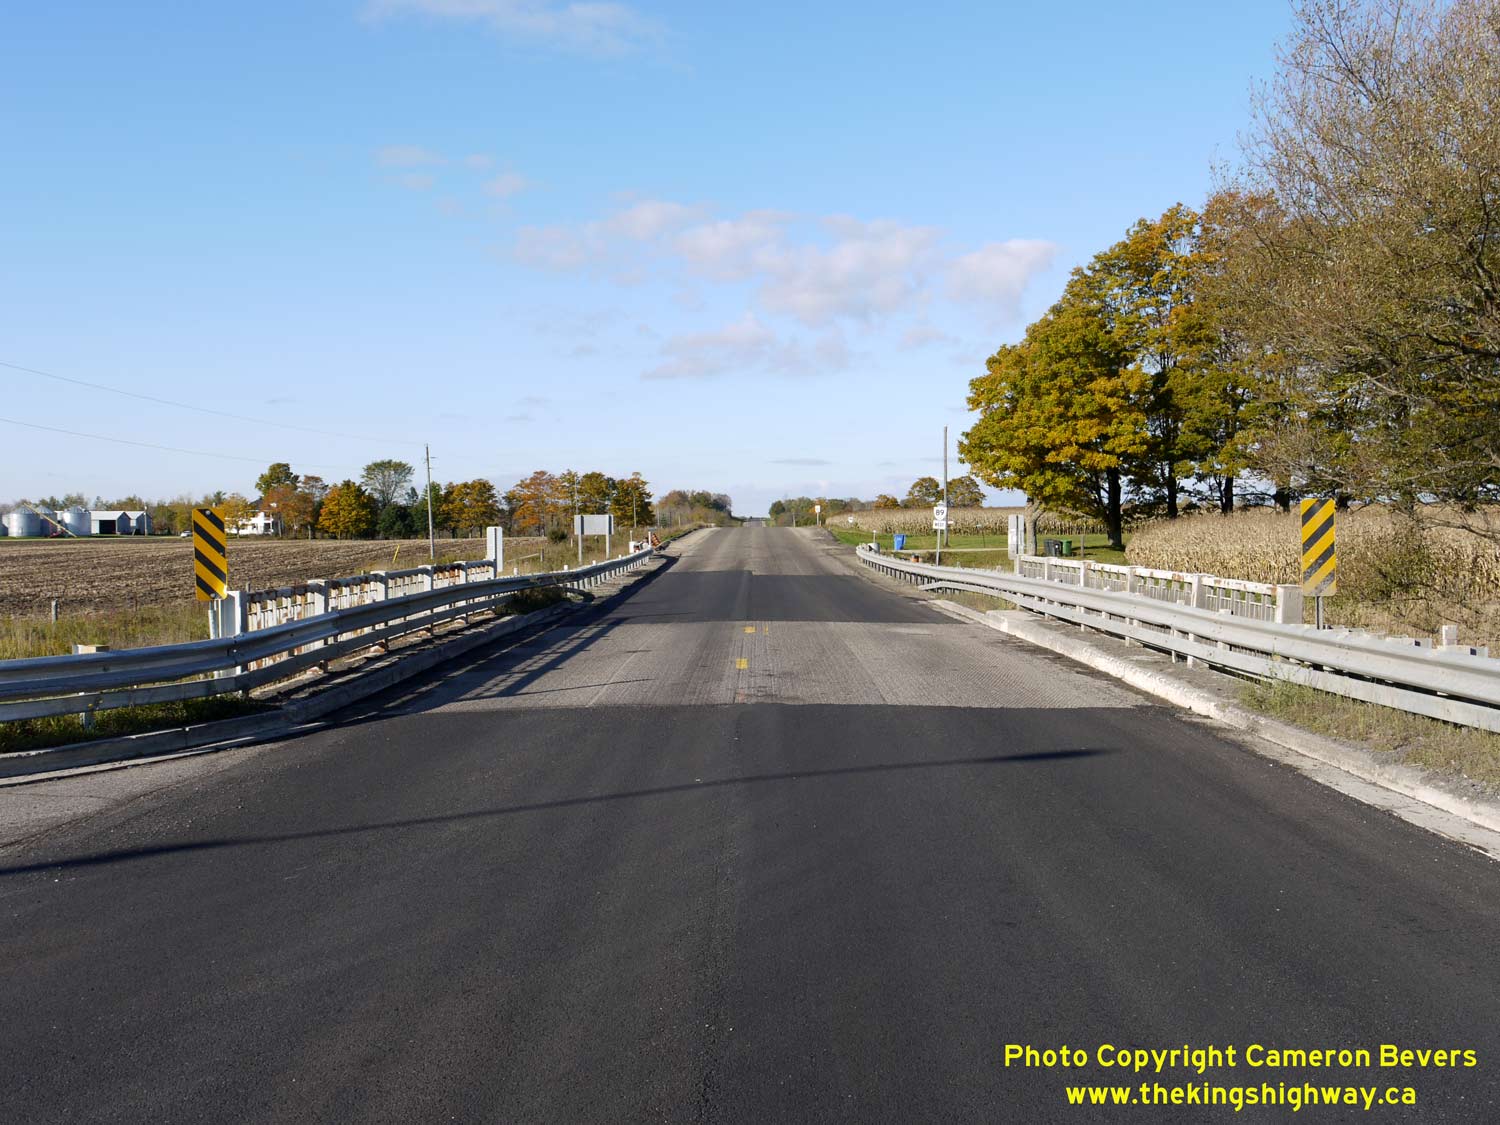
Left - Facing west along Hwy 89 towards Mount Forest from the County Road 14 Junction at Conn. See an
Enlarged Photo Here. (Photograph taken on November 10, 2009 - © Cameron Bevers) Right - County Road 14 Junction on Hwy 89 at Conn, facing east towards Shelburne. See an Enlarged Photo Here. (Photograph taken on November 10, 2009 - © Cameron Bevers) 
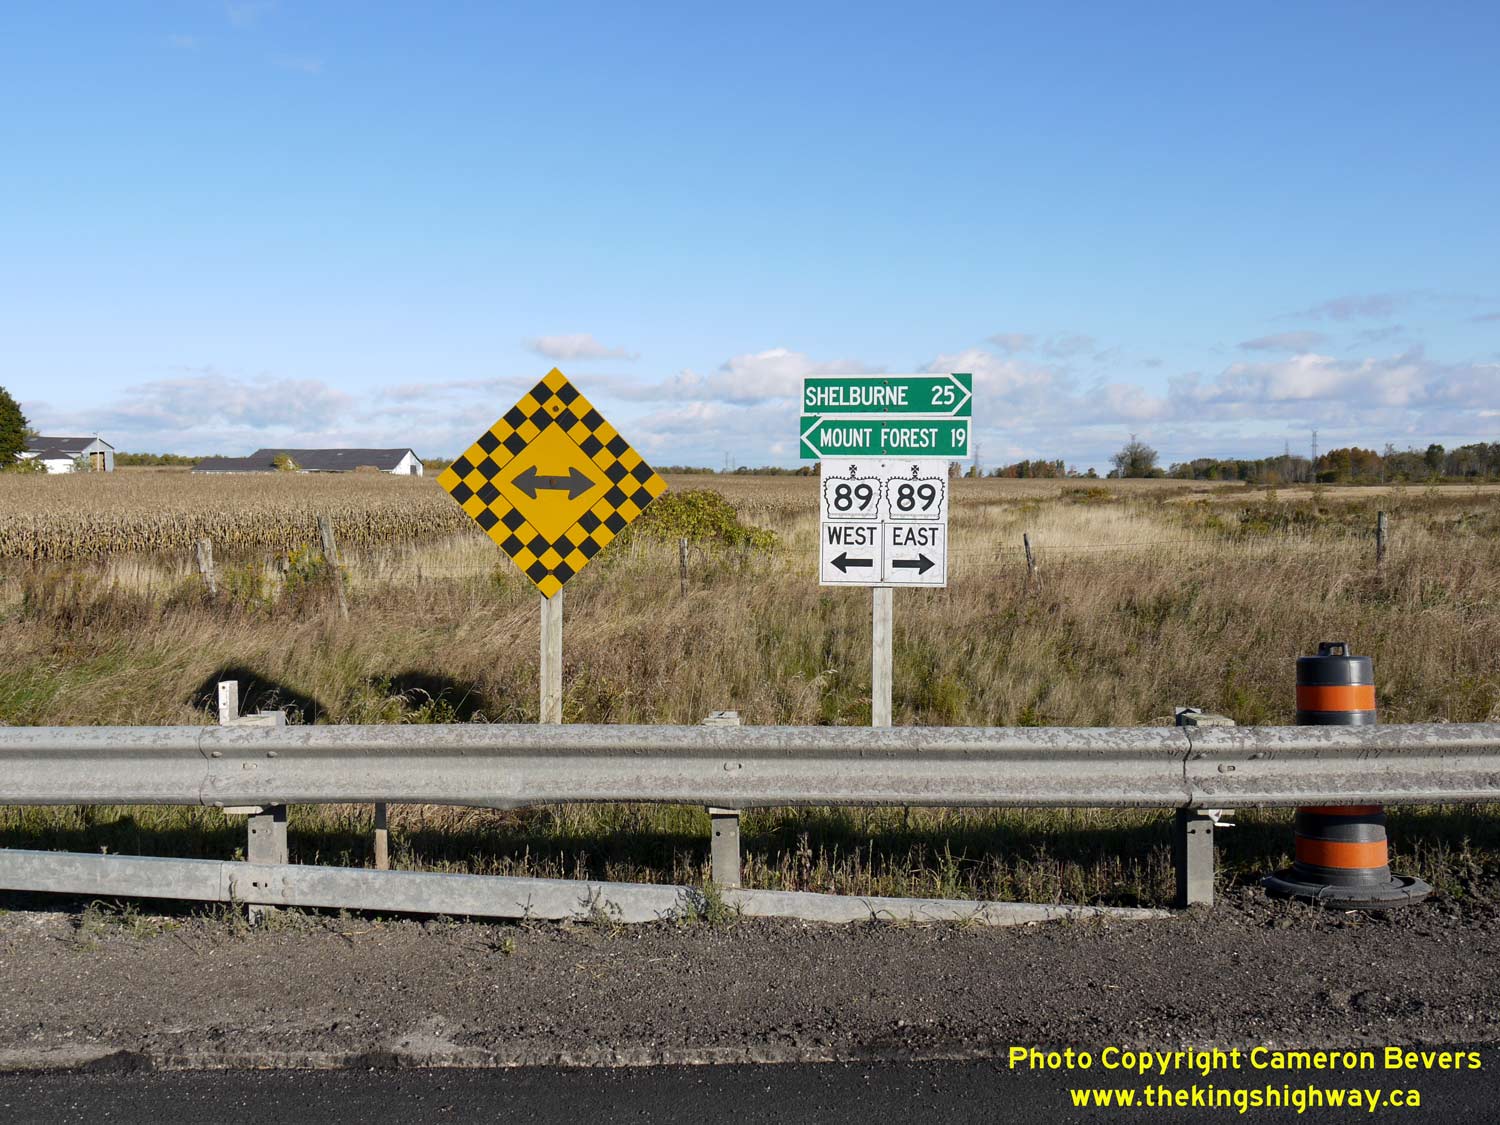
Left - Junction assembly and fingerboard destination guide signs at Hwy 89 and County Road 14 at Conn. Grey County maintains County Road 14 north of Hwy 89,
while Wellington County maintains County Road 14 between Hwy 89 and Arthur. See an
Enlarged Photo Here. (Photograph taken on November 10, 2009 - © Cameron Bevers) Right - Facing west along Hwy 89 at Conn. The junction of Hwy 89 and County Road 14 is marked by an overhead flashing intersection warning beacon. See an Enlarged Photo Here. (Photograph taken on November 10, 2009 - © Cameron Bevers) 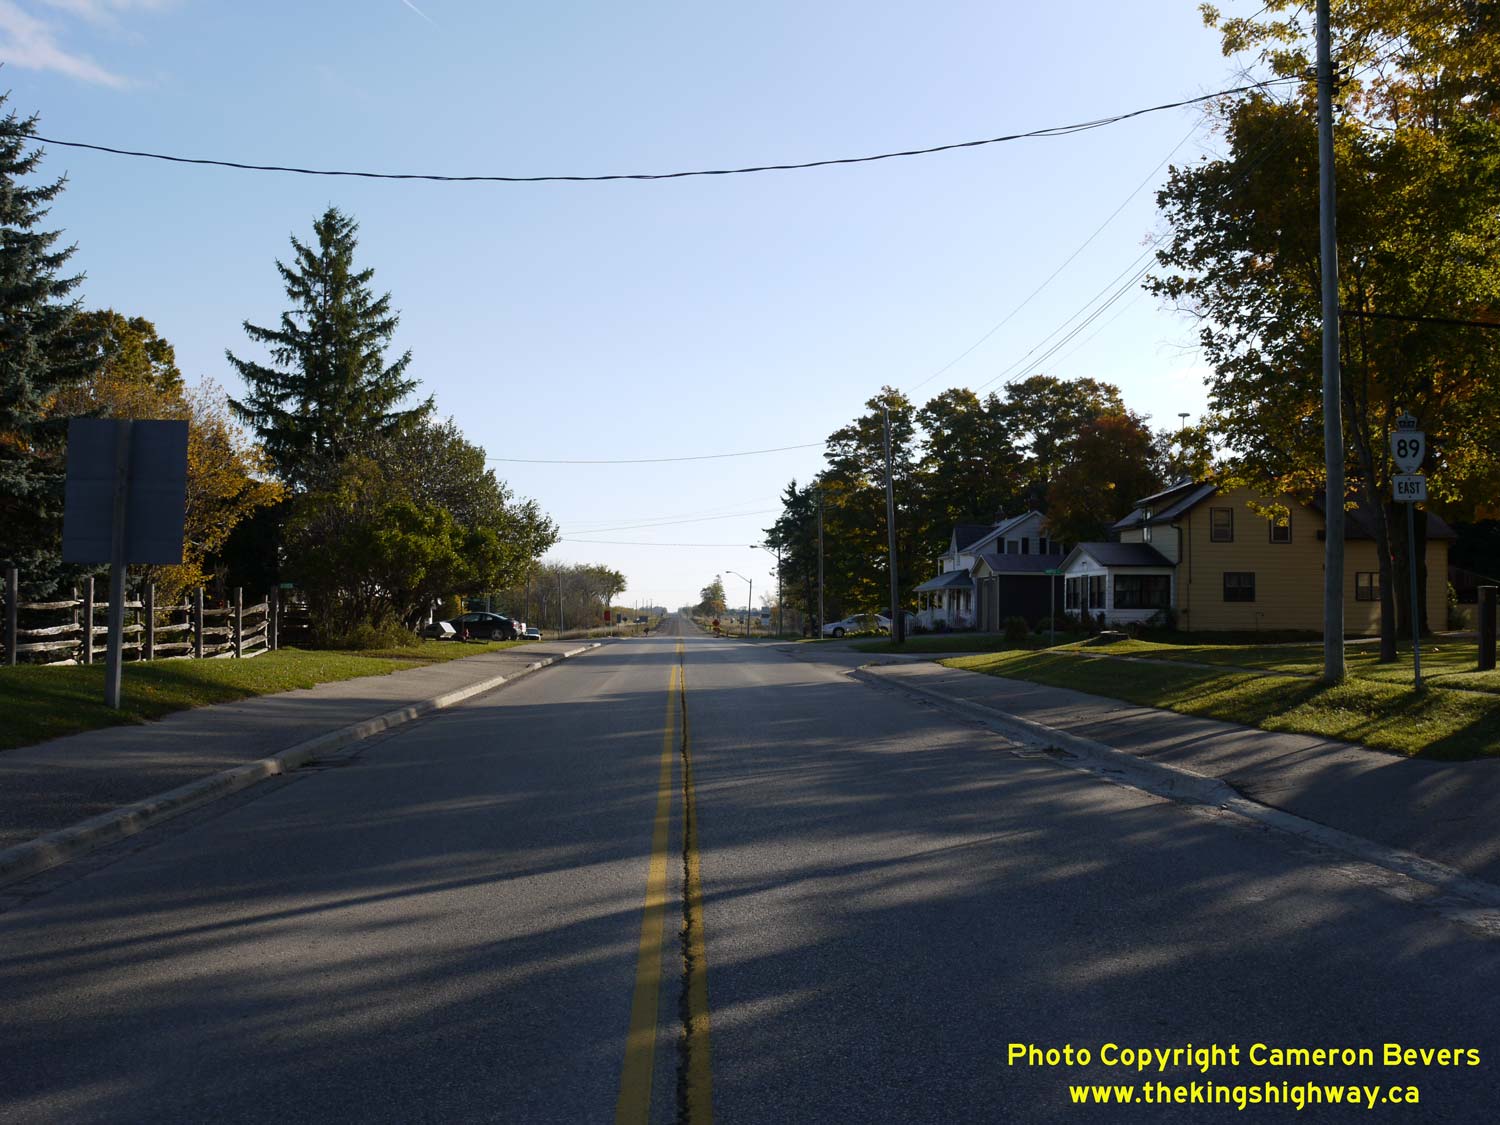
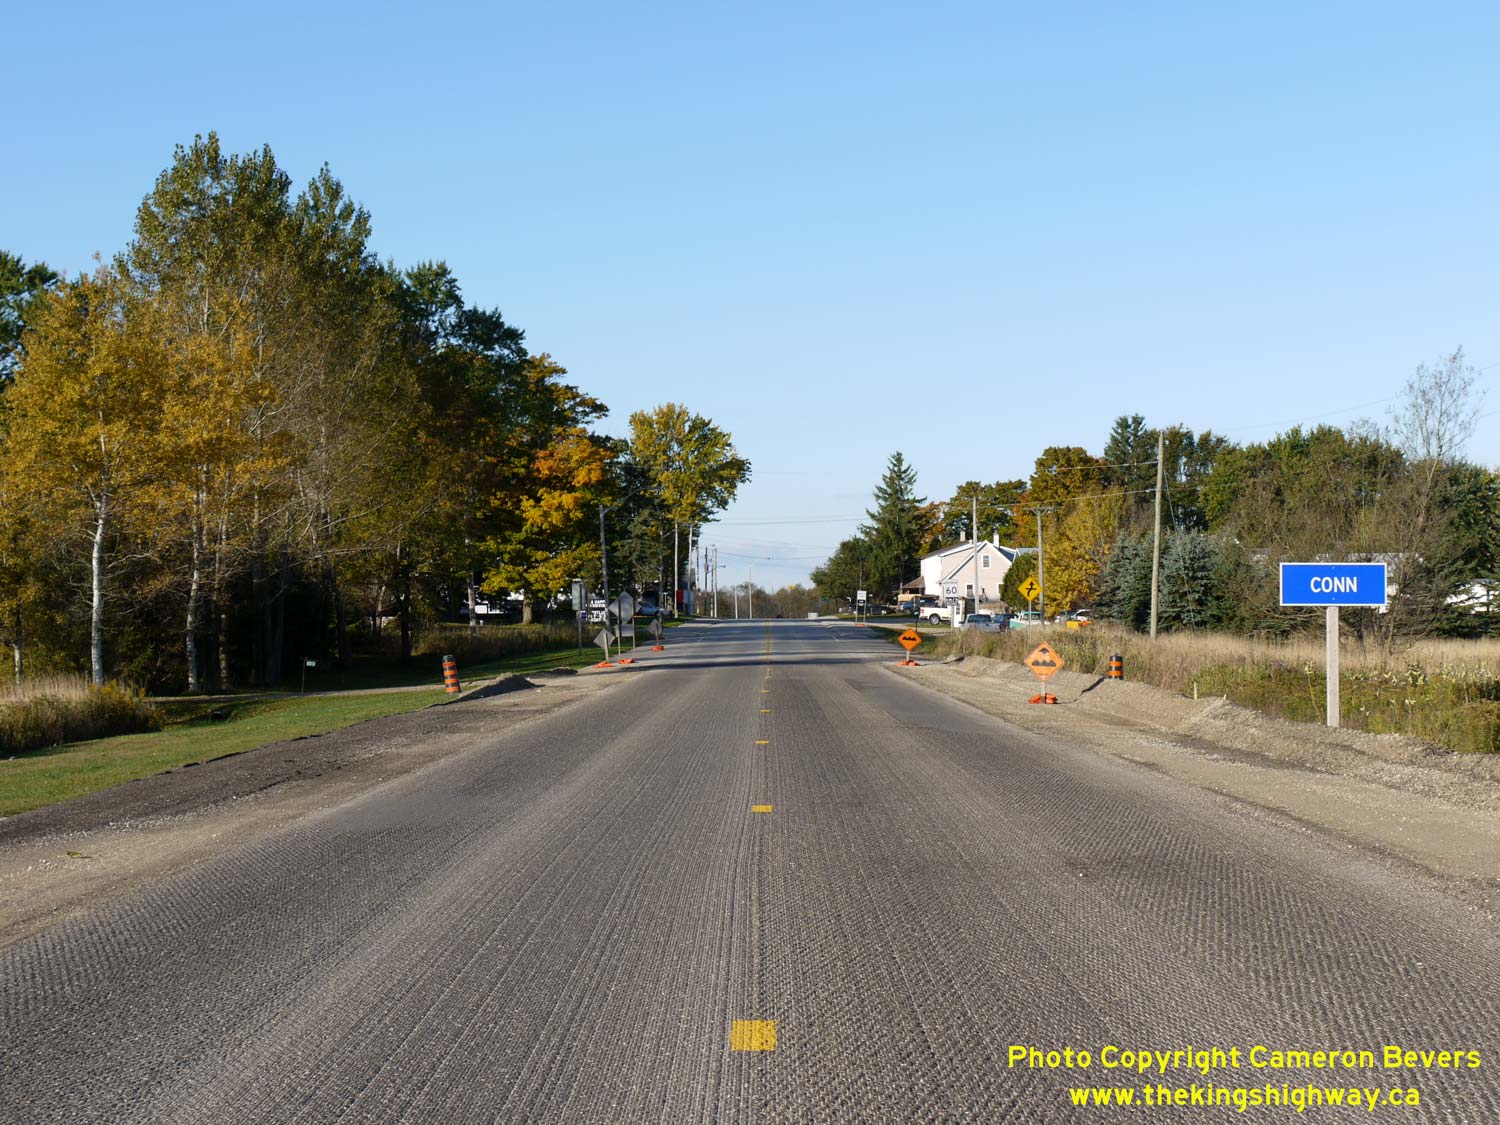
Left - View of Hwy 89 at Conn, facing east from the County Road 14 Junction. See an
Enlarged Photo Here. (Photograph taken on November 10, 2009 - © Cameron Bevers) Right - Facing west along Hwy 89 approaching the rural hamlet of Conn. See an Enlarged Photo Here. (Photograph taken on November 10, 2009 - © Cameron Bevers) 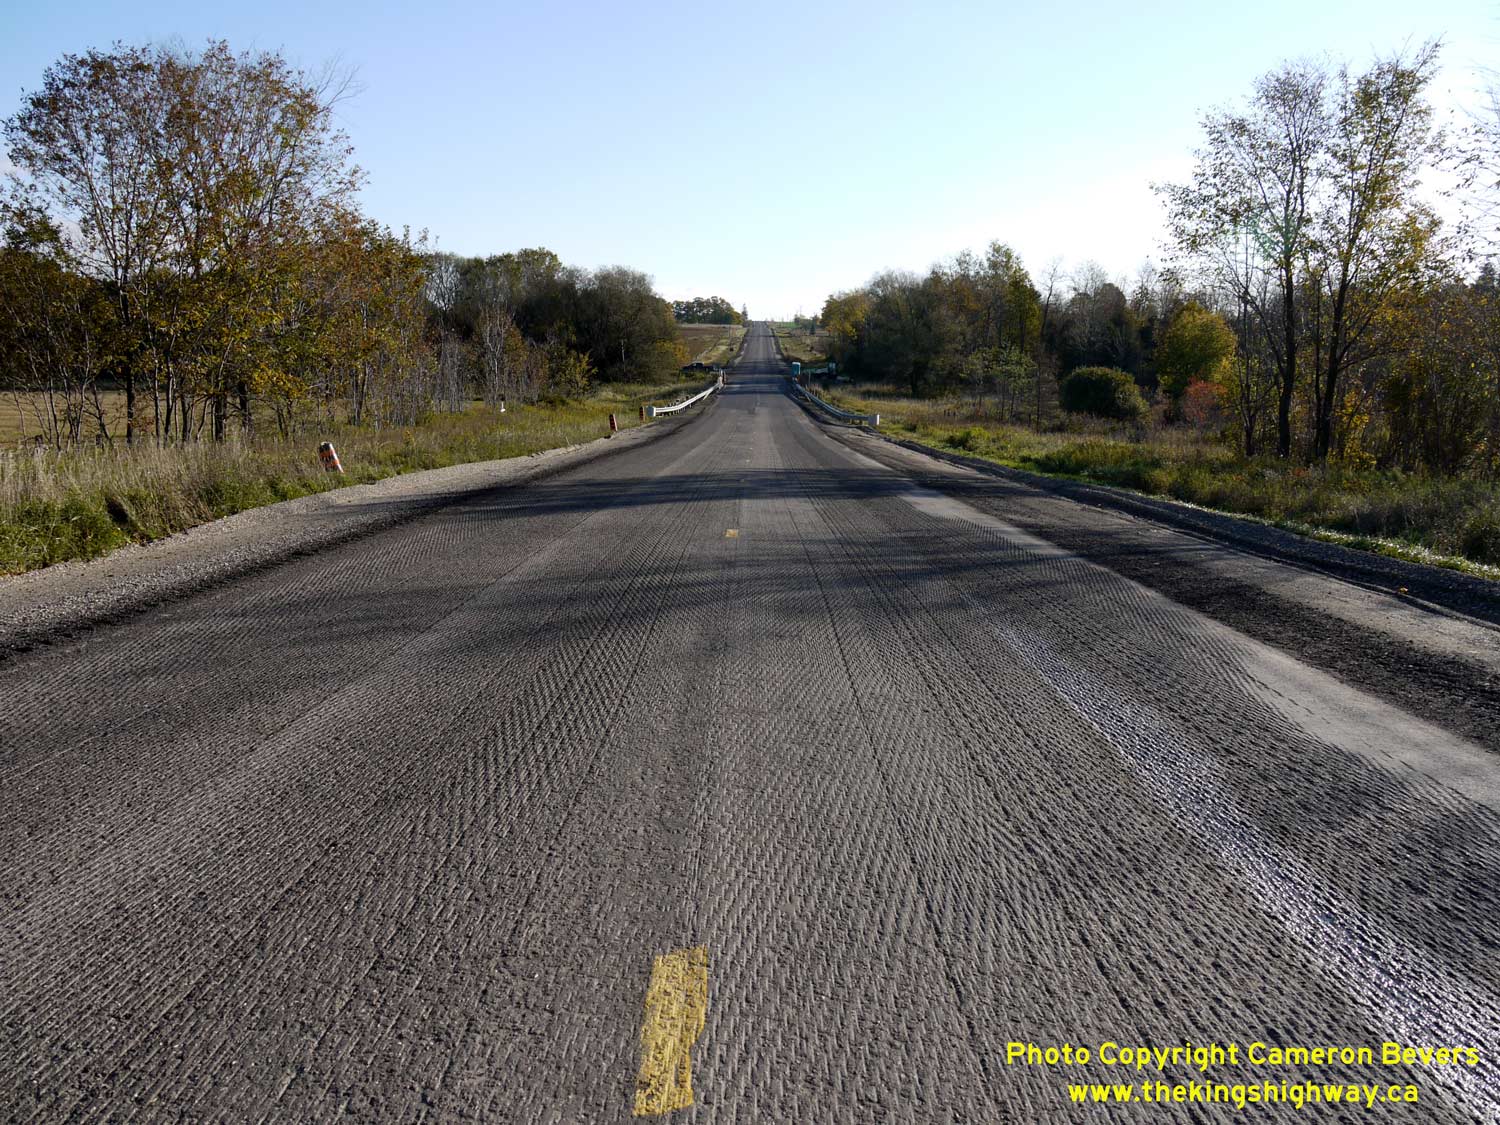
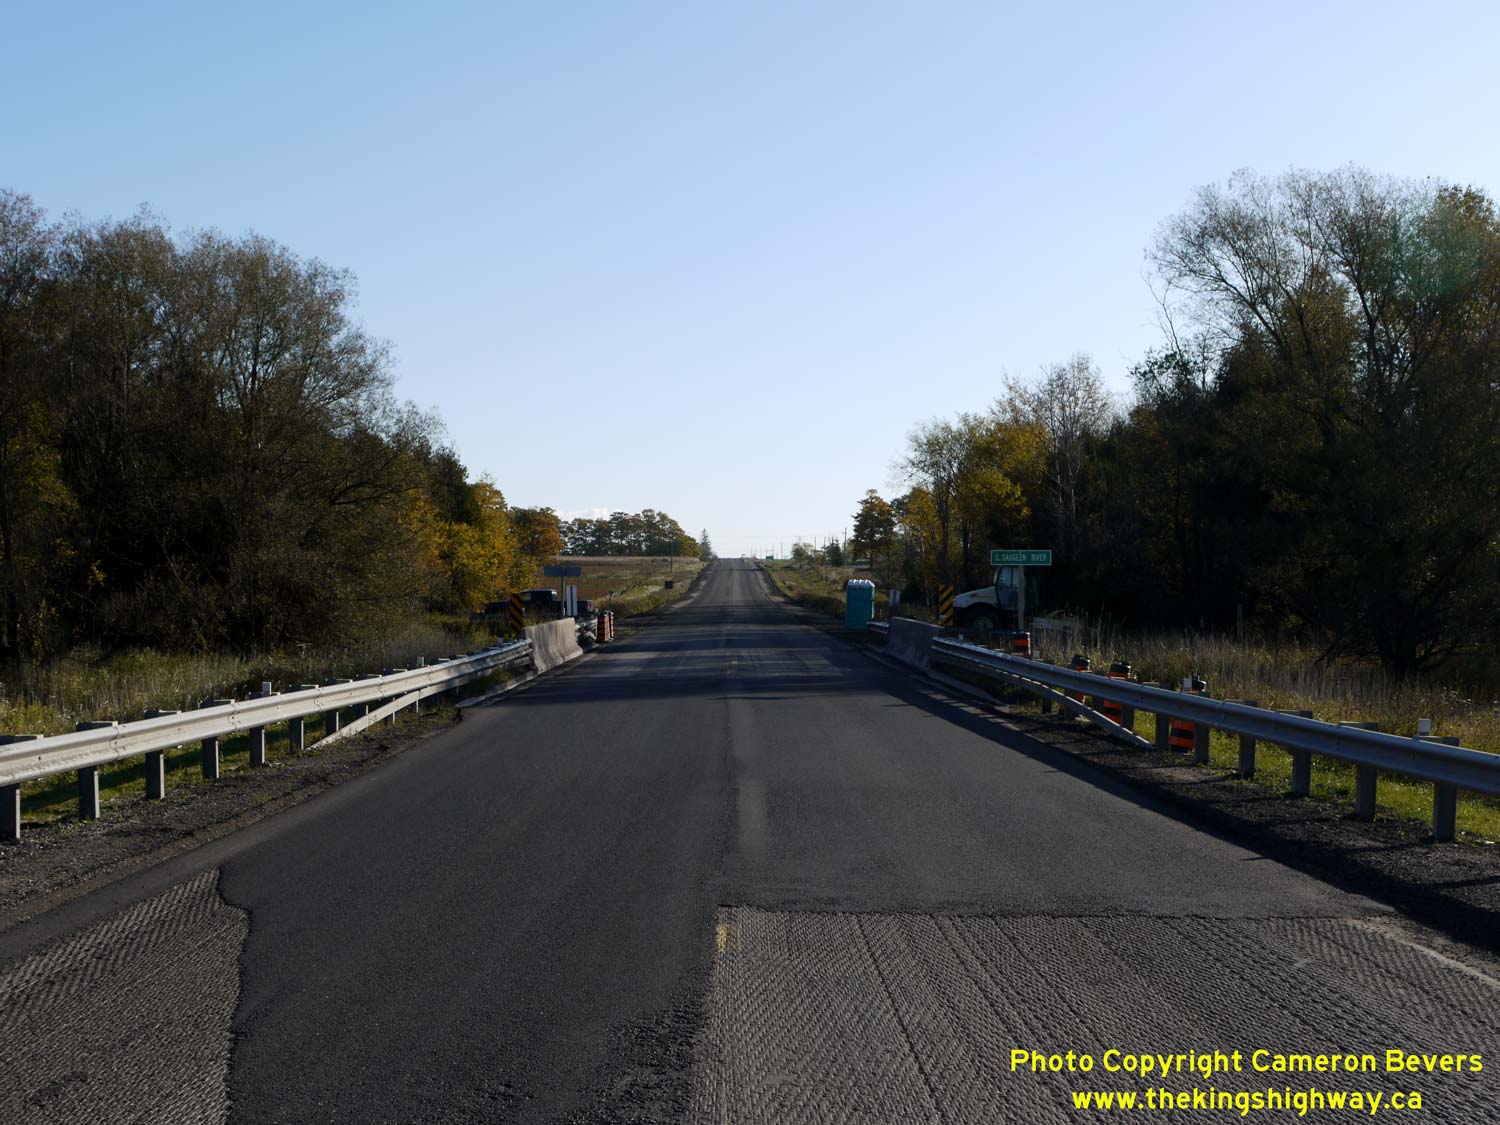
Left - Approaching the South Saugeen River Bridge on Hwy 89, located about 4 km east of Conn. The top-course asphalt had been milled off of Hwy 89 at the time
this photo was taken in 2009, during a late-season highway resurfacing project. Although it is unusual to see a highway paving project taking place in November, it
should be noted that 2009 was also an unusual year. The 2008-2009 Financial Crisis triggered a severe economic recession. In response, the federal and provincial
governments partnered on many infrastructure projects to help stimulate the economy. Many of Ontario's Highways were resurfaced during 2009 and 2010, as these paving
projects required comparatively minimal engineering design work and thus could be "shovel-ready" in a short period of time. See an
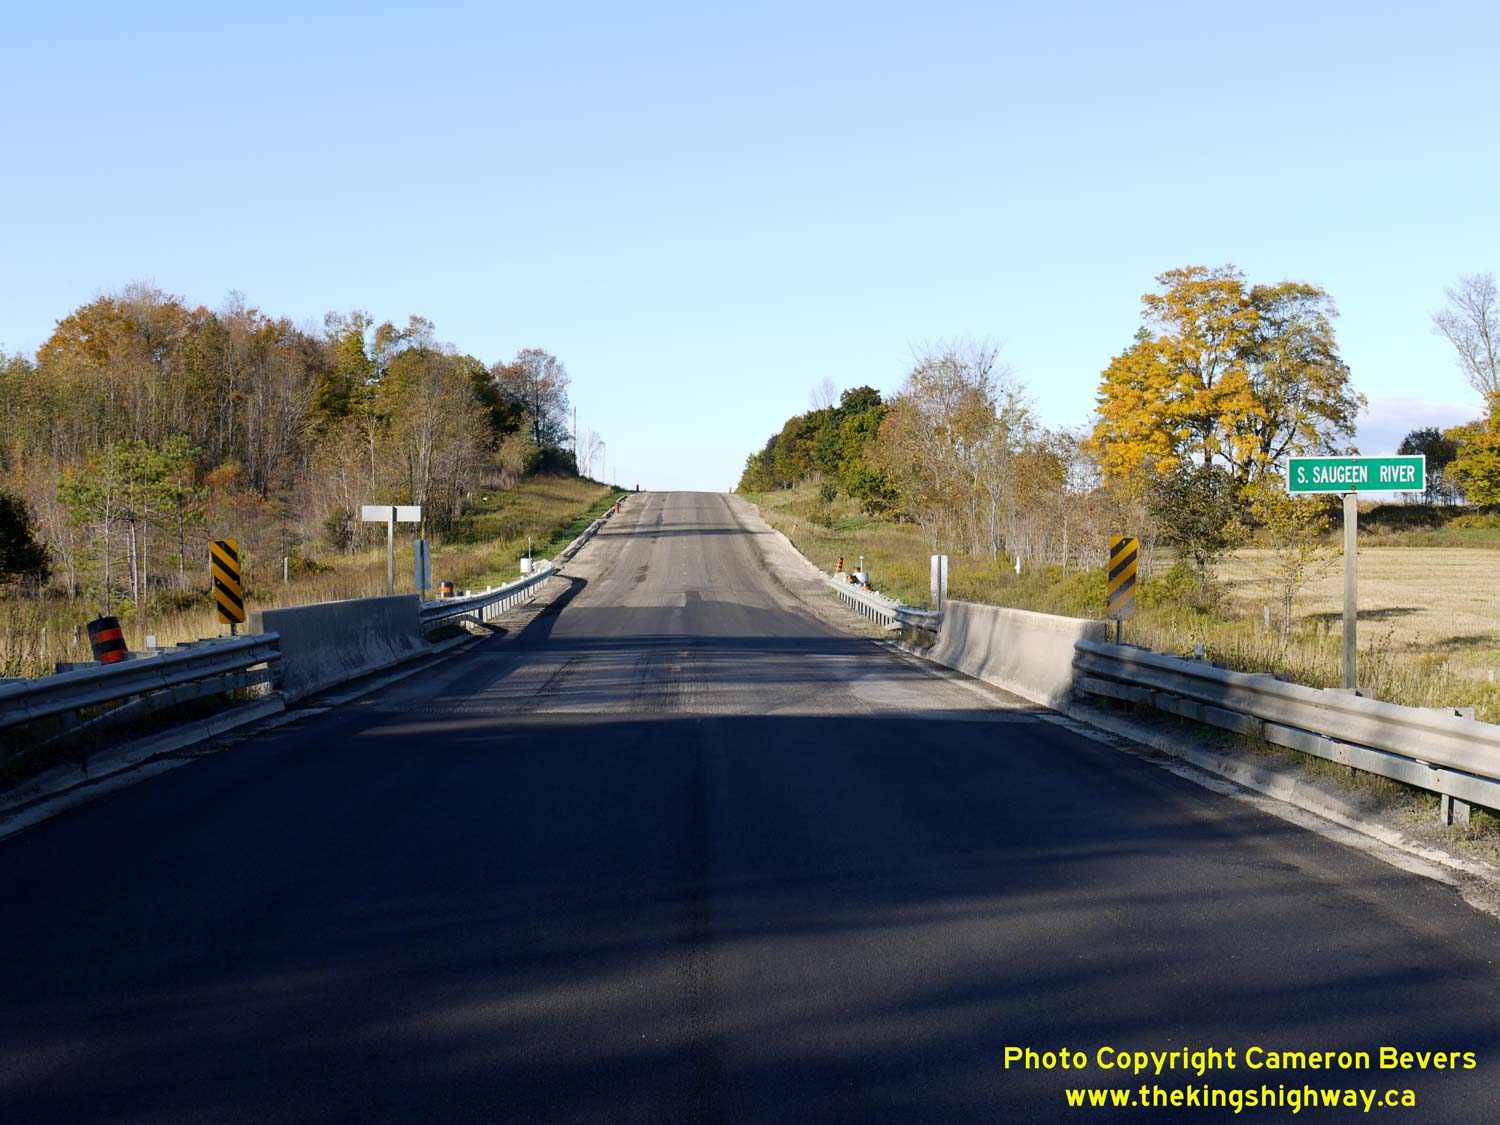
Enlarged Photo Here. (Photograph taken on November 10, 2009 - © Cameron Bevers) Right - Facing west along Hwy 89 towards Mount Forest at the South Saugeen River Bridge. See an Enlarged Photo Here. (Photograph taken on November 10, 2009 - © Cameron Bevers) 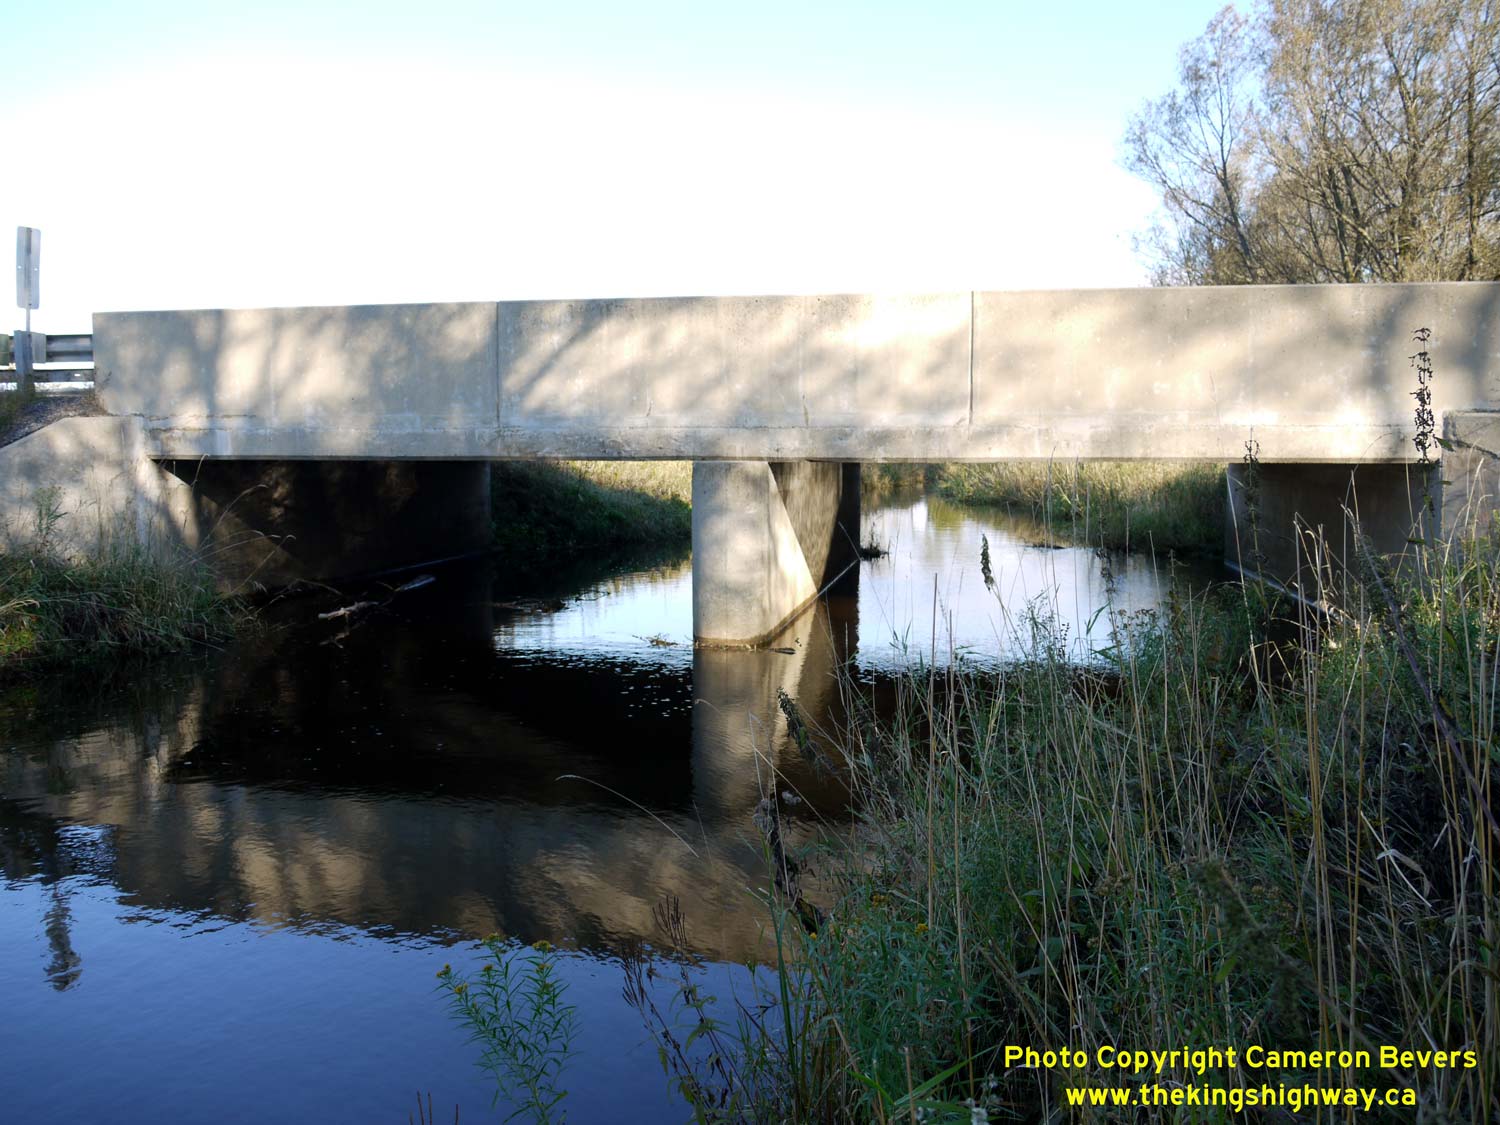
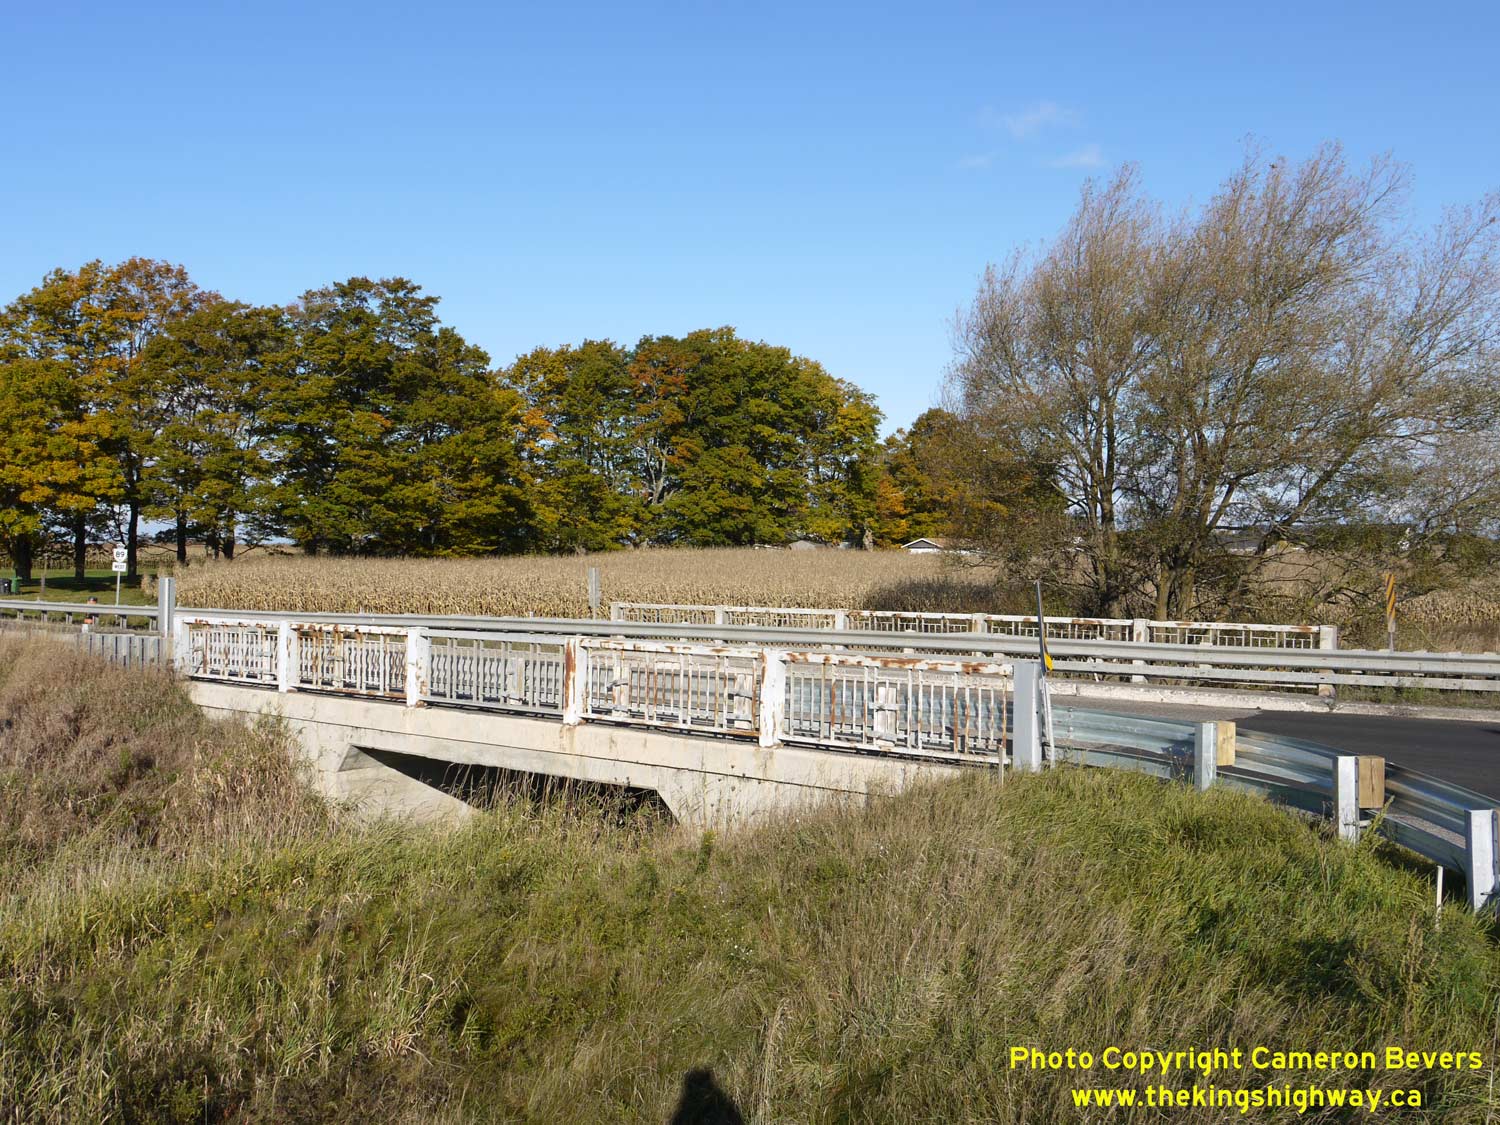
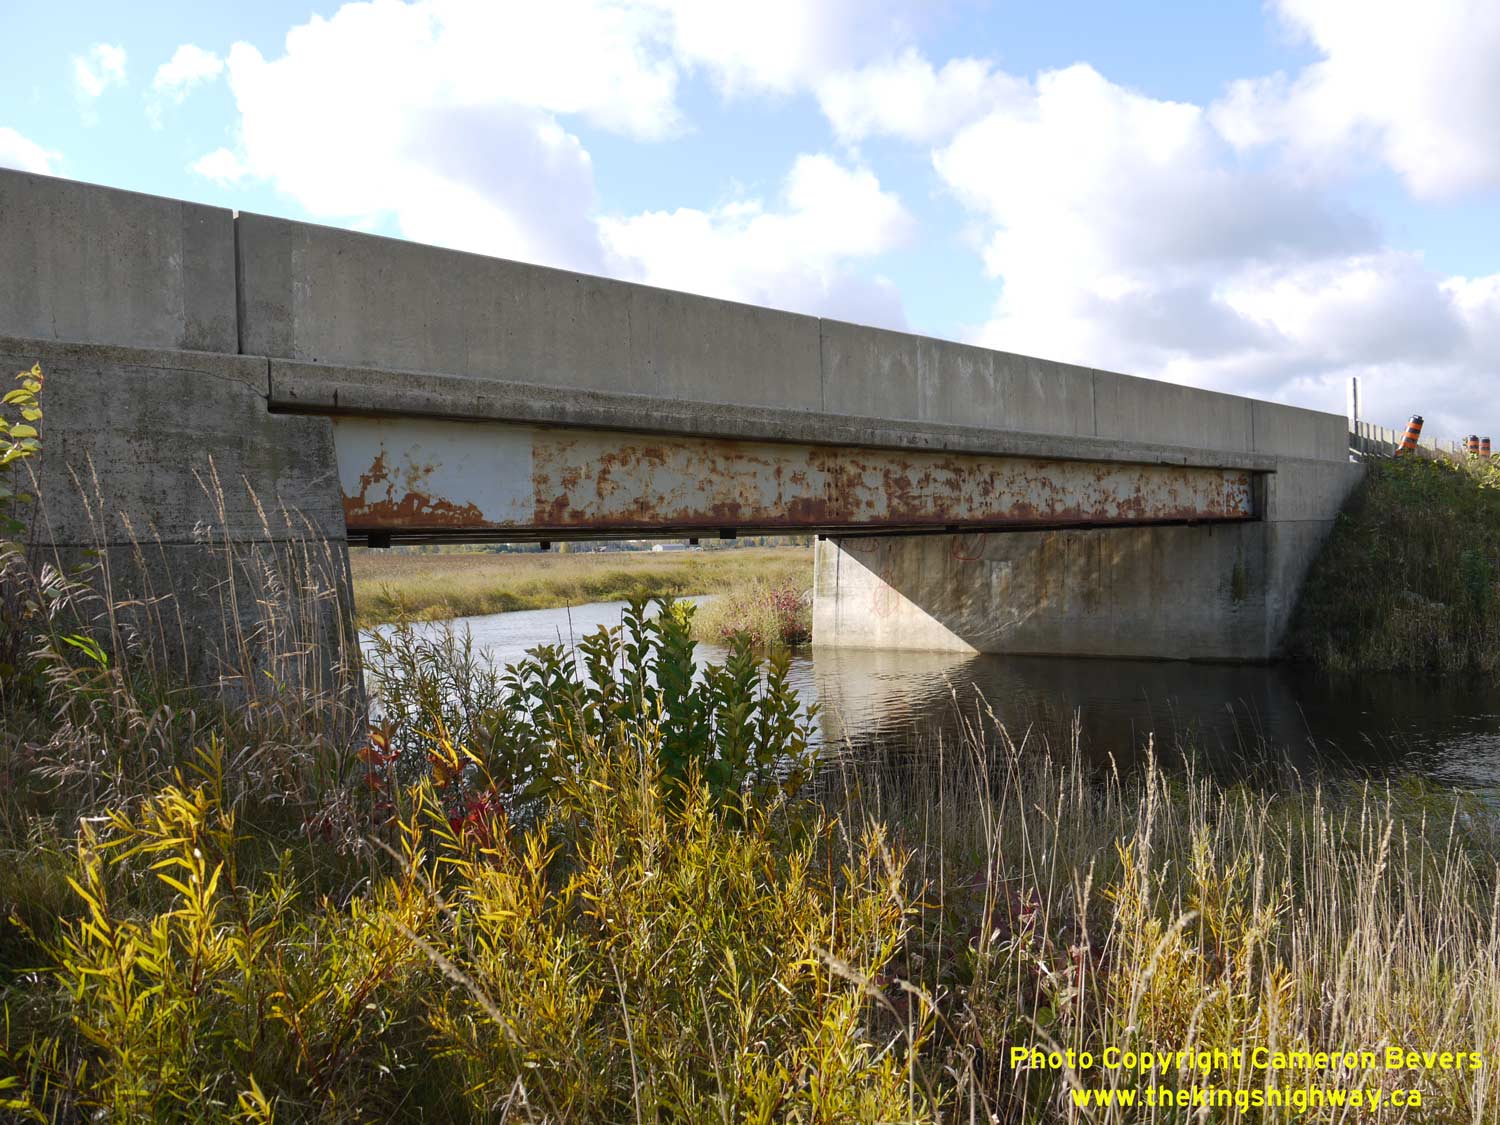
Left - Southern side of the South Saugeen River Bridge on Hwy 89. This two-span concrete slab bridge was completed in 1958. Many of the bridges along Hwy 89
west of Shelburne are of an unusual design, as they were not originally constructed by the Department of Highways of Ontario (DHO). The Harriston-Shelburne Road via
Mount Forest was actually a county road up until 1963, when the province assumed the road as a westerly extension of Hwy 89. See an
Enlarged Photo Here. (Photograph taken on November 10, 2009 - © Cameron Bevers) Right - Facing east along Hwy 89 towards Shelburne at the South Saugeen River Bridge (Site #35-32). See an Enlarged Photo Here. (Photograph taken on November 10, 2009 - © Cameron Bevers) 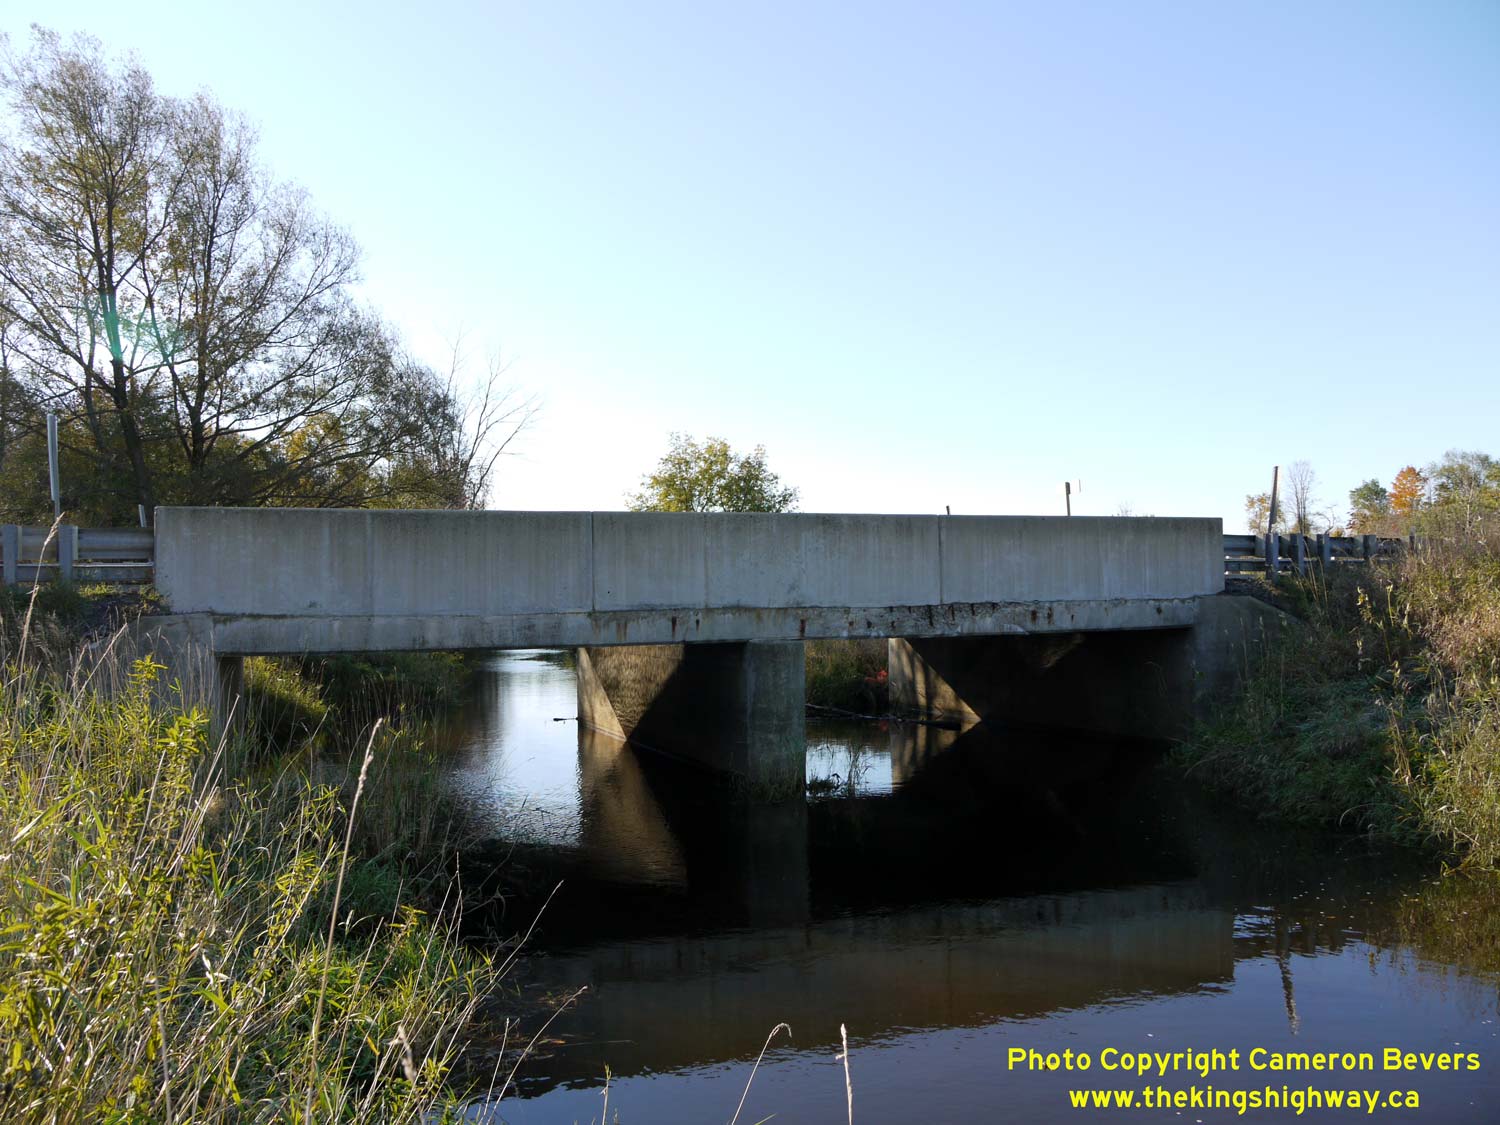
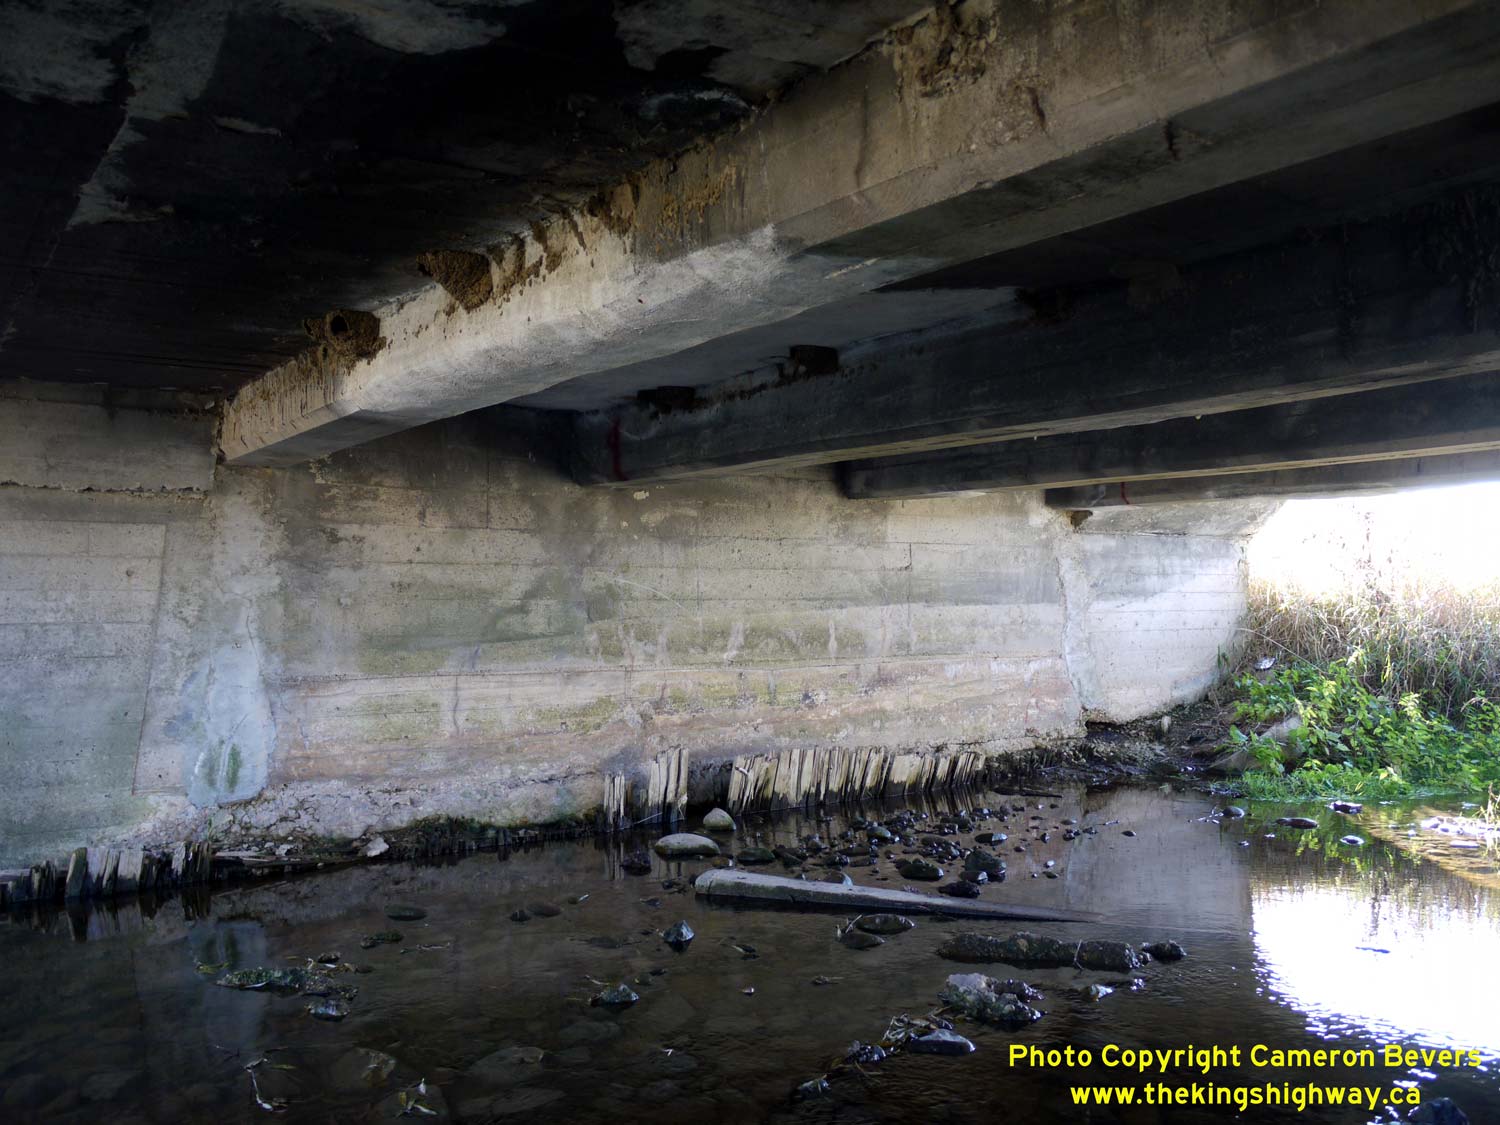
Left - Northern side of the South Saugeen River Bridge on Hwy 89, located about 4 km east of Conn. See an
Enlarged Photo Here. (Photograph taken on November 10, 2009 - © Cameron Bevers) Right - Facing west along Hwy 89 towards Mount Forest from the Wellington County Road 16 Junction. See an Enlarged Photo Here. (Photograph taken on November 10, 2009 - © Cameron Bevers) 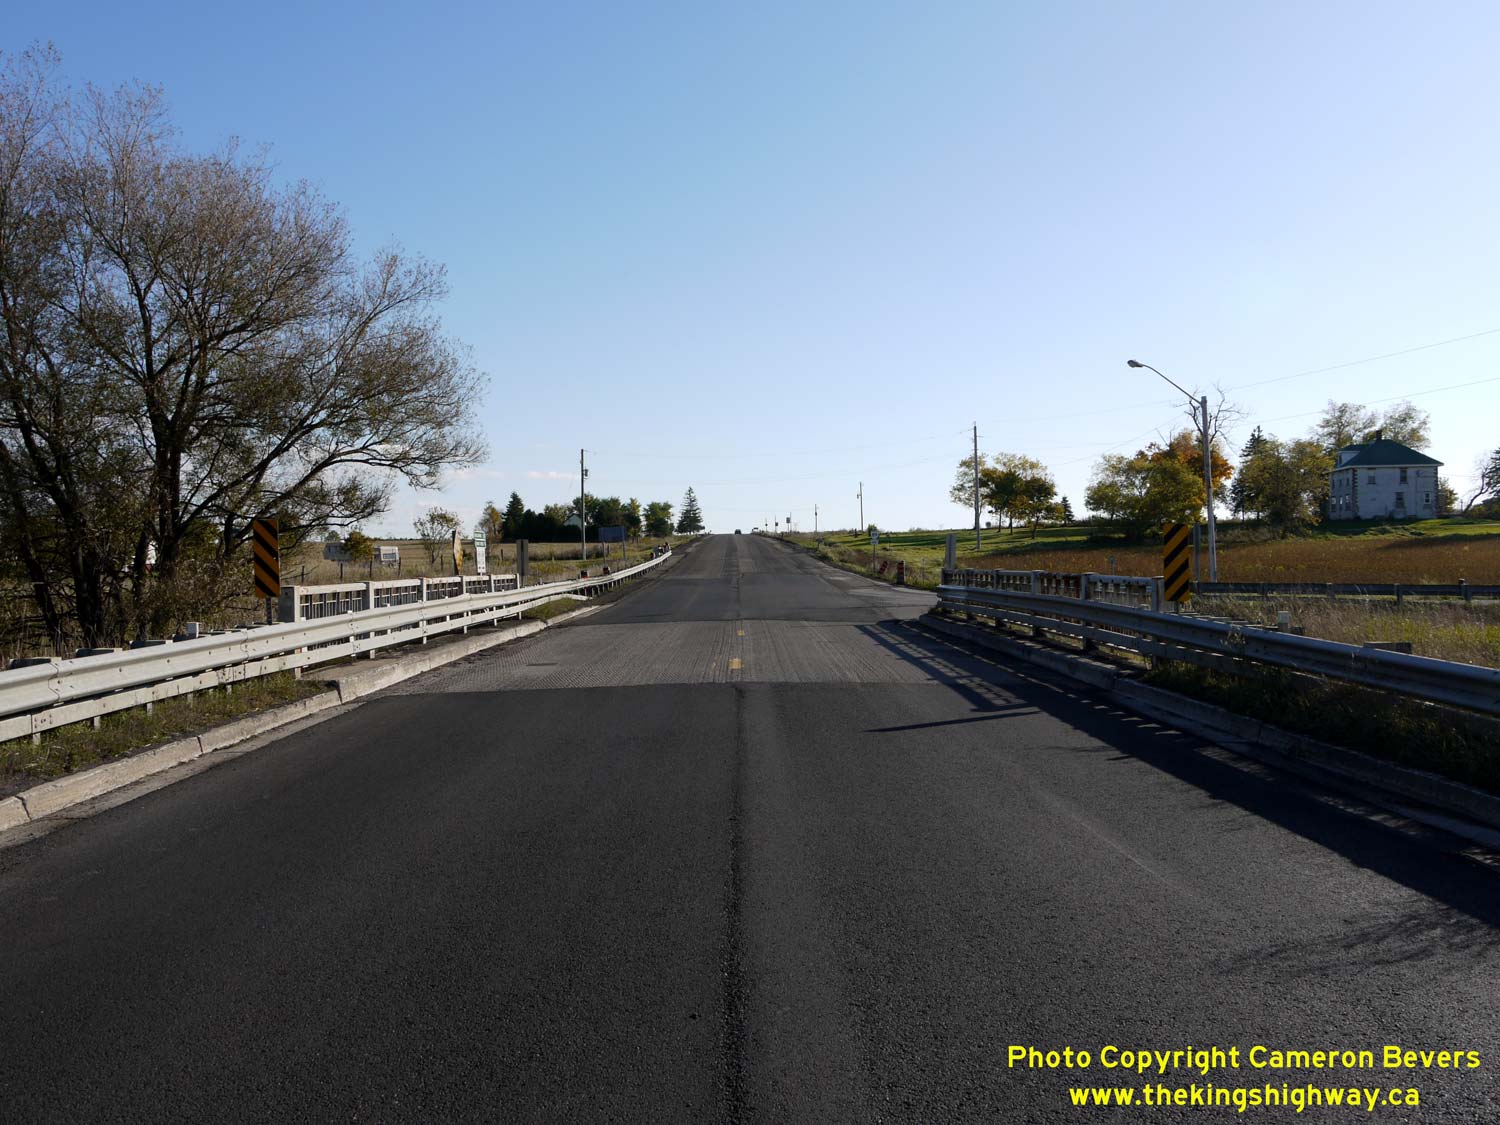
Left - View of Hwy 89 at the Signet Creek Bridge (South Saugeen River Tributary), facing east towards the Wellington County Road 16 Junction. See an
Enlarged Photo Here. (Photograph taken on November 10, 2009 - © Cameron Bevers) Right - Southern side of the Signet Creek Bridge (South Saugeen River Tributary) on Hwy 89, located about 6 km east of Conn. See an Enlarged Photo Here. (Photograph taken on November 10, 2009 - © Cameron Bevers) 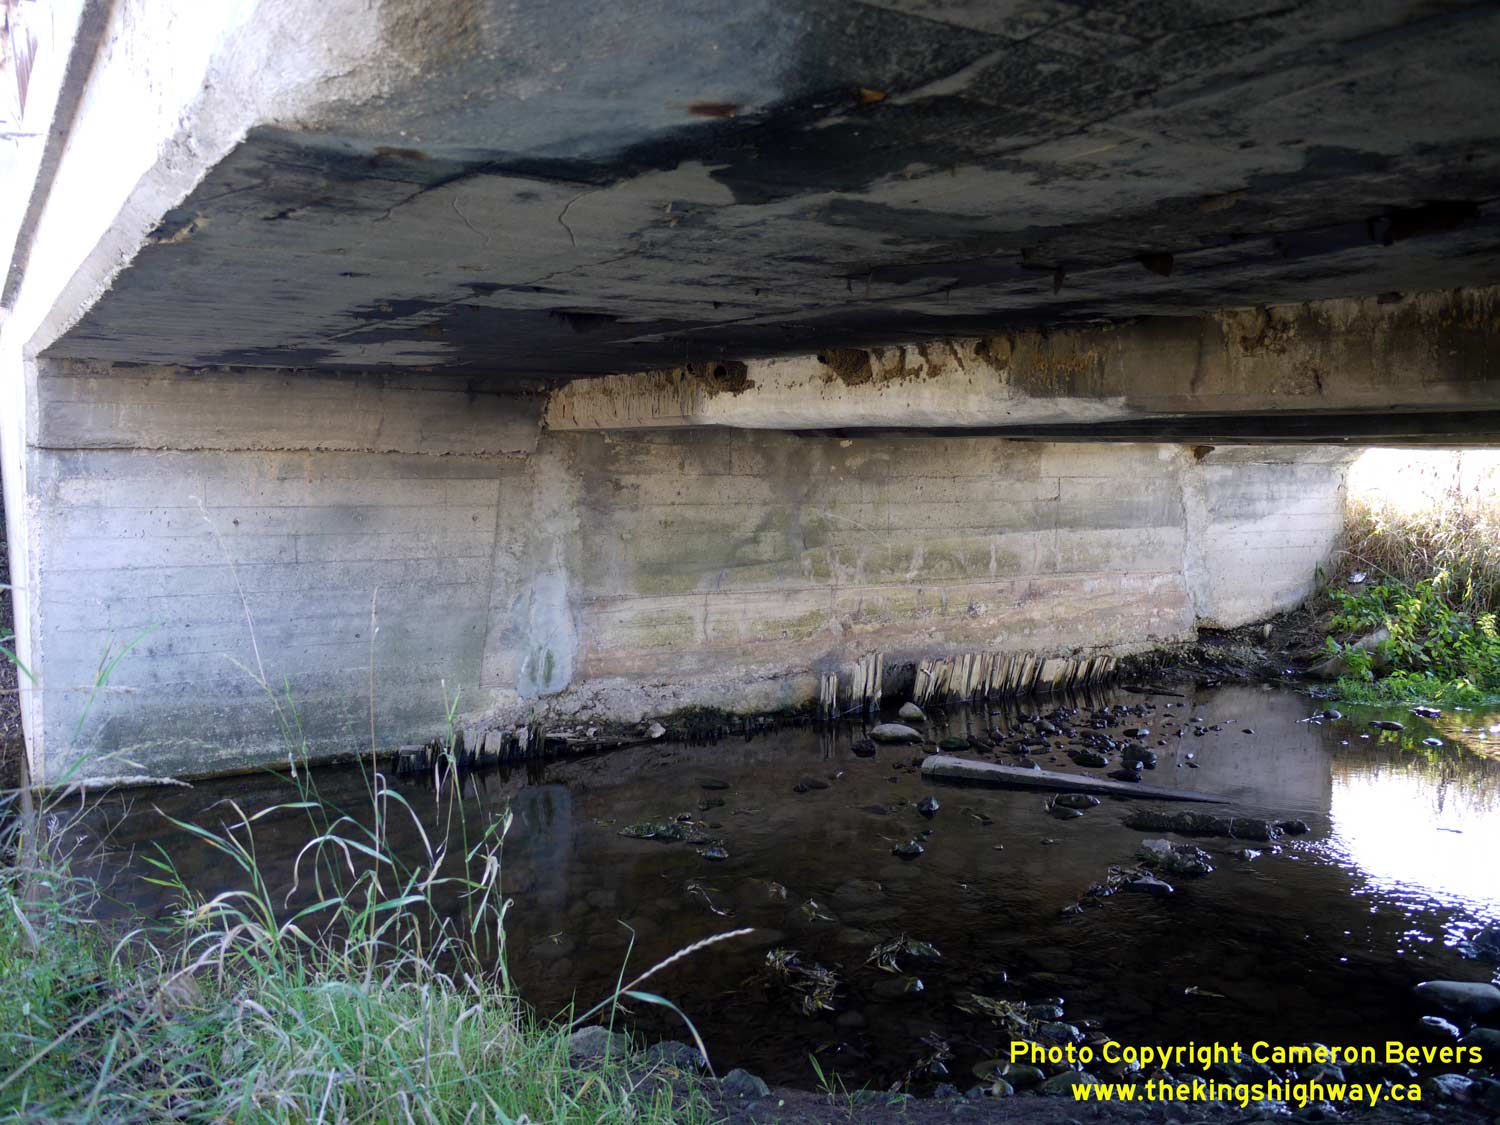
Left - The Signet Creek Bridge on Hwy 89 consists of an older single-span concrete beam structure, flanked on both sides by newer concrete rigid frame
extensions. See an Enlarged Photo Here. (Photograph taken on November 10, 2009 - © Cameron Bevers) Right - Close-up of the older cast-in-place concrete beams of the original Signet Creek Bridge. The construction date of the original bridge is unknown, but it is believed to have been built in the 1920s. The newer extensions on either side of the original structure were built during a bridge widening project which took place in 1960. See an Enlarged Photo Here. (Photograph taken on November 10, 2009 - © Cameron Bevers) 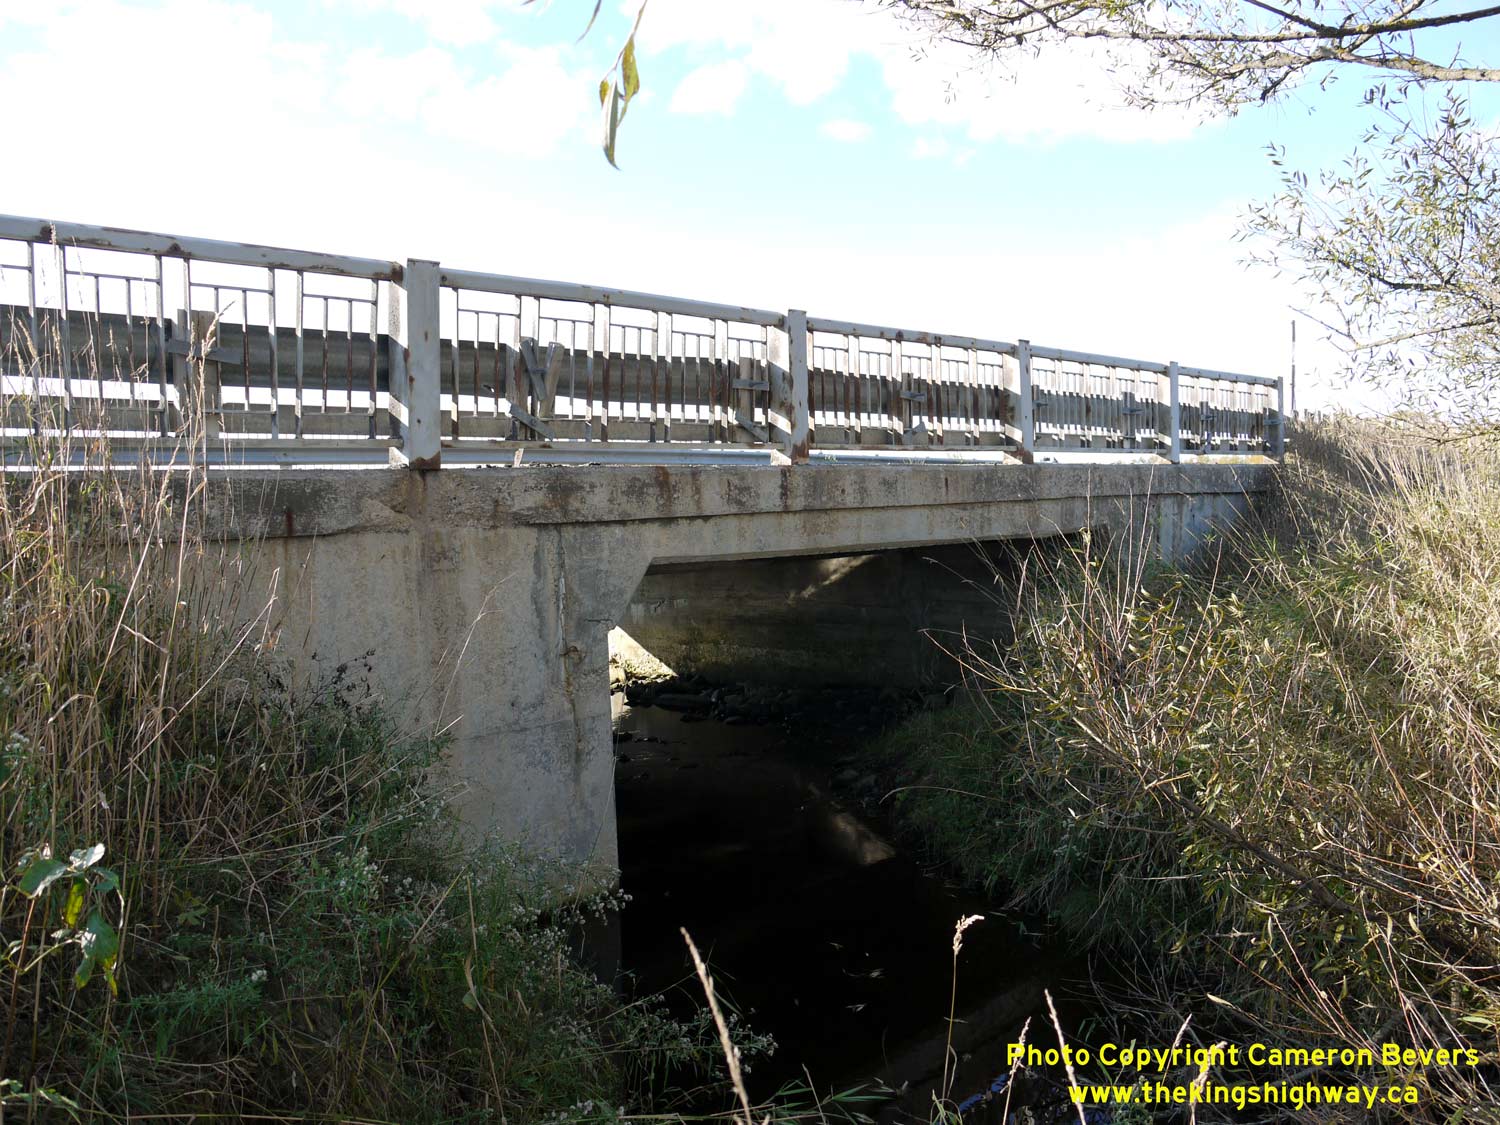
Left - Northern side of the Signet Creek Bridge (South Saugeen River Tributary) on Hwy 89. See an
Enlarged Photo Here. (Photograph taken on November 10, 2009 - © Cameron Bevers) Right - Facing west across the Signet Creek Bridge (Site #35-27) on Hwy 89. See an Enlarged Photo Here. (Photograph taken on November 10, 2009 - © Cameron Bevers) 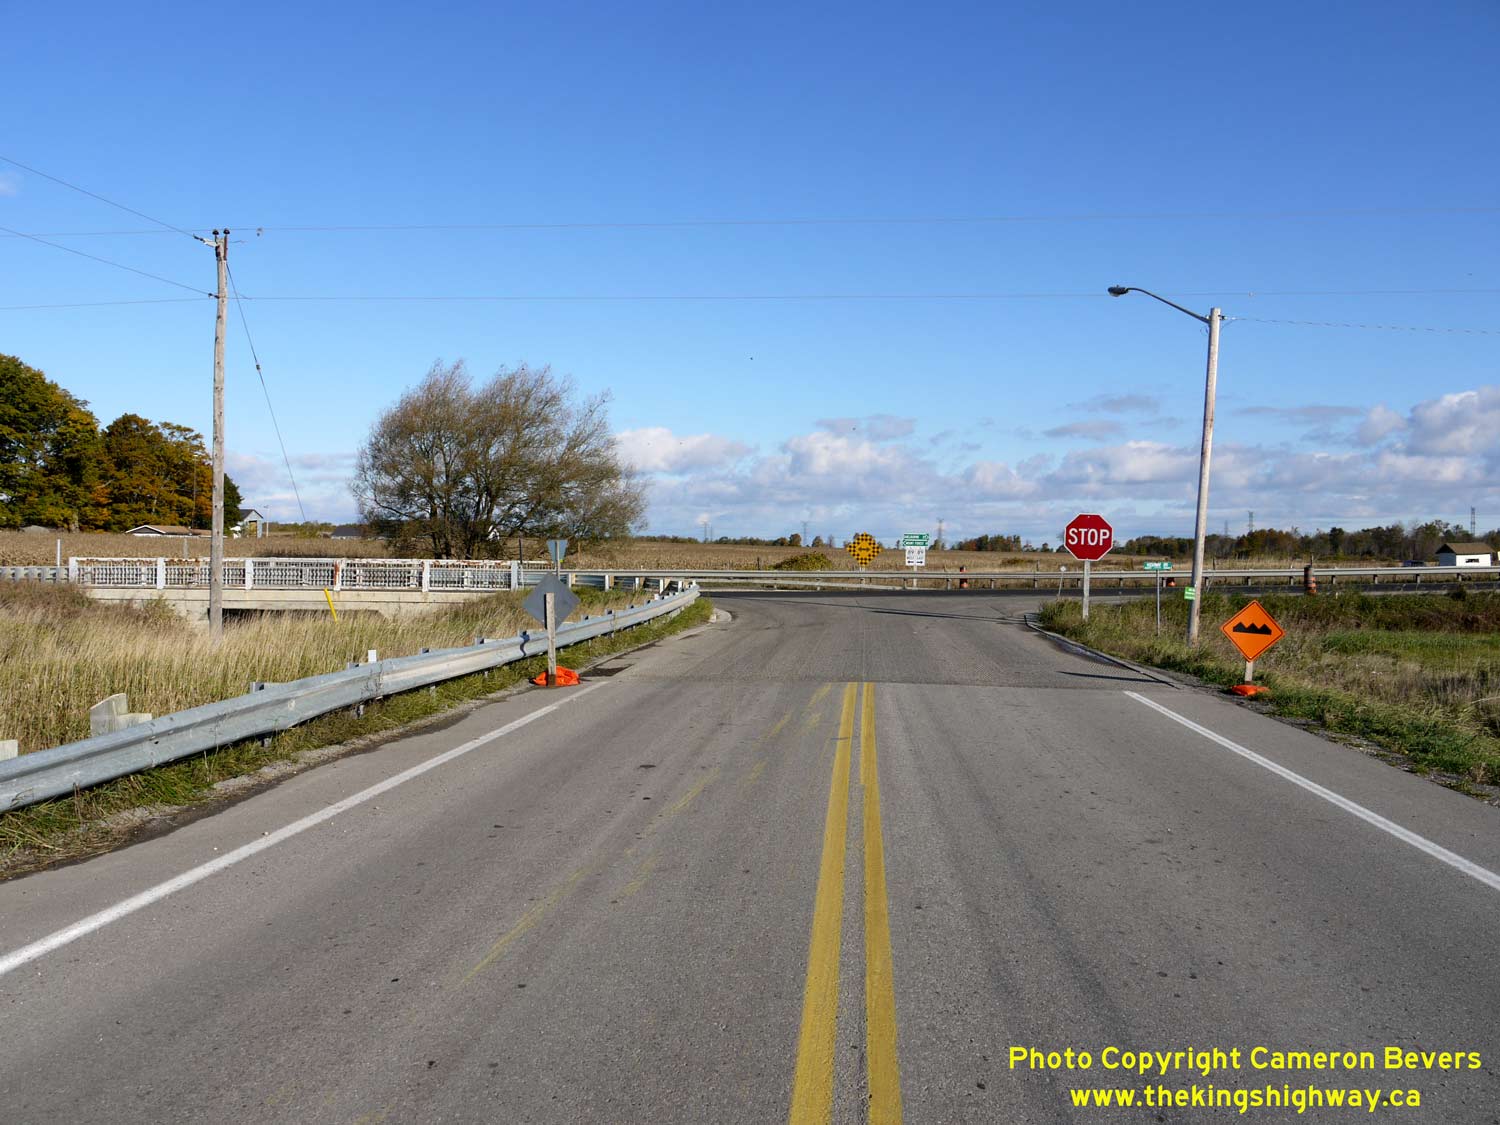
Left - Northern terminus of Wellington County Road 16 at Hwy 89. The Signet Creek Bridge lies immediately to the west of the intersection. Also known
unofficially as the "Damascus Road", Wellington County Road 16 provides a convenient link between Hwy 89 and Hwy 9 (County Road 109) near Arthur. See an
Enlarged Photo Here. (Photograph taken on November 10, 2009 - © Cameron Bevers) Right - Junction sign assembly at the Hwy 89 and County Road 16 Junction between Mount Forest and Shelburne. See an Enlarged Photo Here. (Photograph taken on November 10, 2009 - © Cameron Bevers) 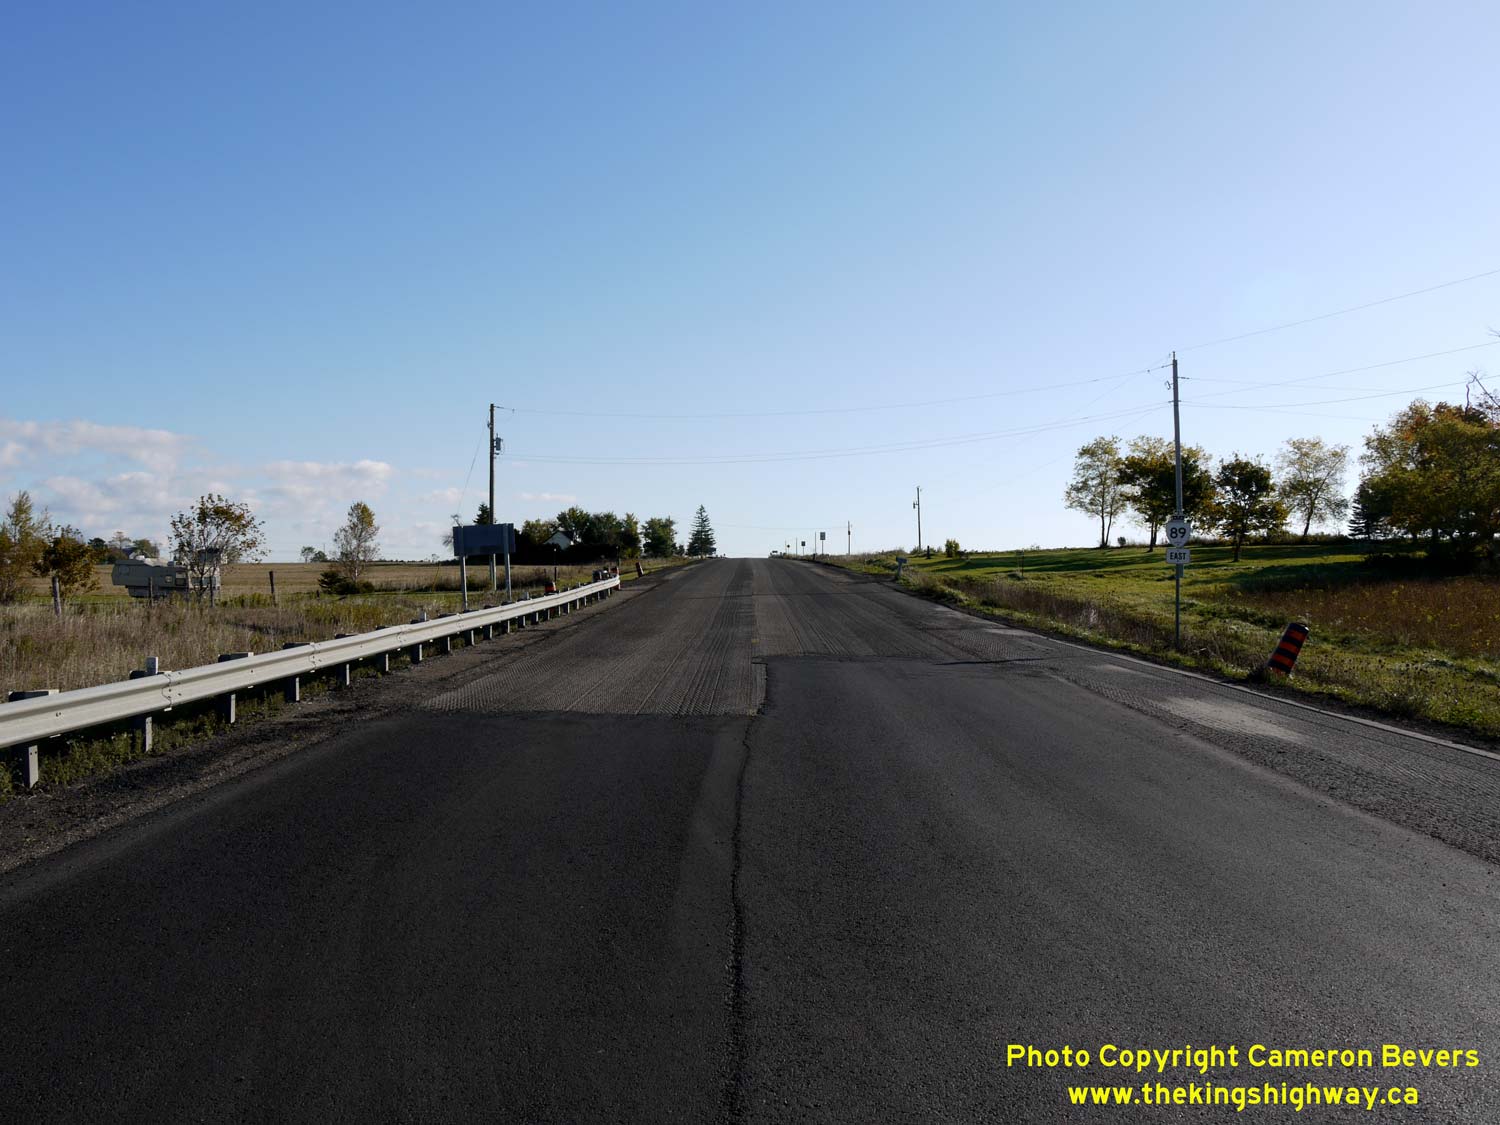
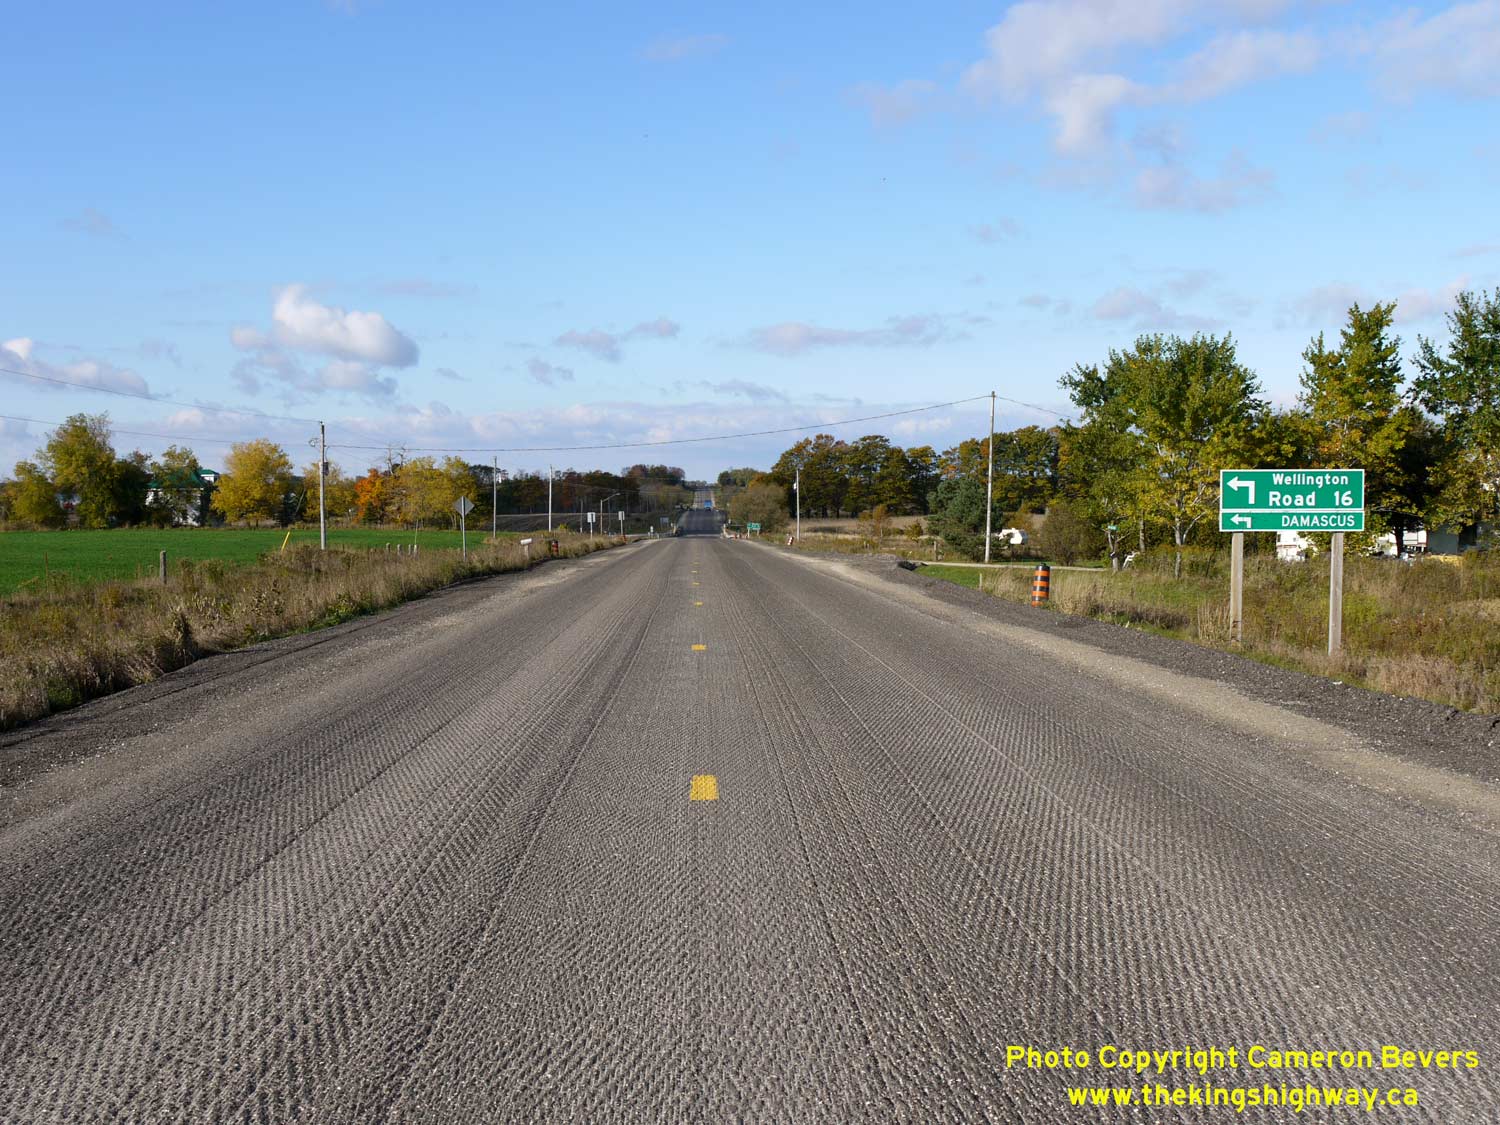
Left - Facing east along Hwy 89 towards Shelburne from the Wellington County Road 16 Junction. See an
Enlarged Photo Here. (Photograph taken on November 10, 2009 - © Cameron Bevers) Right - Advance guide sign for the Wellington County Road 16 (Damascus Road) Junction on westbound Hwy 89. See an Enlarged Photo Here. (Photograph taken on November 10, 2009 - © Cameron Bevers) 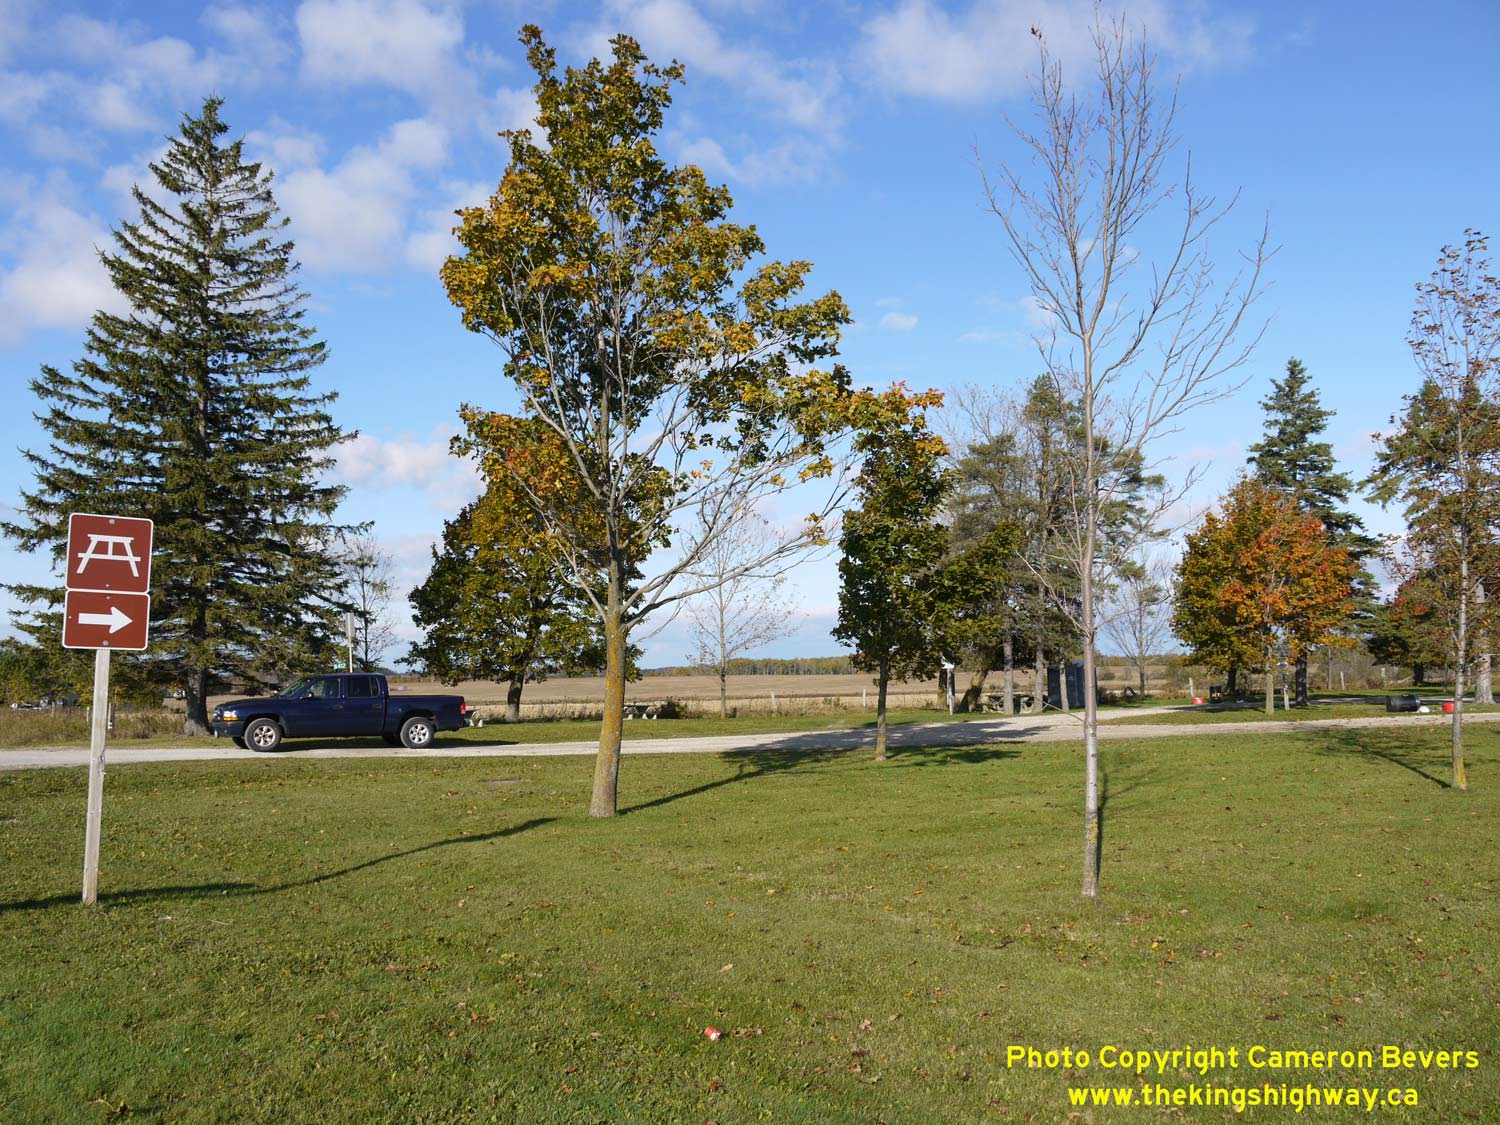
Left - Entrance to the Southgate Township Roadside Park on Hwy 89, located about 1 km east of the Wellington County Road 16 Junction. The older
brown-and-white roadside park signs like the example seen here have been slowly phased out on provincial highways in recent years. The current signs are now
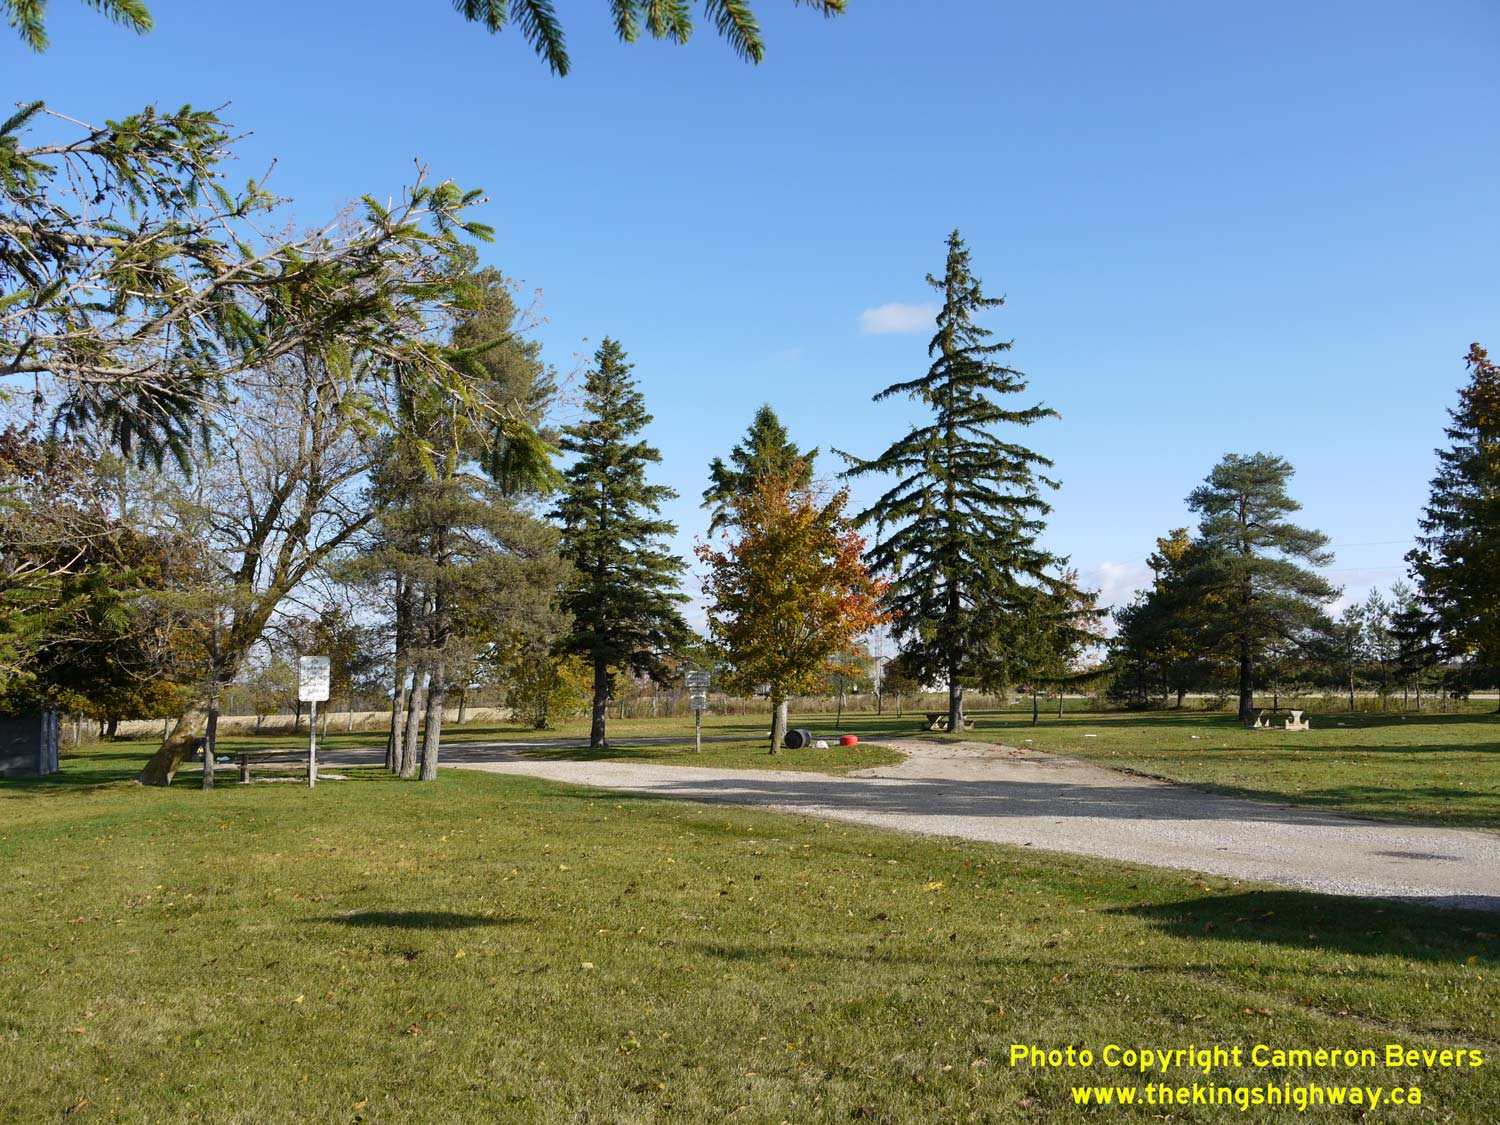
blue-and-white. See an Enlarged Photo Here. (Photograph taken on November 10, 2009 - © Cameron Bevers) Right - View of the Southgate Township Roadside Park on Hwy 89. This roadside park is situated on the former site of a rural schoolhouse, which was acquired by the DHO in 1966. This is one of two roadside parks located along Hwy 89. The other park is situated between Primrose and Alliston just west of the Dufferin County Road 18 (Airport Road) Junction. See an Enlarged Photo Here. (Photograph taken on November 10, 2009 - © Cameron Bevers) 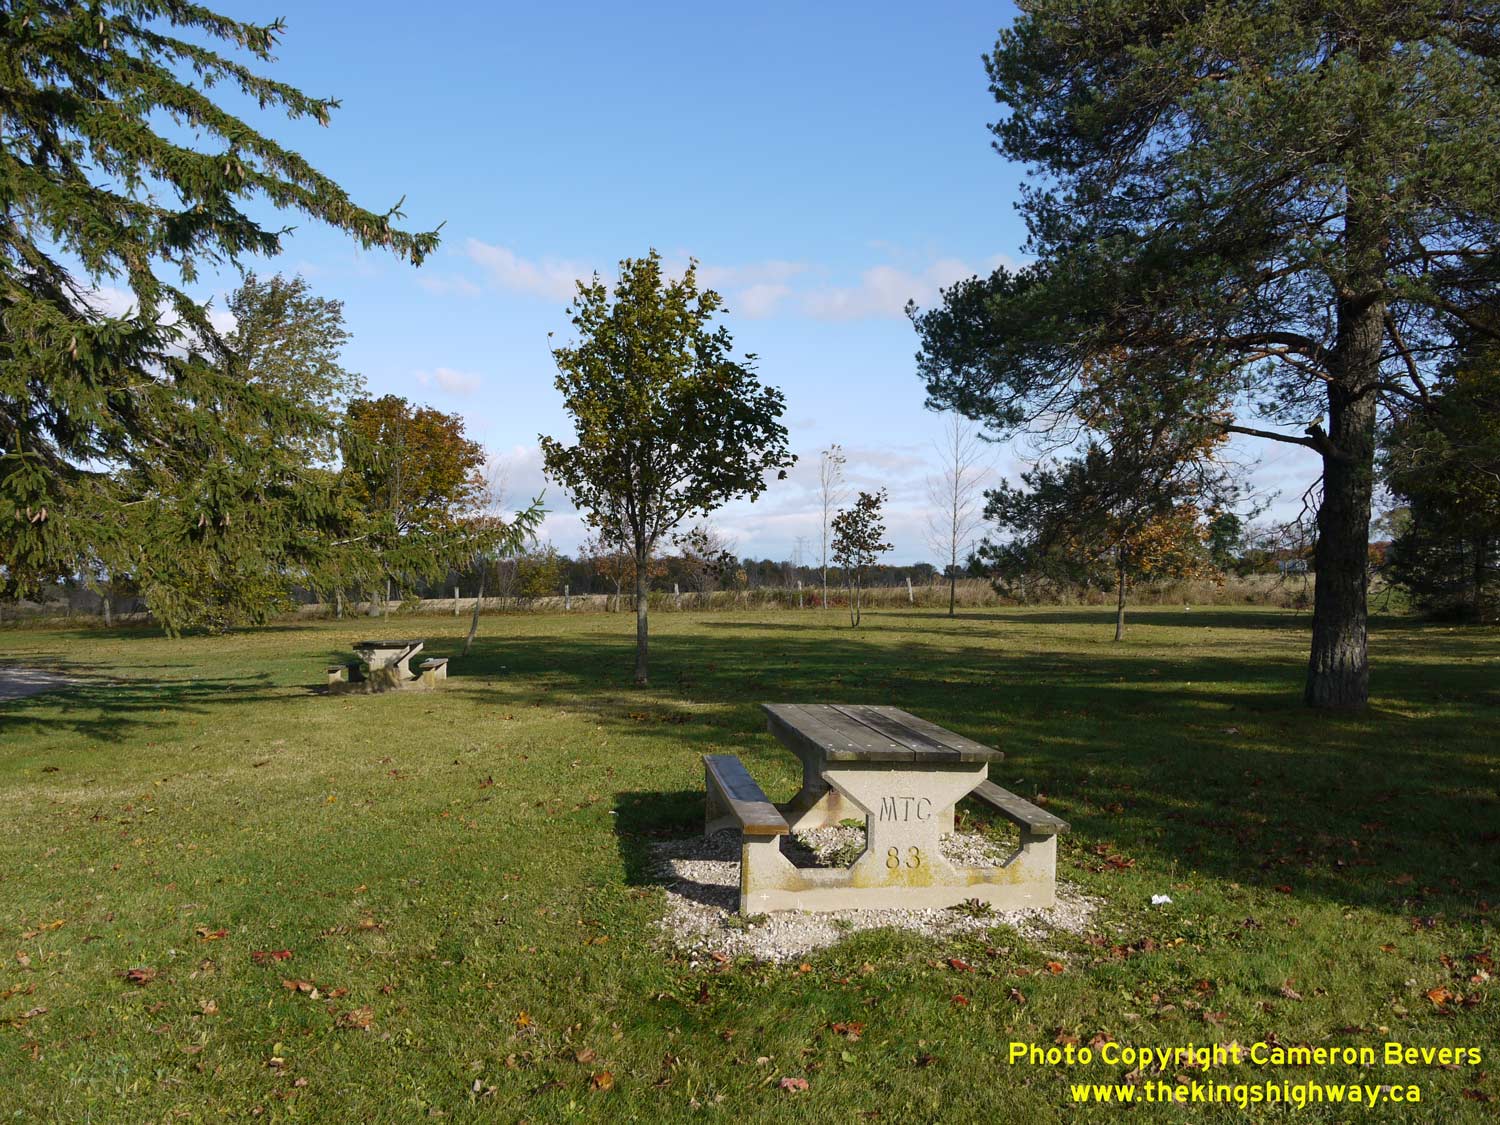
Left - Concrete-based picnic table in the Southgate Township Roadside Park on Hwy 89. In what was an apparent effort to discourage the theft of lighter wooden
picnic tables, the Ministry of Transportation and Communications (MTC) began constructing permanent picnic tables with concrete bases within many of Southern
Ontario's roadside parks in the early 1980s. This particular table was installed by the MTC in 1983. At a size of only 1 acre, this is one of the smaller roadside
parks in Southern Ontario. See an Enlarged Photo Here. (Photograph taken on November 10, 2009 - © Cameron Bevers) Right - Facing east along Hwy 89 towards Shelburne near the entrance to the Southgate Township Roadside Park. See an Enlarged Photo Here. (Photograph taken on November 10, 2009 - © Cameron Bevers) 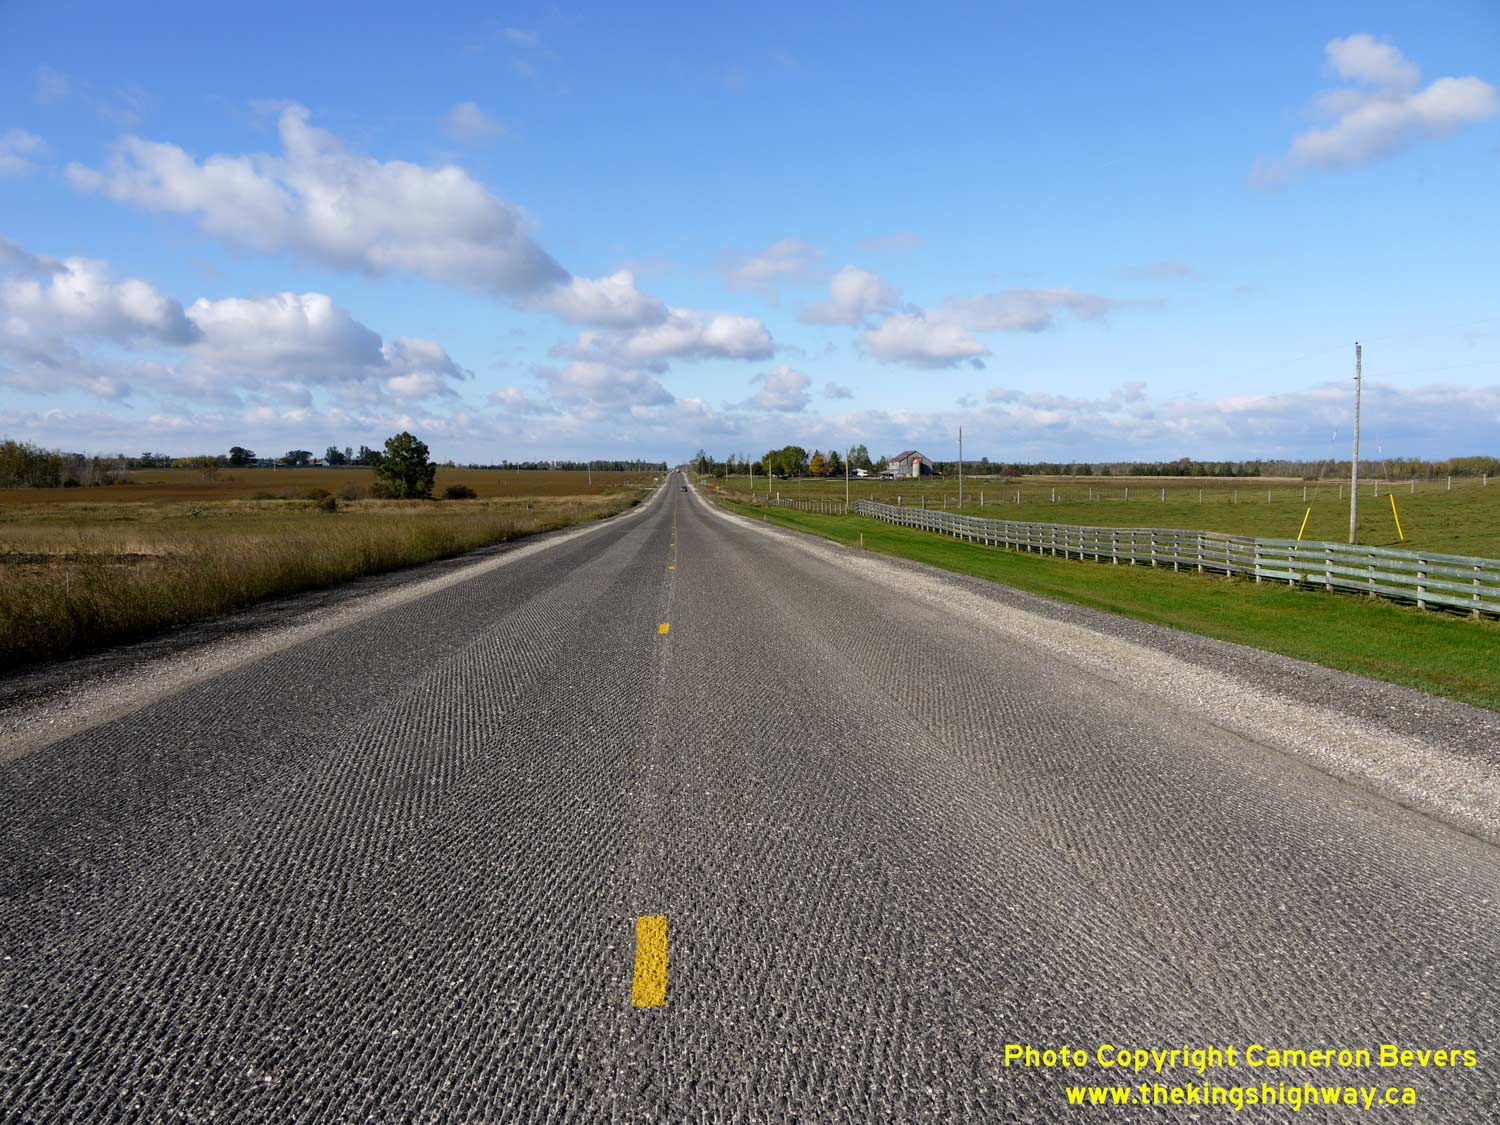
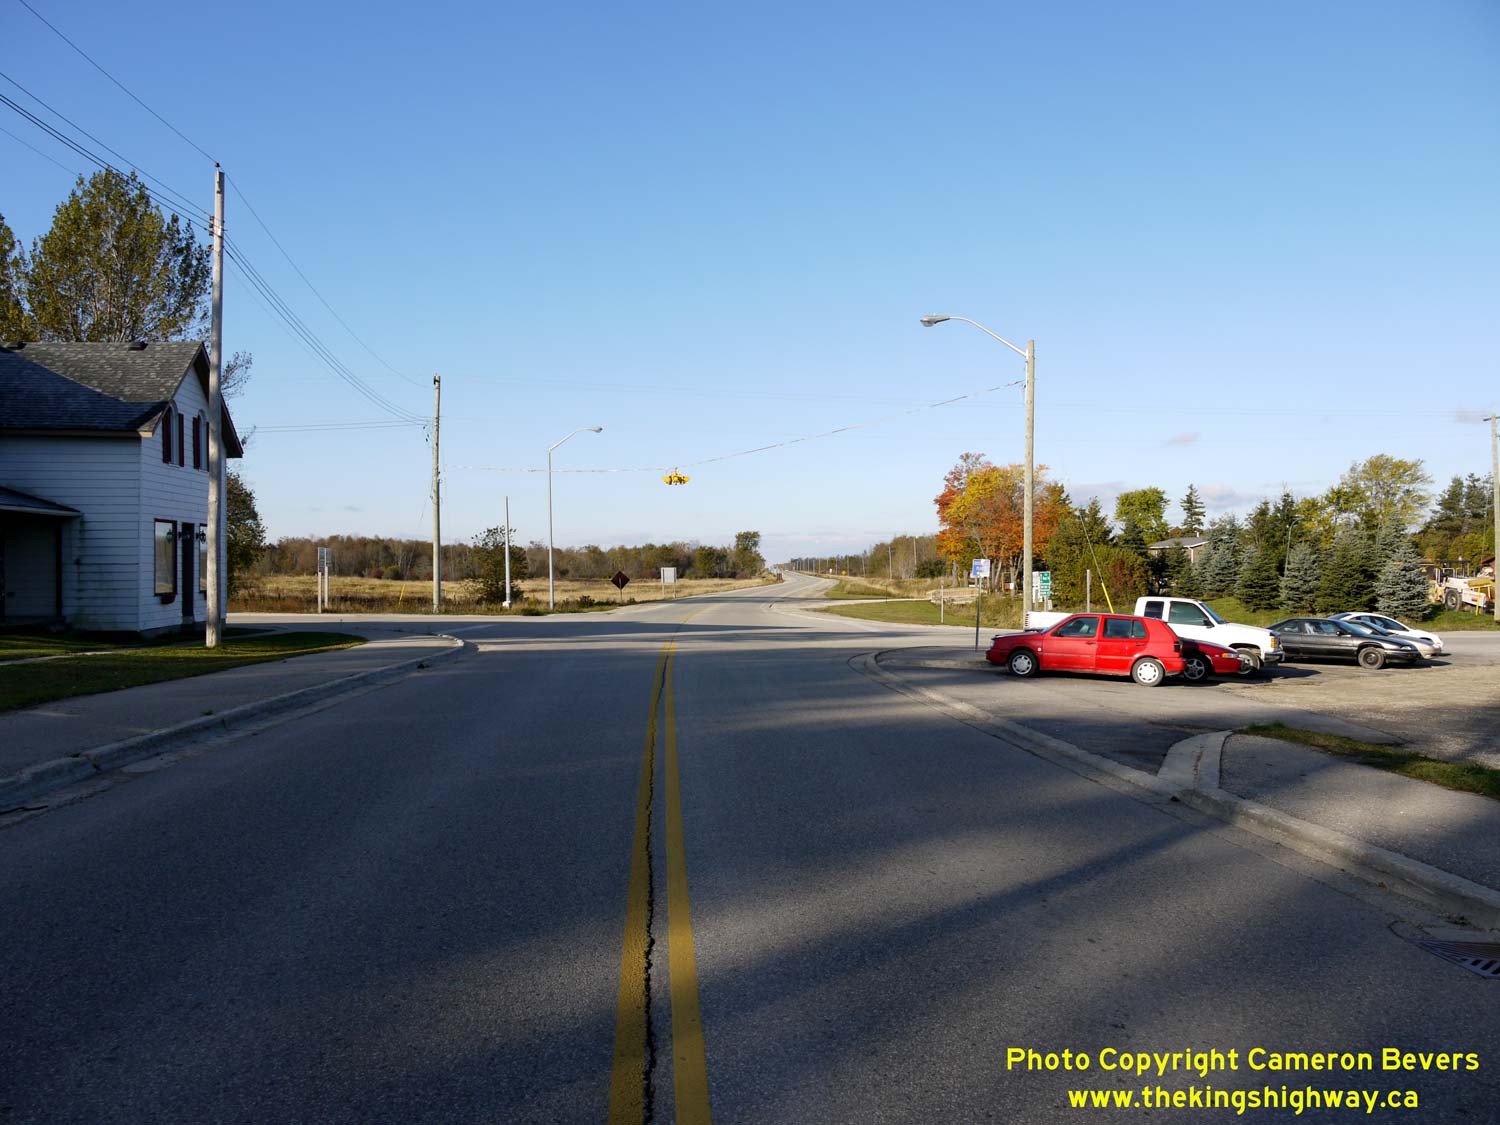
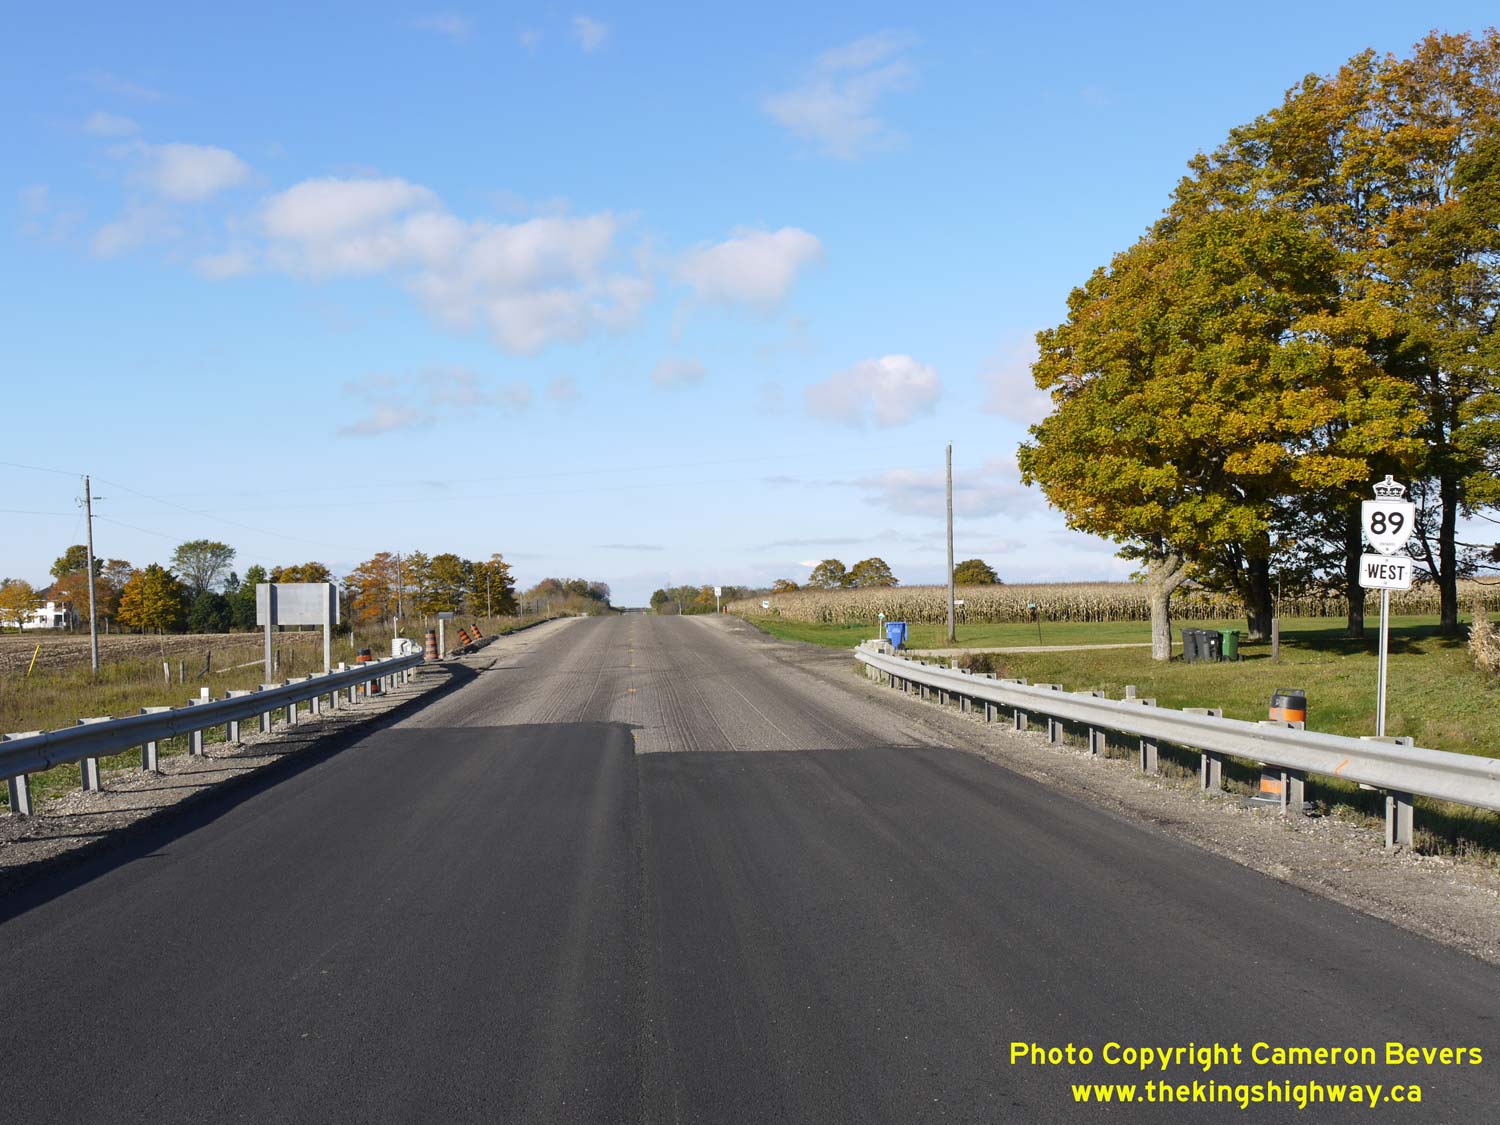
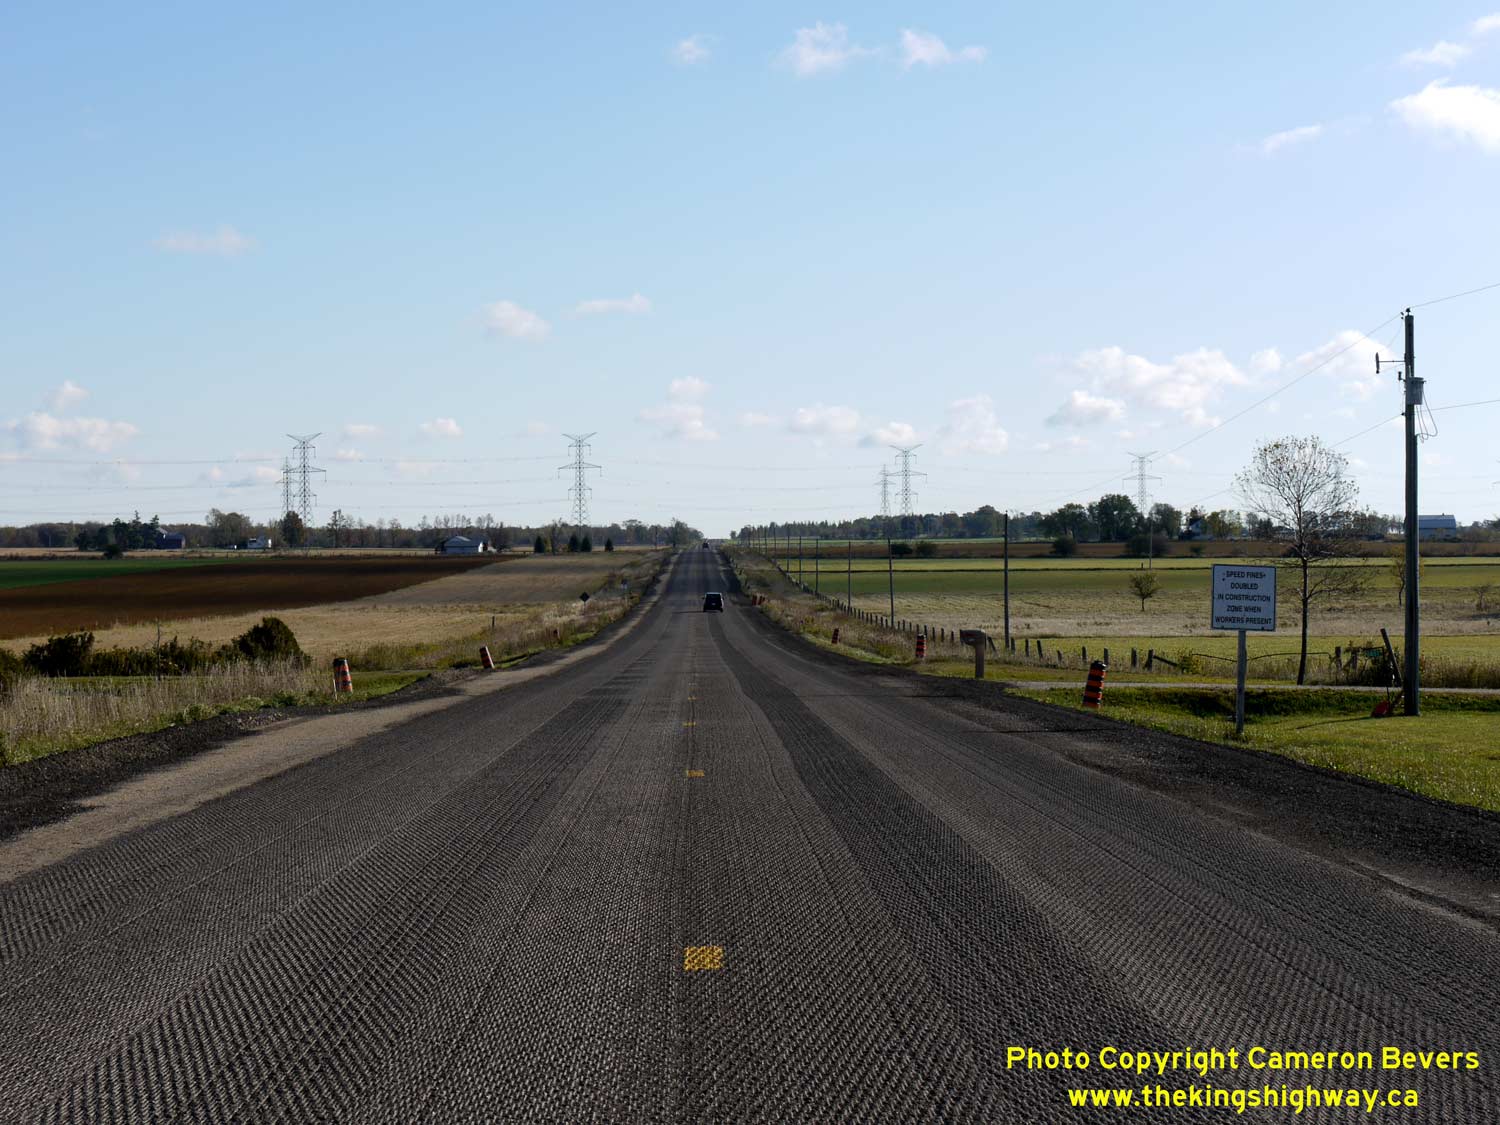
Left - Facing west along Hwy 89 towards Mount Forest about 1 km west of the Grey County Road 8 Junction. This area of Southern Ontario is rather flat and
featureless. See an Enlarged Photo Here. (Photograph taken on November 10, 2009 - © Cameron Bevers) Right - Facing west along Hwy 89 about 1 km east of the Grey County Road 8 Junction near Keldon. See an Enlarged Photo Here. (Photograph taken on November 10, 2009 - © Cameron Bevers) 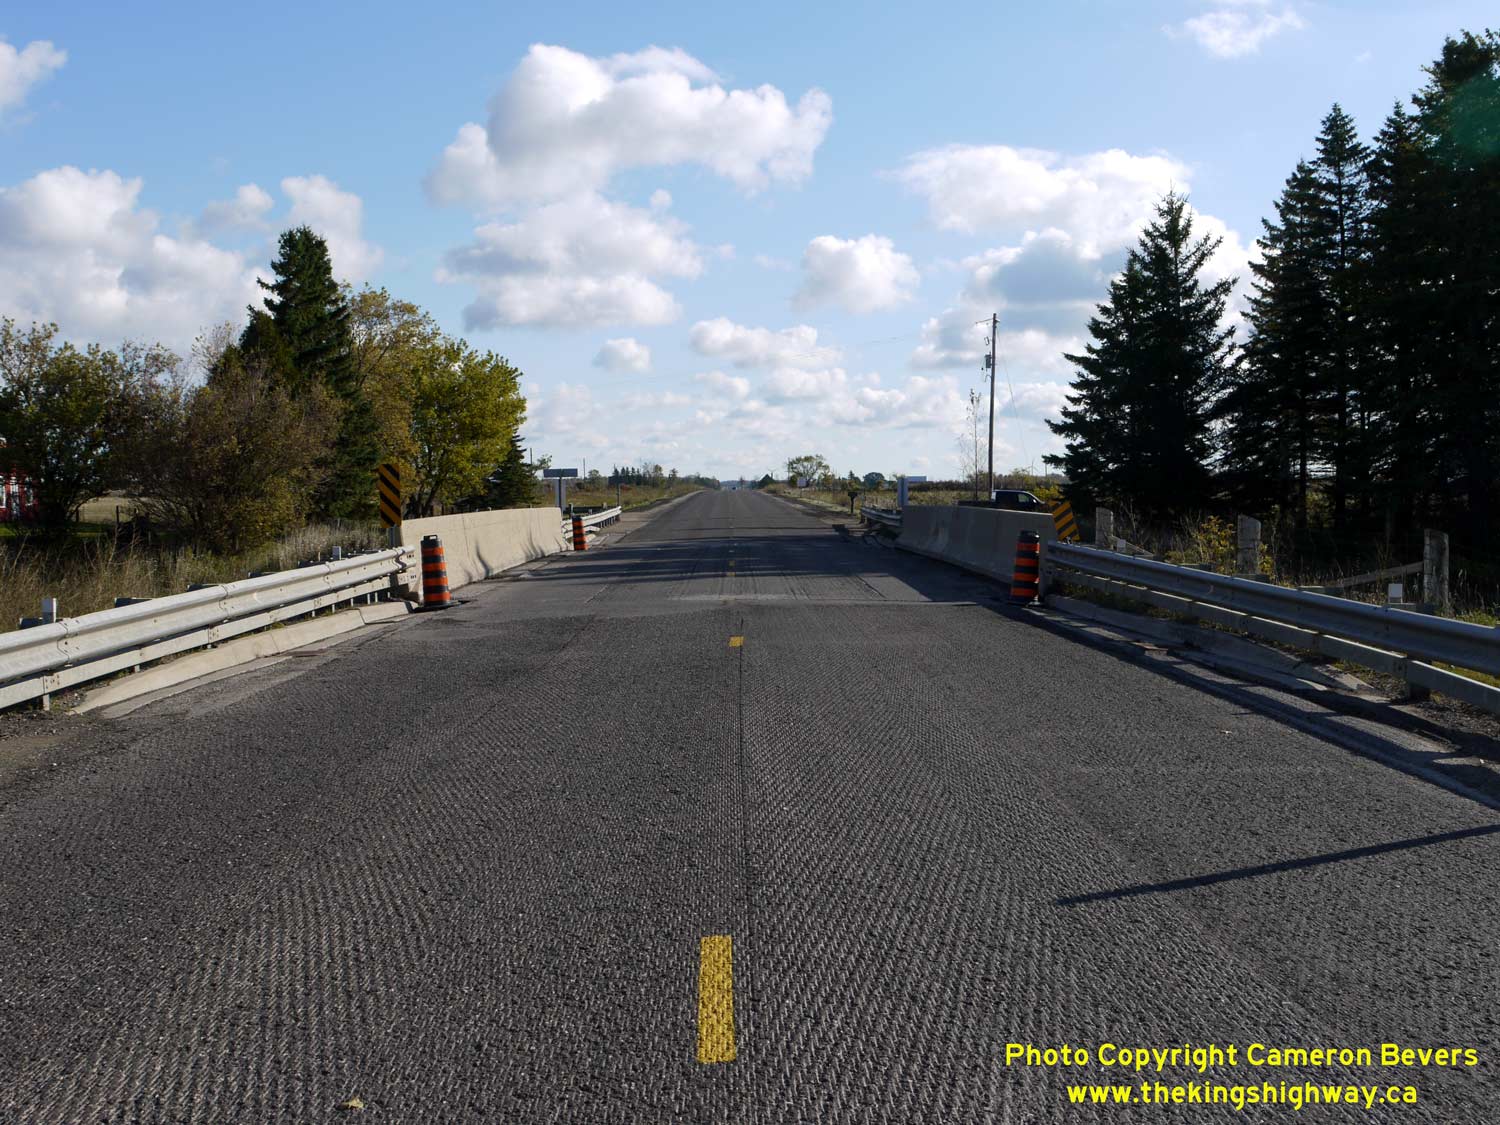
Left - Facing east along Hwy 89 towards Shelburne at the Grand River Bridge (Site #4-133) at Keldon. See an
Enlarged Photo Here. (Photograph taken on November 10, 2009 - © Cameron Bevers) Right - Northern side of the Grand River Bridge on Hwy 89 at Keldon. This two-span concrete rigid frame structure was completed in 1942. This bridge is rather noteworthy in that it is a rare example of a Wartime county road bridge. Similar to the DHO's experience in the 1940s, many counties struggled to secure construction materials and labour during World War II for road projects. It is also interesting to note that many counties built steel truss bridges during this period, which makes the appearance of a concrete rigid frame bridge of this age on a county road rather noteworthy. The province took over ownership of the Keldon Bridge in 1963, when Hwy 89 was extended from Shelburne to Palmerston. Although not related to Hwy 89, road enthusiasts interested in county road bridges of 1940s vintage may want to explore the Princess Elizabeth Bridge over the Conestoga River on Wellington County Road 12 near Conestoga Lake. Completed in 1947, this steel through truss structure is a fine example of Wellington County's ambitious post-war county road and bridge construction program. See an Enlarged Photo Here. (Photograph taken on November 10, 2009 - © Cameron Bevers) 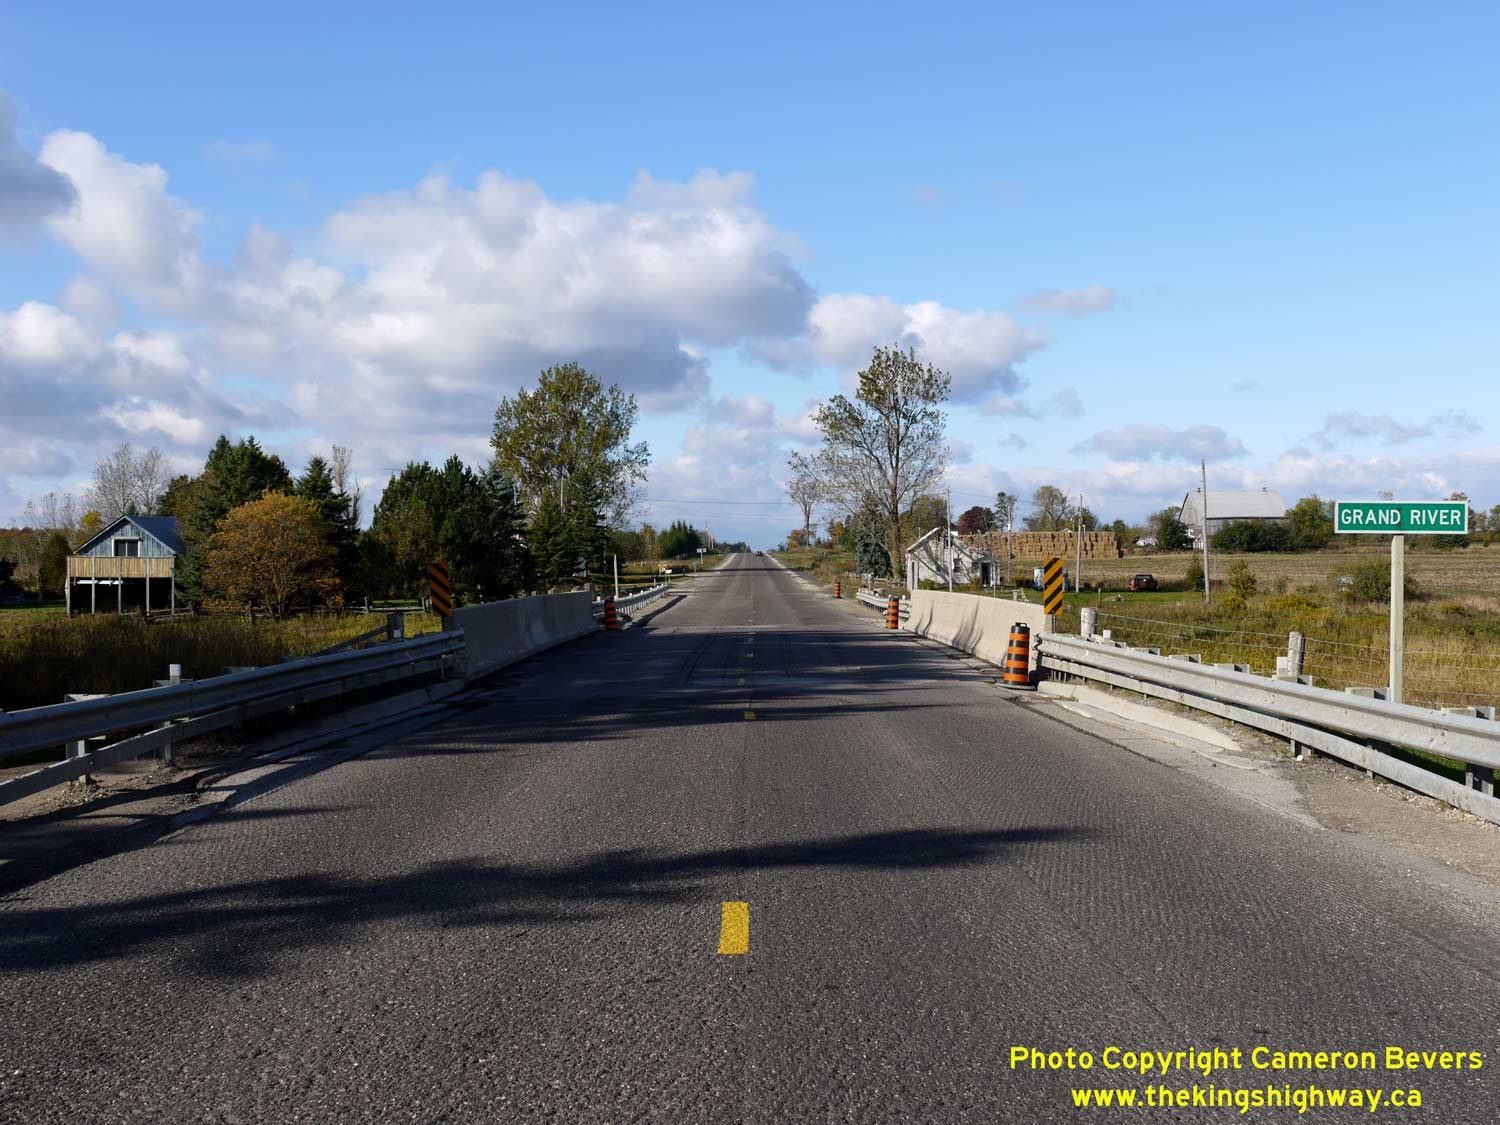

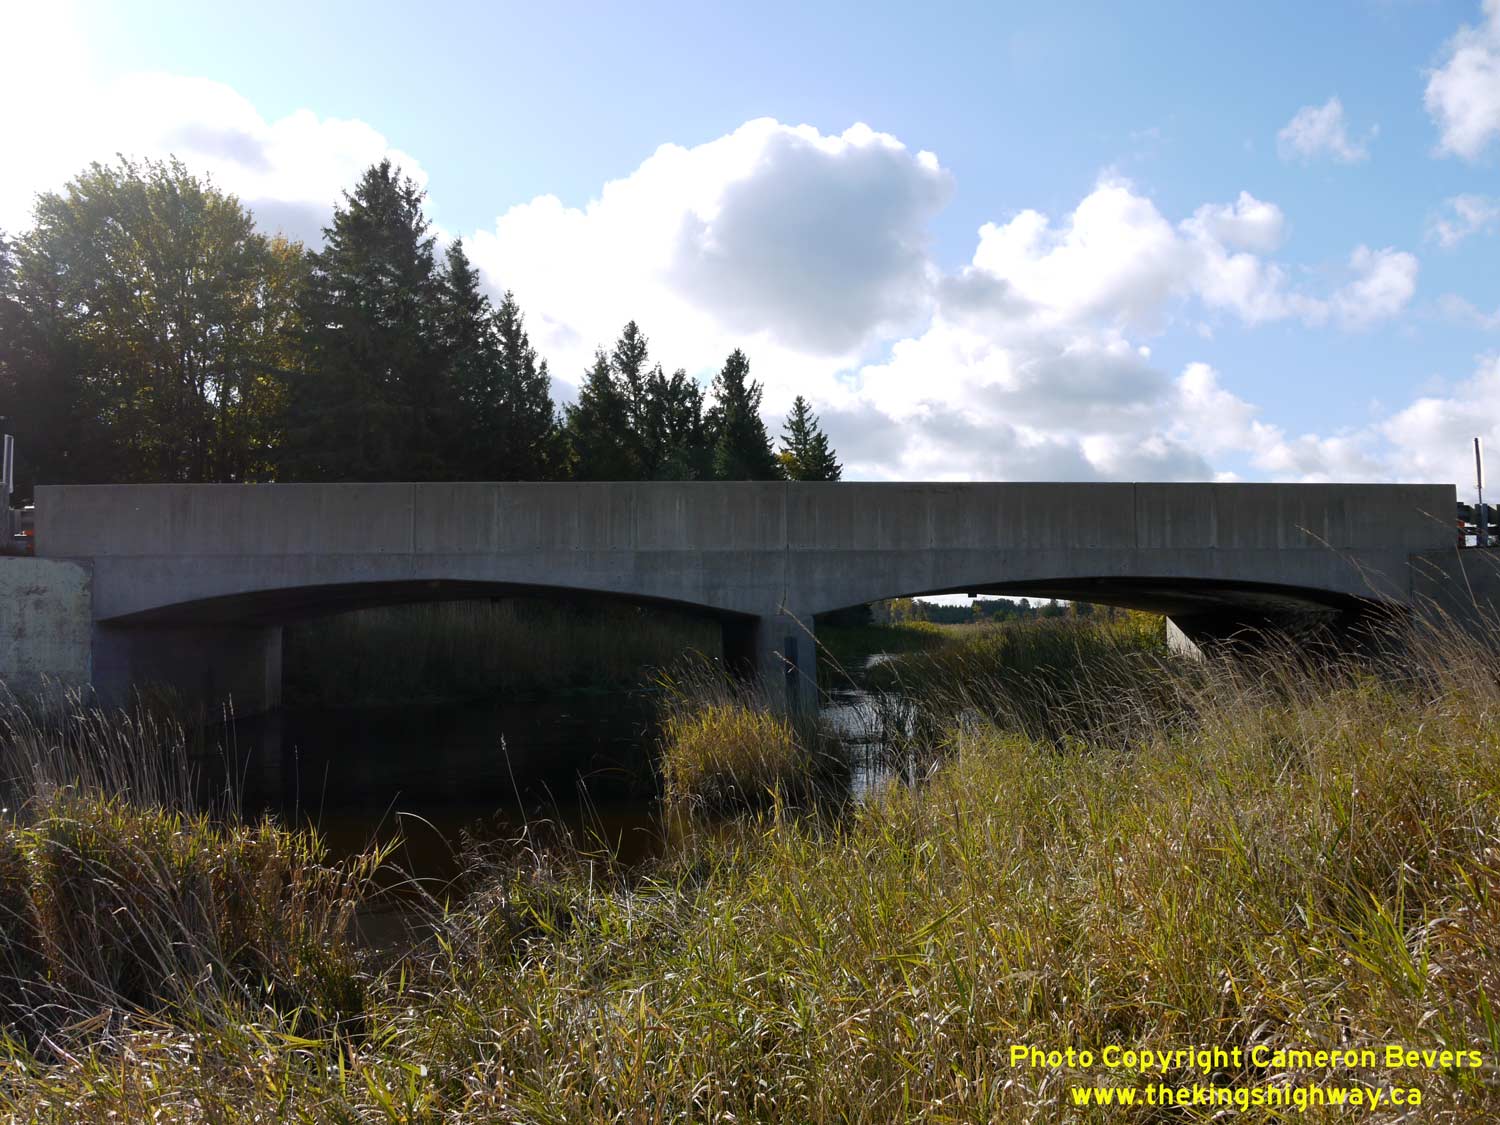
Left - Facing west along Hwy 89 at the Grand River Bridge at Keldon. This is the northernmost bridge across the Grand River on the provincial highway system.
By the time the Grand River reaches Hwy 10 near its source east of Dundalk, the watercourse is small enough that it is merely conveyed under the highway by a culvert.
See an Enlarged Photo Here. (Photograph taken on November 10, 2009 - © Cameron Bevers) Right - View underneath the Grand River Bridge on Hwy 89 at Keldon, showing the original 1942 structure in the centre and the newer deck extensions added to both sides in 1991. As originally built in the 1940s, the Keldon Bridge had a a 22-foot roadway width and two 2-foot sidewalks. When the bridge was rehabilitated in 1991, it was necessary to widen the structure and remove the sidewalks in order to provide enough room for traffic staging. See an Enlarged Photo Here. (Photograph taken on November 10, 2009 - © Cameron Bevers) 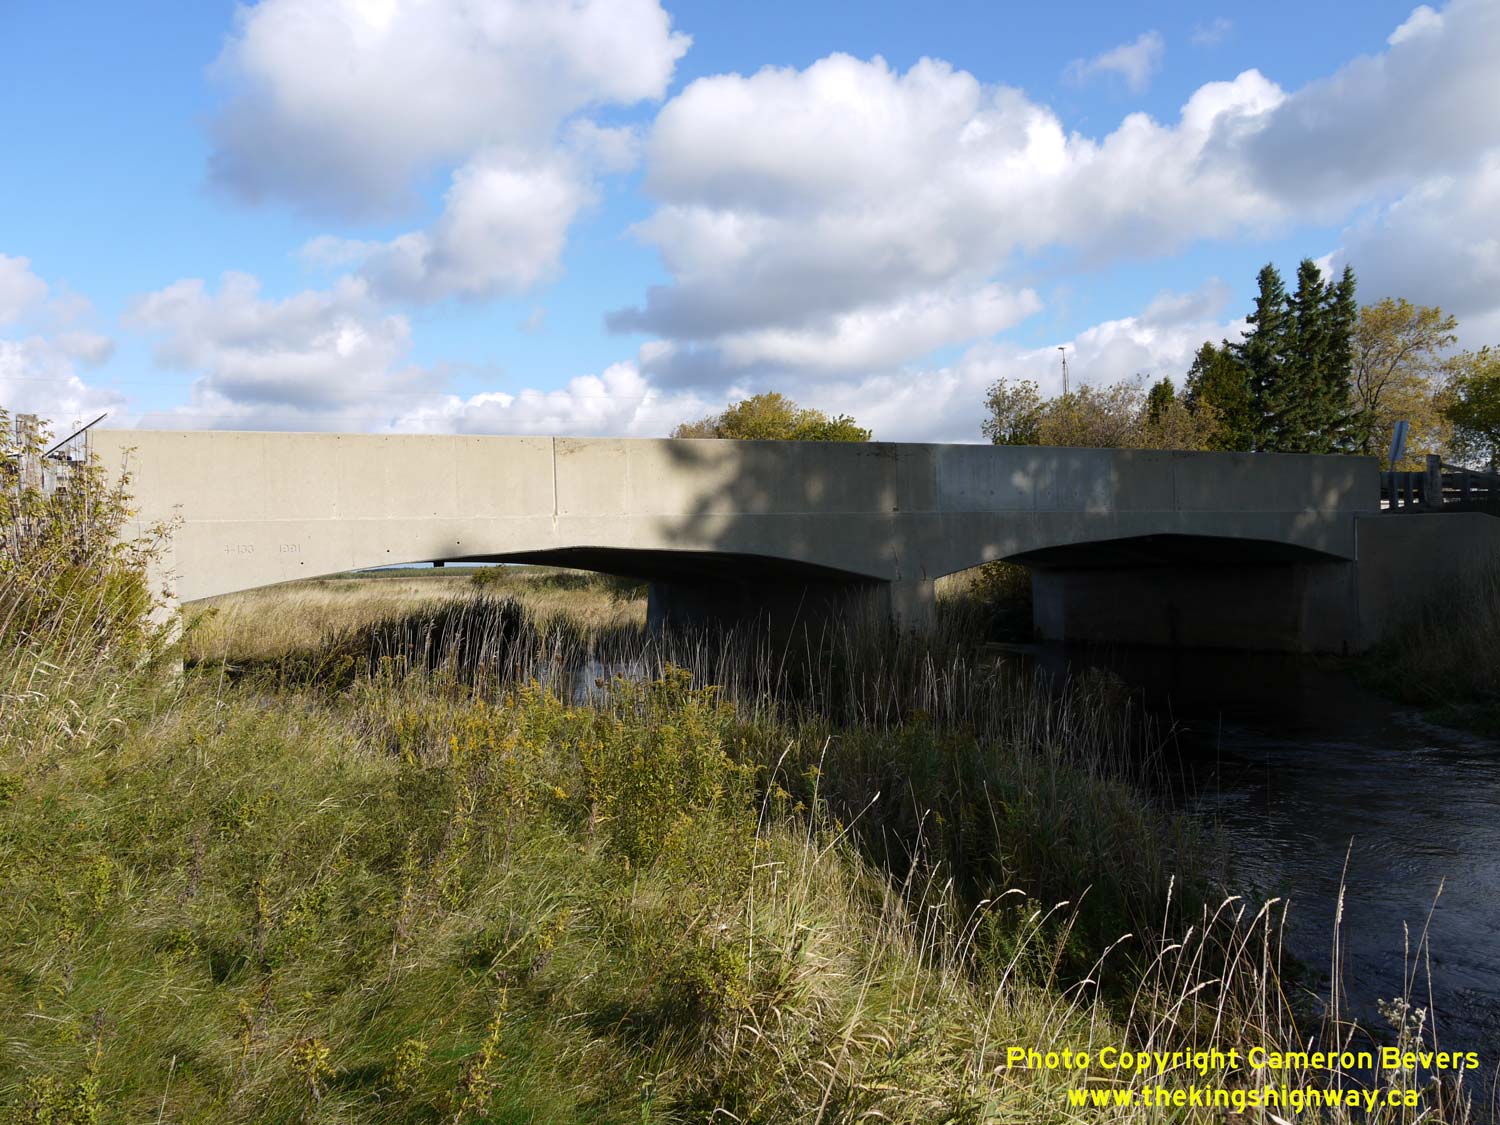
Left - Southern side of the Grand River Bridge at Keldon. With the recent replacement of Glass' Bridge (built 1913) and the Signet Creek Bridge (built ca.
1920), the Grand River Bridge at Keldon is by far the oldest bridge remaining on Hwy 89. Even the recently-replaced Cookstown Overpass at Hwy 89 & Hwy 400
(built 1949) was newer than the Keldon Bridge. The diminutive Grand River seen here may surprise some readers, as it is dramatically different from this view of the
Grand River further downstream, where the river exceeds 200 metres in width in places. The
source of the Grand River lies just off of Hwy 10 in the Dundalk area. The river drains an enormous portion of Southern Ontario and outlets into Lake Erie at Port
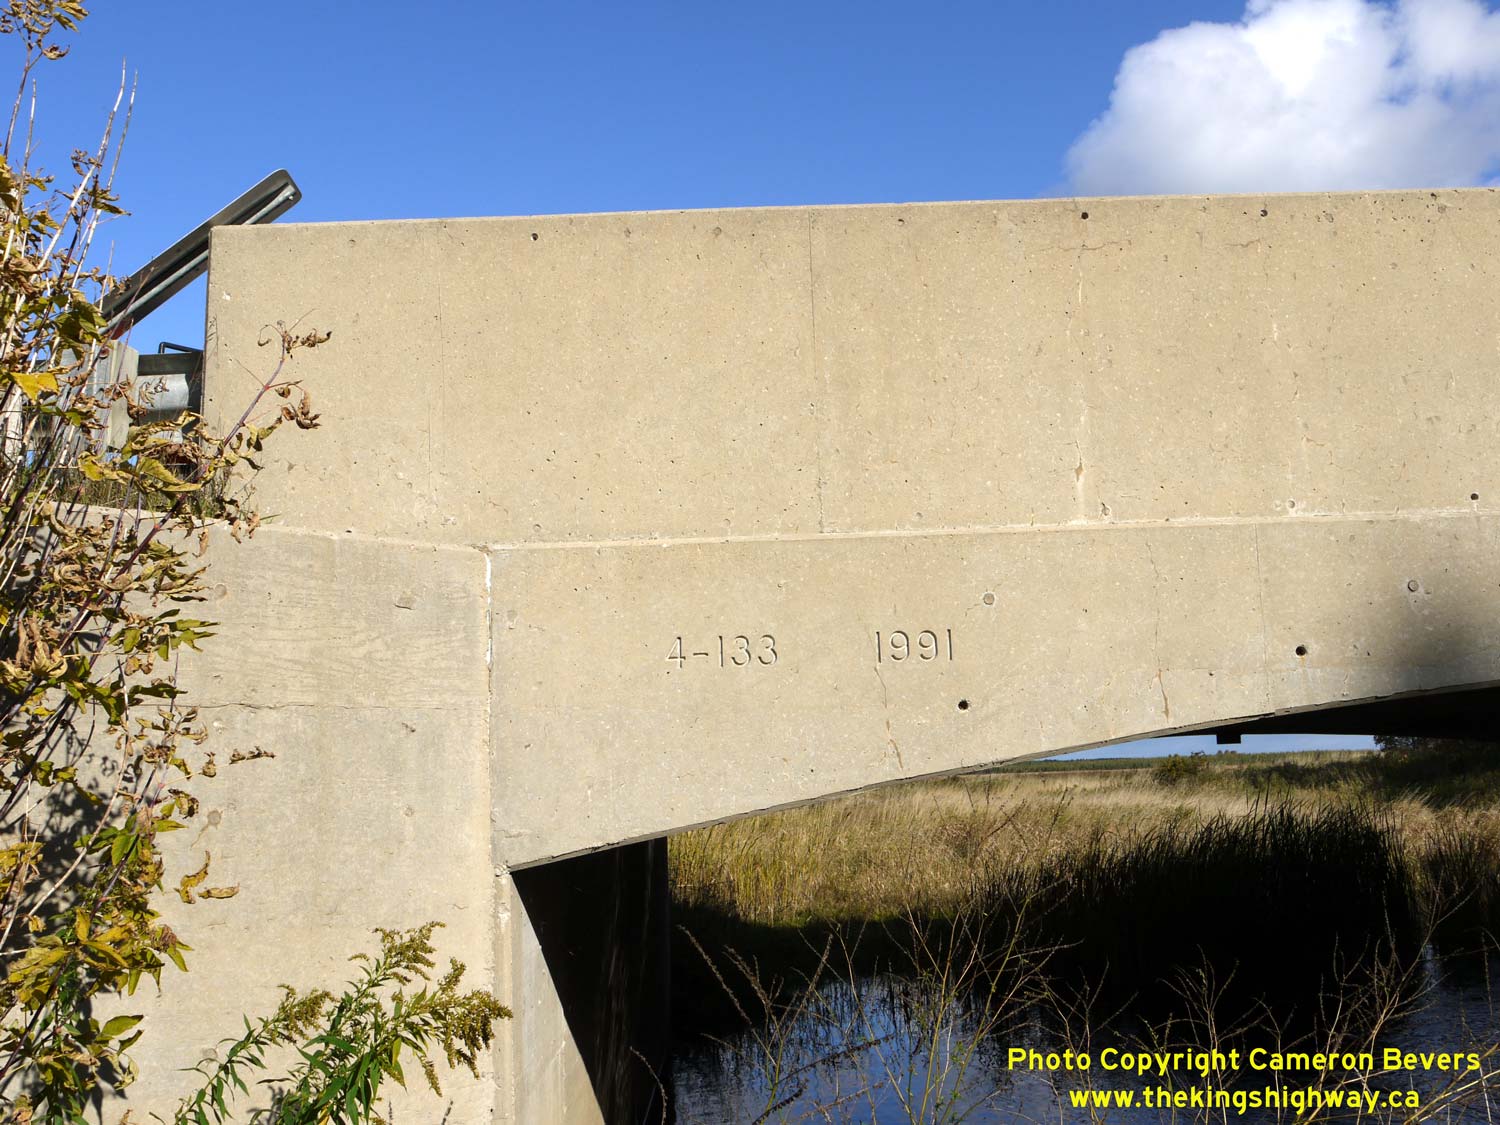
Maitland. See an Enlarged Photo Here. (Photograph taken on November 10, 2009 - © Cameron Bevers) Right - Structure identification number and date stamp (1991) on the Grand River Bridge on Hwy 89 at Keldon. The date stamp refers to the last widening and rehabilitation of the bridge and not the bridge's original construction date of 1942. See an Enlarged Photo Here. (Photograph taken on November 10, 2009 - © Cameron Bevers) 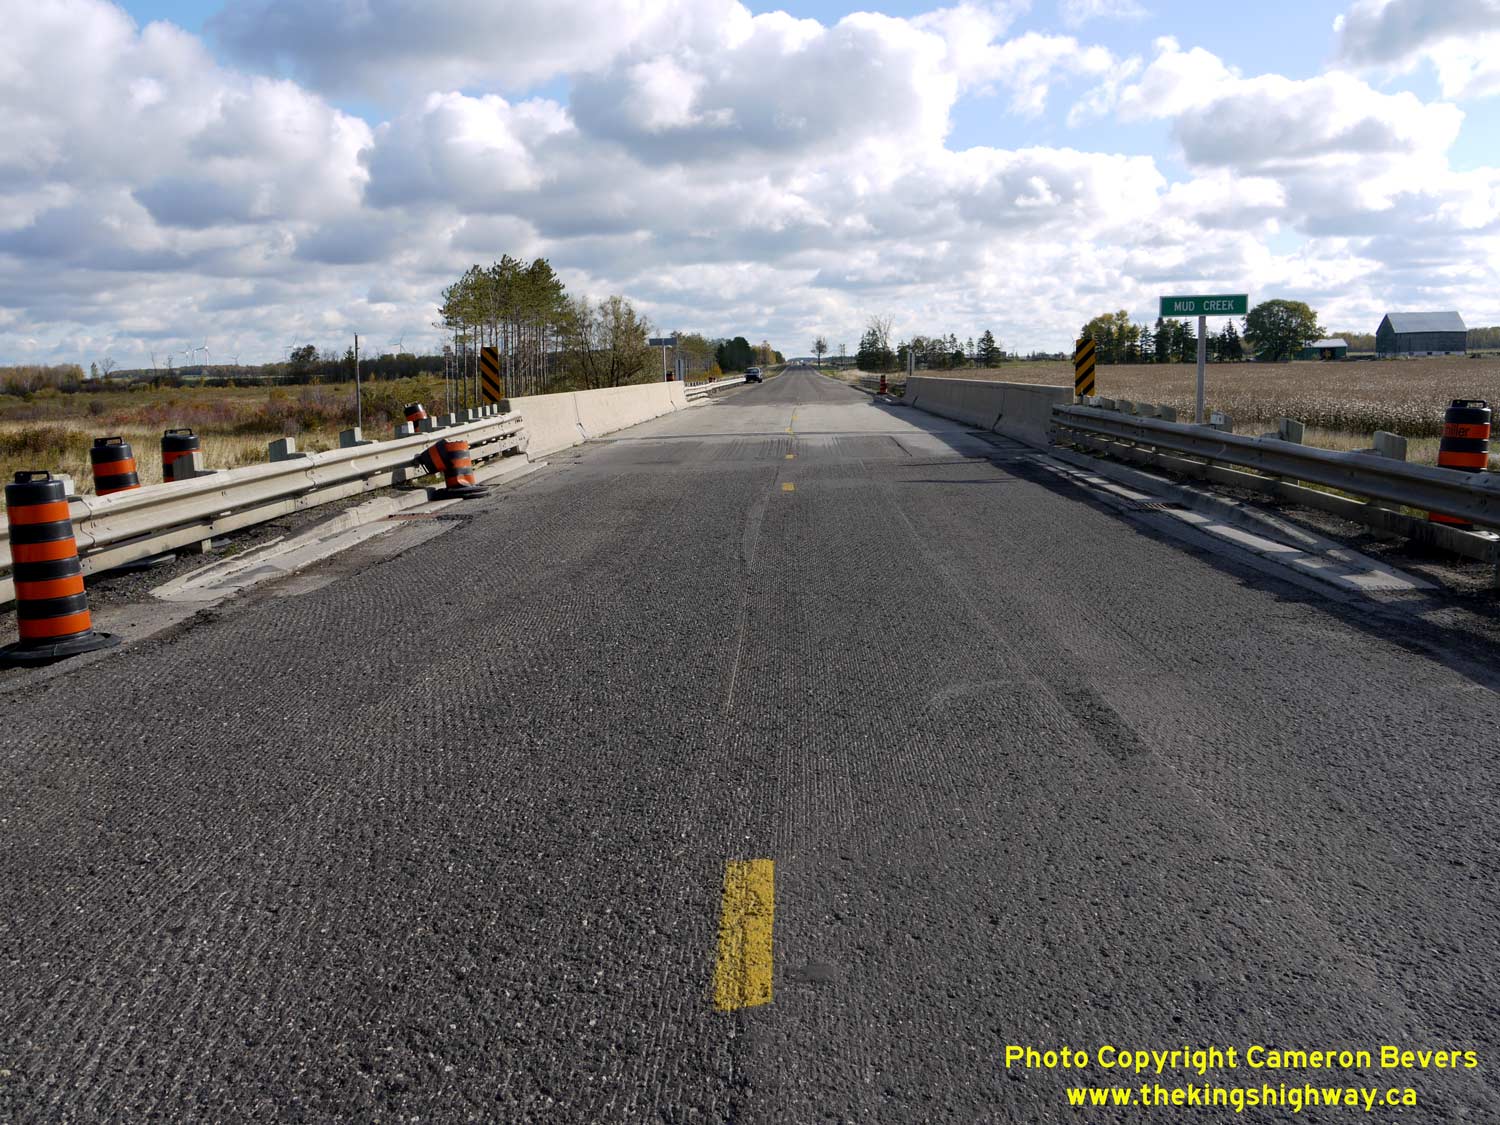
Left - Facing east along Hwy 89 at the Mud Creek Bridge, located about 14 km west of Shelburne. See an
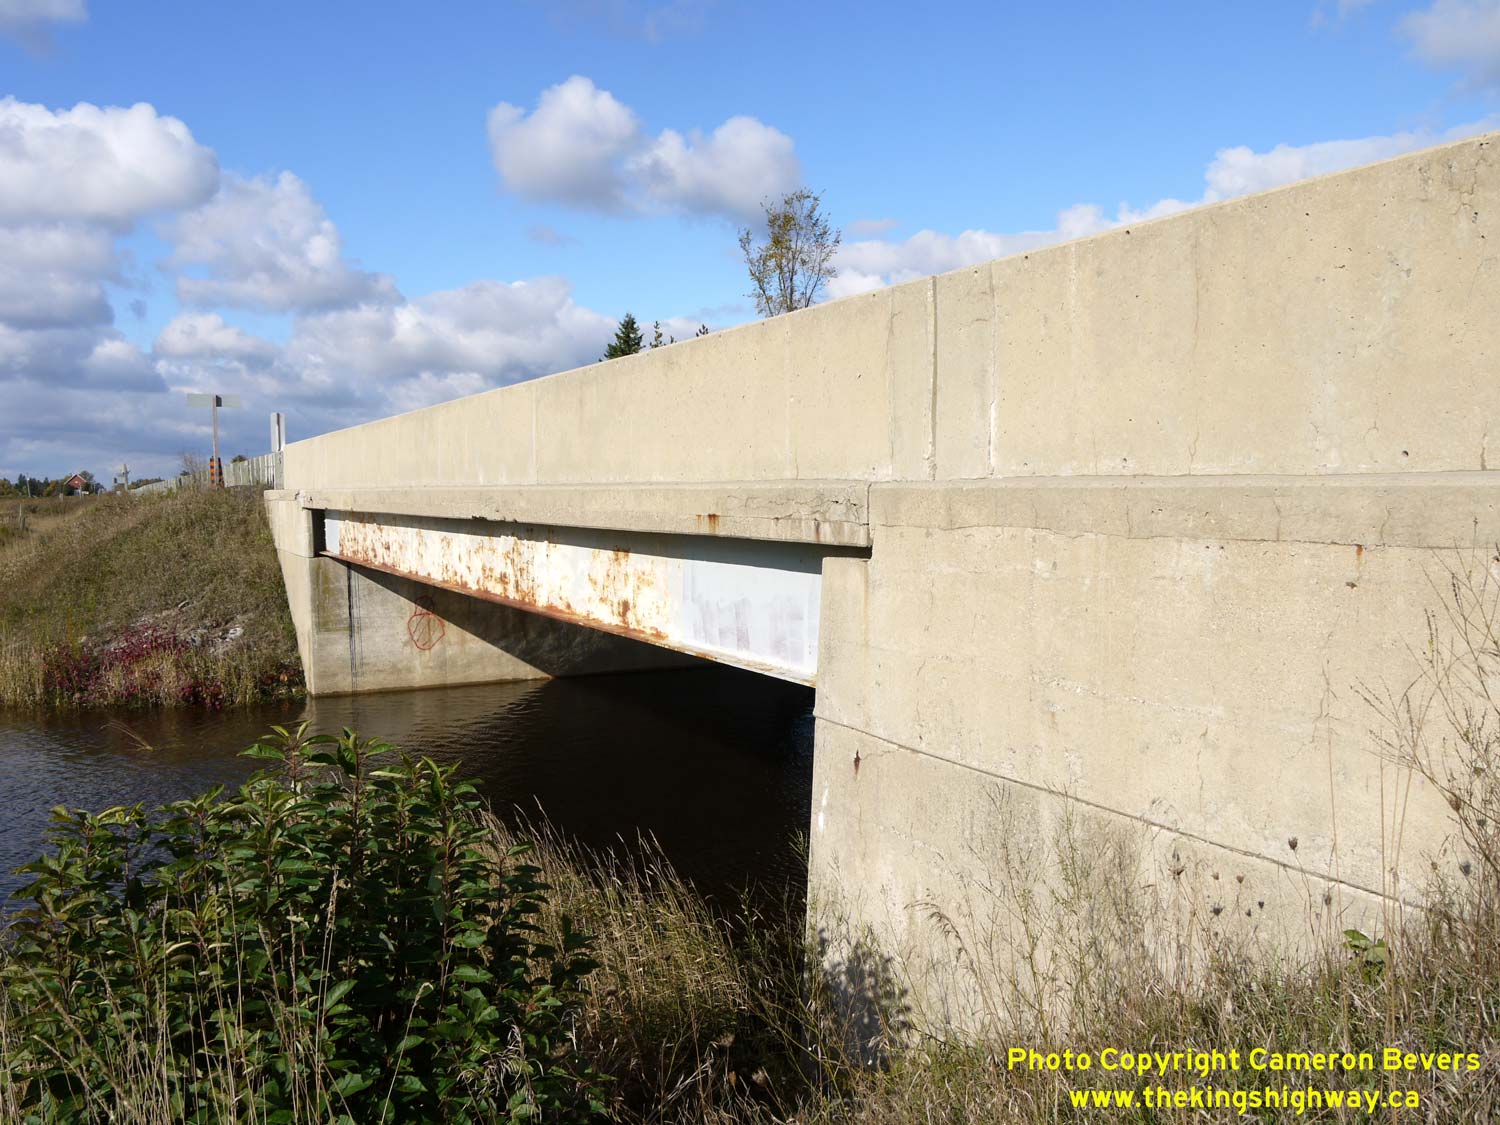
Enlarged Photo Here. (Photograph taken on November 10, 2009 - © Cameron Bevers) Right - Southern side of the Mud Creek Bridge (Site #4-120) on Hwy 89 west of Shelburne. This single-span steel girder structure was completed in 1959. See an Enlarged Photo Here. (Photograph taken on November 10, 2009 - © Cameron Bevers) 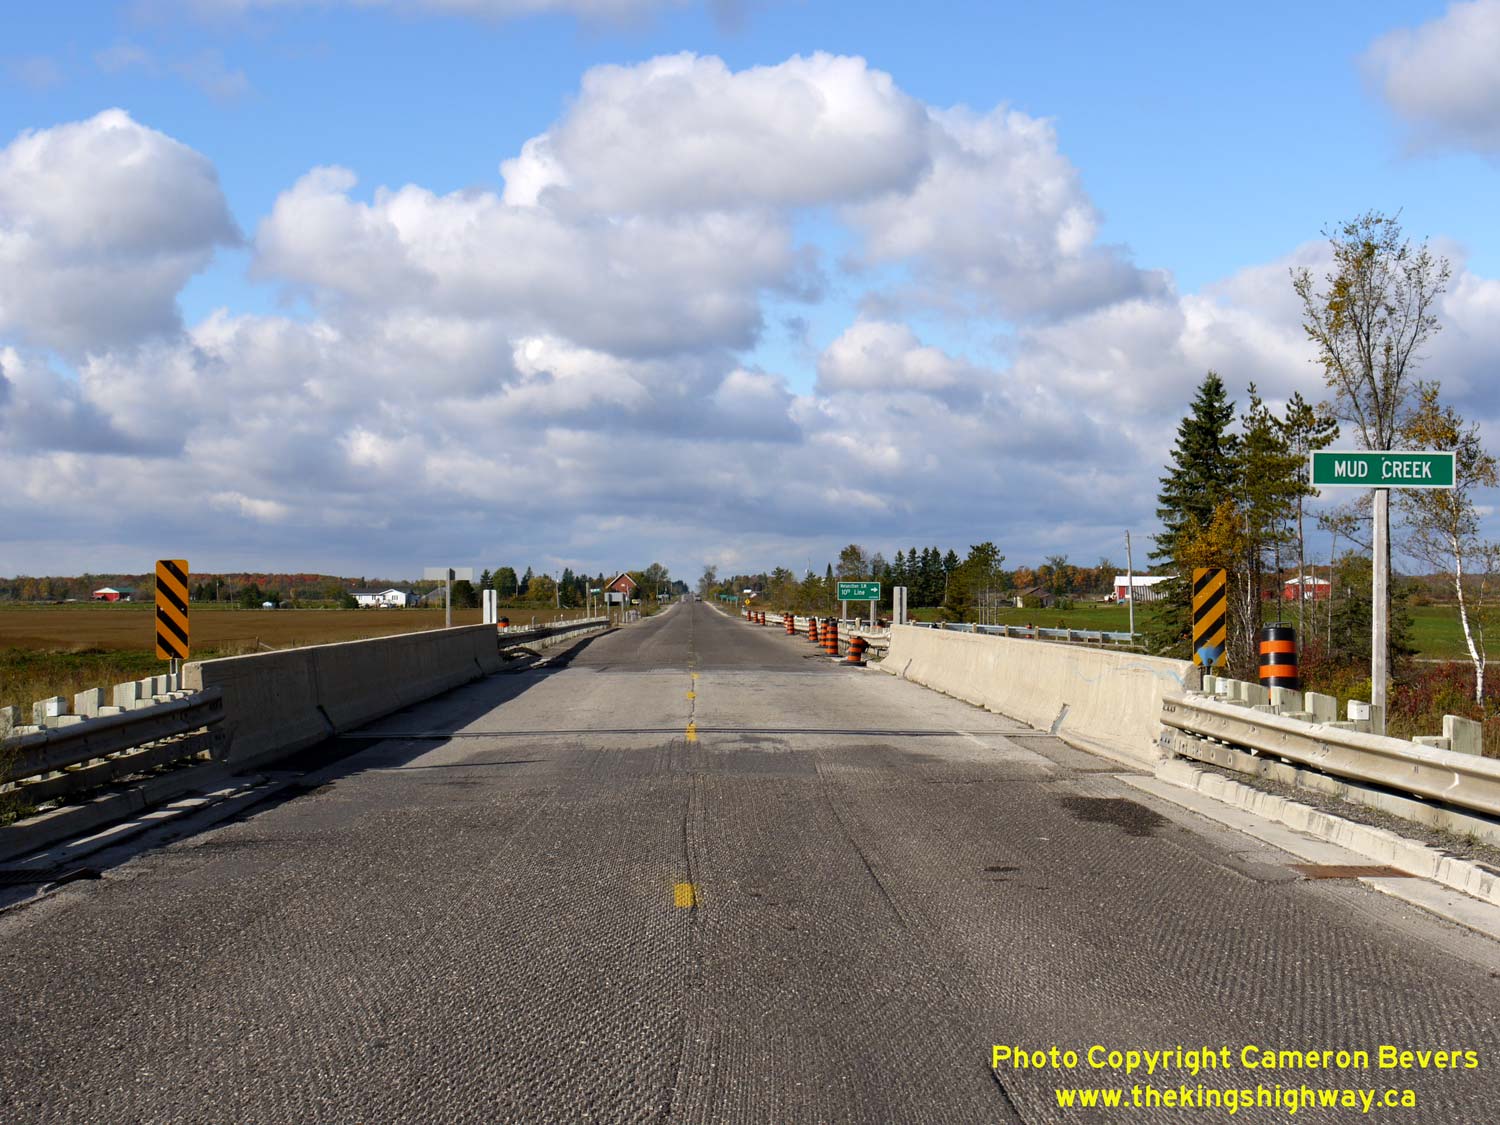
Left - Facing west along Hwy 89 towards Mount Forest at the Mud Creek Bridge. See an
Enlarged Photo Here. (Photograph taken on November 10, 2009 - © Cameron Bevers) Right - Northern side of the Mud Creek Bridge on Hwy 89 west of Shelburne. See an Enlarged Photo Here. (Photograph taken on November 10, 2009 - © Cameron Bevers) 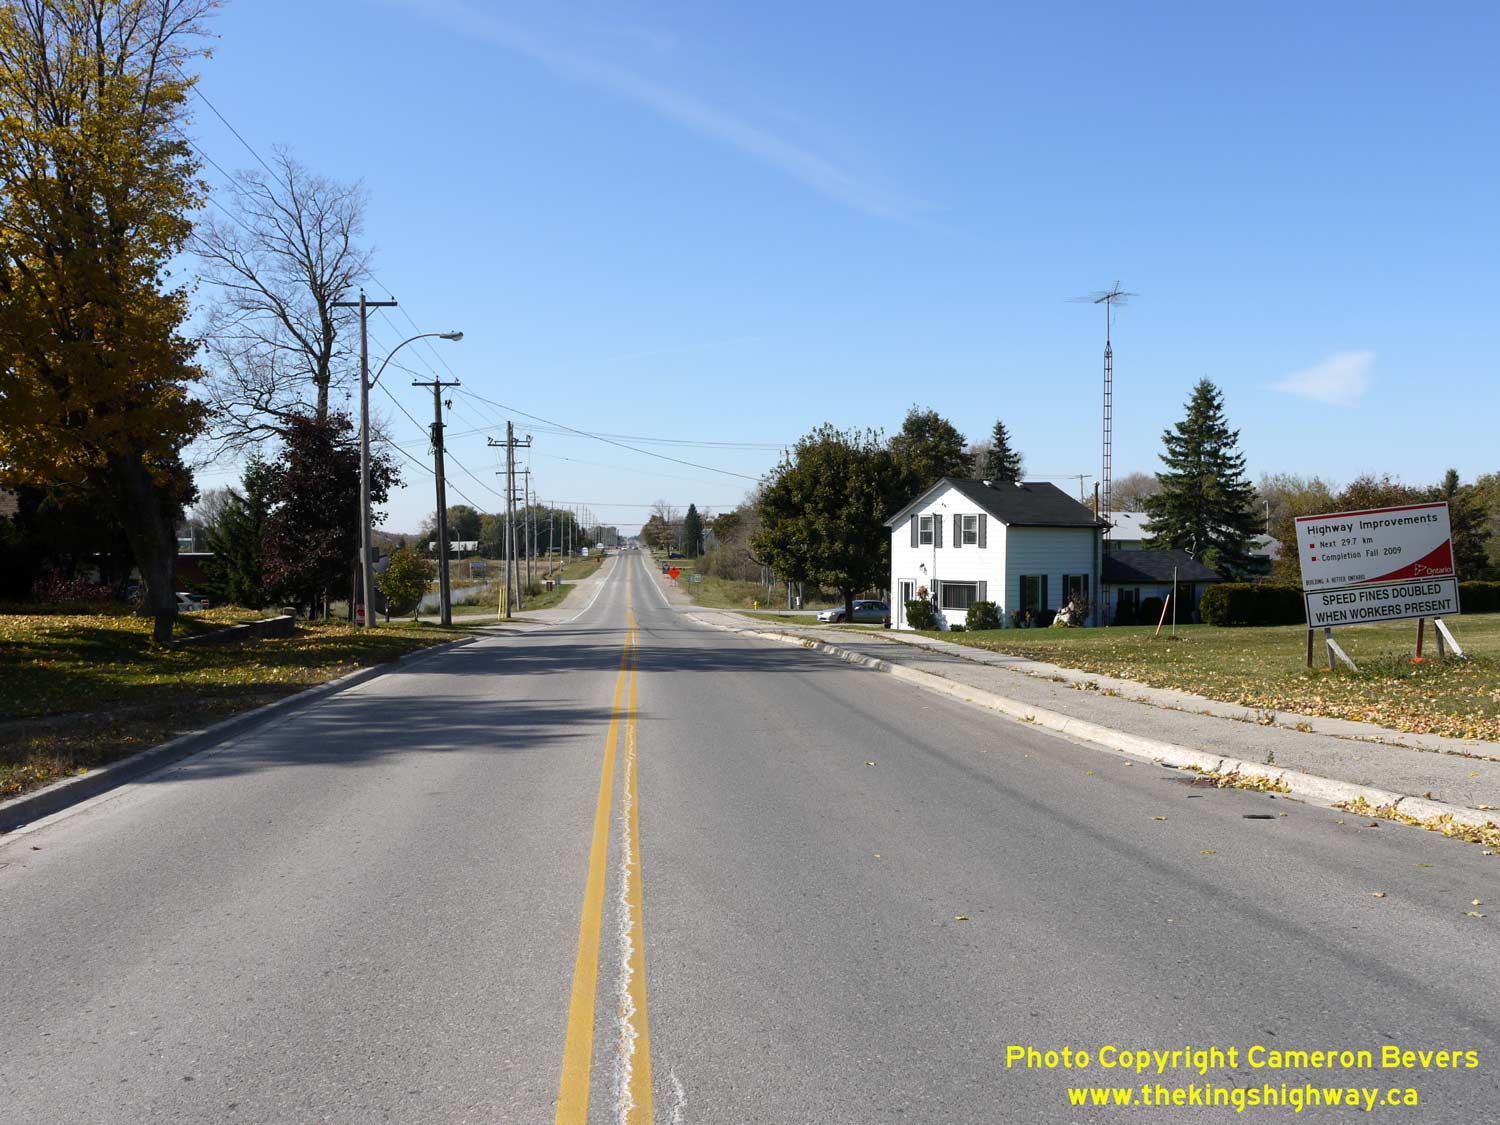
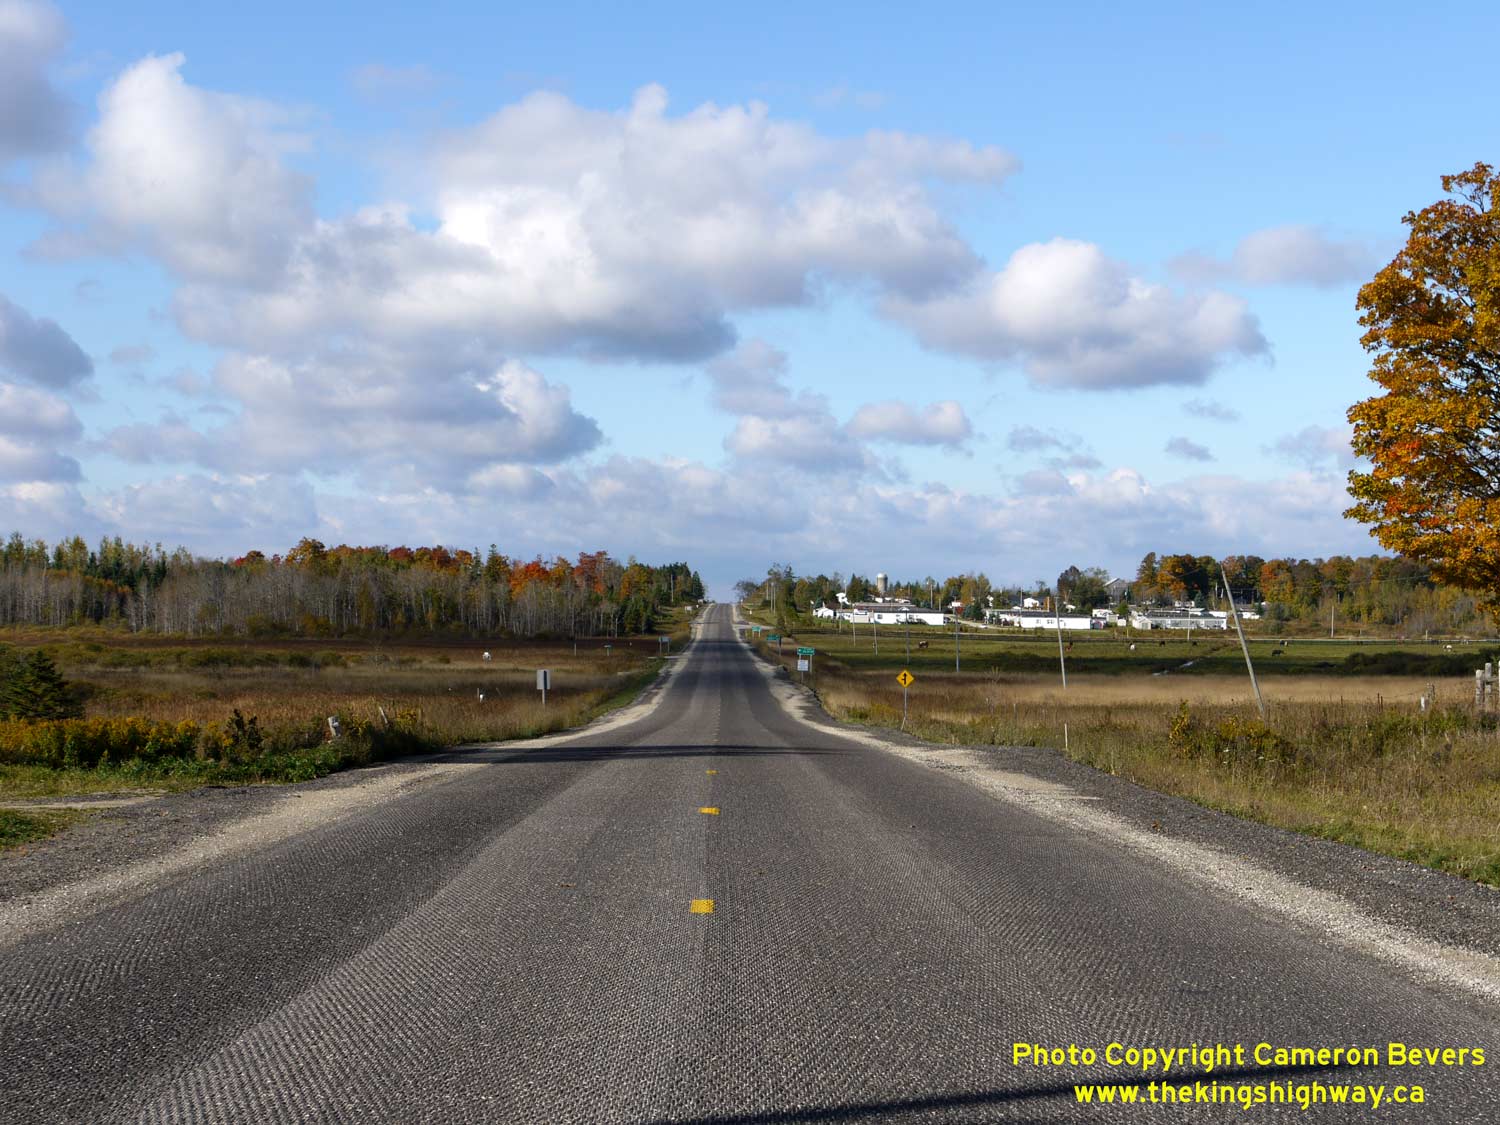
Left - Facing west along Hwy 89 towards Mount Forest at the western entrance to Shelburne. Motorists heading westbound on Hwy 89 from Shelburne should check
their fuel level before leaving town. It is about 45 km to the next service station in Mount Forest. See an
Enlarged Photo Here. (Photograph taken on October 16, 2009 - © Cameron Bevers) Right - Advance junction sign assembly on eastbound Hwy 89 approaching the Hwy 10 Junction in Shelburne. See an Enlarged Photo Here. (Photograph taken on October 16, 2009 - © Cameron Bevers) 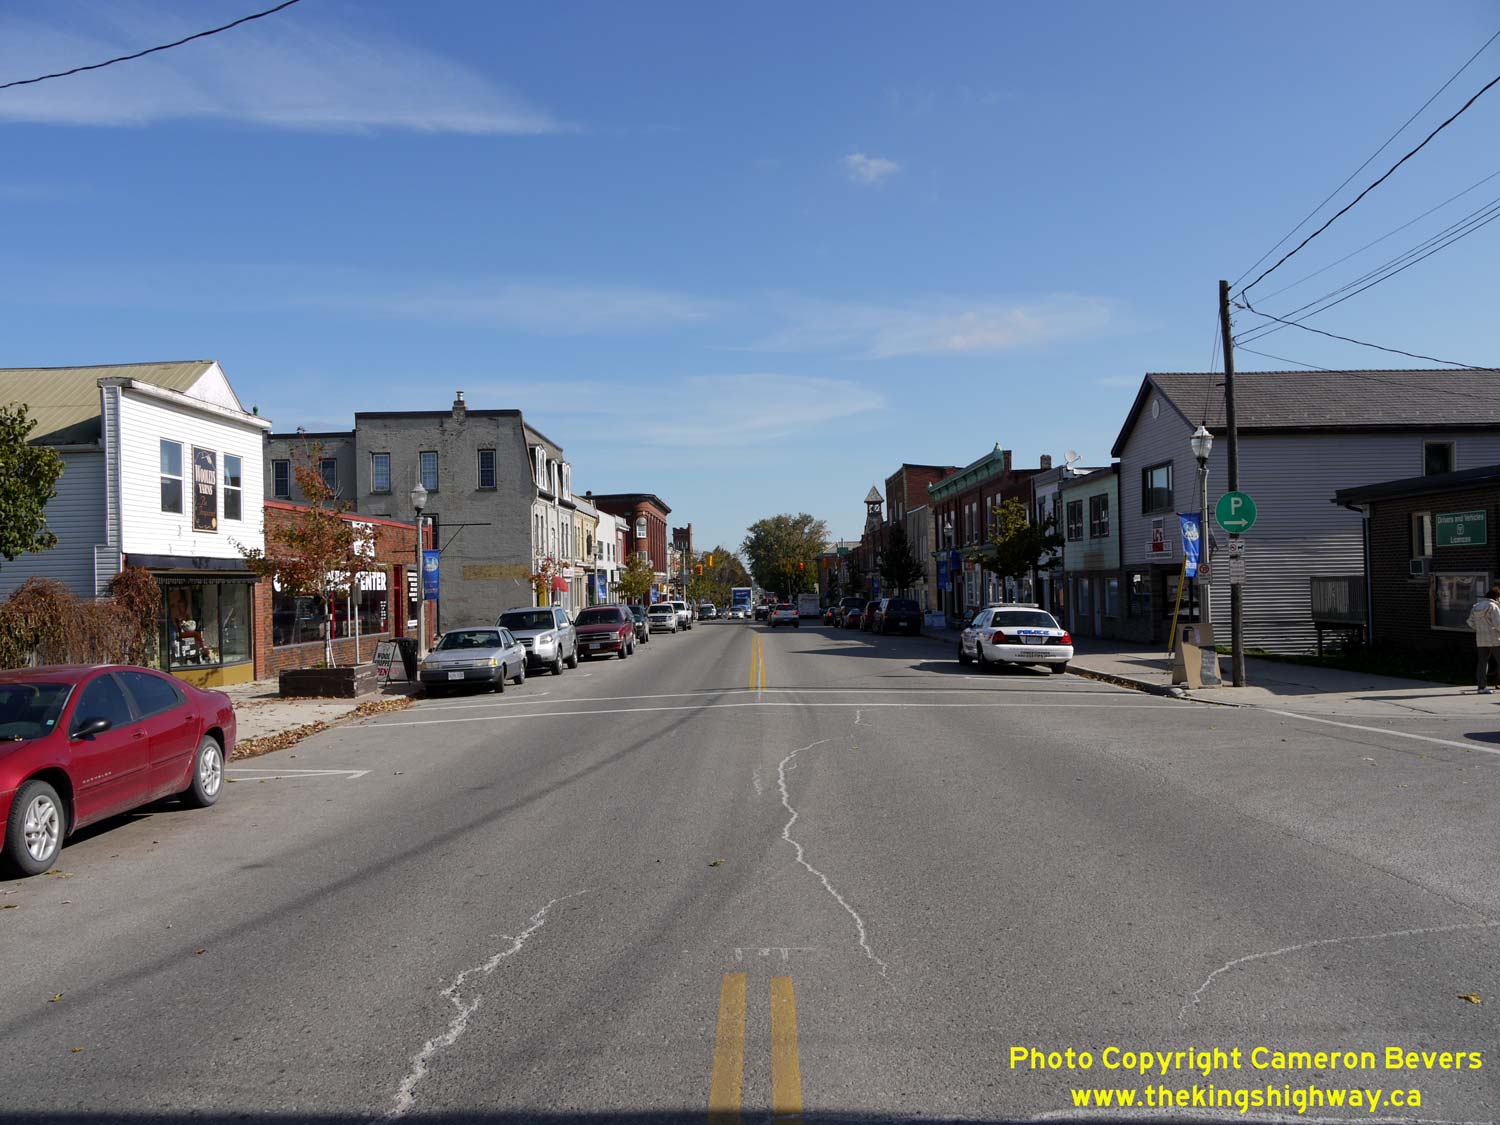
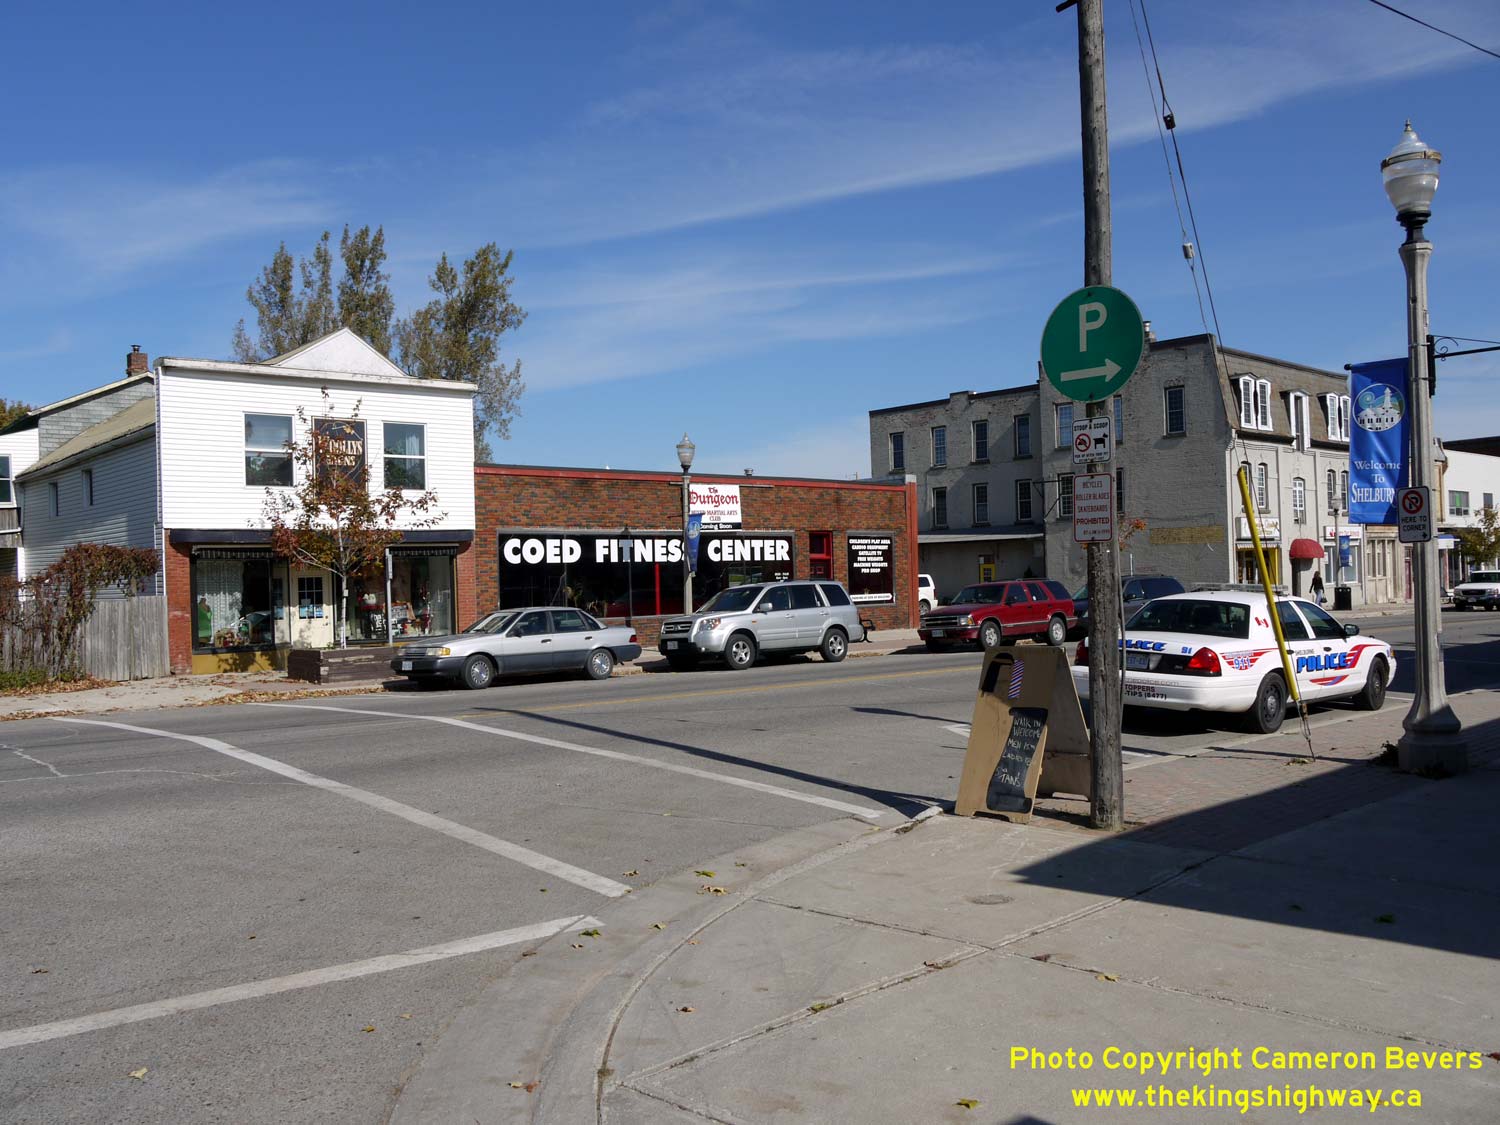
Left - Facing east along Main Street (Hwy 89) at Adeline Street in Shelburne. Note the un-posted pedestrian crosswalk in the background. In the absence of any
regulatory traffic control devices such as a Stop sign, pedestrian crosswalk, or traffic signals, these types of crossings are considered "courtesy crossings". See an
Enlarged Photo Here. (Photograph taken on October 16, 2009 - © Cameron Bevers) Right - Another view of the courtesy crossing on Main Street (Hwy 89) at Adeline Street in Shelburne. These types of courtesy crossings are surprisingly common on municipal streets in small towns and villages in Ontario. They unfortunately send conflicting messages to all road users about who actually has the right-of-way. See an Enlarged Photo Here. (Photograph taken on October 16, 2009 - © Cameron Bevers) 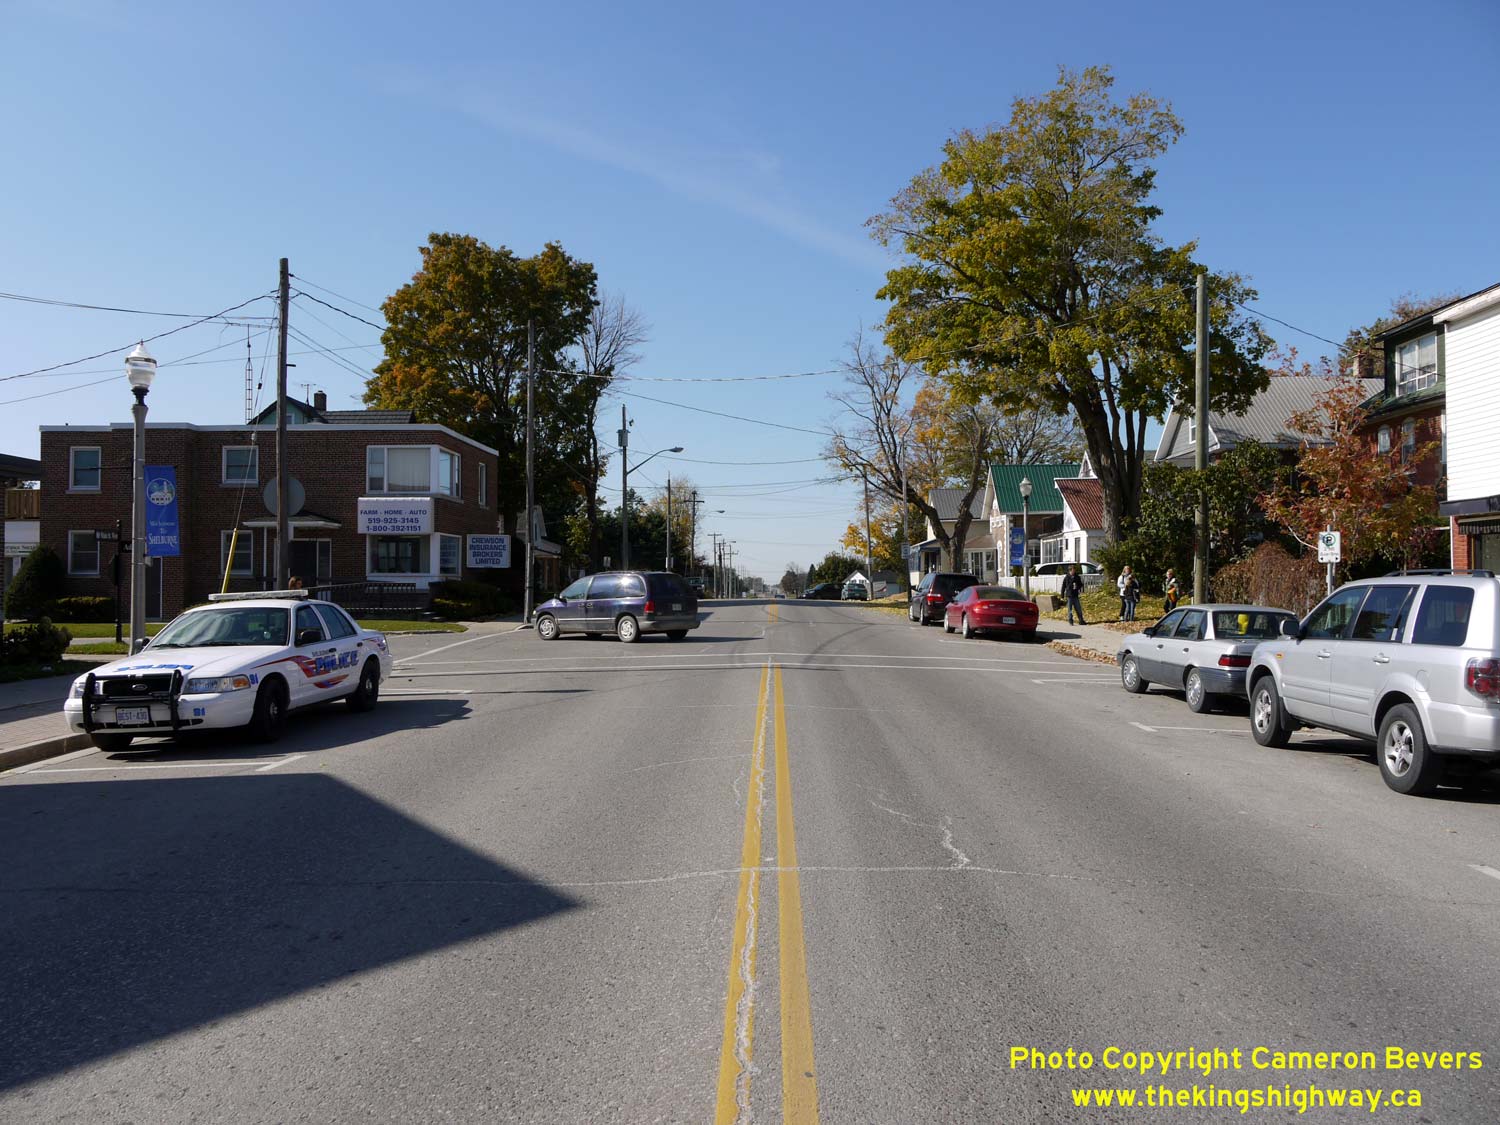

Left - Facing west along Main Street (Hwy 89) at Adeline Street in Shelburne. See an
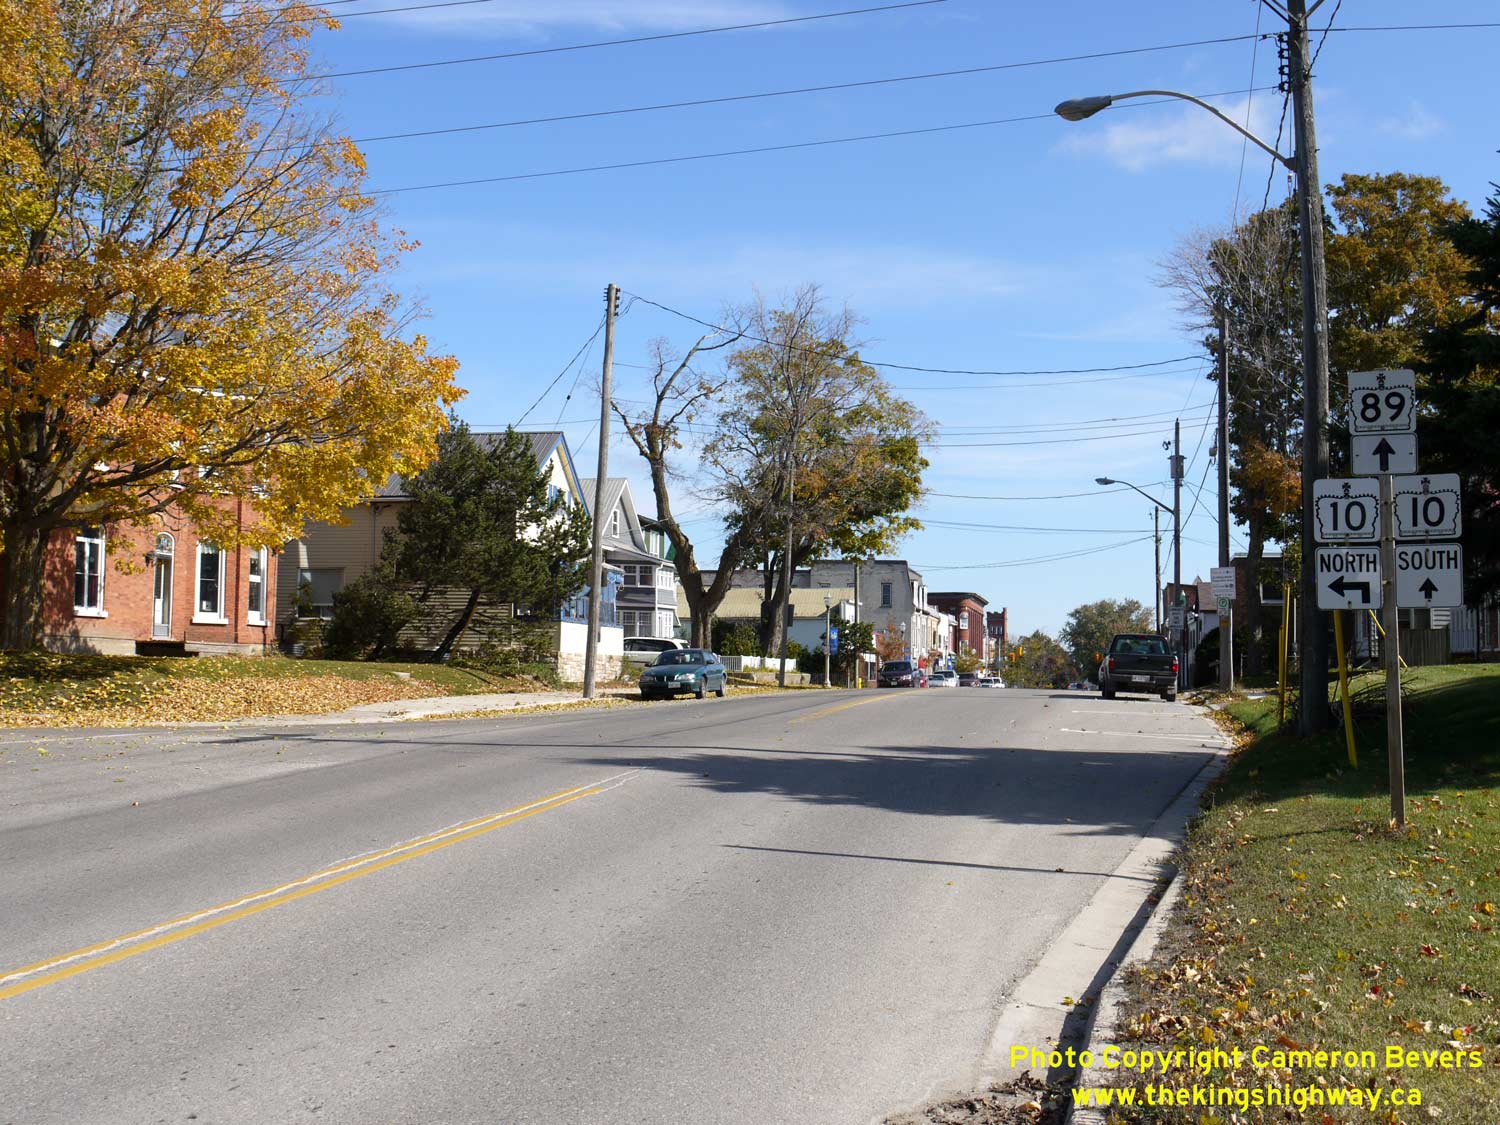
Enlarged Photo Here. (Photograph taken on October 16, 2009 - © Cameron Bevers) Right - Facing east along Main Street (Hwy 89) approaching the Hwy 10 Junction at Owen Sound Street in Shelburne. See an Enlarged Photo Here. (Photograph taken on October 16, 2009 - © Cameron Bevers) 

Left - Facing east along Main Street at the Hwy 10 & Hwy 89 Junction in Downtown Shelburne. See an
Enlarged Photo Here. (Photograph taken on October 16, 2009 - © Cameron Bevers) Right - King's Highway signs on westbound Main Street in Shelburne marking the upcoming turn-off to Hwy 10 North. See an Enlarged Photo Here. (Photograph taken on October 16, 2009 - © Cameron Bevers) 

Left - Facing east along Main Street (Hwy 10 & Hwy 89) in Downtown Shelburne. Hwy 10 & Hwy 89 share a brief overlapped route for 5 km between
Shelburne and Primrose. At Primrose, Hwy 89 continues east towards Alliston, while Hwy 10 turns right and resumes its route south towards Toronto. See an
Enlarged Photo Here. (Photograph taken on October 16, 2009 - © Cameron Bevers) Right - Junction sign assembly on Main Street at the Hwy 10 & Hwy 89 Junction in Downtown Shelburne. See an Enlarged Photo Here. (Photograph taken on October 16, 2009 - © Cameron Bevers) 

Left - Facing west along Main Street (Hwy 10 & Hwy 89) in Downtown Shelburne, approaching Owen Sound Street. Traffic wishing to continue north along Hwy 10
must turn right at Owen Sound Street. As the street name implies, Hwy 10 heads northwest to Owen Sound. Hwy 89 continues straight ahead on its route west towards
Mount Forest. See an Enlarged Photo Here. (Photograph taken on October 16, 2009 - © Cameron Bevers) Right - Junction sign assembly at the Hwy 10 & Hwy 89 Junction in Downtown Shelburne. The west junction of Hwy 10 & Hwy 89 is somewhat unusual, as it occurs in the town centre rather than at a rural or suburban highway junction. Although King's Highways often connect in urban centres, the highway junction itself is seldom situated right in the downtown central core. See an Enlarged Photo Here. (Photograph taken on October 16, 2009 - © Cameron Bevers) 

Left - Facing north along Hwy 10 from Hwy 89 in Shelburne. It is interesting to note that all of Shelburne's historic buildings surrounding this intersection
have managed to survive, thanks to the foresight of early town planners who laid out comparatively wide main streets. All too often, narrow main streets through
Ontario towns left highway engineers with the difficult decision of either demolishing historic buildings around major intersections or bypassing towns altogether in
order to accommodate transport trucks, buses and other long vehicles on Ontario's highways. See an
Enlarged Photo Here. (Photograph taken on October 16, 2009 - © Cameron Bevers) Right - The southbound Hwy 10 Stop Bar at the traffic signal had to be set far back from the intersection to allow trucks and buses to turn right onto Hwy 10 North. See an Enlarged Photo Here. (Photograph taken on October 16, 2009 - © Cameron Bevers) 

Left - A transport truck makes the right turn from Main Street (Hwy 10 & Hwy 89) onto Owen Sound Street (Hwy 10 North) in Downtown Shelburne. Although
transport trucks do have to take this corner slowly, the trucks can physically fit through the intersection. However, this situation was the exception in Ontario,
rather than the rule. In towns with narrow streets, some of the buildings around major intersections had to be demolished in order to create an intersection
which could handle transport trucks, buses and other long vehicles. See an Enlarged Photo Here. (Photograph taken on October 16, 2009 - © Cameron Bevers) Right - Facing south along Owen Sound Street (Hwy 10) at Main Street (Hwy 89). Due to the constrained geometric conditions at this intersection, the Stop Bar had to be set far back from the traffic signals in order to allow transport trucks to make right turns off of Main Street. Right turns are prohibited on red from southbound Hwy 10 to westbound Hwy 89. See an Enlarged Photo Here. (Photograph taken on October 16, 2009 - © Cameron Bevers) 
Above - Facing south along Owen Sound Street (Hwy 10) approaching the Hwy 89 Junction in Shelburne. See an
Enlarged Photo Here. (Photograph taken on October 16, 2009 - © Cameron Bevers)
Continue on to King's Highway 89 Photos: Shelburne to Hwy 11
|
|---|
Links to Adjacent King's Highway Photograph Pages:
Back to King's Highway 88 Photos /
King's Highway 89 History /
On to King's Highway 90 Photos
Ontario Highway History - Main Menu / Back to List of Highways Website contents, photos & text © 2002-2026, Cameron
Bevers (Webmaster) - All Rights Reserved / Contact Me
|
|---|