
| 
| |
|
|
This page contains photographs of British Columbia's Highway 1 (Trans-Canada Highway), arranged by location from the Highway 97
Junction at Monte Creek westerly to Kamloops. All photographs displayed on this page were taken by the Webmaster (Cameron Bevers). To view photos of other British
Columbia Highways, please select a highway number listed on the
British Columbia Photograph Index Page. Click on any thumbnail to see a larger image!
Please note that all photographs displayed on this website are protected by copyright. These photographs must not be
reproduced, published, electronically stored or copied, distributed, or posted onto other websites without my written permission. If you want to use photos from this
website, please email me first for permission. Thank-you!
|
|---|
|
Page 5: BC Highway 1 (Trans-Canada Highway) Photographs: Highway 97 to Kamloops


Left - Facing east along the Trans-Canada Highway (Hwy 1) towards Salmon Arm from the Hwy 97 Interchange at Monte Creek. See an
Enlarged Photo Here. (Photograph taken on June 5, 2015 - © Cameron Bevers) Right - Approaching the Hwy 97 Interchange on westbound Hwy 1 at Monte Creek, located about 25 km east of Kamloops. See an Enlarged Photo Here. (Photograph taken on June 5, 2015 - © Cameron Bevers) 

Left - Facing west along Hwy 1 at the Hwy 97 Overpass at Monte Creek. This structure carries ramp traffic from northbound Hwy 97 to westbound Hwy 1. There is
no exit ramp to southbound Hwy 97 from westbound Hwy 1 at this interchange. Westbound Hwy 1 traffic has to U-turn at the next interchange (Hook Road) in order to
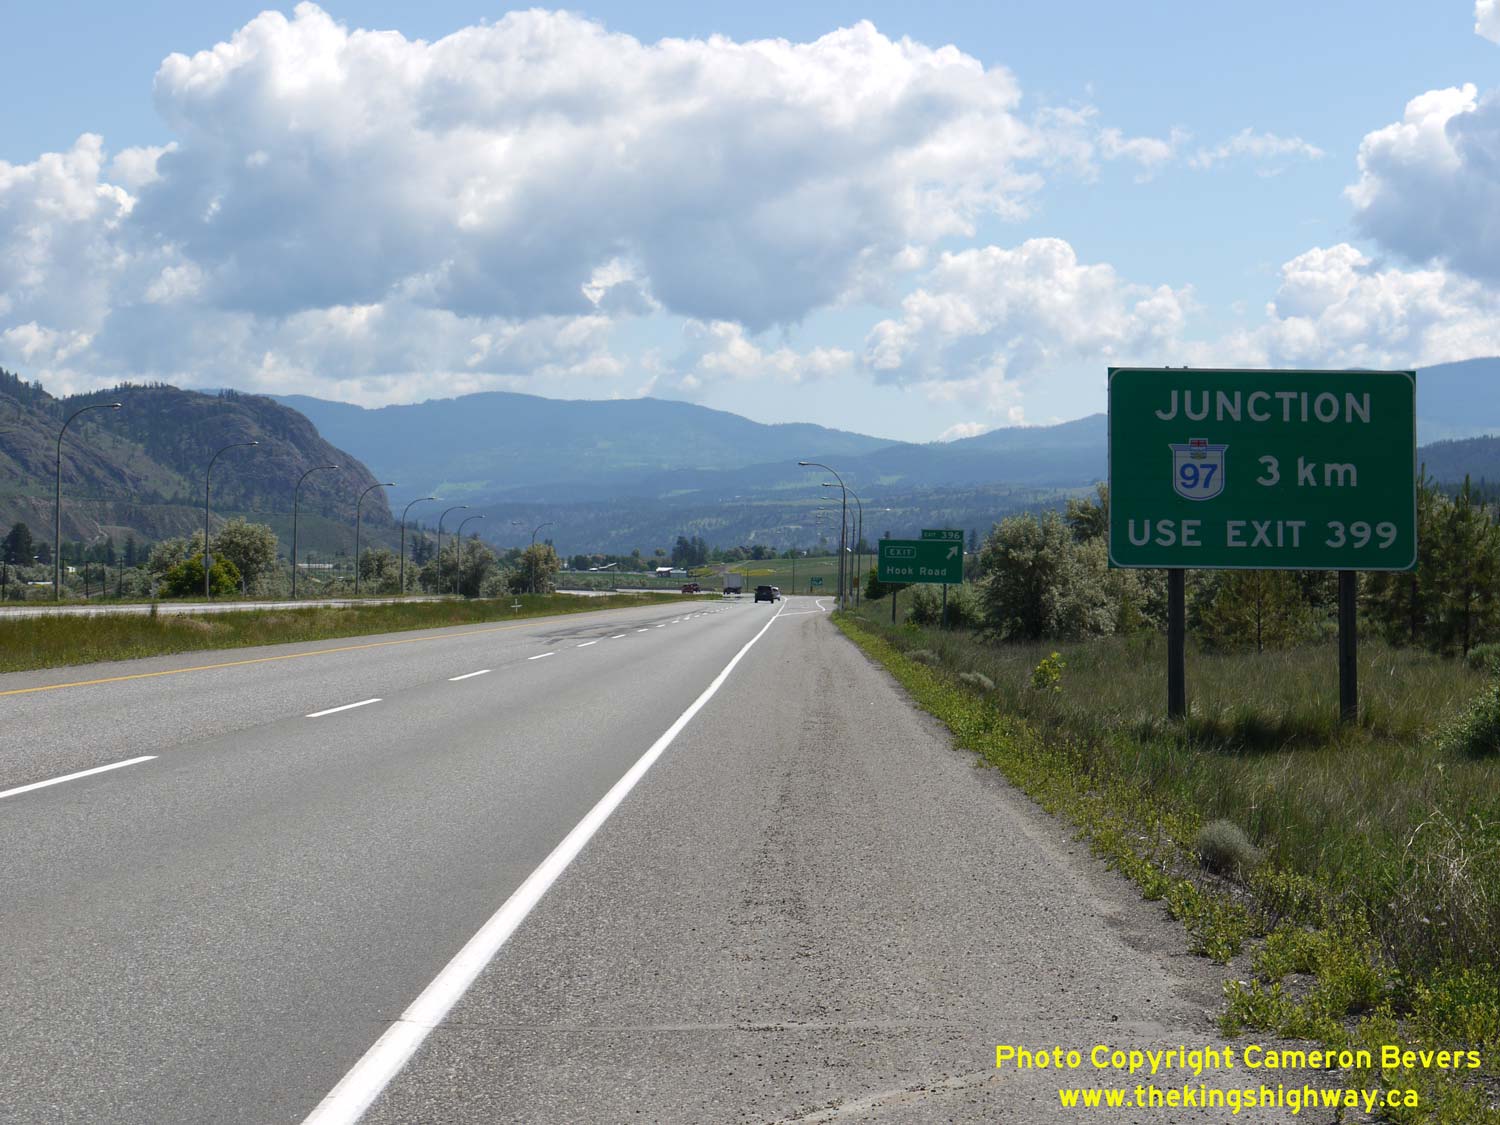
reach Hwy 97 South. See an Enlarged Photo Here. (Photograph taken on June 5, 2015 - © Cameron Bevers) Right - Distance guide sign on southbound Hwy 97 (Okanagan Highway) at the Hwy 1 Interchange at Monte Creek. Hwy 97 is British Columbia's longest provincial highway, and is also a critical transportation corridor. South of the Trans-Canada Highway, Hwy 97 serves as the main north-south route through the famous Okanagan Valley. The Okanagan Highway provides access to the cities of Vernon, Kelowna and Penticton, as well as many smaller centres. See an Enlarged Photo Here. (Photograph taken on June 5, 2015 - © Cameron Bevers) 

Left - Facing north along Hwy 97 approaching the Hwy 1 Interchange. A former alignment of Hwy 97 (Dallas Drive) can be seen at left. Before the Hwy 1 &
Hwy 97 Interchange was built in the late 1990s, Hwy 97 used to pass through the small rural community of Monte Creek. The eastern highway approach to Kamloops from
Monte Creek follows the dry South Thompson River Valley. The highway offers motorists views of desert-like landscapes which are unique to this region of Canada. See
an Enlarged Photo Here. (Photograph taken on June 5, 2015 - © Cameron Bevers) Right - Green guide sign for Hwy 1 West on northbound Hwy 97 at Monte Creek. The Okanagan Highway section of Hwy 97 comes to an end at the Hwy 1 Interchange, after travelling almost 270 km north from the Canada-United States Boundary near Osoyoos. The route of Hwy 97 follows the Trans-Canada Highway from Monte Creek westerly to Cache Creek, via Kamloops. Hwy 1 & Hwy 97 share a concurrent route for 110 km between Monte Creek and Cache Creek. See an Enlarged Photo Here. (Photograph taken on June 5, 2015 - © Cameron Bevers) 

Left - Green guide sign for Hwy 1 East on northbound Hwy 97 at Monte Creek. See an
Enlarged Photo Here. (Photograph taken on June 5, 2015 - © Cameron Bevers) Right - Green guide sign on eastbound Hwy 1 at Monte Creek marking the exit ramp to Hwy 97 South to Vernon. See an Enlarged Photo Here. (Photograph taken on June 5, 2015 - © Cameron Bevers) 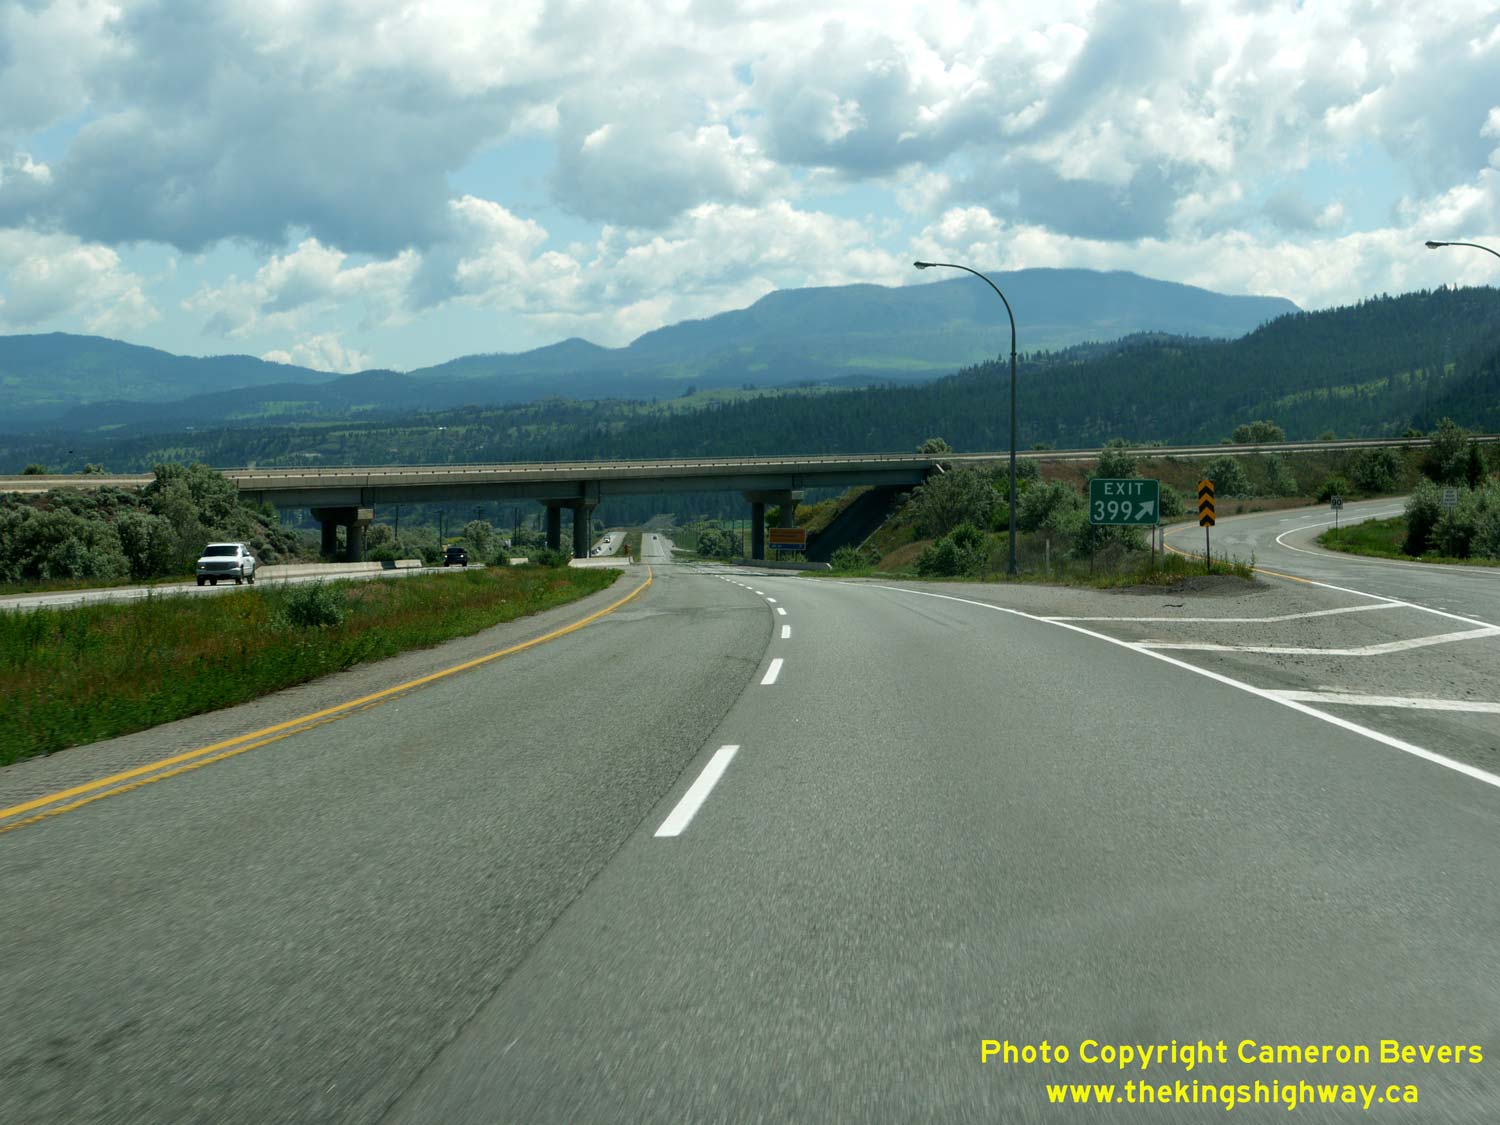

Left - Facing east along the Trans-Canada Highway (Hwy 1) towards Salmon Arm at the Hwy 97 Interchange. The overlapped routes of Hwy 1 & Hwy 97 part ways
at this interchange. Hwy 1 continues east towards Salmon Arm and Revelstoke, while Hwy 97 exits the freeway and turns south towards Vernon and Kelowna, located in
the Okanagan Valley. See an Enlarged Photo Here. (Photograph taken on June 5, 2015 - © Cameron Bevers) Right - Green guide sign on eastbound Hwy 1 marking the upcoming Hwy 97 Interchange at Monte Creek. See an Enlarged Photo Here. (Photograph taken on June 5, 2015 - © Cameron Bevers) 
Left - Facing east along the Trans-Canada Highway approaching the Hwy 97 Interchange at Monte Creek. No, your eyes are not playing tricks on you - that is
indeed a cyclist that you are seeing on the freeway's right-hand shoulder. Although it is not recommended, bicycles are legally permitted to use the shoulder on most
freeways in British Columbia, unless there are signs indicating that bicycles are prohibited. See an
Enlarged Photo Here. (Photograph taken on June 5, 2015 - © Cameron Bevers) Right - Facing west along the Trans-Canada Highway from the Hwy 97 Interchange. An advance exit sign for Hook Road & Hwy 97 South appears at right. Due to the configuration of the Hwy 97 Interchange, westbound traffic on Hwy 1 must U-turn at the adjacent Hook Road Interchange in order to reach Hwy 97 South. See an Enlarged Photo Here. (Photograph taken on June 5, 2015 - © Cameron Bevers) 

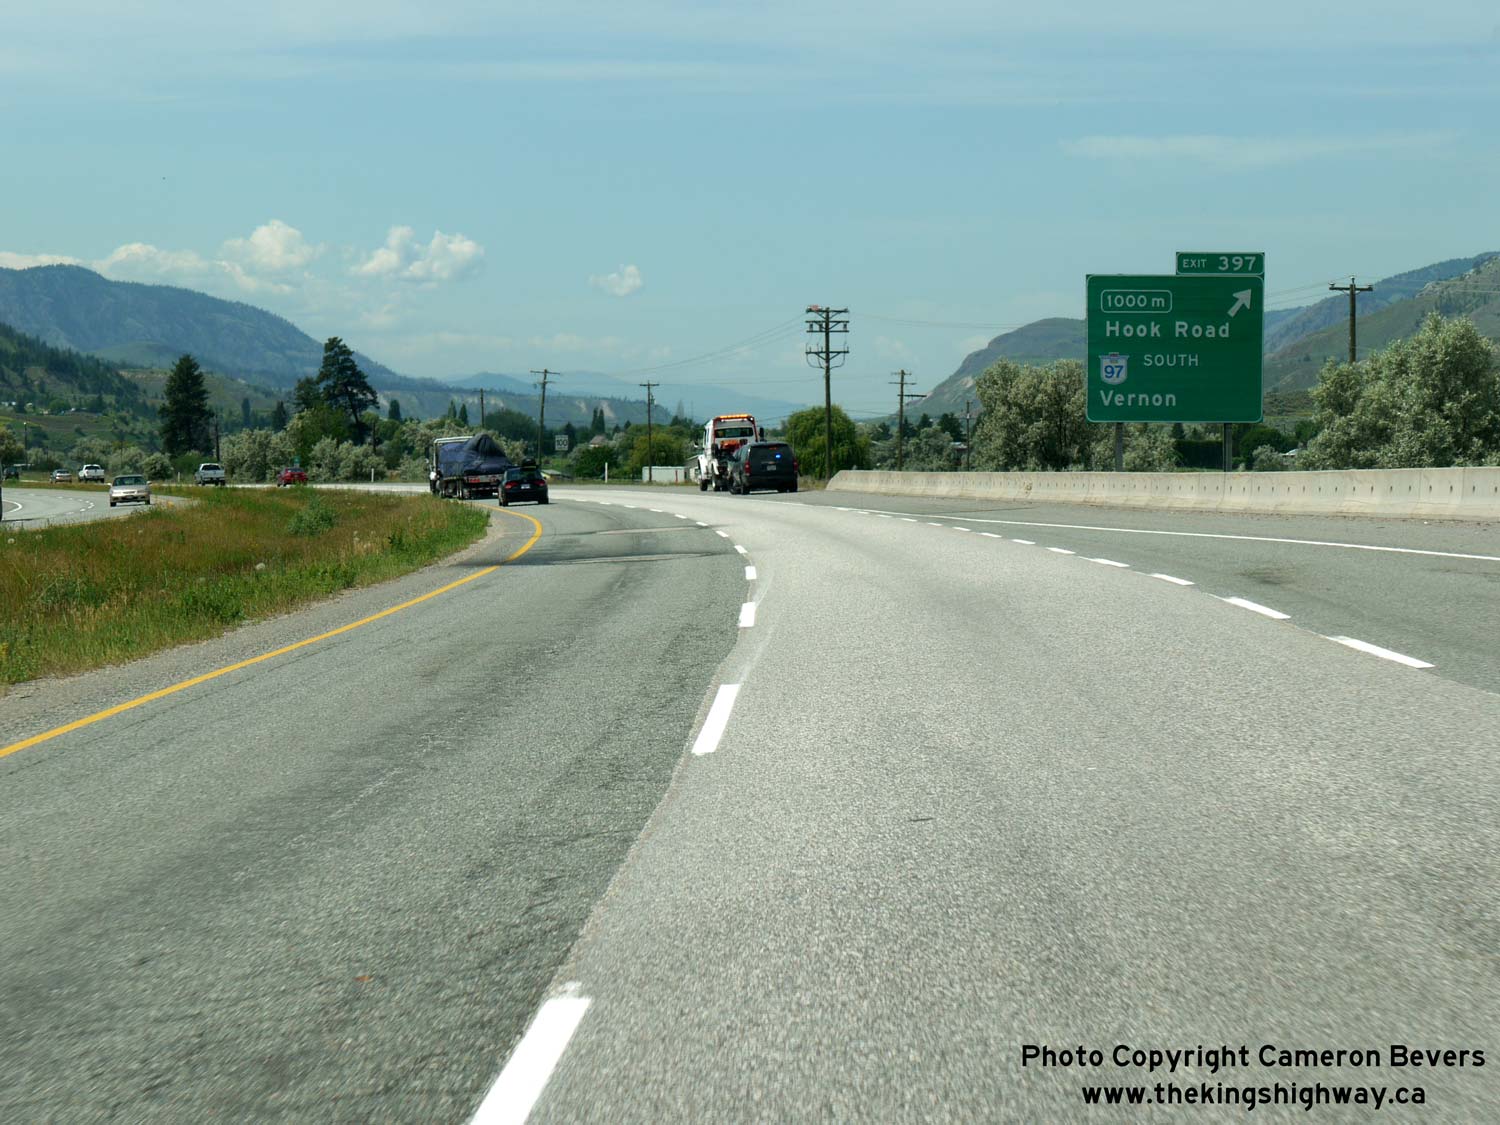
Left - Approaching the Hook Road Interchange on the westbound Trans-Canada Highway (Hwy 1 & Hwy 97). Most of the highway signs along Hwy 1 & Hwy 97 in
the Monte Creek area are in Federal Highways Administration (FHWA) font. This font type did not see widespread use in British Columbia. See an
Enlarged Photo Here. (Photograph taken on June 5, 2015 - © Cameron Bevers) Right - Green guide sign marking the exit to Hook Road on the westbound Trans-Canada Highway (Hwy 1 & Hwy 97) at Monte Creek. See an Enlarged Photo Here. (Photograph taken on June 5, 2015 - © Cameron Bevers) 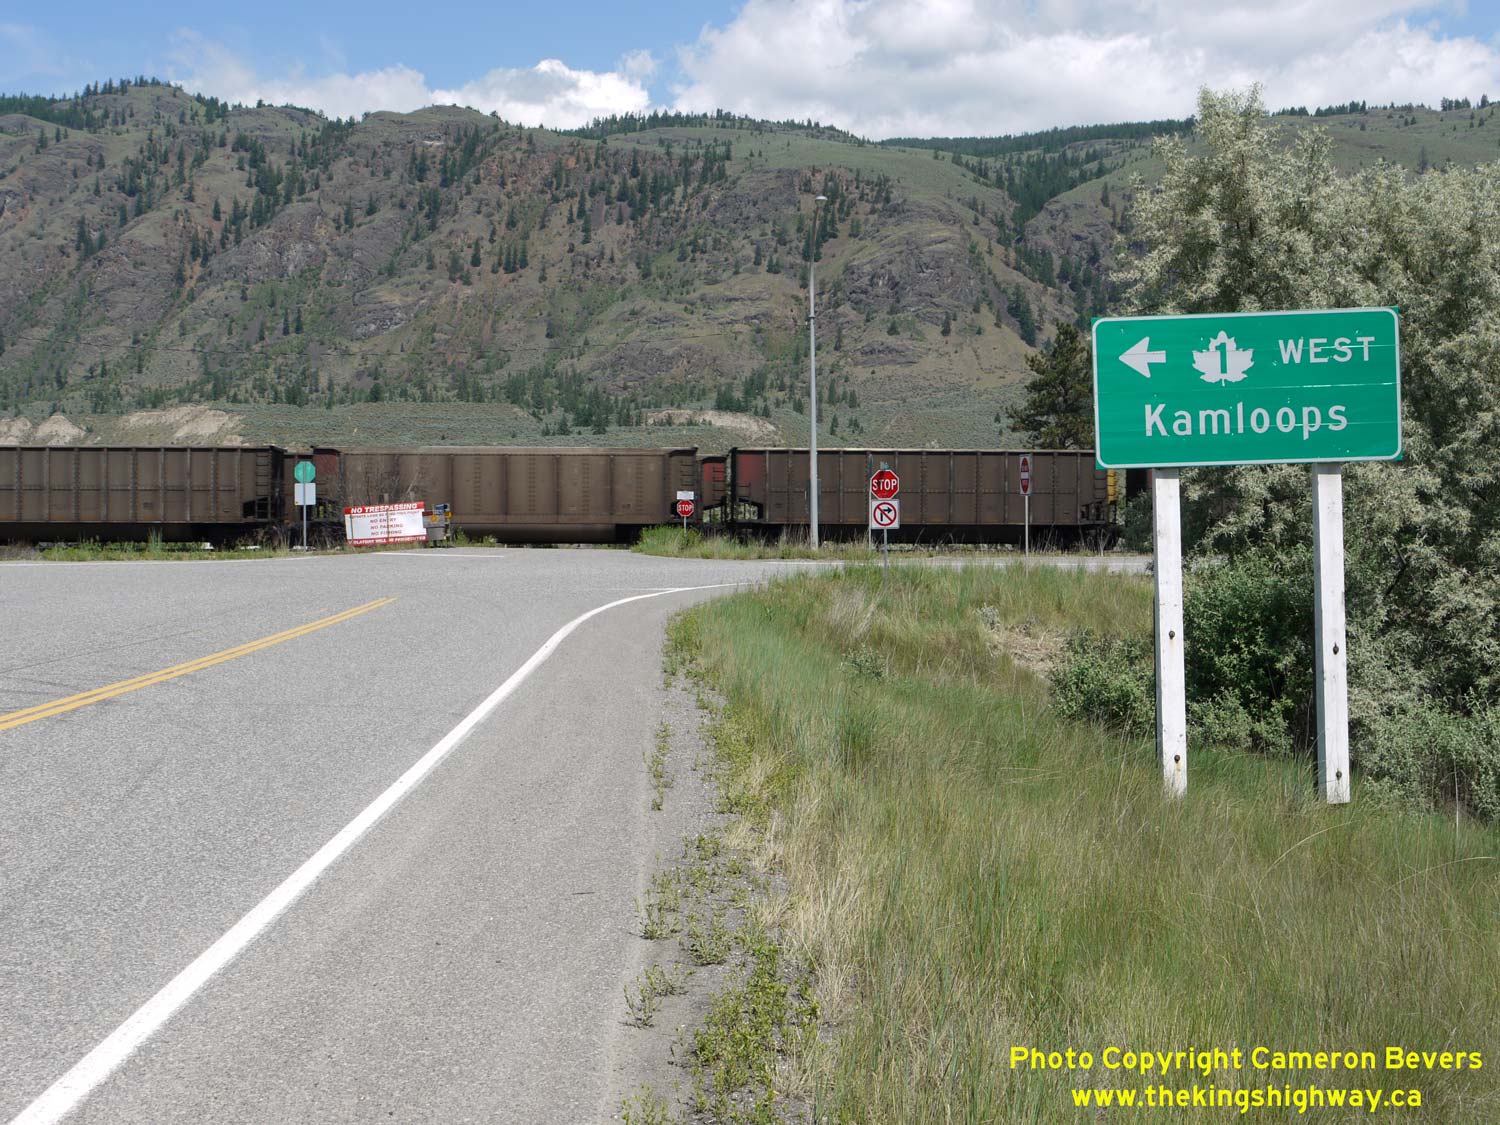

Left - Green guide sign at the Hook Road Interchange in Monte Creek marking the on-ramp to Hwy 1 West to Kamloops. Interestingly, the route of Hwy 97 is not
marked. See an Enlarged Photo Here. (Photograph taken on June 5, 2015 - © Cameron Bevers) Right - Exit ramp to Hook Road from westbound Hwy 1 & Hwy 97. The U-turn route for Hwy 97 South turns left at the stop sign. See an Enlarged Photo Here. (Photograph taken on June 5, 2015 - © Cameron Bevers) 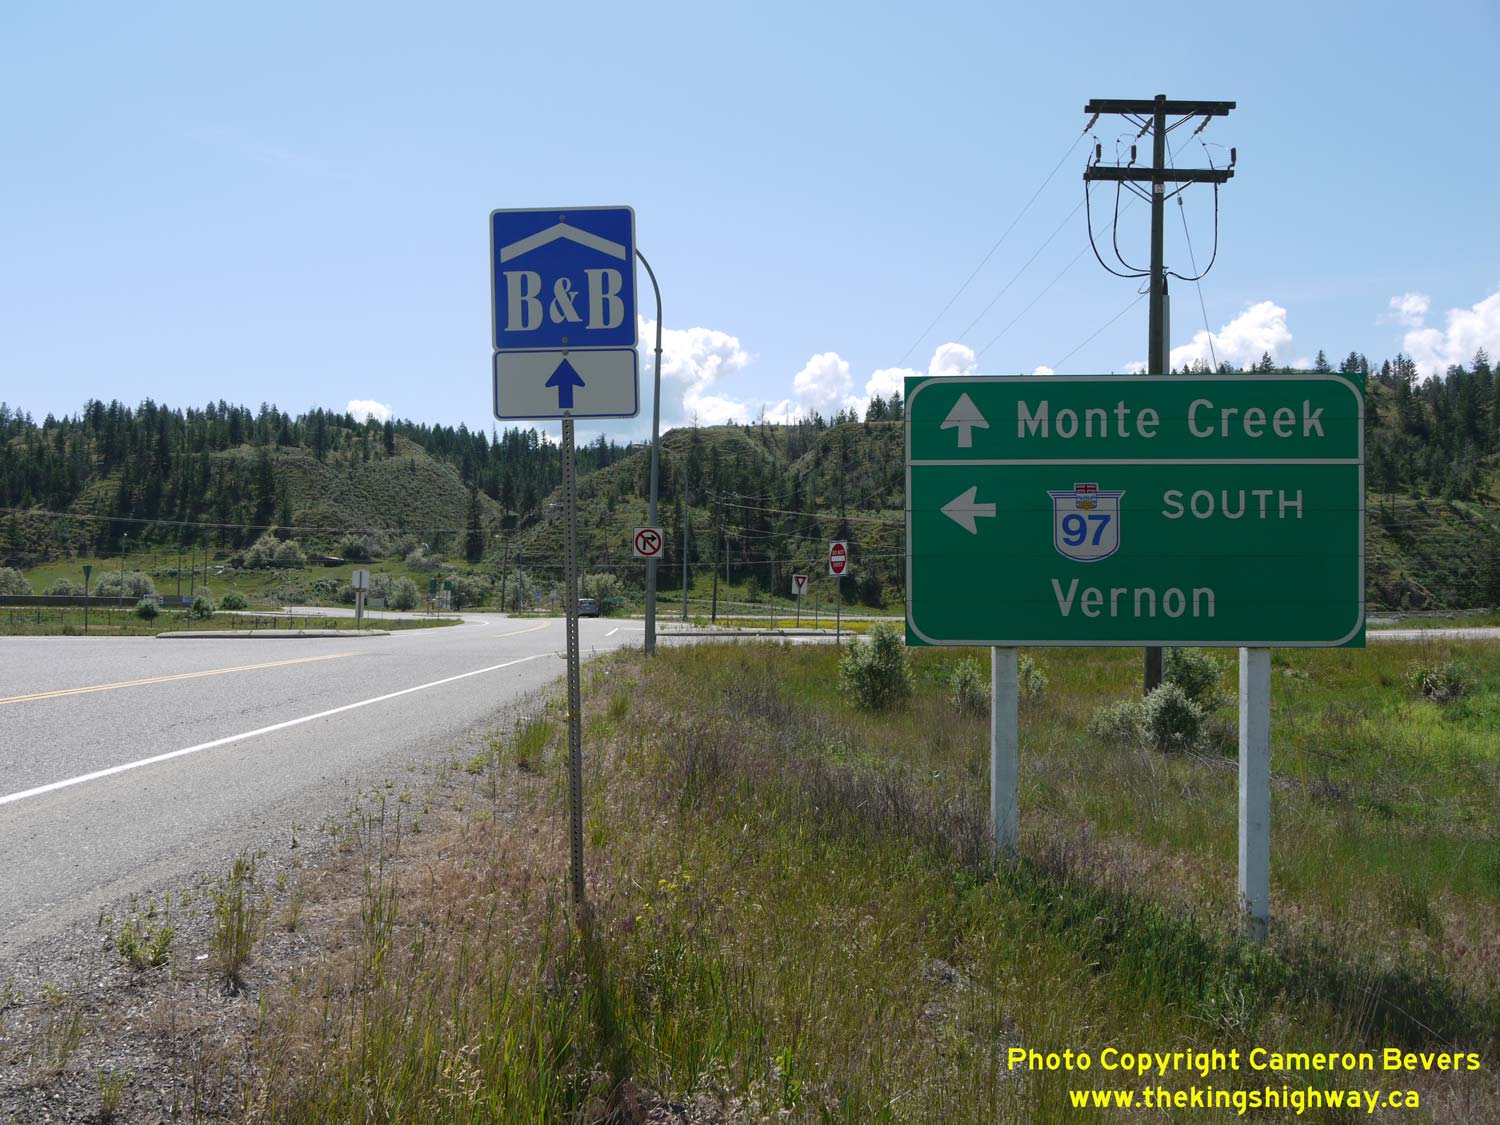

Left - Green guide sign on southbound Hook Road in Monte Creek, marking the U-turn route to Hwy 97 South. Interestingly, Hwy 1 isn't signed at all going
southbound on Hook Road. Heading northbound on Hook Road, both Hwy 1 East and Hwy 1 West are signed, but not Hwy 97 North. See an
Enlarged Photo Here. (Photograph taken on June 5, 2015 - © Cameron Bevers) Right - Junction sign assembly on northbound Hook Road at the Hwy 1 & Hwy 97 Interchange in Monte Creek. See an Enlarged Photo Here. (Photograph taken on June 5, 2015 - © Cameron Bevers) 
Left - Green guide sign marking the exit to Hook Road on the eastbound Trans-Canada Highway (Hwy 1 & Hwy 97) at Monte Creek. See an
Enlarged Photo Here. (Photograph taken on June 5, 2015 - © Cameron Bevers) Right - Motorists on the eastbound Trans-Canada Highway (Hwy 1 & Hwy 97) are provided with plenty of advance notice that Hwy 97 in about to depart from the freeway ahead. The two highways have shared an overlapped route since Cache Creek, located more than 100 km to the west. See an Enlarged Photo Here. (Photograph taken on June 5, 2015 - © Cameron Bevers) 
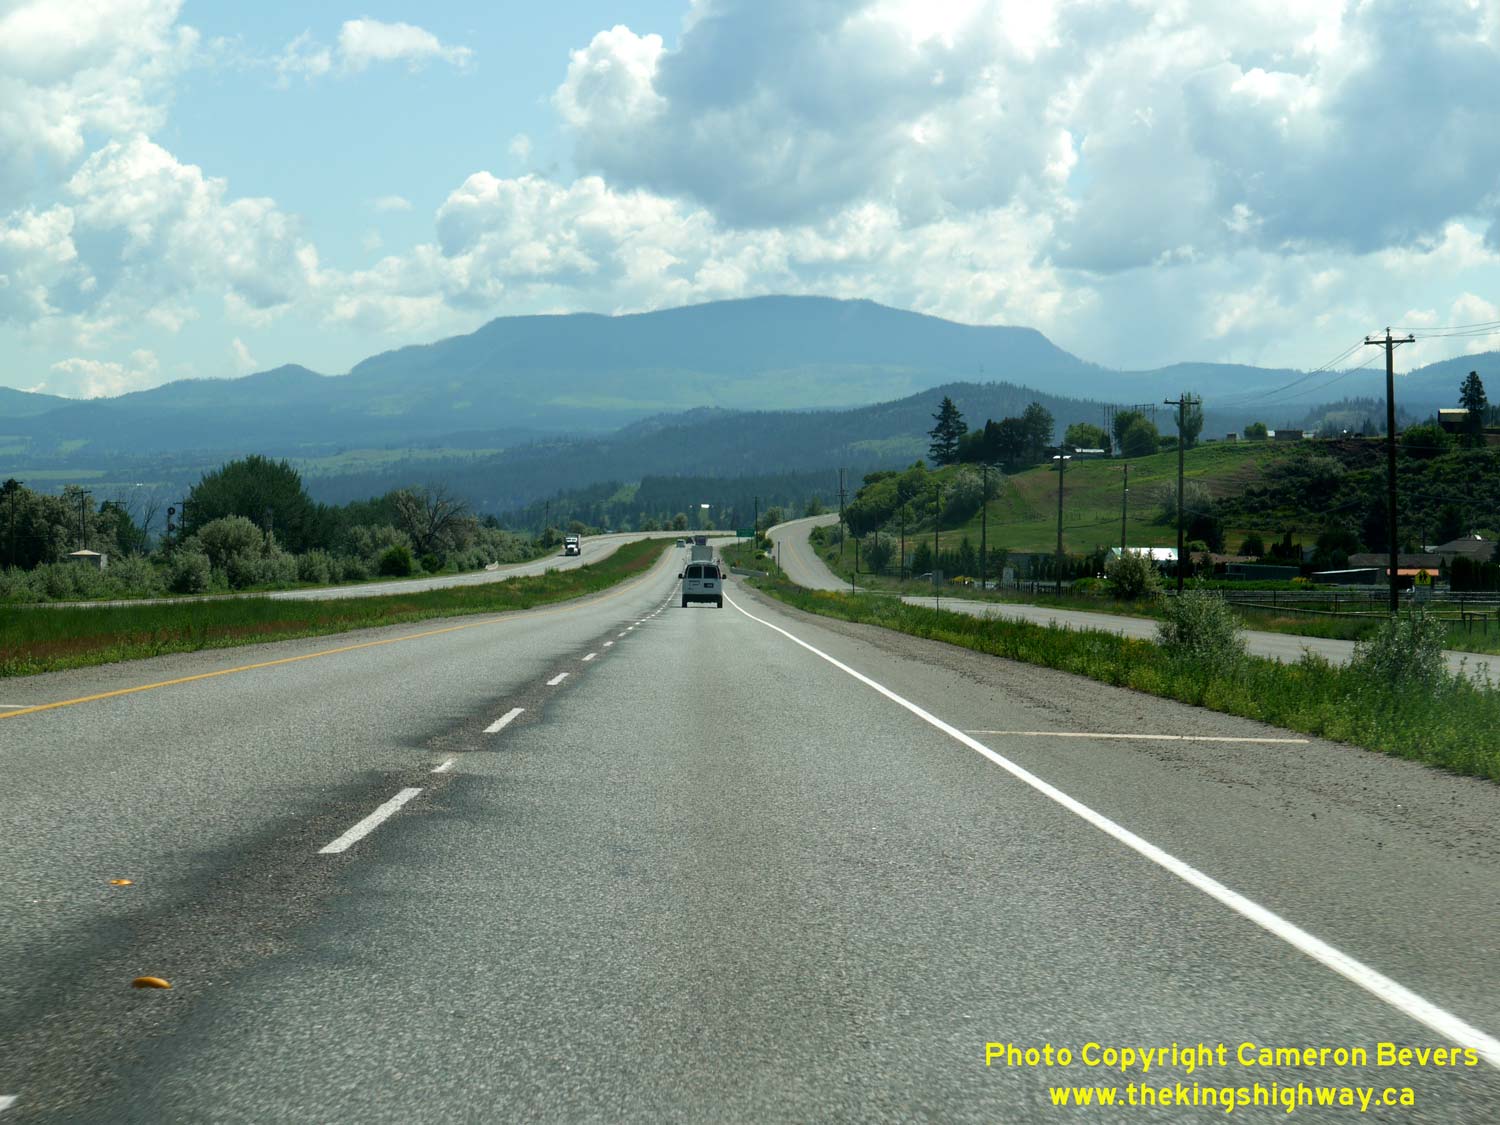
Left - View of the Trans-Canada Highway (Hwy 1 & Hwy 97) about 4 km west of Monte Creek, facing west towards Kamloops. See an
Enlarged Photo Here. (Photograph taken on June 5, 2015 - © Cameron Bevers) Right - Facing east along the Trans-Canada Highway (Hwy 1 & Hwy 97) about 4 km west of Monte Creek, facing east towards Salmon Arm. See an Enlarged Photo Here. (Photograph taken on June 5, 2015 - © Cameron Bevers) 

Left - View of Hwy 1 & Hwy 97 at the Lafarge Road Interchange, facing east towards Monte Creek. See an
Enlarged Photo Here. (Photograph taken on June 5, 2015 - © Cameron Bevers) Right - Trans-Canada Highway route markers at the Lafarge Road Interchange east of Kamloops. See an Enlarged Photo Here. (Photograph taken on June 5, 2015 - © Cameron Bevers) 

Left - Facing west along the Trans-Canada Highway (Hwy 1 & Hwy 97) towards Kamloops at the Lafarge Road Interchange. See an
Enlarged Photo Here. (Photograph taken on June 5, 2015 - © Cameron Bevers) Right - The Trans-Canada Highway enters into a much drier climate west of Monte Creek. Around the Lafarge Road Interchange, sagebrush begins to appear along the highway. Many of British Columbia's interior valleys have dry, desert-like climates. The high coast mountains shield the interior valleys from much of the moisture off of the Pacific Ocean. See an Enlarged Photo Here. (Photograph taken on June 5, 2015 - © Cameron Bevers) 

Left - Facing east along Hwy 1 & Hwy 97 at the Lafarge Road Interchange east of Kamloops. See an
Enlarged Photo Here. (Photograph taken on June 5, 2015 - © Cameron Bevers) Right - Approaching Lafarge Road on the eastbound Trans-Canada Highway (Hwy 1 & Hwy 97) about 17 km east of Kamloops. See an Enlarged Photo Here. (Photograph taken on June 5, 2015 - © Cameron Bevers) 

Left - Kamloops Welcome Sign on the westbound Trans-Canada Highway (Hwy 1 & Hwy 97). The municipal limits of Kamloops actually extend a long way east along
the South Thompson River, stretching almost all the way to Monte Creek. The city centre lies about 18 km to the west of the Welcome Sign. See an
Enlarged Photo Here. (Photograph taken on June 5, 2015 - © Cameron Bevers) Right - Green guide sign on the westbound Trans-Canada Highway (Hwy 1 & Hwy 97) approaching the Kokanee Way Interchange. See an Enlarged Photo Here. (Photograph taken on June 5, 2015 - © Cameron Bevers) 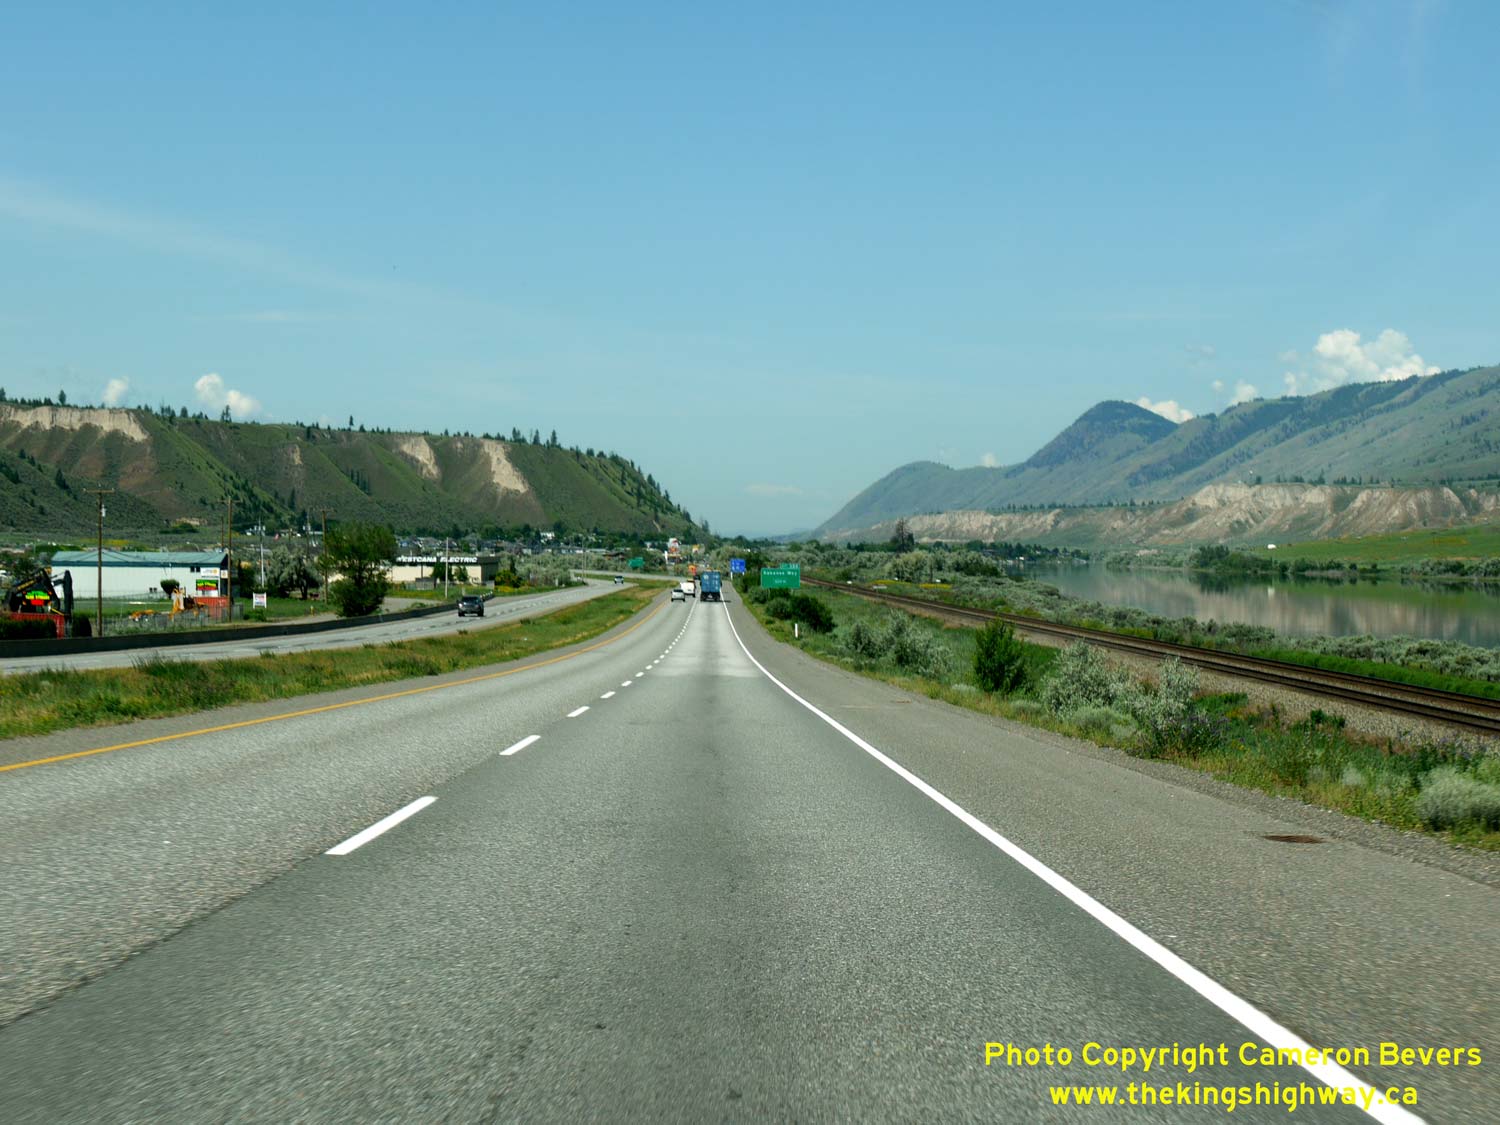

Left - Facing west along Hwy 1 & Hwy 97 approaching the Kokanee Way Interchange in Kamloops. See an
Enlarged Photo Here. (Photograph taken on June 5, 2015 - © Cameron Bevers) Right - Green guide sign marking the exit to Kokanee Way on the westbound Trans-Canada Highway (Hwy 1 & Hwy 97). See an Enlarged Photo Here. (Photograph taken on June 5, 2015 - © Cameron Bevers) 

Left - View of the Trans-Canada Highway (Hwy 1 & Hwy 97), facing east from the Kokanee Way Interchange in Kamloops. See an
Enlarged Photo Here. (Photograph taken on June 5, 2015 - © Cameron Bevers) Right - Facing west along the Trans-Canada Highway (Hwy 1 & Hwy 97) towards Downtown Kamloops at the Kokanee Way Interchange. As the highway winds its way along the South Thompson River Valley, the climate gets progressively drier with each passing mile. The transition between these landscapes is rather dramatic. See an Enlarged Photo Here. (Photograph taken on June 5, 2015 - © Cameron Bevers) 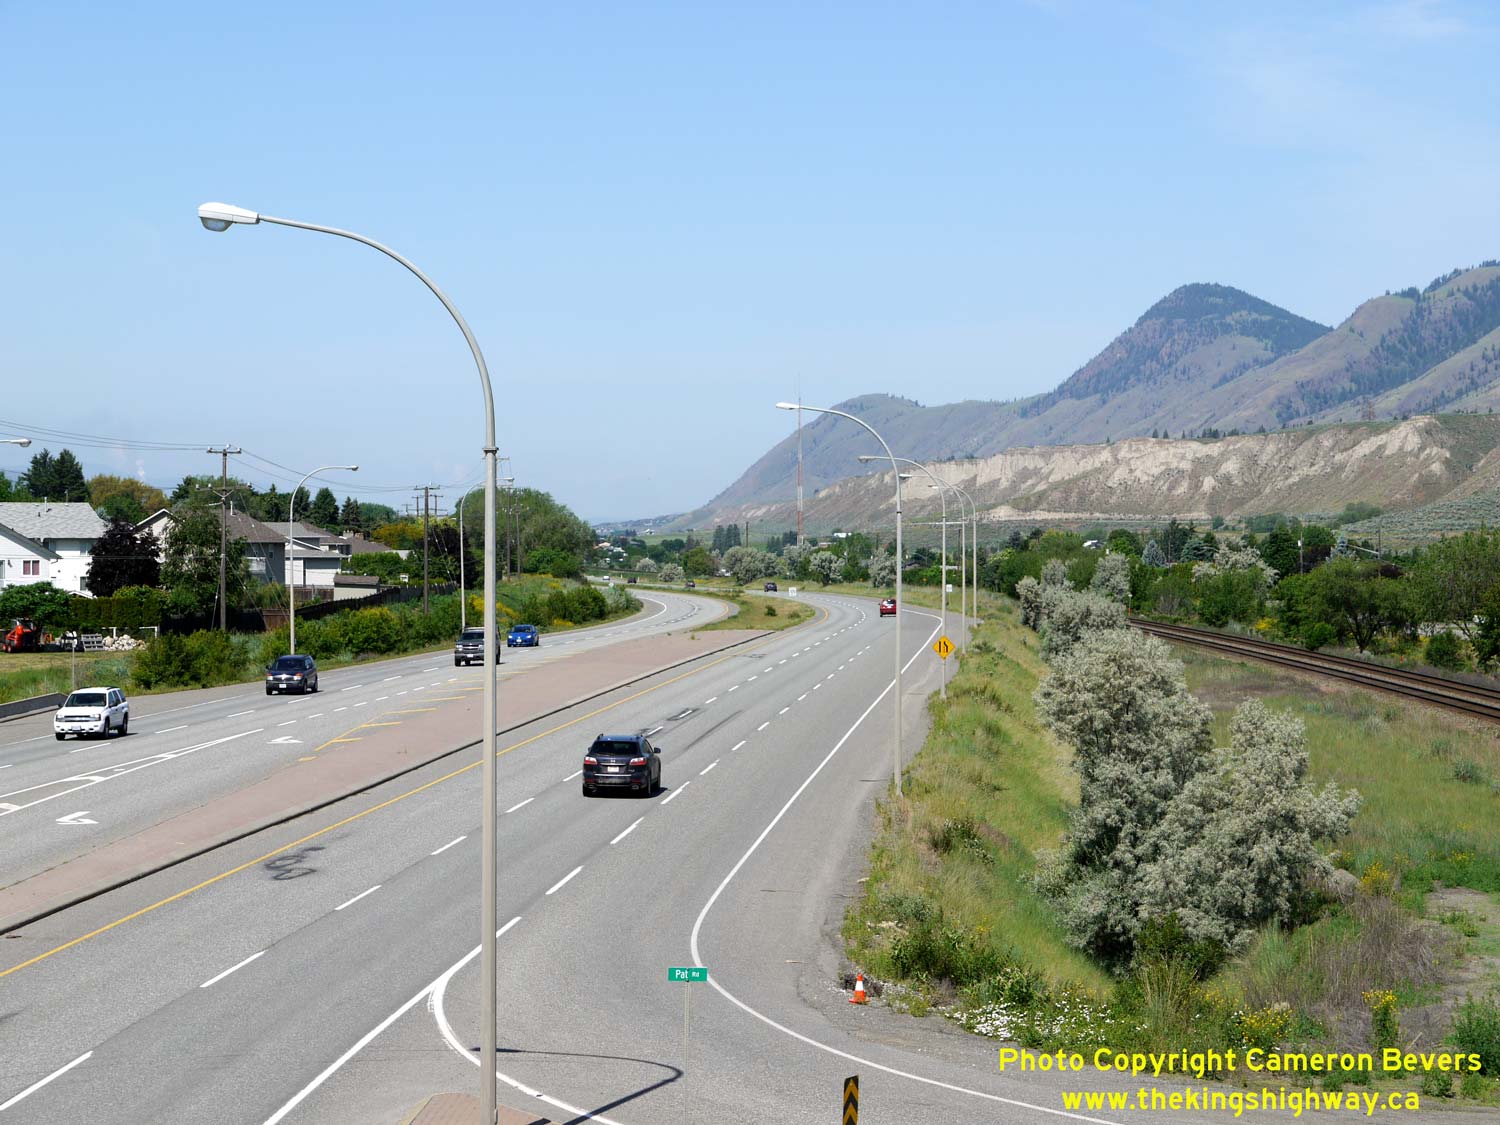

Left - Facing west along Hwy 1 & Hwy 97 from Pat Drive Pedestrian Overpass in Kamloops. Pat Drive meets the Trans-Canada Highway at an at-grade
intersection. It is one of several at-grade intersections along the highway on the eastern approach to Kamloops. See an
Enlarged Photo Here. (Photograph taken on June 5, 2015 - © Cameron Bevers) Right - Facing east along Hwy 1 & Hwy 97 towards Monte Creek from Pat Drive in Kamloops. See an Enlarged Photo Here. (Photograph taken on June 5, 2015 - © Cameron Bevers) 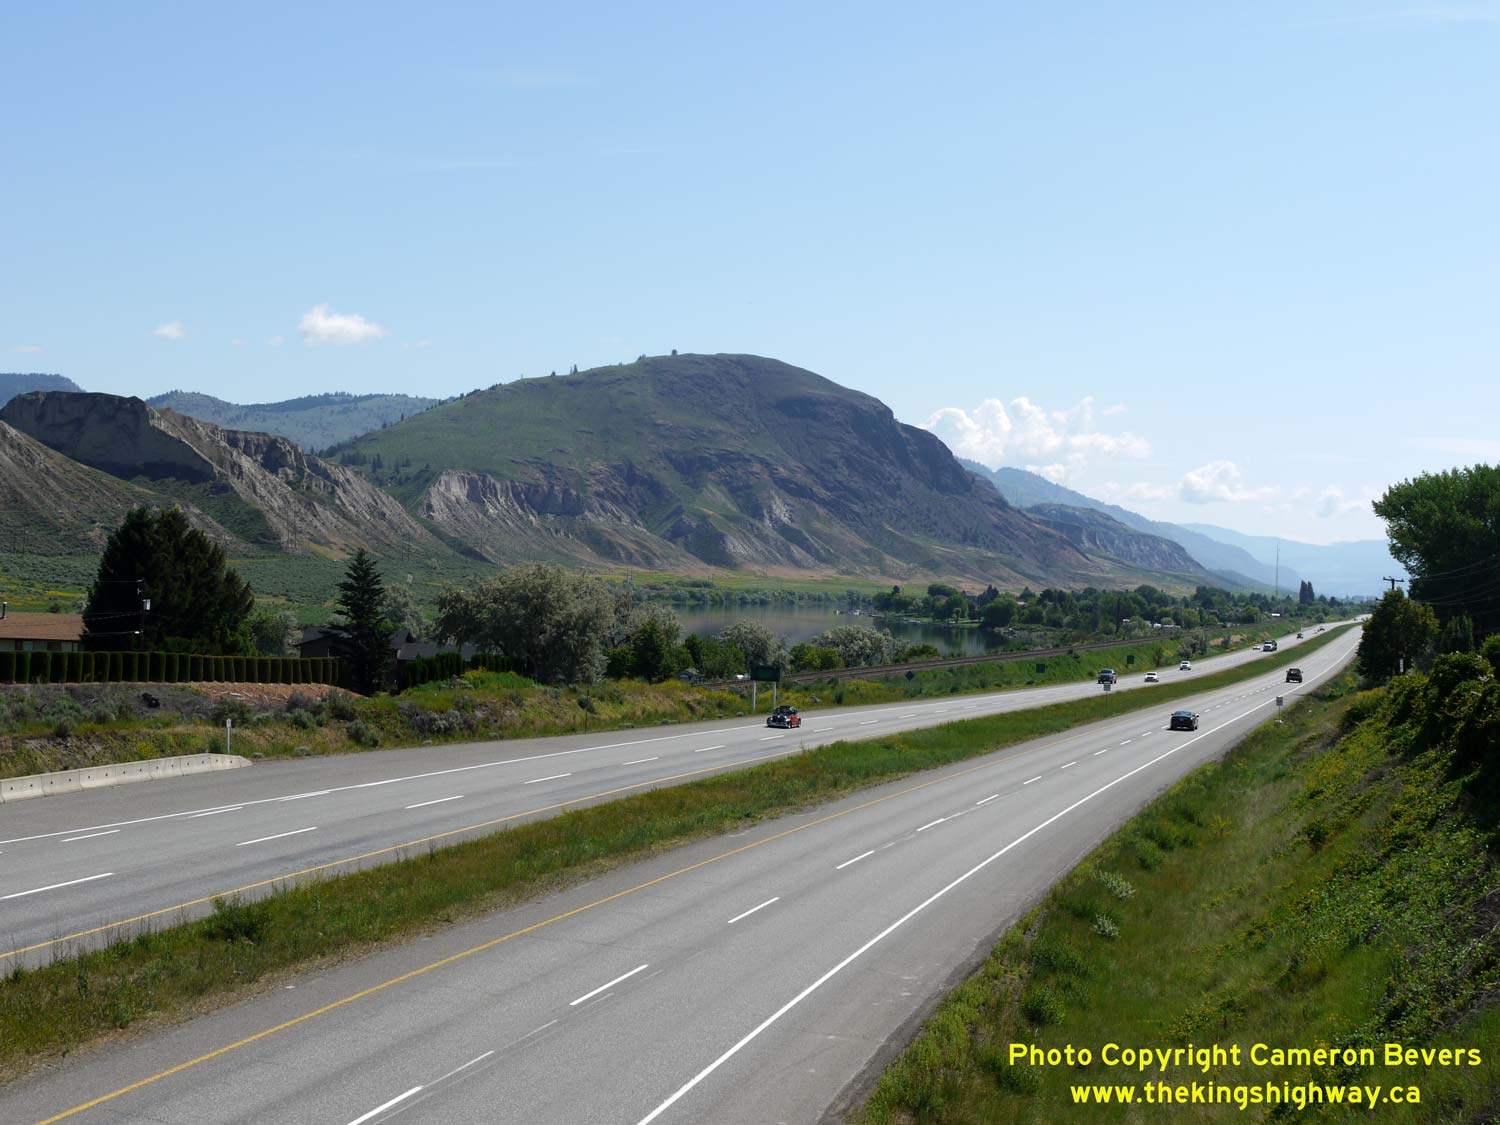
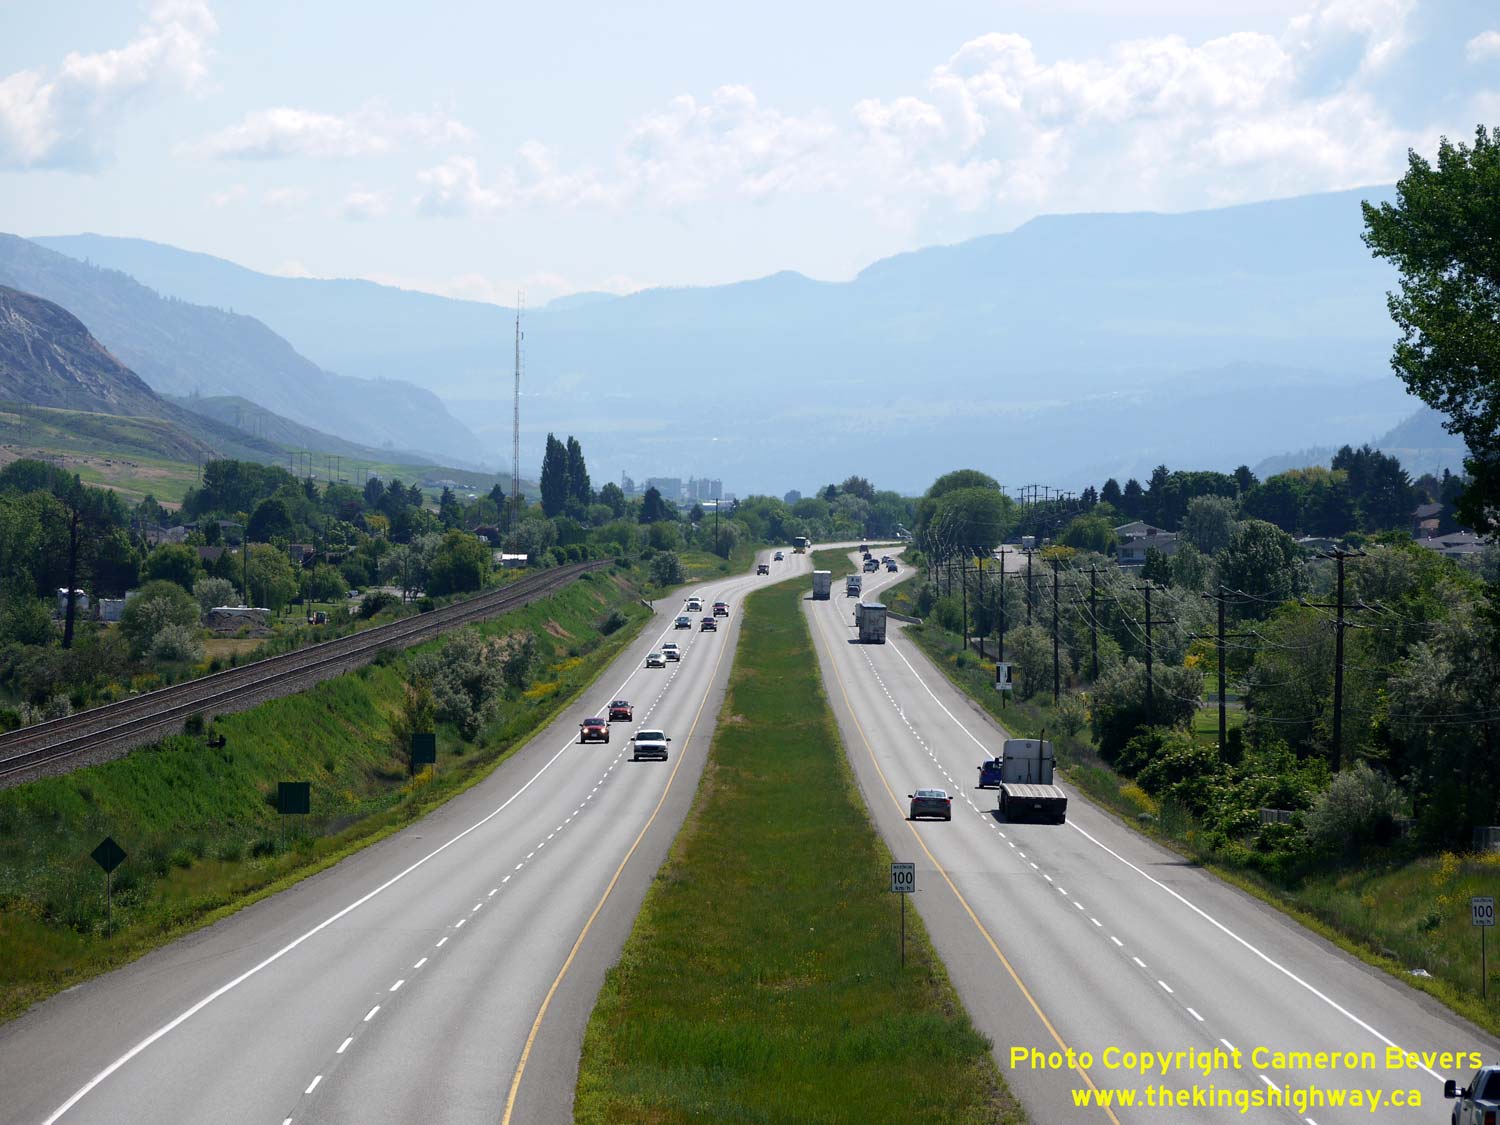
Left - View of the Trans-Canada Highway (Hwy 1 & Hwy 97) about 11 km east of Downtown Kamloops, facing east towards Monte Creek. See an
Enlarged Photo Here. (Photograph taken on June 5, 2015 - © Cameron Bevers) Right - Facing east along Hwy 1 & Hwy 97 from the Viking Drive Pedestrian Overpass in Kamloops. The hazy mountains in the background lie to the east of Monte Creek. See an Enlarged Photo Here. (Photograph taken on June 5, 2015 - © Cameron Bevers) 

Left - Approaching the Dallas Drive & Kipp Road Interchange on Hwy 1 & Hwy 97 in Kamloops, facing west. This is the last grade-separated interchange
along the Trans-Canada Highway before the divided highway ends and the road becomes an arterial street through Kamloops' eastern commercial strip. See an
Enlarged Photo Here. (Photograph taken on June 5, 2015 - © Cameron Bevers) Right - Facing east along Hwy 1 & Hwy 97 from Holman Road, located about 9 km east of Downtown Kamloops. See an Enlarged Photo Here. (Photograph taken on June 5, 2015 - © Cameron Bevers) 
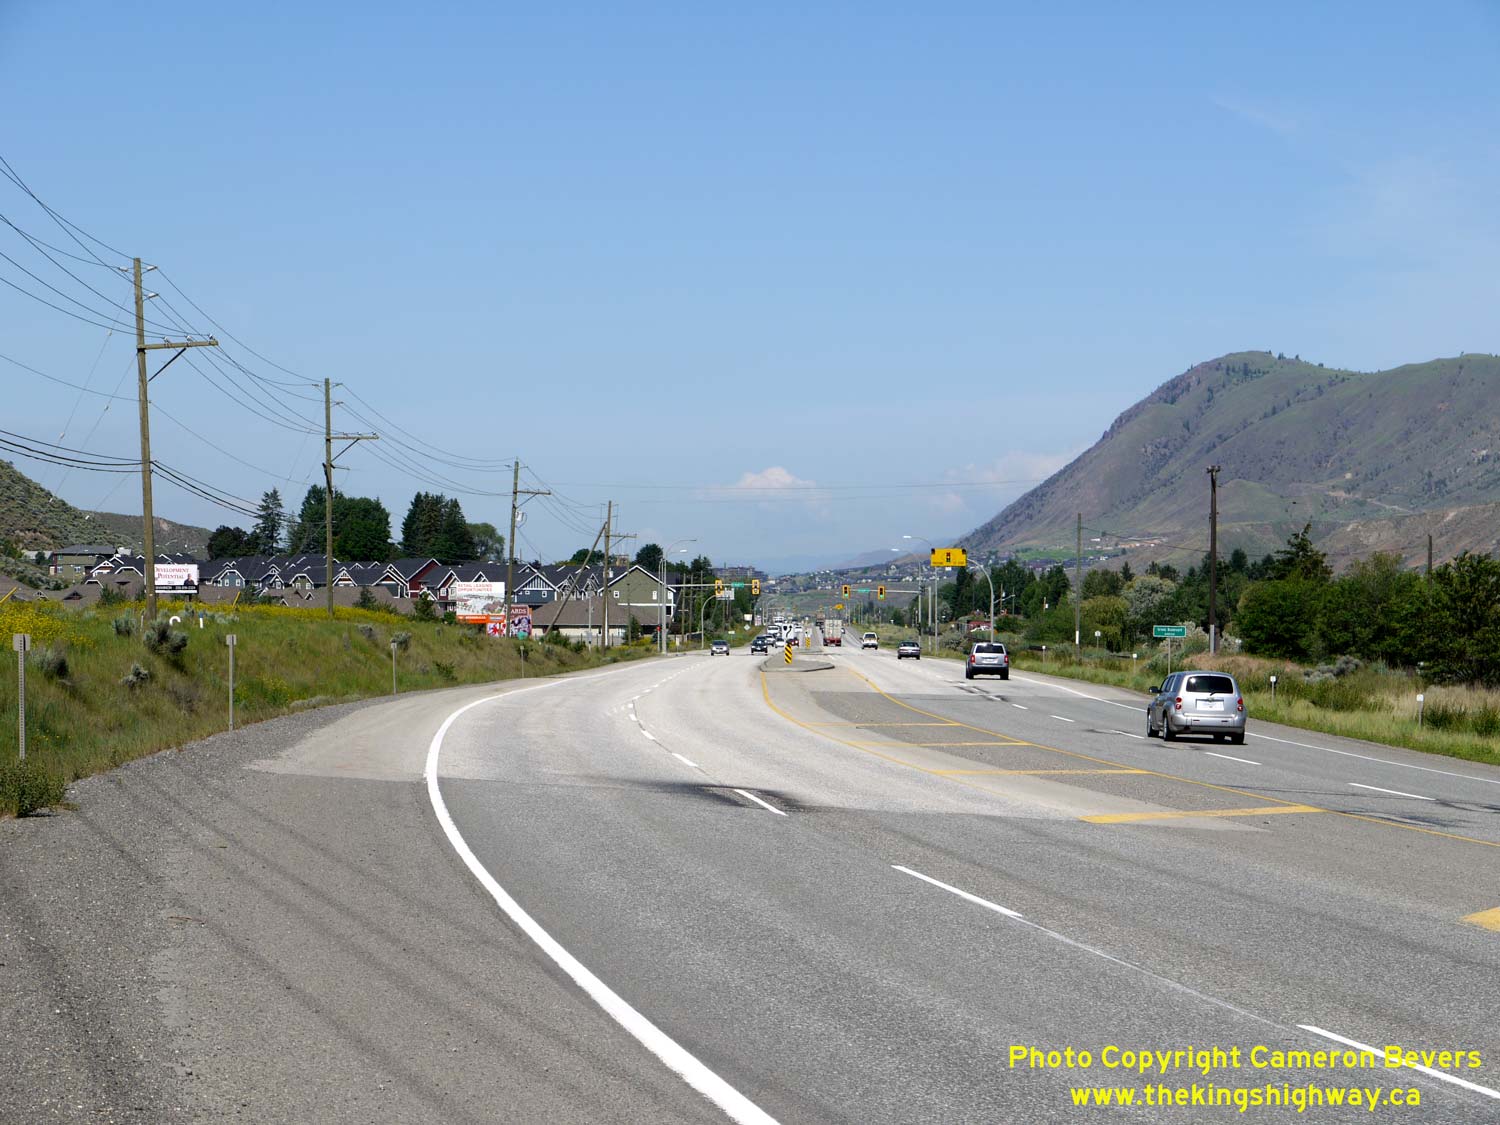
Left - Start of the divided highway near Grand Boulevard in Kamloops. From this point easterly to Monte Creek, Hwy 1 & Hwy 97 is a four-lane divided
highway with several interchanges and a handful of at-grade intersections. Portions of the route have freeway characteristics, with full access control. See an
Enlarged Photo Here. (Photograph taken on June 5, 2015 - © Cameron Bevers) Right - Facing west along the Trans-Canada Highway (Hwy 1 & Hwy 97) at Grand Boulevard, located about 7 km east of Downtown Kamloops. From this point westerly to the start of the Kamloops Freeway at the Hwy 5 Interchange, Hwy 1 & Hwy 97 is an undivided four-lane arterial street with numerous signalized intersections. See an Enlarged Photo Here. (Photograph taken on June 5, 2015 - © Cameron Bevers) 

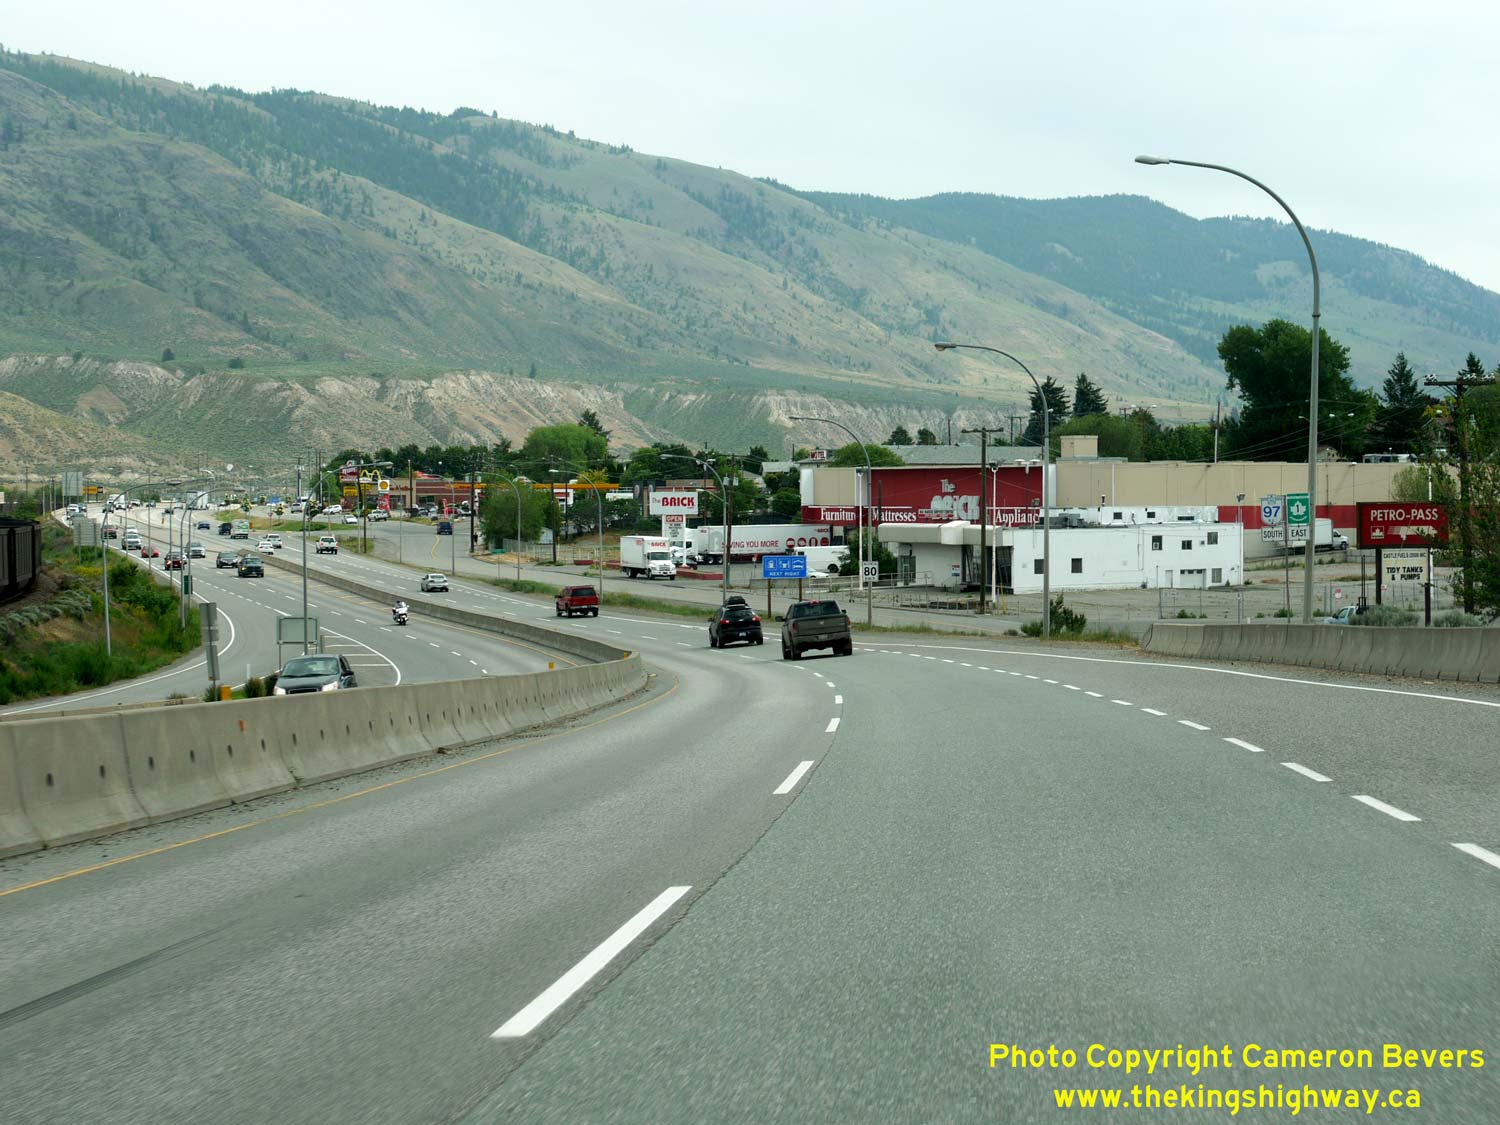
Left - Facing east along Hwy 1 & Hwy 97 at Vicars Road in Kamloops. See an
Enlarged Photo Here. (Photograph taken on June 1, 2015 - © Cameron Bevers) Right - Approaching the Kamloops Interchange on the Trans-Canada Highway (Hwy 1 & Hwy 97), facing west from Comazzetto Road. This complicated interchange marks the beginning of the Kamloops Freeway, and provides access to Downtown Kamloops via Battle Street and the Southern Yellowhead Highway (Hwy 5 North). Comazzetto Road is the final at-grade intersection on Hwy 1 & Hwy 97 before the freeway resumes. All turns are permitted at Comazzetto Road, except outbound left-turns to the westbound Trans-Canada Highway. See an Enlarged Photo Here. (Photograph taken on May 31, 2015 - © Cameron Bevers) 
Left - Kamloops' eastern commercial strip is situated along a Frontage Road on the southern side of the Trans-Canada Highway. Several municipal streets
intersect Hwy 1 & Hwy 97 over the next few kilometres, but only the signalized intersections allow for all-moves access. The heavily-utilized exit ramp to
Downtown Kamloops (Battle Street) can be seen departing from the freeway at left. See an
Enlarged Photo Here. (Photograph taken on June 1, 2015 - © Cameron Bevers) Right - Facing east along Hwy 1 & Hwy 97 from the Battle Street Underpass in Kamloops. See an Enlarged Photo Here. (Photograph taken on June 1, 2015 - © Cameron Bevers) 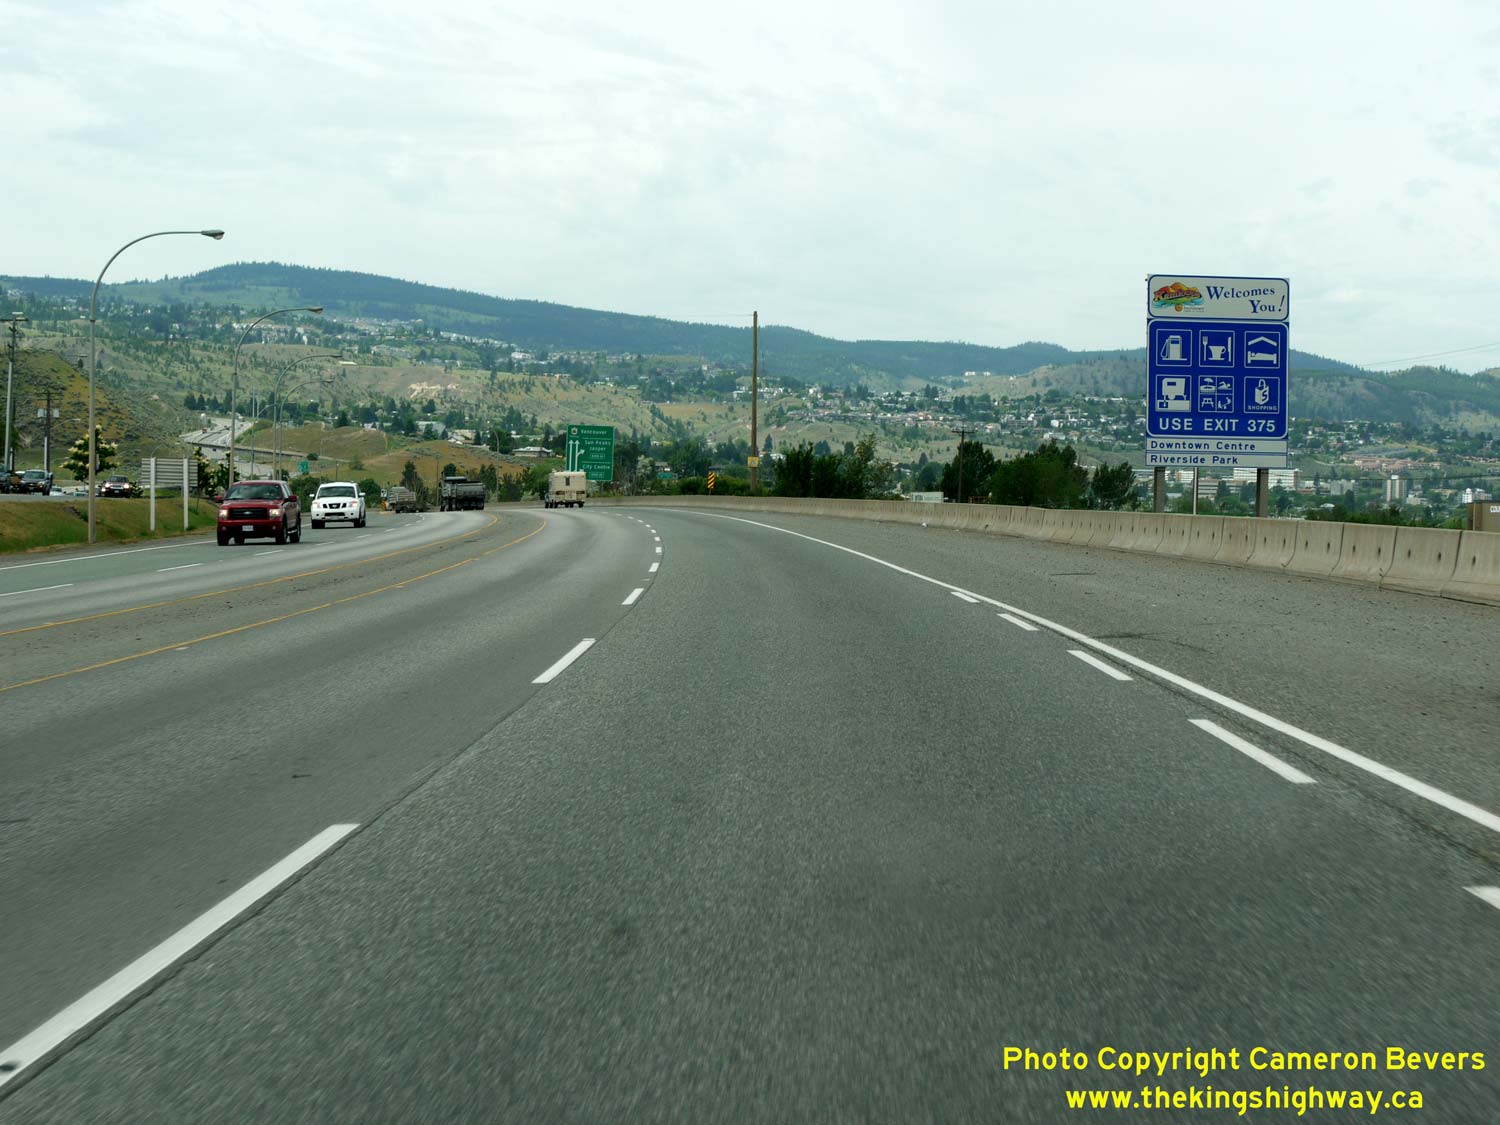

Left - Facing west along Hwy 1 & Hwy 97 between Vicars Road and the Battle Street Interchange in Kamloops. See an
Enlarged Photo Here. (Photograph taken on June 1, 2015 - © Cameron Bevers) Right - Green guide sign for the Southern Yellowhead Highway (Hwy 5 North) and Battle Street on westbound Hwy 1 & Hwy 97 in Kamloops. See an Enlarged Photo Here. (Photograph taken on June 1, 2015 - © Cameron Bevers) 
Above - Start of the Kamloops Freeway at the Battle Street Interchange, facing west. See an
Enlarged Photo Here. (Photograph taken on June 1, 2015 - © Cameron Bevers)
Continue west along BC Highway 1 from Kamloops to the Coquihalla Highway |
|---|
Links to Adjacent BC Highway Photograph Pages:
Back to BC Highway 395 Photos /
British Columbia Highways Photo Index /
On to BC Highway 3 Photos
Ontario Highway History - Main Menu / Vacation Highway Photos - Main Menu Website contents, photos & text © 2002-2026, Cameron
Bevers (Webmaster) - All Rights Reserved / Contact Me
|
|---|