
| 
| |
|
|
This page contains present day photos (Year 2000 to date) of Ontario's King's Highway 121, arranged by location from Minden
easterly to Paudash. All photographs displayed on this page were taken by the Webmaster (Cameron Bevers), unless specifically noted otherwise. Click on any
thumbnail to see a larger image!
Please note that all photographs displayed on this
website are protected by copyright. These photographs must not be reproduced, published,
electronically stored or copied, distributed, or posted onto other websites without
my written permission. If you want to use photos from this website, please
email me first for permission. Thank-you!
|
|---|
|
Page 2: Present Day King's Highway 121 Photographs (Minden to Paudash)


Left - Facing north along Hwy 35 between Minden and the former Hwy 121 North Junction. See an
Enlarged Photo Here. (Photograph taken on September 19, 2008 - © Cameron Bevers) Right - Facing north along Hwy 35 towards the former Hwy 121 North Junction at Minden. See an Enlarged Photo Here. (Photograph taken on September 19, 2008 - © Cameron Bevers) 

Left - Green guide sign marking the former Hwy 121 Junction north of Minden. Haliburton County renumbered the west leg of County Road 121 (Formerly Hwy 121) as
County Road 21, in order to differentiate this route from the south leg of former Hwy 121 between Minden and Fenelon Falls. See an
Enlarged Photo Here. (Photograph taken on September 19, 2008 - © Cameron Bevers) Right - Facing south along Hwy 35 from the former Hwy 121 North Junction at Minden. See an Enlarged Photo Here. (Photograph taken on September 19, 2008 - © Cameron Bevers) 

Left - Facing north along Hwy 35 from the former Hwy 121 North Junction at Minden. See an
Enlarged Photo Here. (Photograph taken on September 19, 2008 - © Cameron Bevers) Right - Facing east along Hwy 121 at the Kashagawigamog Lake Narrows Bridge (Site #40-36) near Haliburton Village. See an Enlarged Photo Here. (Photograph taken on October 11, 2008 - © Cameron Bevers) 

Left - Kashagawigamog Lake Narrows Bridge on Hwy 121 near Haliburton Village. This single-span steel girder structure was built under Contracts #1958-259
(structural steel) and #1958-647 (concrete substructure and approaches, along with other improvements to Hwy 121). The new structure was completed in 1959. See an
Enlarged Photo Here. (Photograph taken on October 11, 2008 - © Cameron Bevers) Right - Facing west along Hwy 121 towards Minden at the Kashagawigamog Lake Narrows Bridge. See an Enlarged Photo Here. (Photograph taken on October 11, 2008 - © Cameron Bevers) 

Left - Close-up of the steel handrail and superelevated deck of the Kashagawigamog Lake Narrows Bridge. See an
Enlarged Photo Here. (Photograph taken on October 11, 2008 - © Cameron Bevers) Right - Northern side of the Head Lake Narrows Bridge (Site #40-37) on Hwy 121 near Haliburton Village. See an Enlarged Photo Here. (Photograph taken on October 11, 2008 - © Cameron Bevers) 

Left - Southern side of the Head Lake Narrows Bridge on Hwy 121. This three-span continuous concrete T-beam structure was built under Contract #1962-321 and
was completed in 1963. The once-popular concrete T-beam structure design was made obsolete by the 1960s by newer bridge construction techniques. This was among the
last concrete T-beam structures completed on the provincial highway system. This concrete structure replaced an old timber trestle bridge which was built at this
location by the Department of Northern Development in 1933. See an Enlarged Photo Here. (Photograph taken on October 11, 2008 - © Cameron Bevers) Right - Facing west along Hwy 121 towards Minden at the Head Lake Narrows Bridge near Haliburton Village. See an Enlarged Photo Here. (Photograph taken on October 11, 2008 - © Cameron Bevers) 

Left - A newer Haliburton County Road 21 flowerpot route marker at the western entrance to Haliburton Village. Prior to King's Highway 121's transfer to
Haliburton County in the 1990s, provincial jurisdiction over the highway resumed at this location. The section of Hwy 121 lying east of this point through Haliburton
Village was designated as a Municipal Connecting Link and was thus under the jurisdiction of the local municipality. See an
Enlarged Photo Here. (Photograph taken on September 30, 2022 - © Cameron Bevers) Right - Scenic view of Haliburton Village and Head Lake from Hwy 121 near the intersection of Haliburton Road 1 Junction (Gelert Road). See an Enlarged Photo Here. (Photograph taken on September 30, 2022 - © Cameron Bevers) 

Left - Facing west along Hwy 121 approaching the Haliburton Road 1 Junction (Gelert Road). Up until 1981, Gelert Road was part of an Ontario Secondary Highway
known as Hwy 519. The route of Hwy 519 was signed concurrently with Hwy 121 through Haliburton Village via Highland Street between 1956 and 1981, since Hwy 519 also
continued north of Haliburton Village up to Redstone Lake. See an Enlarged Photo Here. (Photograph taken on September 30, 2022 - © Cameron Bevers) Right - View of the western entrance to Haliburton Village on Hwy 121. Interestingly, Haliburton is not an incorporated village despite its distinctly urbanized area. It is part of the much larger Municipality of Dysart et al. As the name indicates, this municipality is comprised of the geographic townships of Dysart and others. See an Enlarged Photo Here. (Photograph taken on September 30, 2022 - © Cameron Bevers) 

Left - View of Highland Street (Hwy 121) approaching Haliburton's village centre, facing east. This attractive all-seasons resort town is also the main
commerce area of Haliburton County and thus sees considerable local and tourist traffic. The fall colour season in Haliburton County is especially popular, with vivid
foliage displays visible throughout the village as well as the surrounding highlands. See an
Enlarged Photo Here. (Photograph taken on September 30, 2022 - © Cameron Bevers) Right - Facing west along Highland Street (Hwy 121) towards Minden at Cedar Street in Haliburton Village. When Hwy 121 was first assumed by the Department of Highways of Ontario (DHO) as a new King's Highway in 1955-1956, ownership of the entire highway route through Haliburton Village was under provincial jurisdiction and control. However, the DHO gradually transferred jurisdiction over Hwy 121 through the urbanized area of the village to municipal control beginning in 1968. At one time, the intersection of Cedar Street marked the resumption of provincial jurisdiction over Hwy 121 on the western side of the village. In 1981, this jurisdictional boundary was shifted even further west to Gelert Road. See an Enlarged Photo Here. (Photograph taken on September 30, 2022 - © Cameron Bevers) 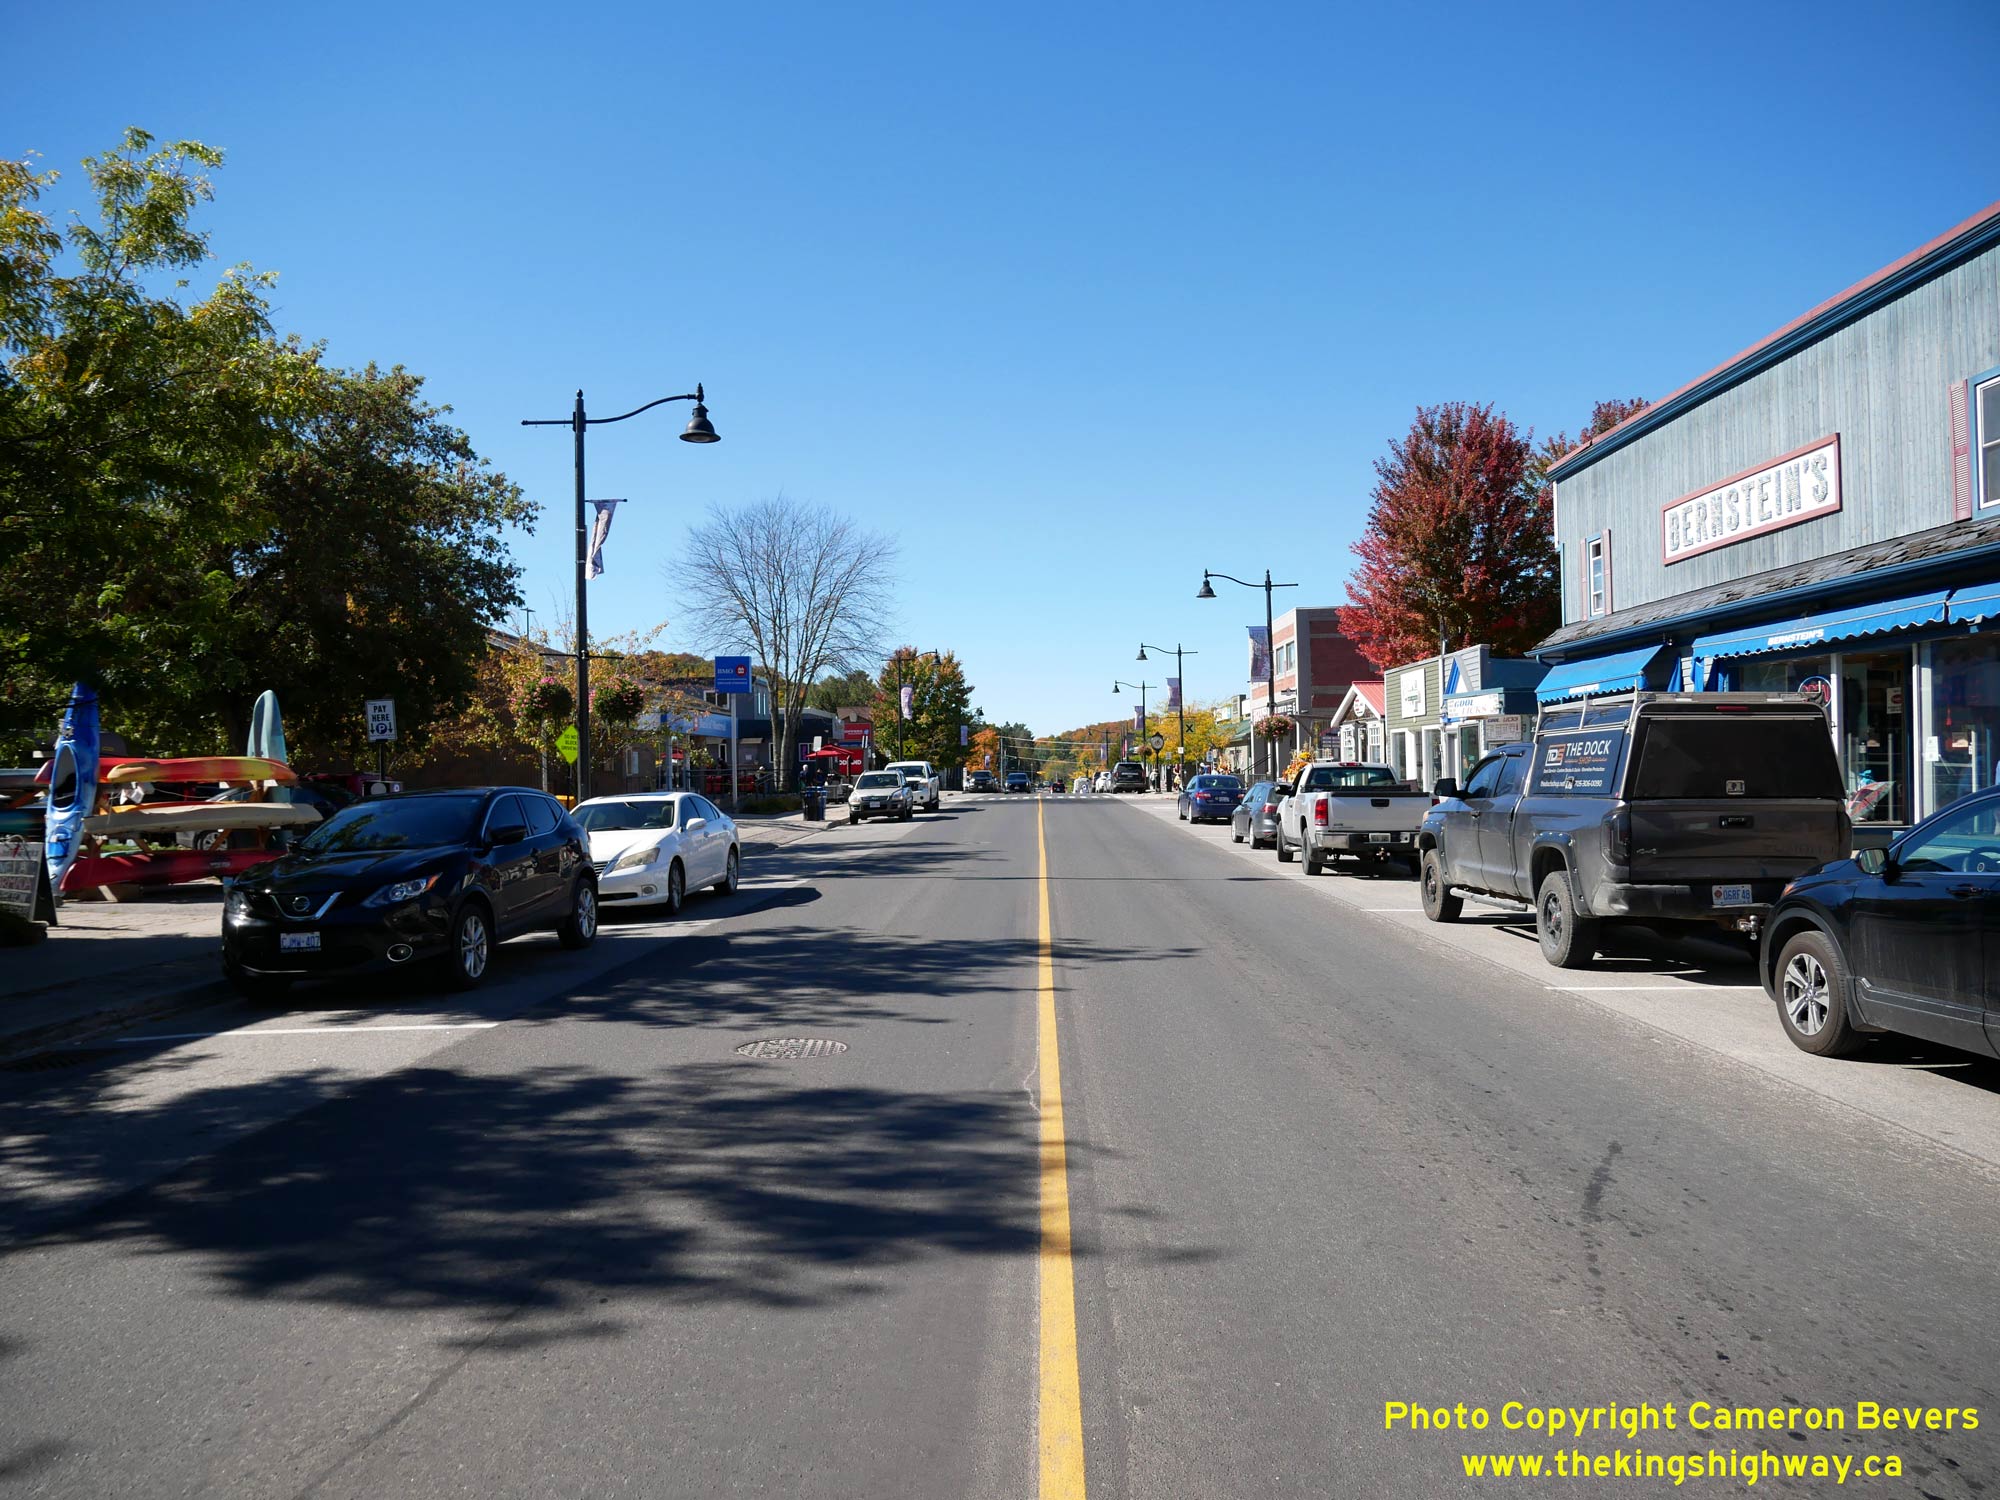

Left - View of Highland Street (Hwy 121) in Haliburton's village centre, facing west from the Hwy 118 Junction at Maple Avenue. See an
Enlarged Photo Here. (Photograph taken on September 30, 2022 - © Cameron Bevers) Right - Facing east along Highland Street (Hwy 121) approaching the Hwy 118 Junction at Maple Avenue in Haliburton Village. See an Enlarged Photo Here. (Photograph taken on September 30, 2022 - © Cameron Bevers) 

Left - Junction sign assembly on southbound Maple Avenue (Hwy 118) approaching Highland Street (Hwy 121) in Haliburton Village. Up until 2003, the route of
Hwy 118 came to an end at this intersection, while Hwy 121 continued straight ahead towards the Bancroft area via Maple Avenue. As a result of a 2003 highway
renumbering, the Hwy 121 designation east of Haliburton Village was supplanted by the Hwy 118 designation. This resulted in a 50 km easterly extension of Hwy 118 to
the Hwy 28 Junction at Paudash, located southwest of Bancroft. Signs are still in place at this intersection advising motorists of the change in route numbers. The
western leg of Hwy 121 from Haliburton Village to Minden was downloaded to the County of Haliburton in 1998 and is now officially known as Haliburton County
Road 21. See an Enlarged Photo Here. (Photograph taken on September 30, 2022 - © Cameron Bevers) Right - Junction of Hwy 118 & Hwy 121 in Haliburton Village, facing south along Maple Avenue. At this intersection, motorists can either turn right and follow Hwy 121 (today's Haliburton County Road 21) west towards Minden, or continue straight ahead towards the Bancroft area via Hwy 118. See an Enlarged Photo Here. (Photograph taken on September 30, 2022 - © Cameron Bevers) 

Left - Facing north along Maple Avenue (Hwy 118) from Highland Street (Hwy 121) in Haliburton Village. From this intersection, Hwy 118 follows Maple Avenue
north out of the village centre. Hwy 118 then curves around the eastern and northern shores of Head Lake and then resumes its route westerly towards Carnarvon and
Bracebridge. Up until the early 1980s, this section of Hwy 118 was part of an Ontario Secondary Highway (Hwy 519). In 1981, the Vankoughnet Road between Bracebridge
and Carnarvon was assumed by the province as an easterly extension of Hwy 118. East of Carnarvon, parts of Hwy 519 and Hwy 530 were renumbered as Hwy 118, in order to
complete a new King's Highway link between the District of Muskoka and Haliburton County. See an
Enlarged Photo Here. (Photograph taken on September 30, 2022 - © Cameron Bevers) Right - Junction sign assembly on northbound Maple Avenue (Hwy 118) approaching Highland Street (Hwy 121) in Haliburton Village. Traffic approaching this junction can either turn left and follow Hwy 121 (today's County Road 21) westerly to Minden, or continue straight ahead via westbound Hwy 118 towards Bracebridge. See an Enlarged Photo Here. (Photograph taken on September 30, 2022 - © Cameron Bevers) 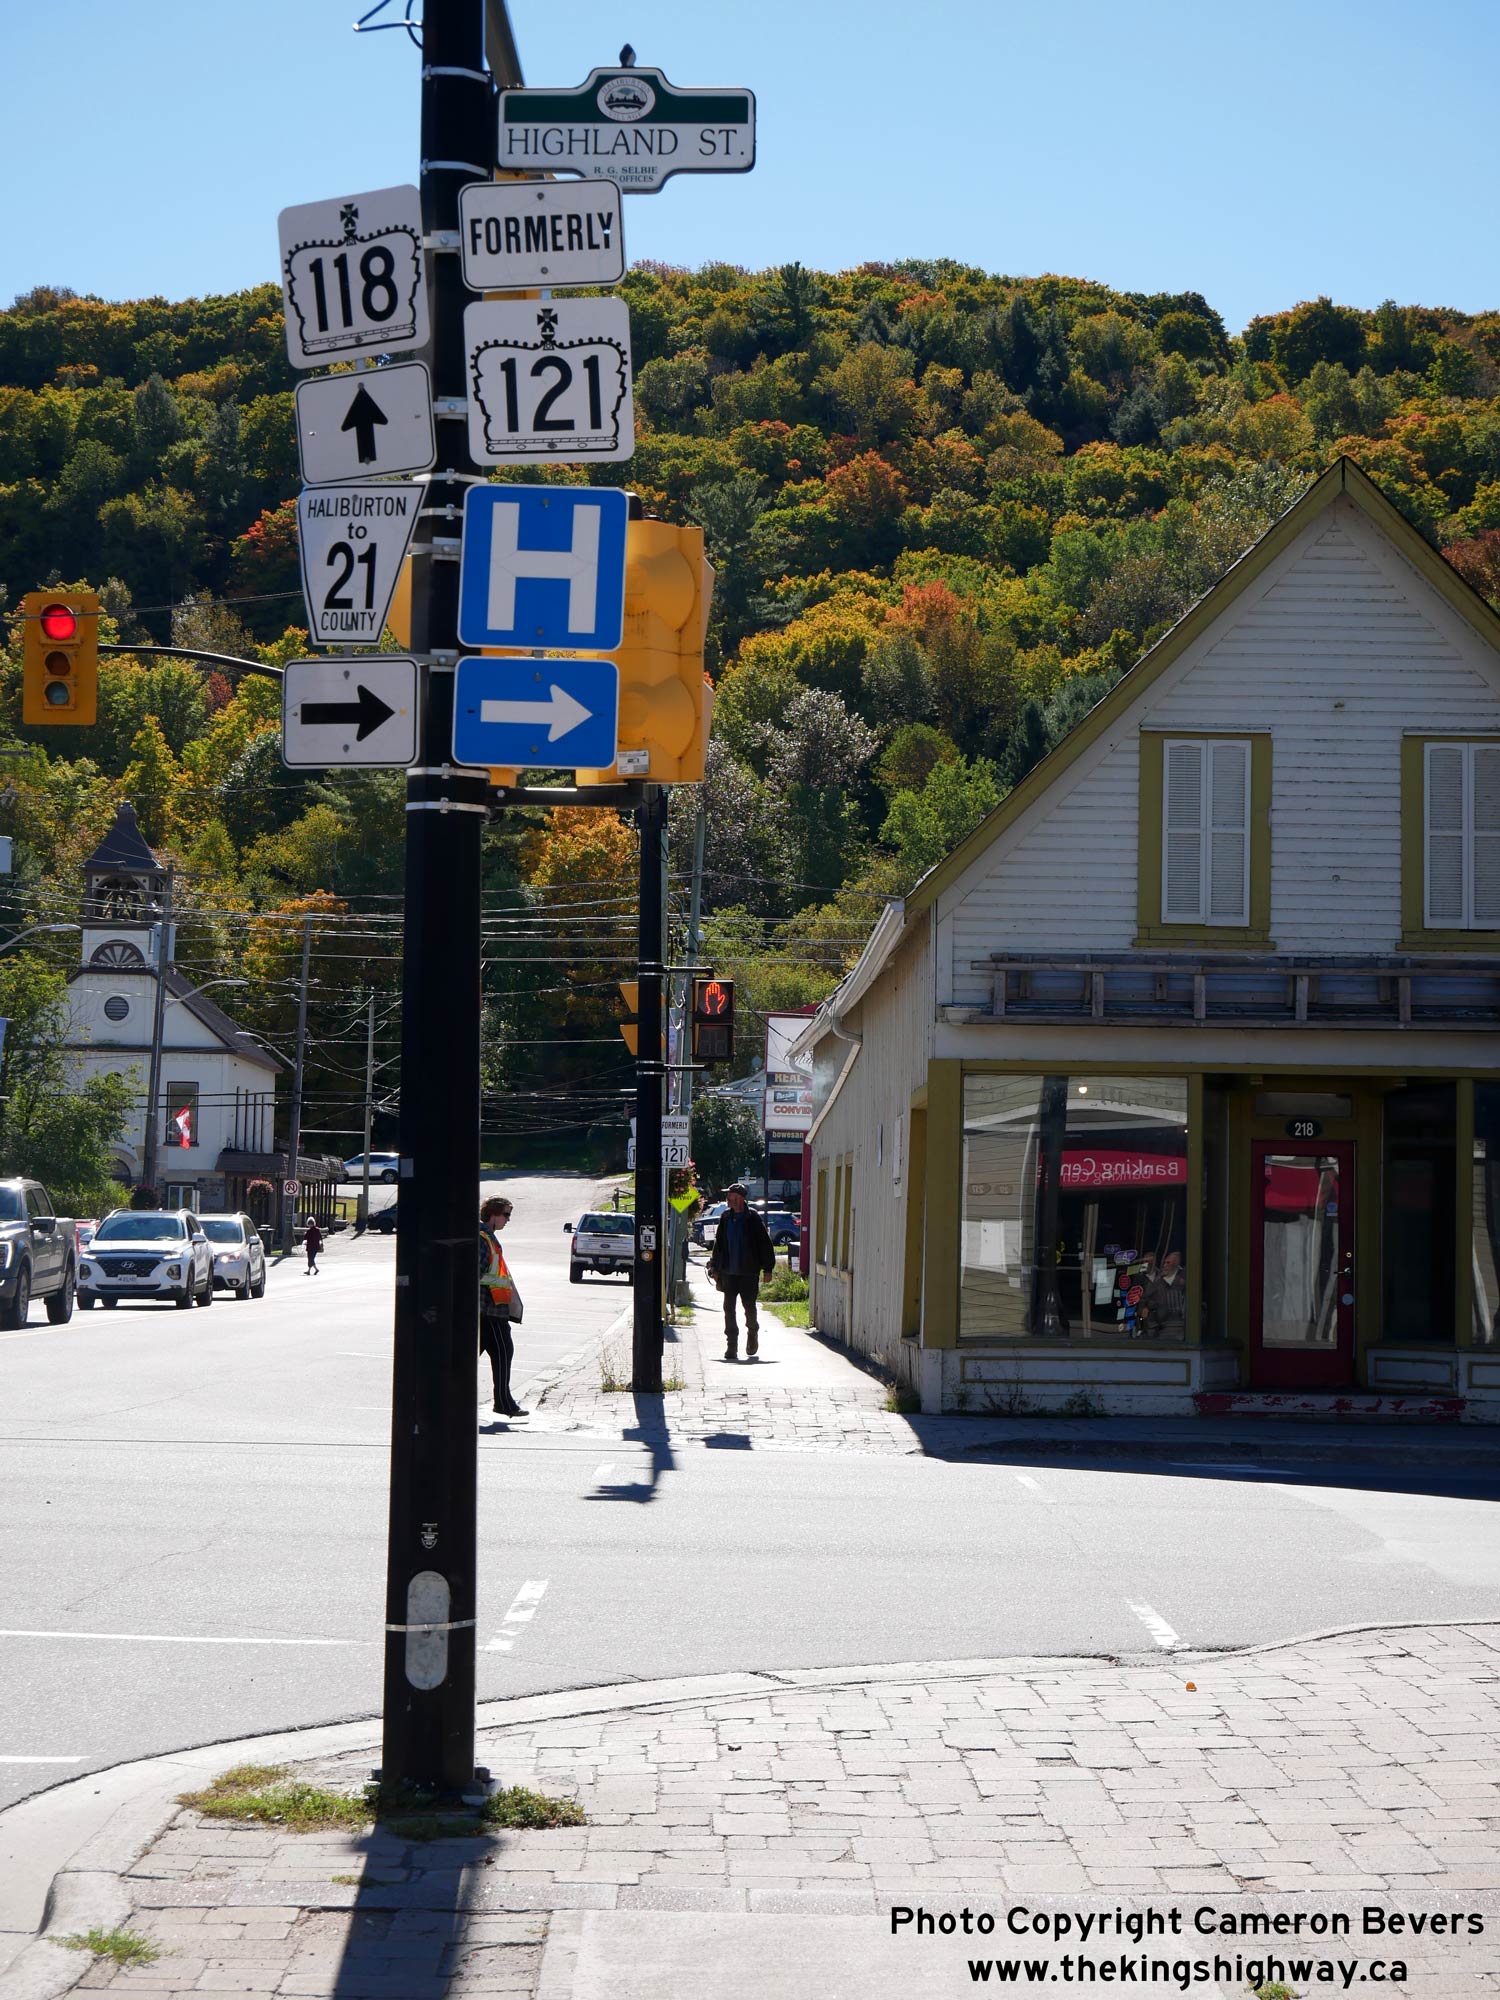
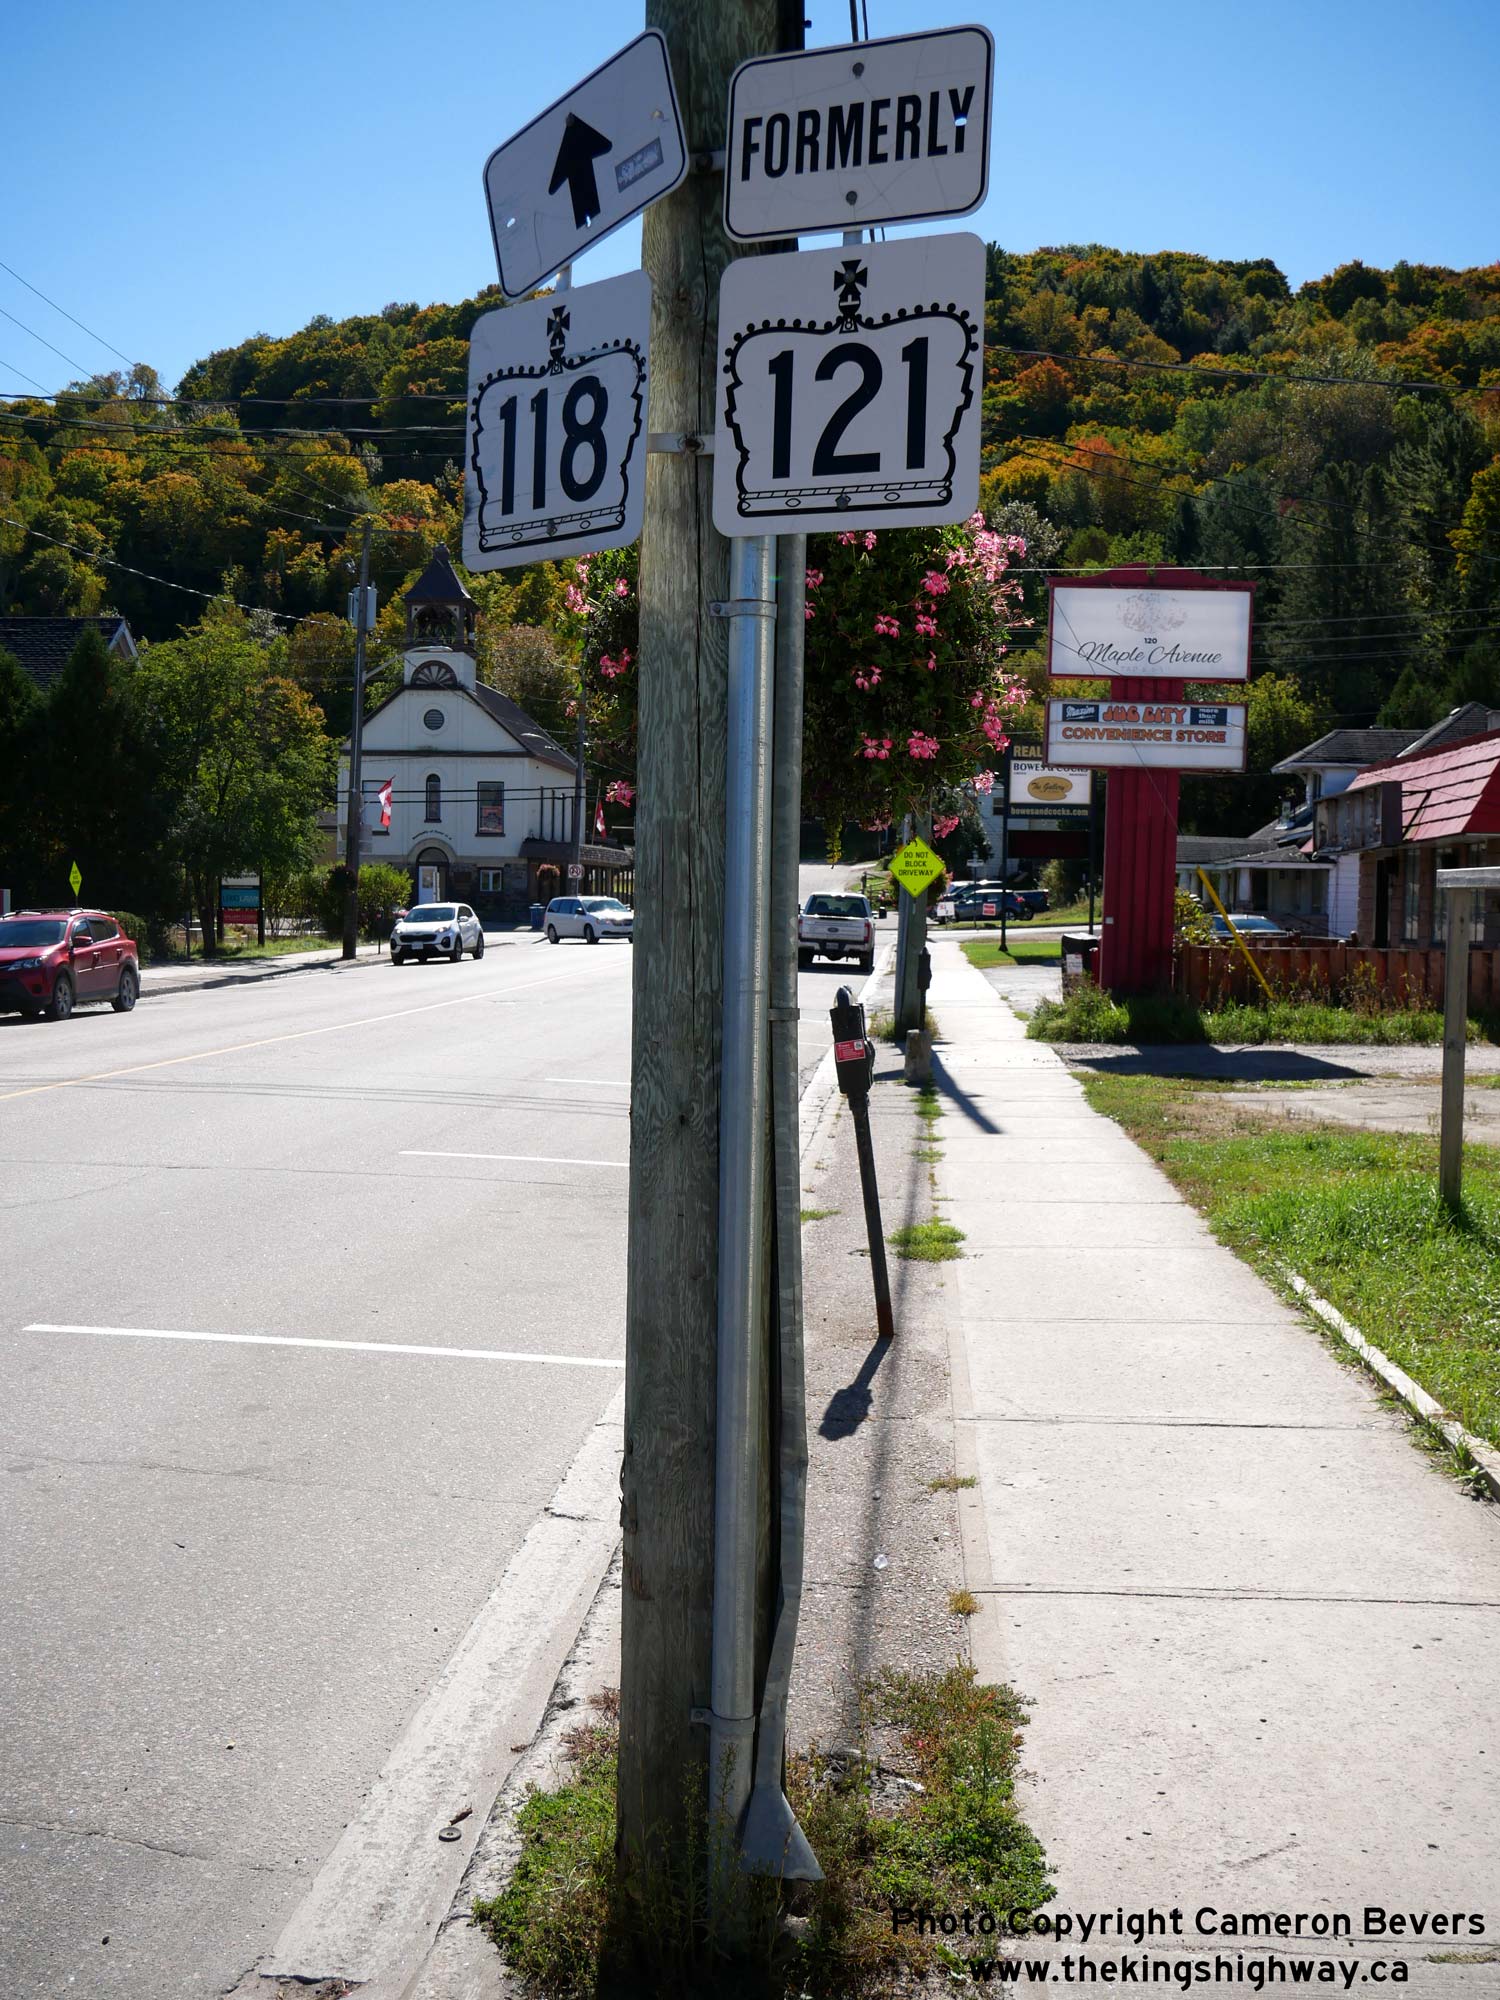
Left - Junction sign assembly on southbound Maple Avenue (Hwy 118) at Highland Street (Hwy 121) in Haliburton Village. Up until the 1990s, Hwy 121 ran in both
directions from this highway junction. Hwy 121 continued east towards Minden at right via today's Haliburton Road 21. Until 2003, Hwy 118 ended here, while Hwy 121
continued straight ahead (east) towards Bancroft. In order to simplify route numbering this area, the Ministry of Transportation decided to renumber the eastern leg
of Hwy 121 as an easterly extension of Hwy 118 during 2003. See an Enlarged Photo Here. (Photograph taken on September 30, 2022 - © Cameron Bevers) Right - Reassurance route marker for Hwy 118 on southbound Maple Avenue in Haliburton Village. A "Formerly 121" crown sign and tab are still in place at this junction following the renumbering of the eastern leg of Hwy 121 from Haliburton Village to Paudash as Hwy 118 back in 2003. See an Enlarged Photo Here. (Photograph taken on September 30, 2022 - © Cameron Bevers) 

Left - Facing north along Maple Avenue (Hwy 118) approaching Highland Street (Hwy 121) in Haliburton Village. See an
Enlarged Photo Here. (Photograph taken on September 30, 2022 - © Cameron Bevers) Right - View of Maple Avenue (Hwy 118) facing south from Highland Street (Hwy 121) in Haliburton Village. The route of Hwy 118 continues south via Maple Avenue for one block. At the flashing beacon in the background, Hwy 118 turns left onto Mountain Street where the highway resumes its route east towards Tory Hill and the Bancroft area. See an Enlarged Photo Here. (Photograph taken on September 30, 2022 - © Cameron Bevers)
More King's Highway 121 Photographs Coming Soon!
|
|---|
Links to Adjacent King's Highway Photograph Pages:
Back to King's Highway 120 Photos /
King's Highway 121 History /
On to King's Highway 122 Photos
Ontario Highway History - Main Menu / Back to List of Highways Website contents, photos & text © 2002-2026, Cameron
Bevers (Webmaster) - All Rights Reserved / Contact Me
|
|---|