
| 
| |
|
|
This page contains historical photos of Ontario's King's Highway 17 dating from 1950 to 1953. All photographs displayed on
this page were taken by the Ontario Ministry of Transportation, unless specifically noted otherwise. Historical photographs are arranged in approximate chronological
order. Click on any thumbnail to see a larger image!
Please note that all photographs displayed on this
website are protected by copyright. These photographs must not be reproduced, published,
electronically stored or copied, distributed, or posted onto other websites without
my written permission. If you want to use photos from this website, please
email me first for permission. Thank-you!
|
|---|
|
Page 3: Historical King's Highway 17 Photographs (1950 to 1953)

Above - Circa 1950 postcard view of Hwy 17 at Cavers Hill between Rossport and Nipigon. This iconic stretch of the North Shore Highway was photographed shortly
after a new pavement surface was laid on the grade. During the Fall of 1949, crews with the Department of Highways of Ontario (DHO) constructed a mulch asphalt
surface from the summit of Cavers Hill westerly for a distance of 2 1/2 miles. This new highway surface allowed the placement of zone striping (centreline pavement
markings) along Hwy 17 up the steep, winding grade in an effort to improve highway safety. By the end of the 1950s, Hwy 17 was in the process of being relocated
altogether onto an improved highway grade located a short distance inland from the original route of the North Shore Highway seen here. See an
Enlarged Photo Here. Photo taken circa 1950. (Photo courtesy of The Camera Shop, Port Arthur) 

Left - Circa 1950 view of Hwy 17 approaching the Hwy 70 Junction (today's Hwy 71) at Longbow Corners east of Kenora. This large directional "Y" intersection
was reconfigured many years ago so that Hwy 71 ended at a T-intersection with Hwy 17. However, at the time this photo was taken, traffic had to turn rather sharply to
the left in order to continue east along Hwy 17 towards Dryden. The apparent "through route" at this junction was actually Hwy 70, which began to turn south towards
Sioux Narrows and Fort Frances beyond Longbow Corners. This through route appearance is further amplified by the highway's surface - note that Hwy 70 was paved with a
marked centreline through the highway junction. Observers may notice that the pavement ends on Hwy 17 just beyond the split, where it becomes a gravel-surfaced
highway. It wasn't until the early 1960s that an asphalt pavement was completed along Hwy 17 east of Longbow Corners. See an
Enlarged Photo Here. Photo taken circa 1950. (Photo from Cameron Bevers' historical photograph collection - Original photographer unknown) Right - Circa 1950 postcard view of the Keewatin Channel Bridge on Hwy 17 near Kenora, facing northeast. See an Enlarged Photo Here. Photo taken circa 1950. (Photo courtesy of Lakewood Studio, Kenora) 
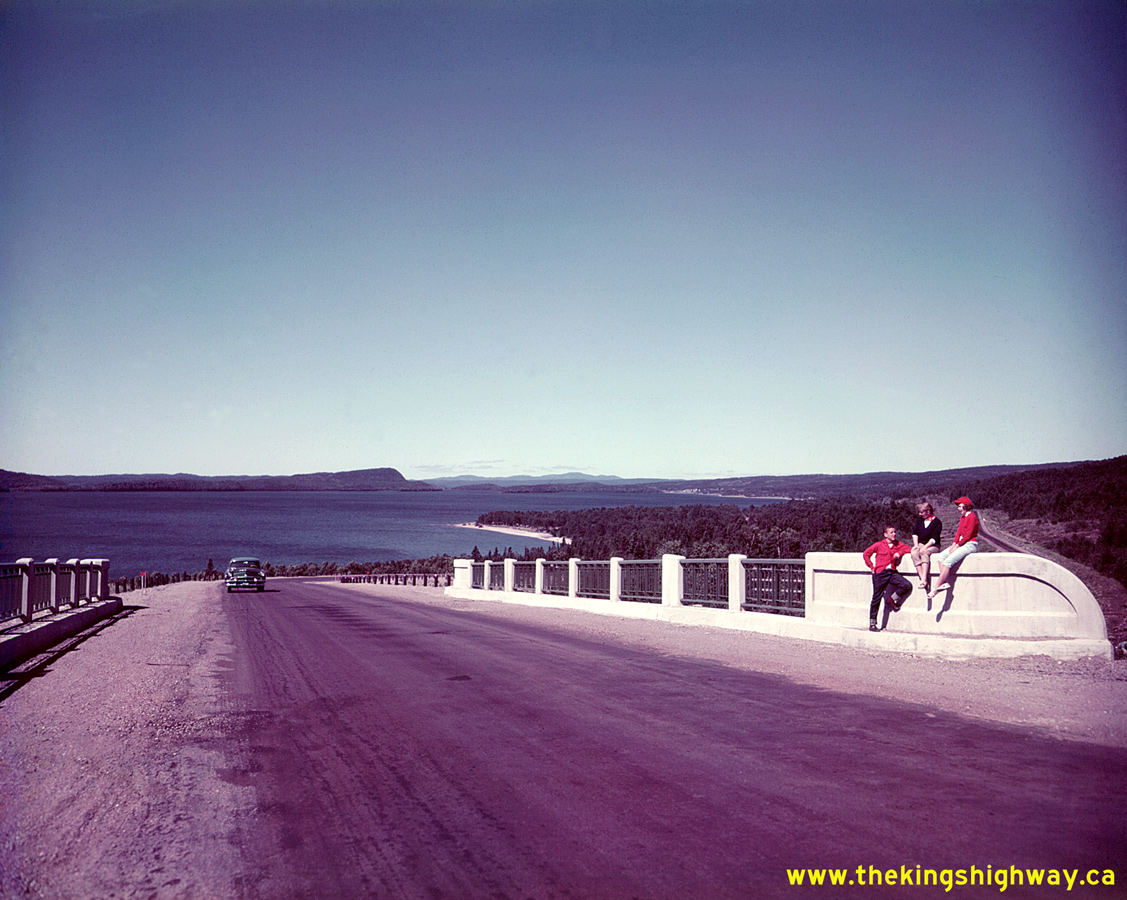
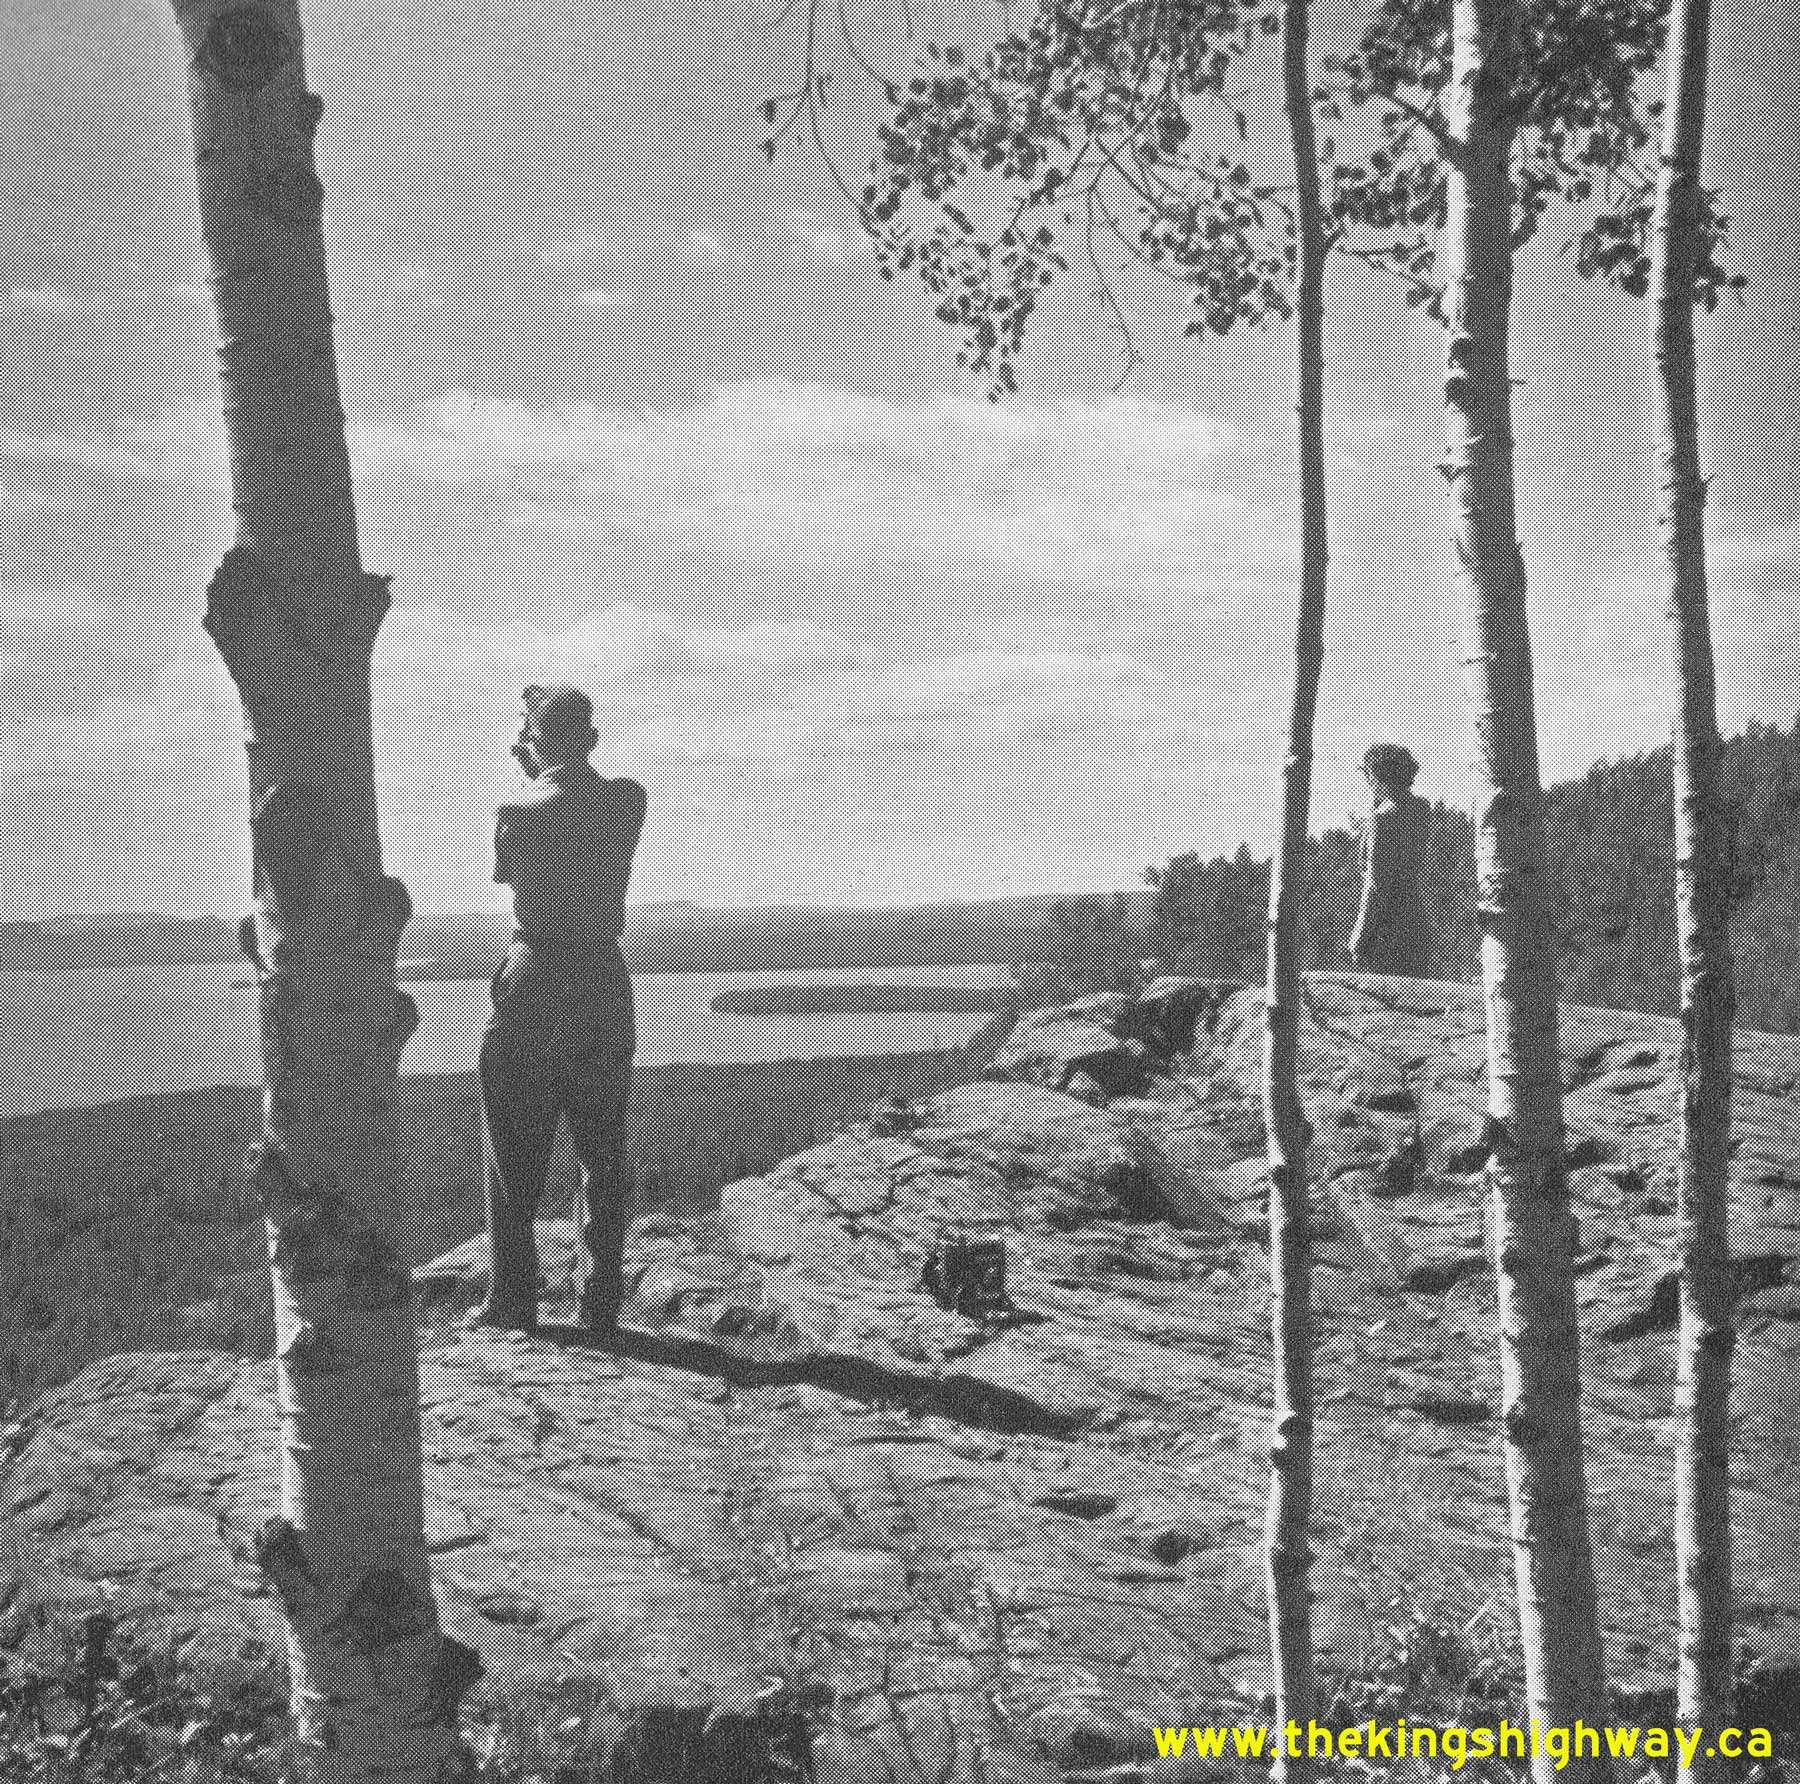
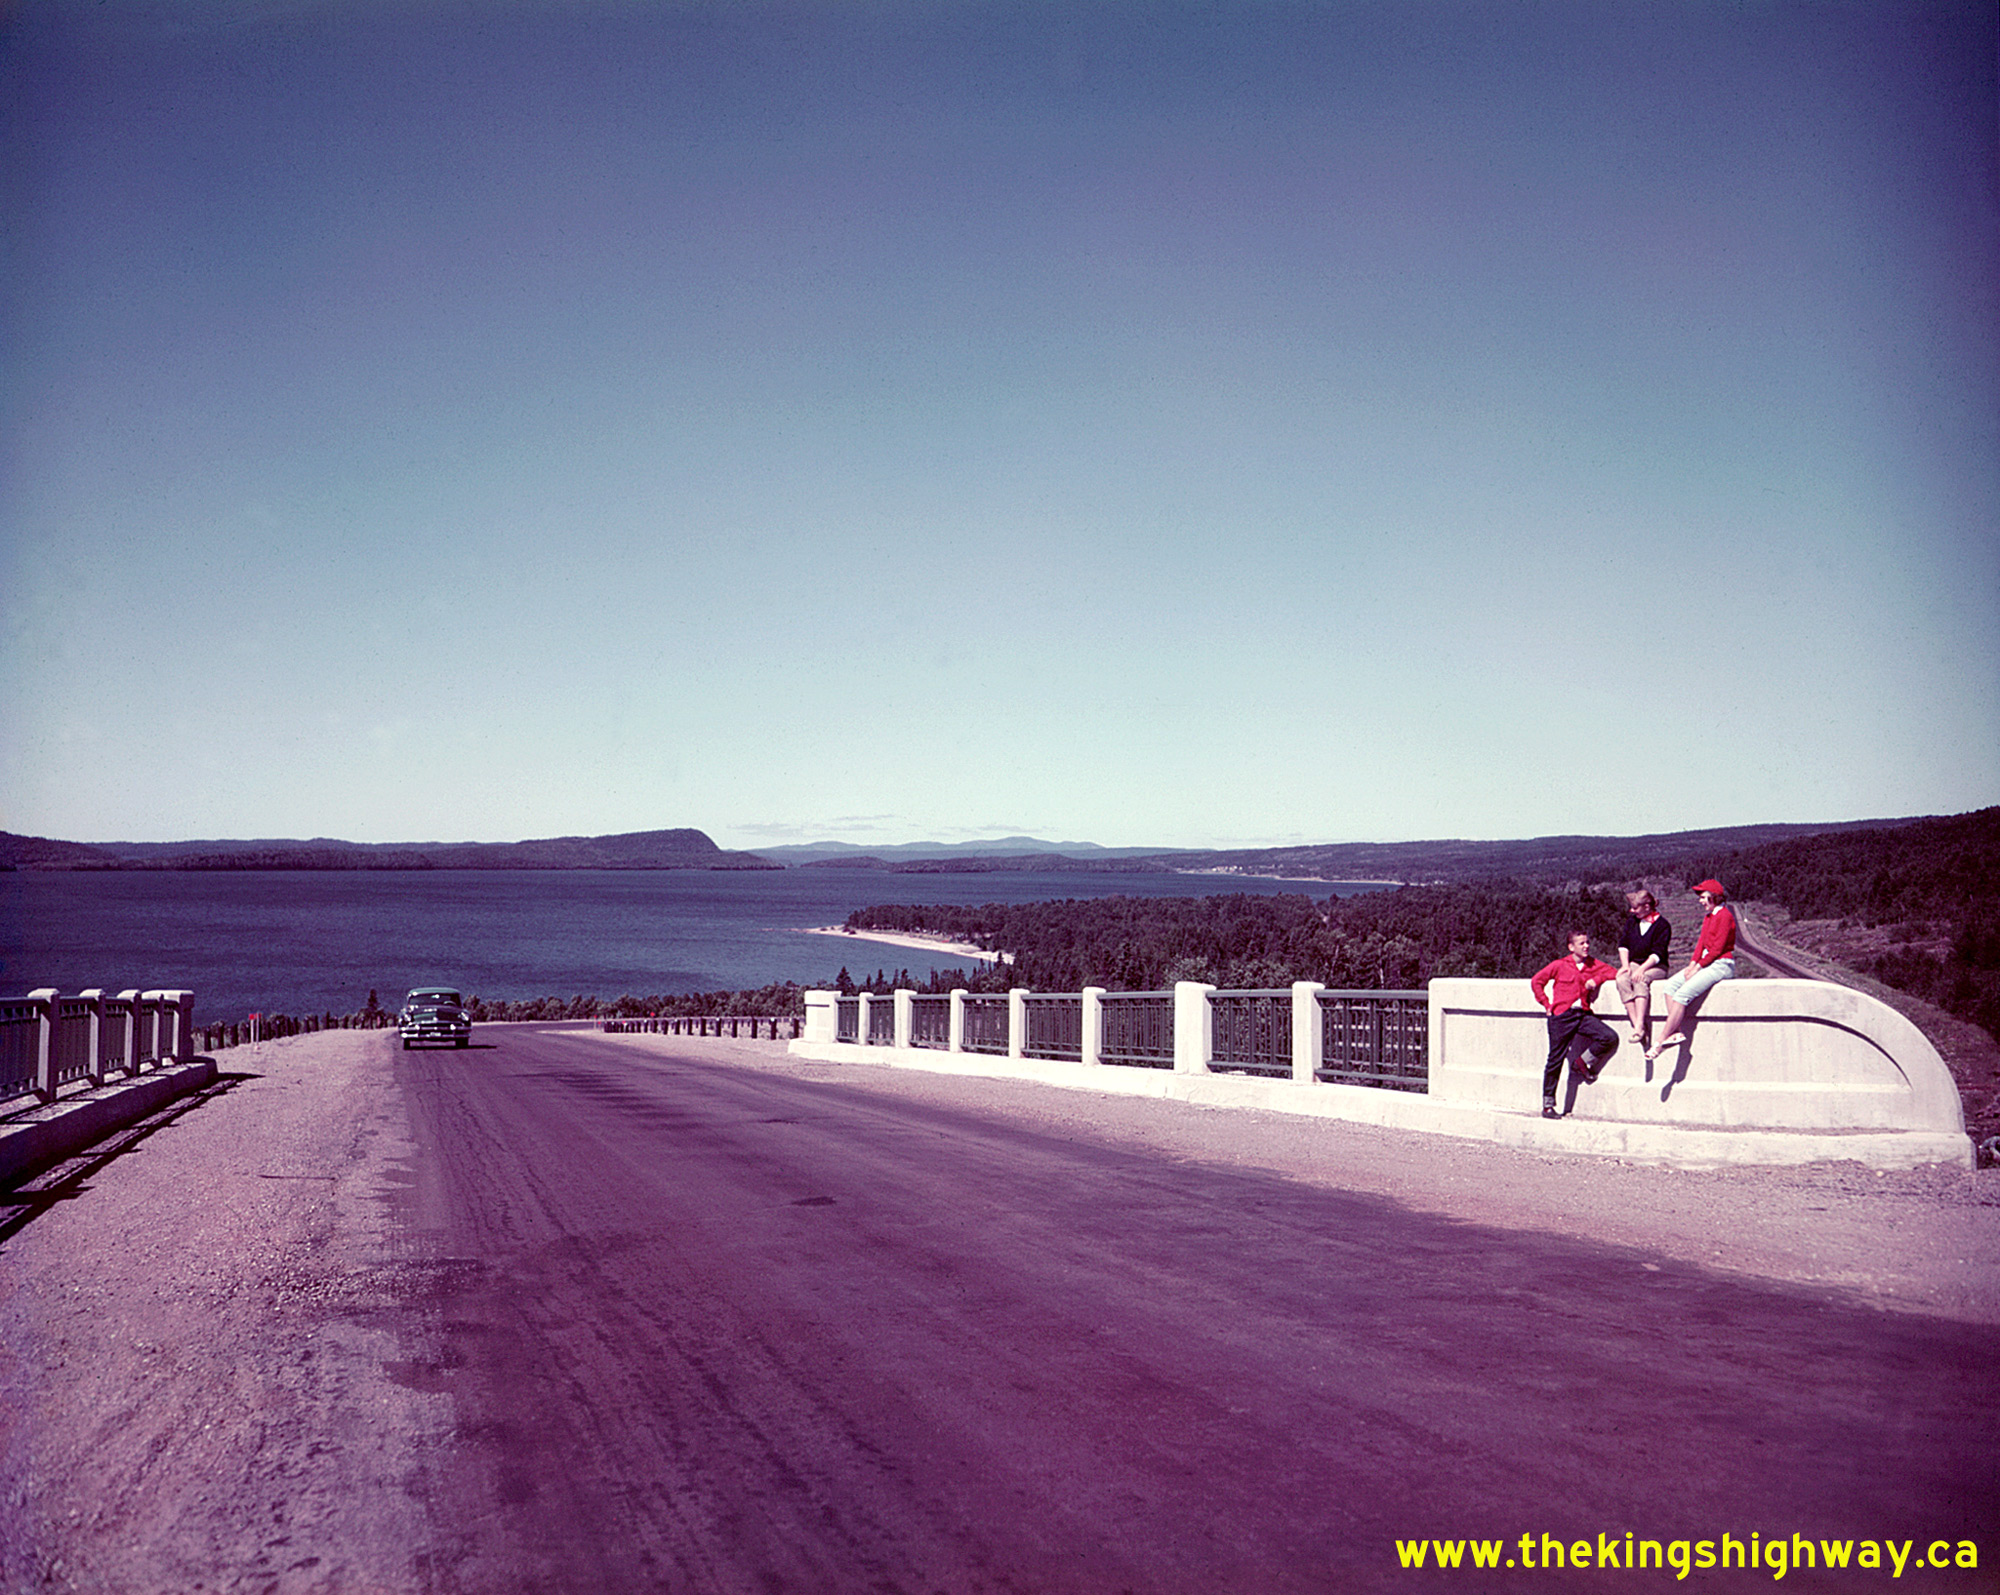
Above - Motorists taking in the view from the Kama Hill Lookout on Hwy 17 east of Nipigon. See an
Enlarged Photo Here. Photo taken in 1950. (Photo courtesy of Ontario Ministry of Transportation - © King's Printer for Ontario, 1950) 

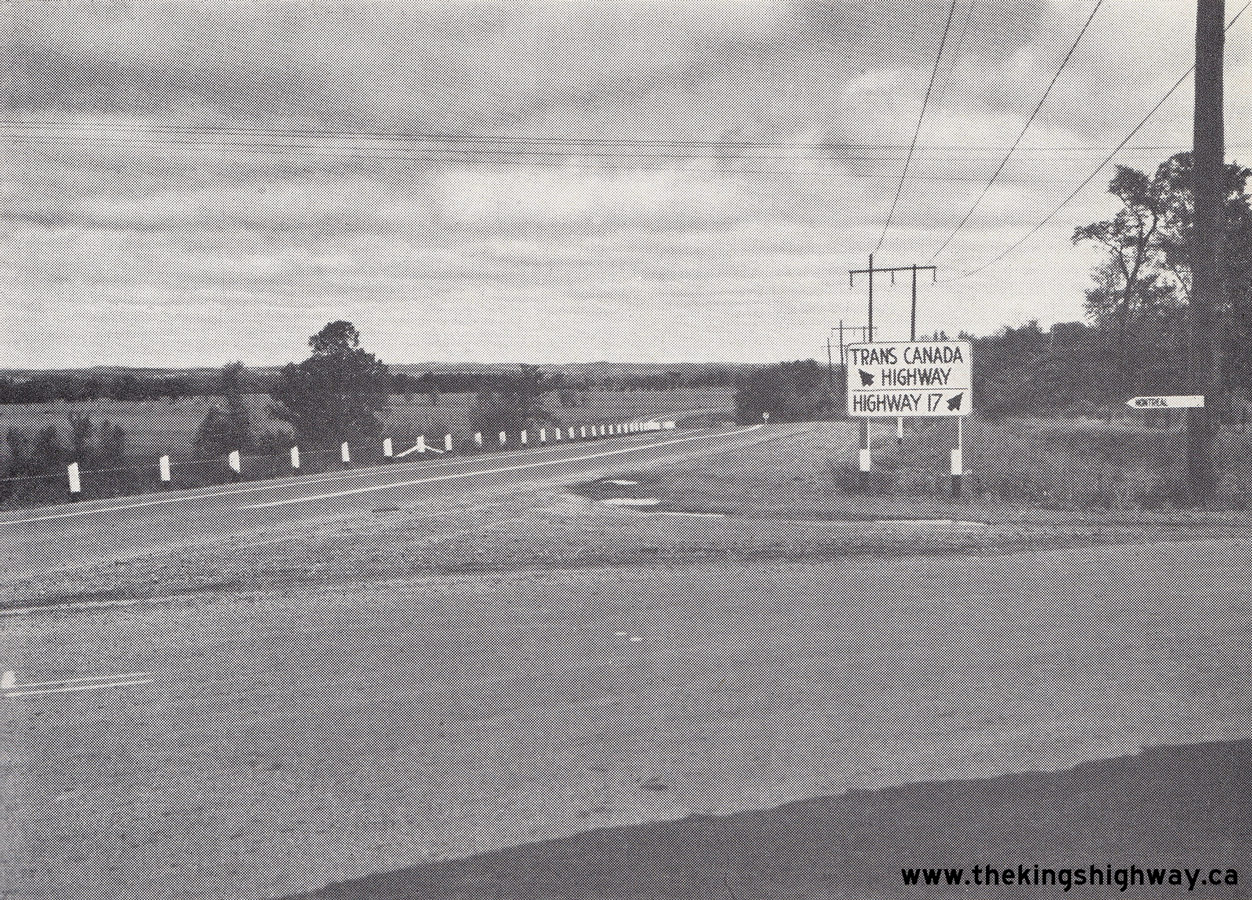
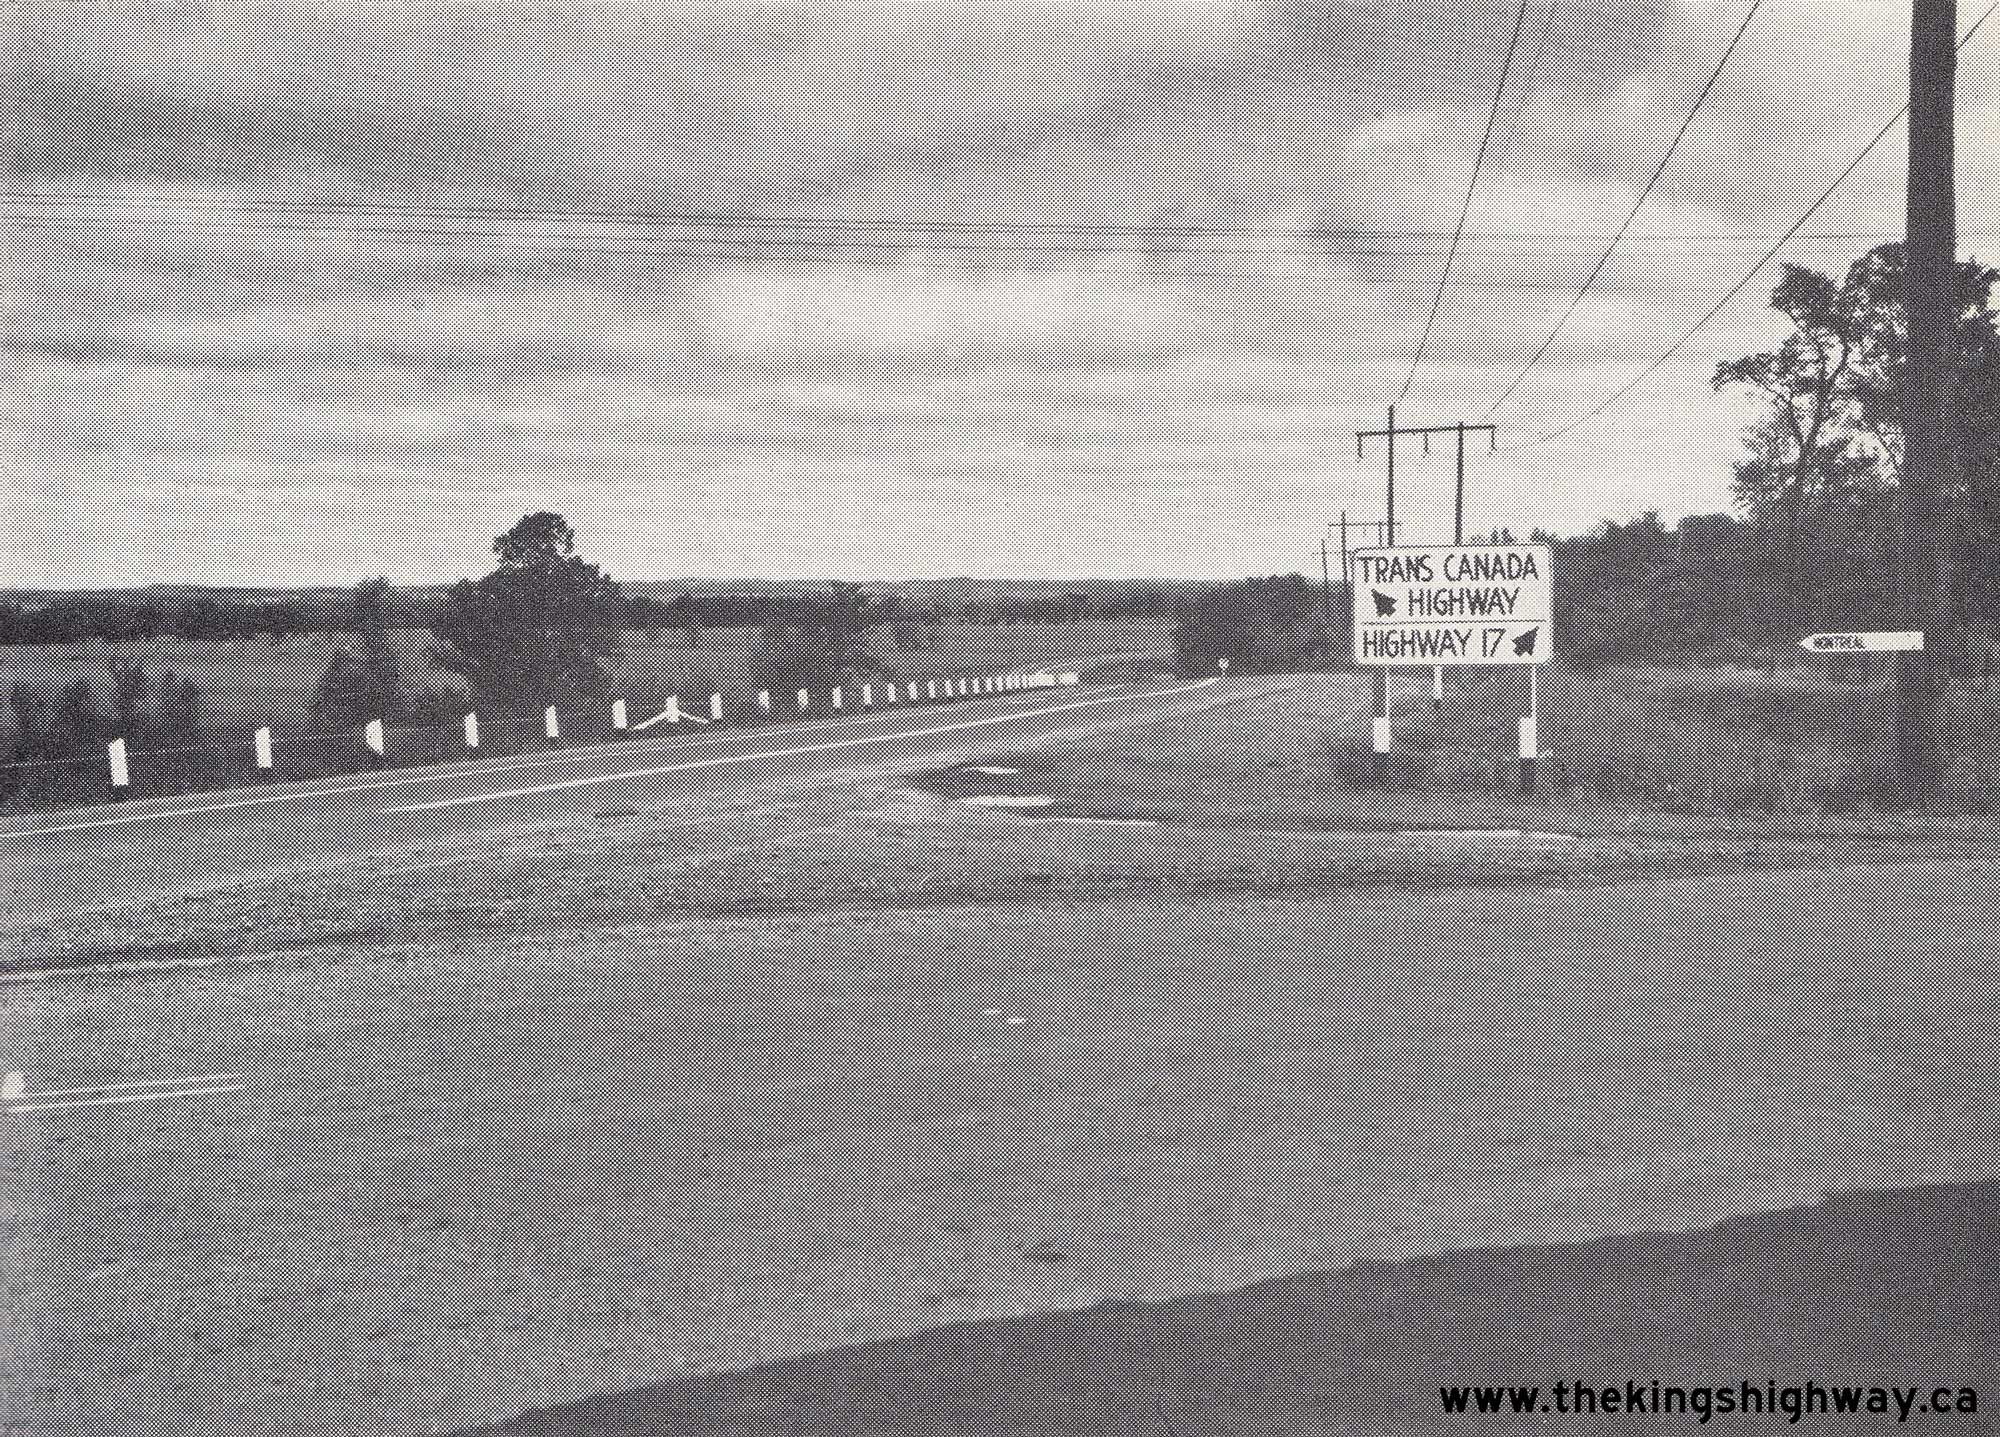
Left - Trans-Canada Highway Sign at the junction of Hwy 15 & Hwy 17 in Ottawa. At the time this photo was taken in 1950, Hwy 17 was incomplete around Lake
Superior between Montreal River Harbour and Terrace Bay. Motorists wishing to travel across Canada had to use the more northerly route offered by Hwy 11 between North
Bay and Nipigon in order to access the discontinuous western section of Hwy 17 from Eastern Canada. In fact, until Hwy 11 was completed through Northern Ontario in
1943, it wasn't possible to drive to Northwestern Ontario's highway system at all, unless one drove through the United States. See an
Enlarged Photo Here. Photo taken on July 19, 1950. (Photo courtesy of Ontario Ministry of Transportation - © King's Printer for Ontario, 1950) Right - Grading for the new Trans-Canada Highway route of Hwy 17 (Hwy 17 Alternate) east of Ottawa, Contract #1949-75. See an Enlarged Photo Here. Photo taken on July 21, 1950. (Photo courtesy of Ontario Ministry of Transportation - © King's Printer for Ontario, 1950) 

Left - View of the Des Joachims Hydro Dam from the scenic lookout on Hwy 17 at Rolphton in 1950. The road through the supply yard in the foreground was
designated as a Secondary Highway (Hwy 635) in 1960. See an Enlarged Photo Here. Photo taken
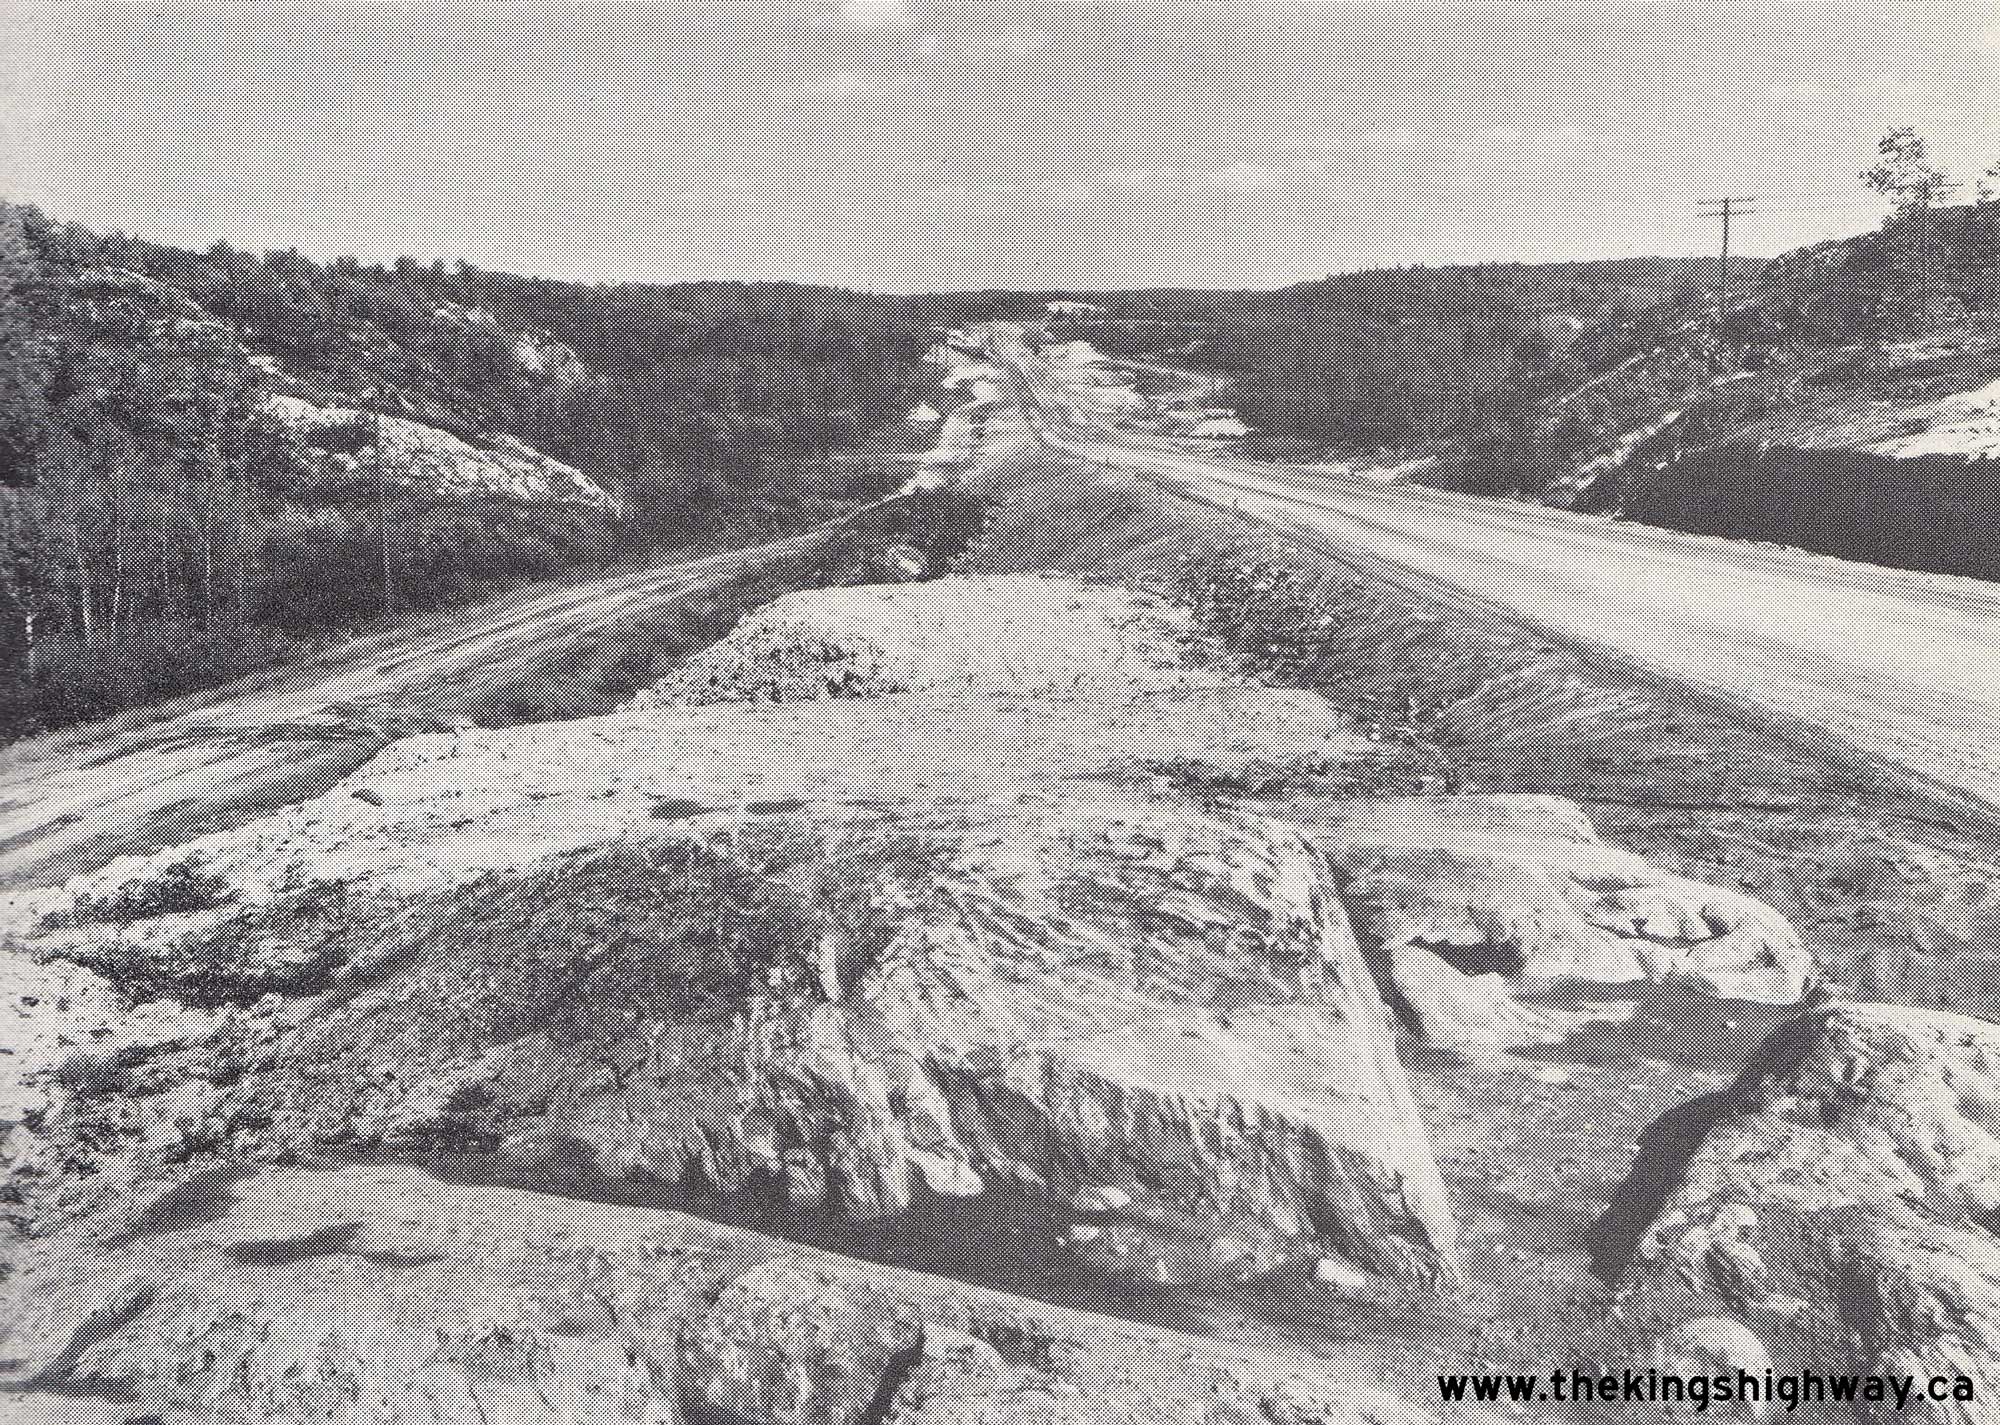
on July 22, 1950. (Photo from Cameron Bevers' historical photograph collection - Original photographer unknown) Right - Grading and fill for the Hwy 17 Extension east of Terrace Bay by Fort York Construction Company, facing east from Sta. 1042+00. Under Contract #1950-63, Hwy 17 was extended by a further 6 1/4 miles east of Terrace Bay up to the proposed site of the Steel River Bridge. See an Enlarged Photo Here. Photo taken on August 23, 1950. (Photo courtesy of Ontario Ministry of Transportation - © King's Printer for Ontario, 1950) 

Left - Construction of Hwy 17 east of Jackfish near the proposed Steel River Bridge site, facing east from Sta. 1000+00, Contract #1950-63. See an
Enlarged Photo Here. Photo taken on August 23, 1950. (Photo courtesy of Ontario Ministry of Transportation - © King's Printer for Ontario, 1950) Right - View of the Des Joachims Lookout on Hwy 17 at Rolphton, located between Pembroke and North Bay. See an Enlarged Photo Here. Photo taken on September 5, 1950. (Photo courtesy of Ontario Ministry of Transportation - © King's Printer for Ontario, 1950) 

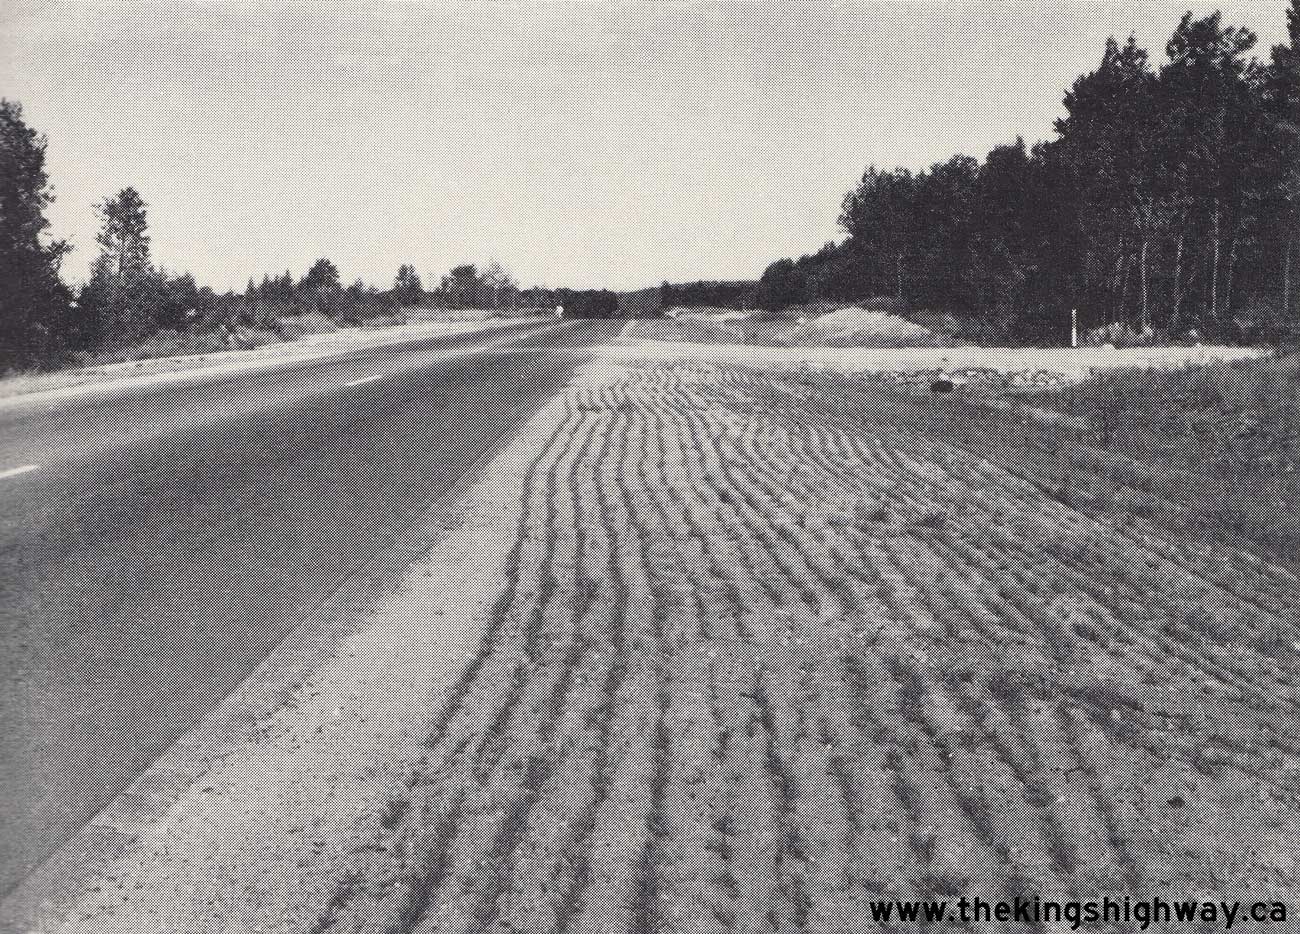
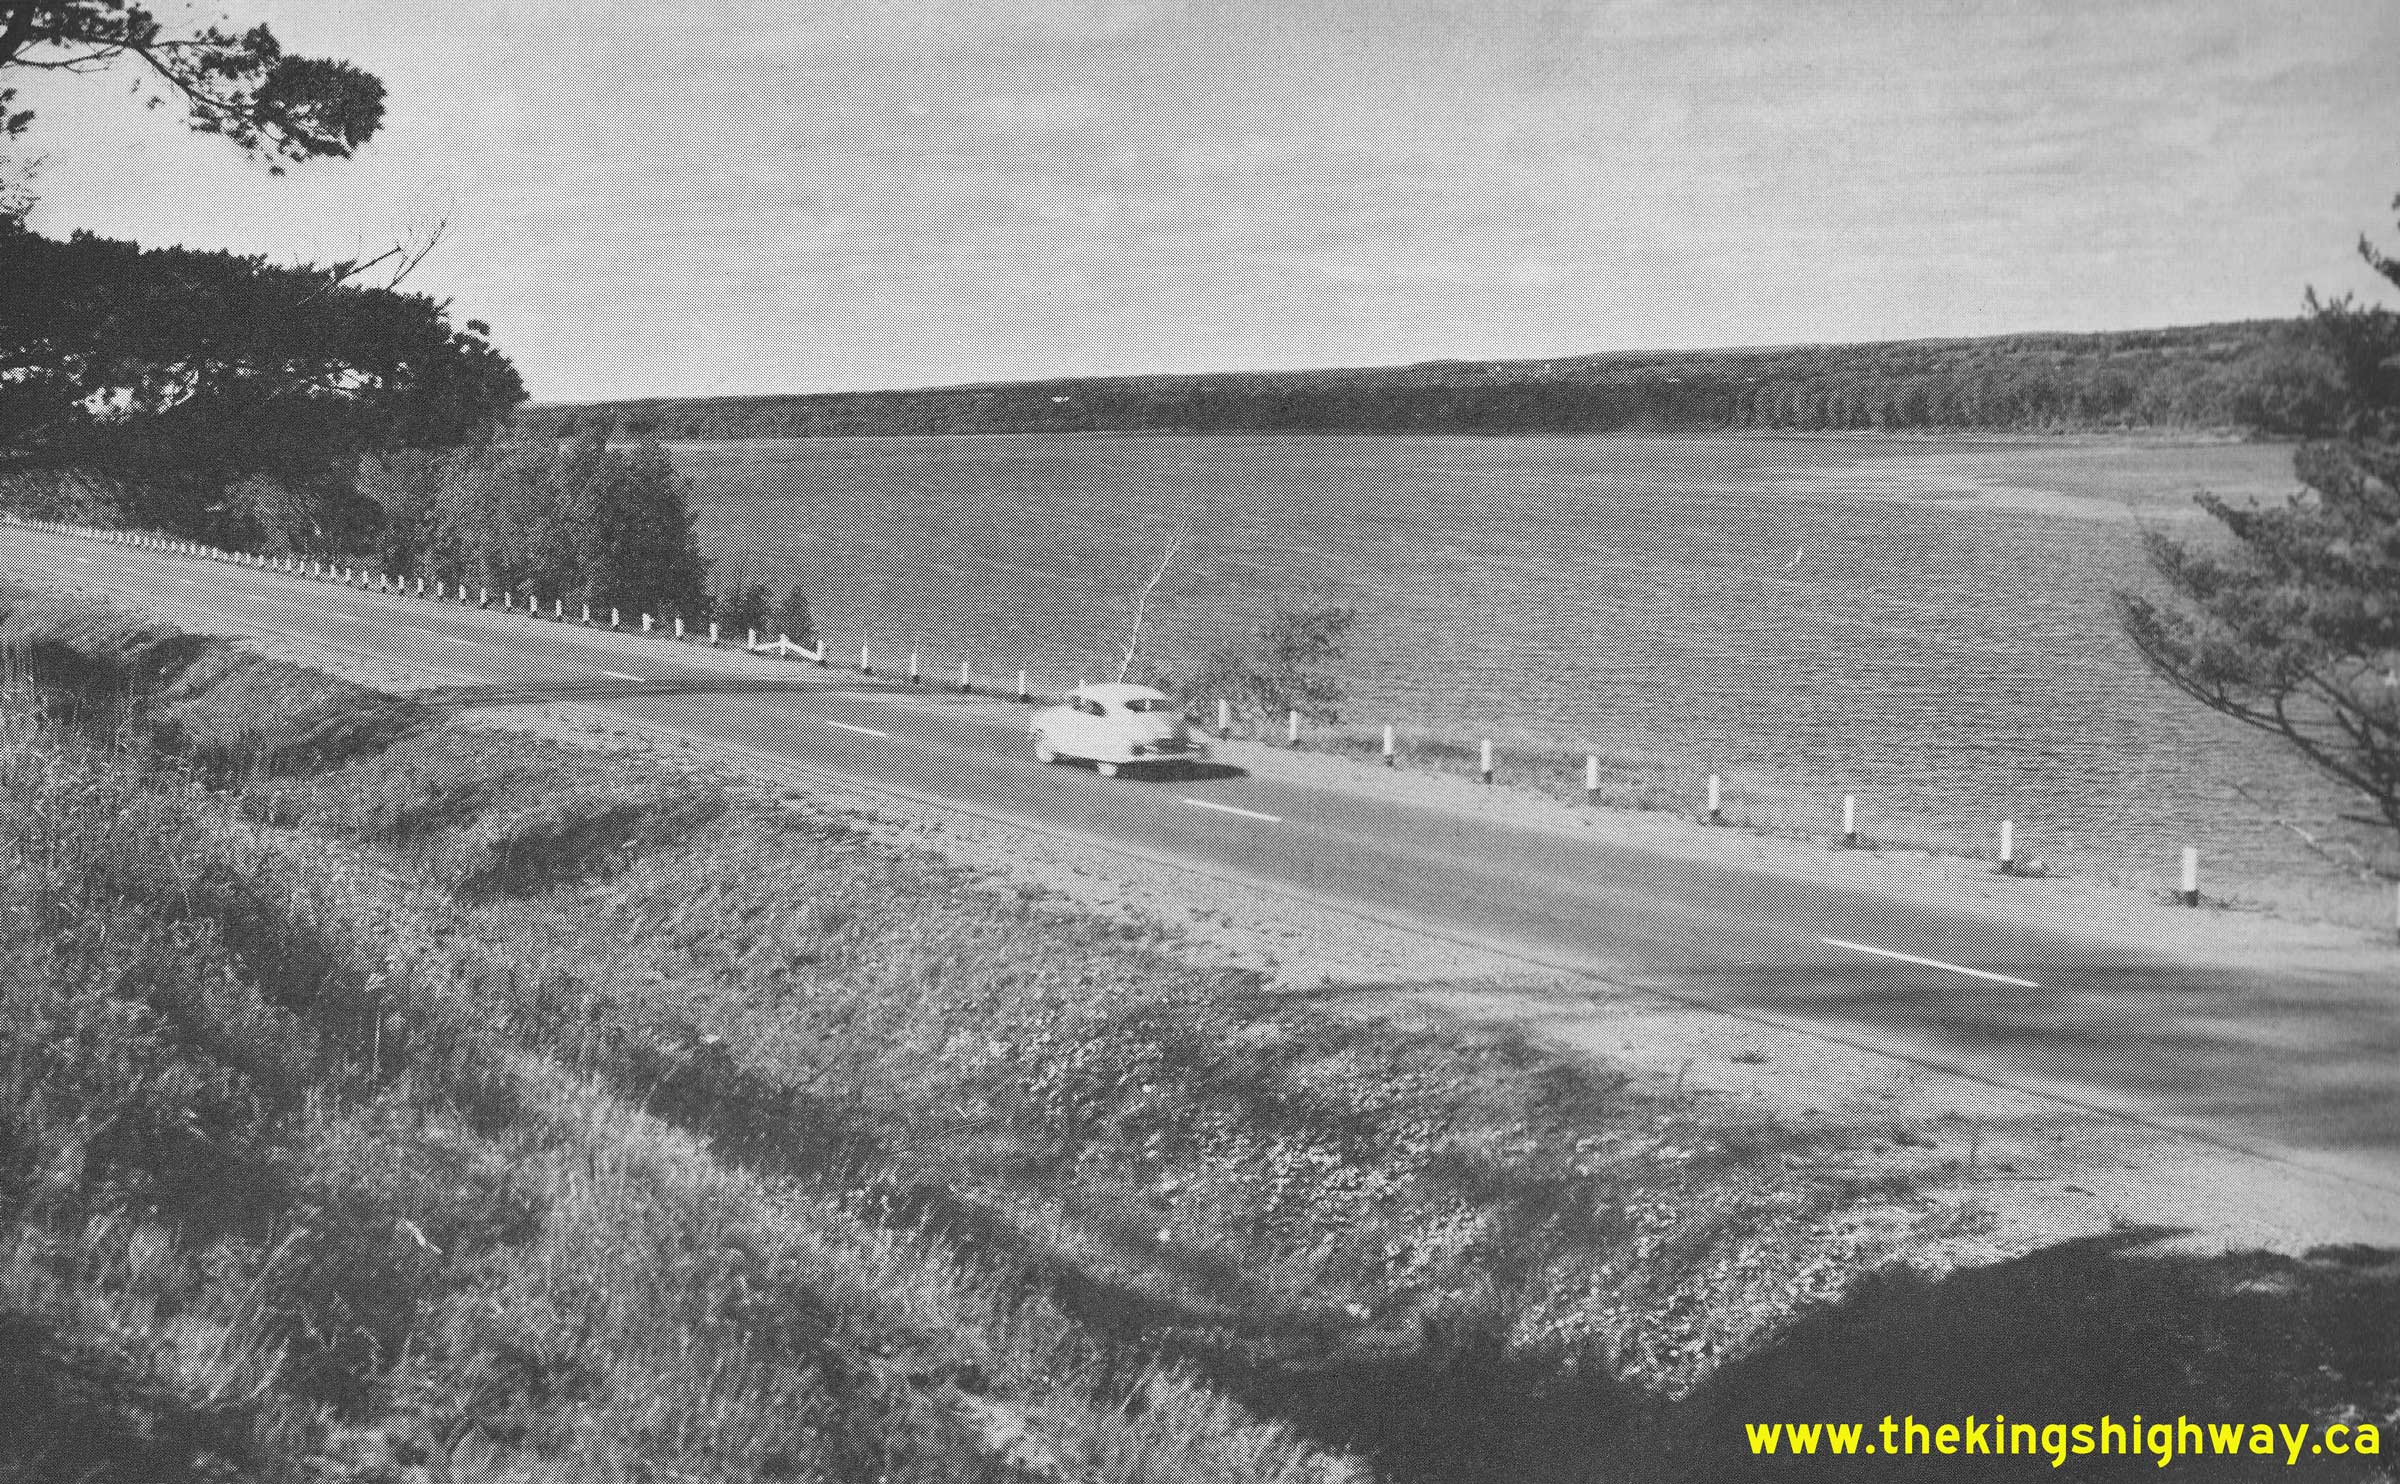
Left - Grass seeding along the shoulders of Hwy 17, 6 miles west of North Bay. At one time, the DHO used to plant grass seed along newly-built highways in
order to reduce erosion of the road shoulders. However, this practice required continuous grass cutting during the summer months. Eventually, this practice was set
aside and shoulders along reconstructed highways were simply left with a granular surface which required periodic grading to restore the slope. See an
Enlarged Photo Here. Photo taken on September 5, 1950. (Photo courtesy of Ontario Ministry of Transportation - © King's Printer for Ontario, 1950) Right - Zone striping on Hwy 17 east of Mattawa. facing west. See an Enlarged Photo Here. Photo taken on September 5, 1950. (Photo courtesy of Ontario Ministry of Transportation - © King's Printer for Ontario, 1950) 

Left - A scenic view of the Rideau Canal in Ottawa in 1950, approaching the Wellington Street Bridge near Parliament Hill. Although they are not particularly
obvious in this photo, note the four King's Highway route markers mounted onto a single post on Rideau Canal Drive at left. For many years, the routes of Hwy 15,
Hwy 16, Hwy 17 and Hwy 31 all followed Rideau Canal Drive along a city-signed scenic loop through Downtown Ottawa. See an
Enlarged Photo Here. Photo taken in 1950. (Photo courtesy of Ontario Ministry of Transportation - © King's Printer for Ontario, 1950) Right - Facing south along Rideau Canal Drive (Hwy 15, Hwy 16, Hwy 17 & Hwy 31) in Ottawa in 1951. See an Enlarged Photo Here. Photo taken in 1951. (Photo courtesy of Ontario Ministry of Transportation - © King's Printer for Ontario, 1951) 
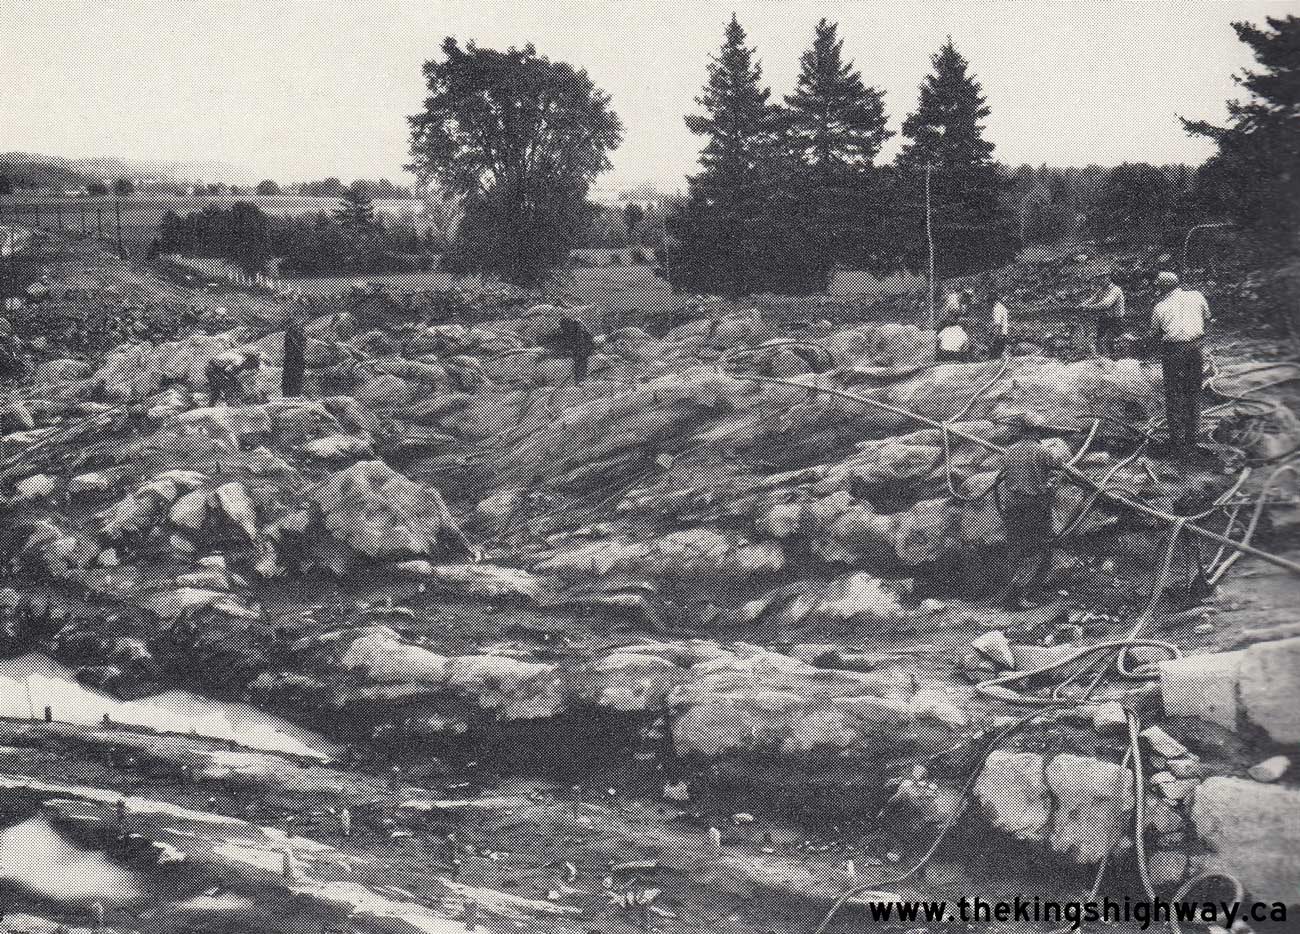
Above - Preparation for rock blasting for a new Hwy 17 alignment under Contract #1950-384, 4 1/2 miles south of Haley. See an
Enlarged Photo Here. Photo taken on June 12, 1951. (Photo courtesy of Ontario Ministry of Transportation - © King's Printer for Ontario, 1951) 

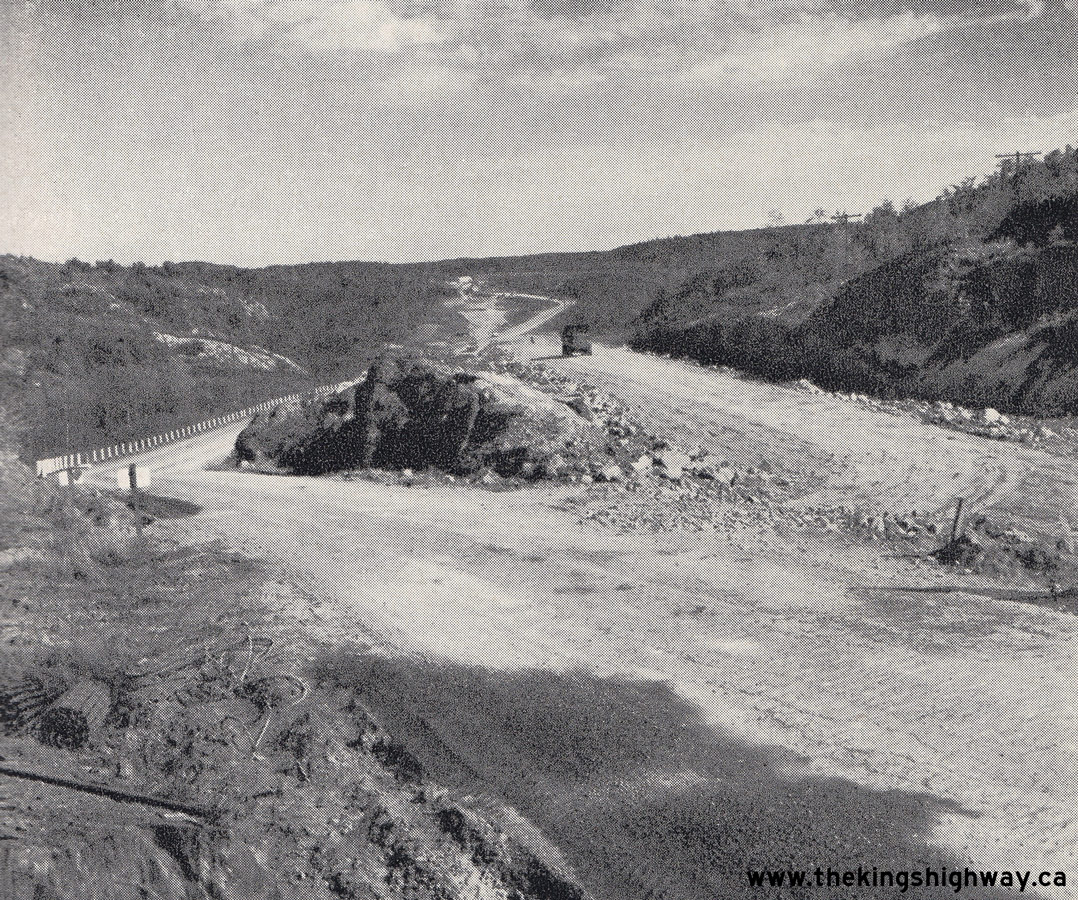
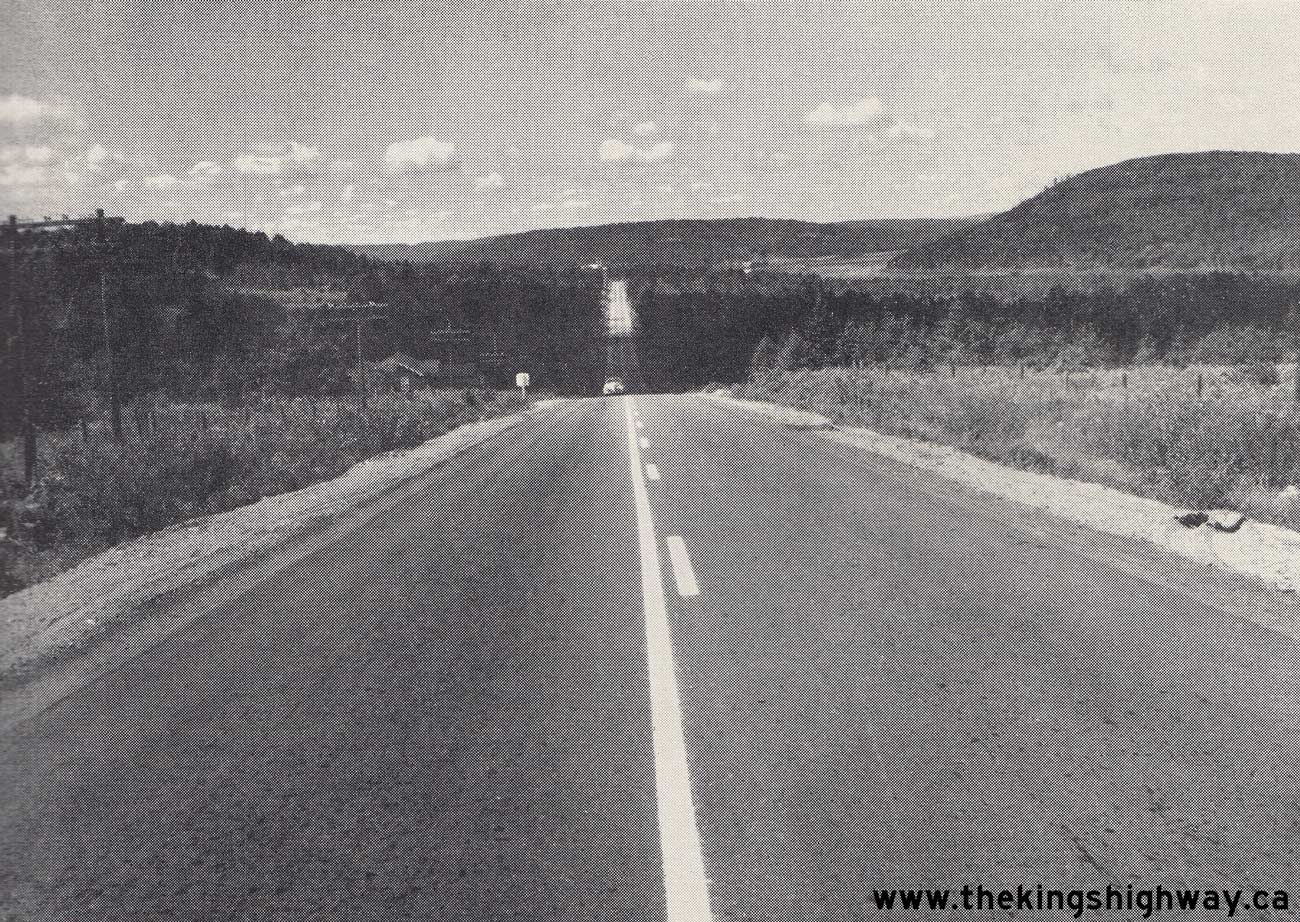
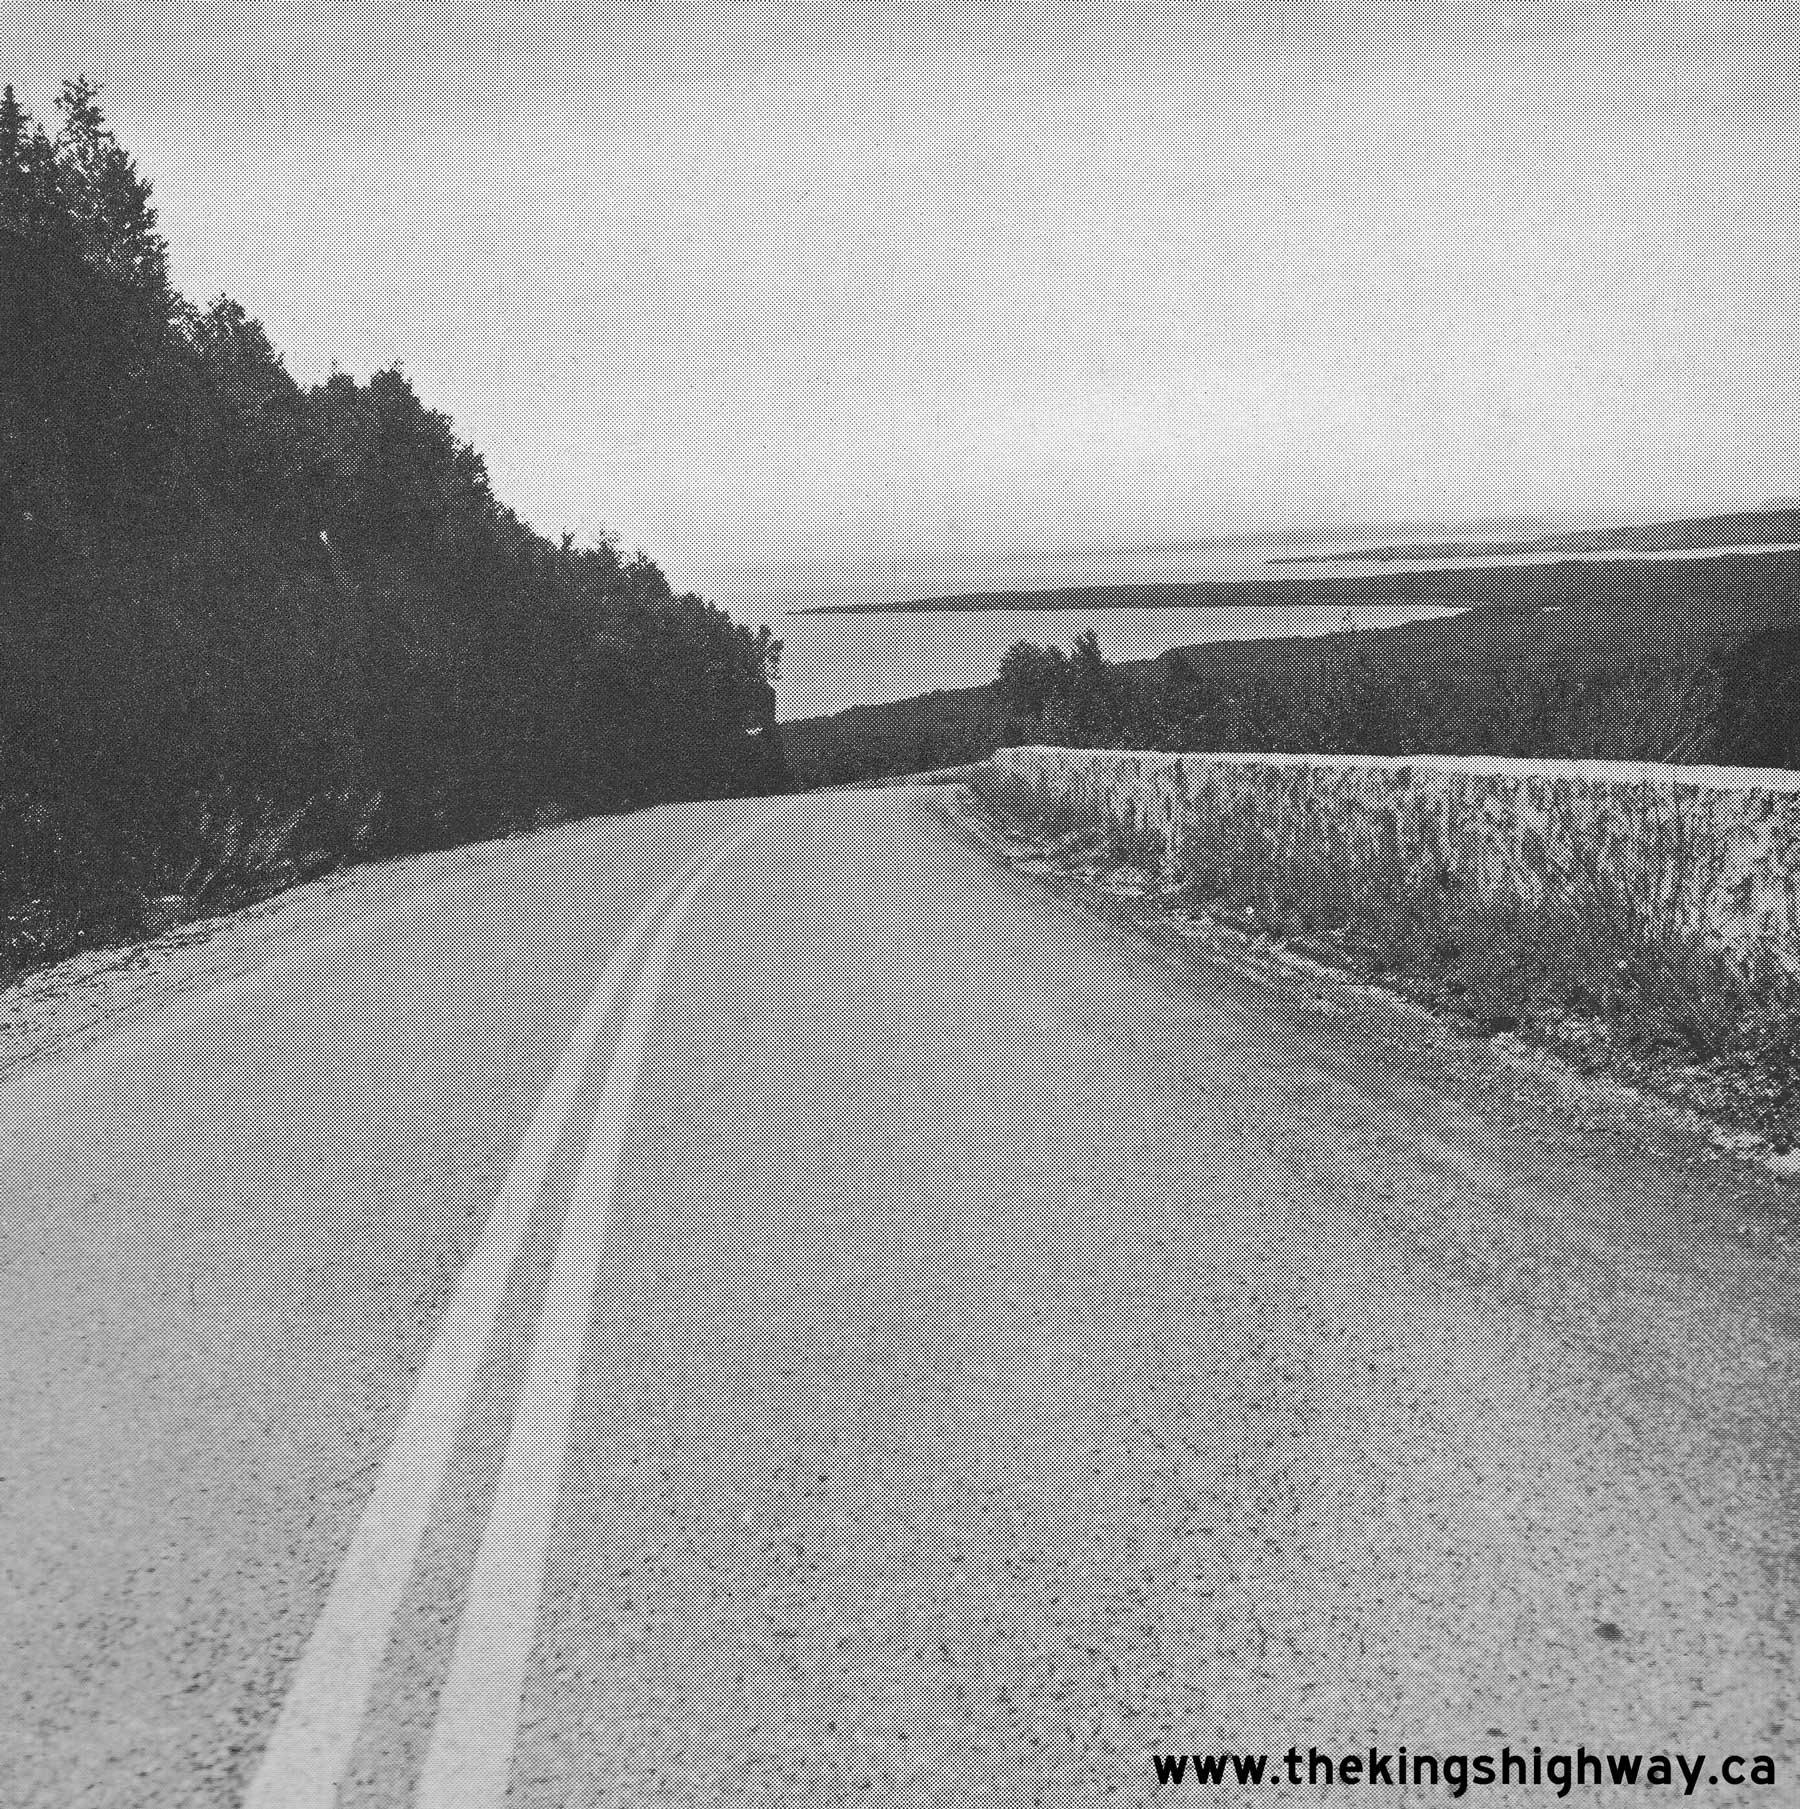
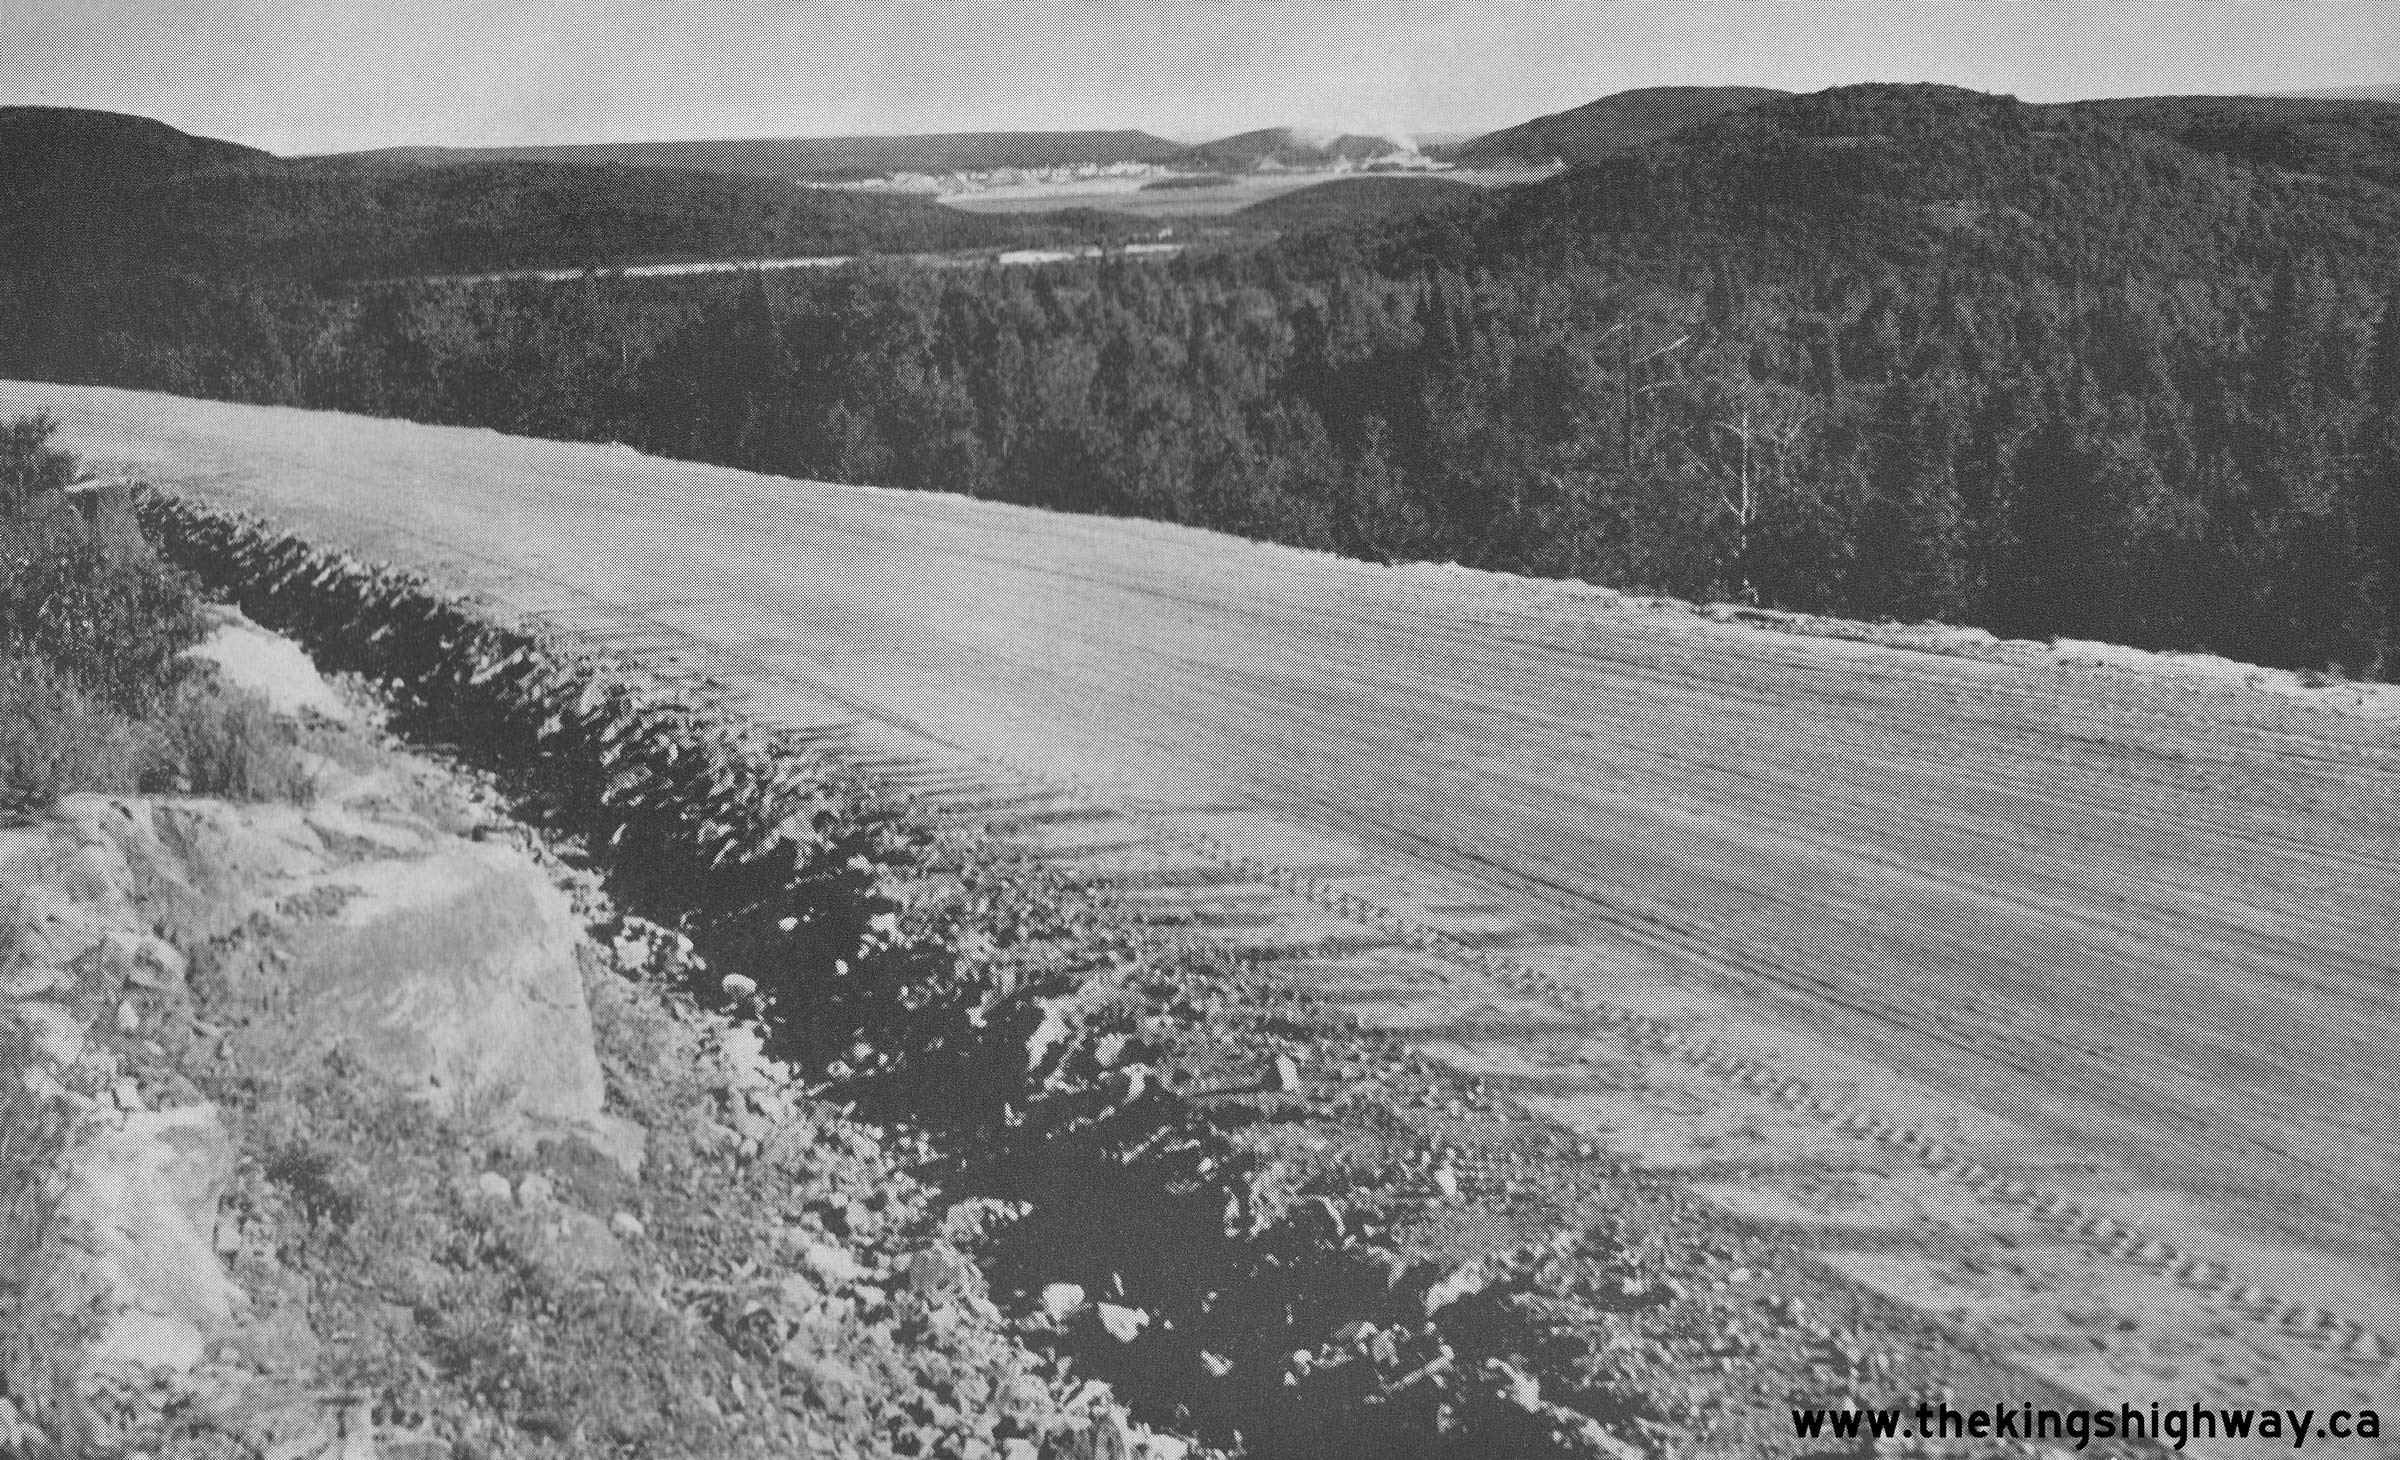
Left - Approaching Jackfish Lake on a newly-completed and paved section of Hwy 17 about 12 1/2 miles east of Terrace Bay. See an
Enlarged Photo Here. Photo taken on August 15, 1951. (Photo courtesy of Ontario Ministry of Transportation - © King's Printer for Ontario, 1951) Right - Cresting over the summit of Cavers Hill on the original Hwy 17 alignment in 1951. This section of Hwy 17 was bypassed by an entirely new highway alignment in 1959-1960, in an effort to improve the steep grade seen here. The original highway alignment, along with its trademark stone retaining wall, now lie abandoned in the forests high above the present-day Cavers Hill Rock Cut on Hwy 17. See an Enlarged Photo Here. Photo taken on August 15, 1951. (Photo courtesy of Ontario Ministry of Transportation - © King's Printer for Ontario, 1951) 
Left - Street protest in Wawa aimed at speeding up the construction of Hwy 17 to Sault Ste. Marie. This 1951 photo clearly depicts the frustration of Wawa
residents in the 1950s, who felt isolated from the rest of the province because the town lacked an external highway link. This frustration was echoed in many other
remote towns in Northern Ontario during the 1950s and 1960s, until the DHO launched an ambitious northern highway construction program to link these distant
communities with the rest of the province. On September 17, 1960, the Lake Superior Route of the Trans-Canada Highway was completed and officially opened to traffic,
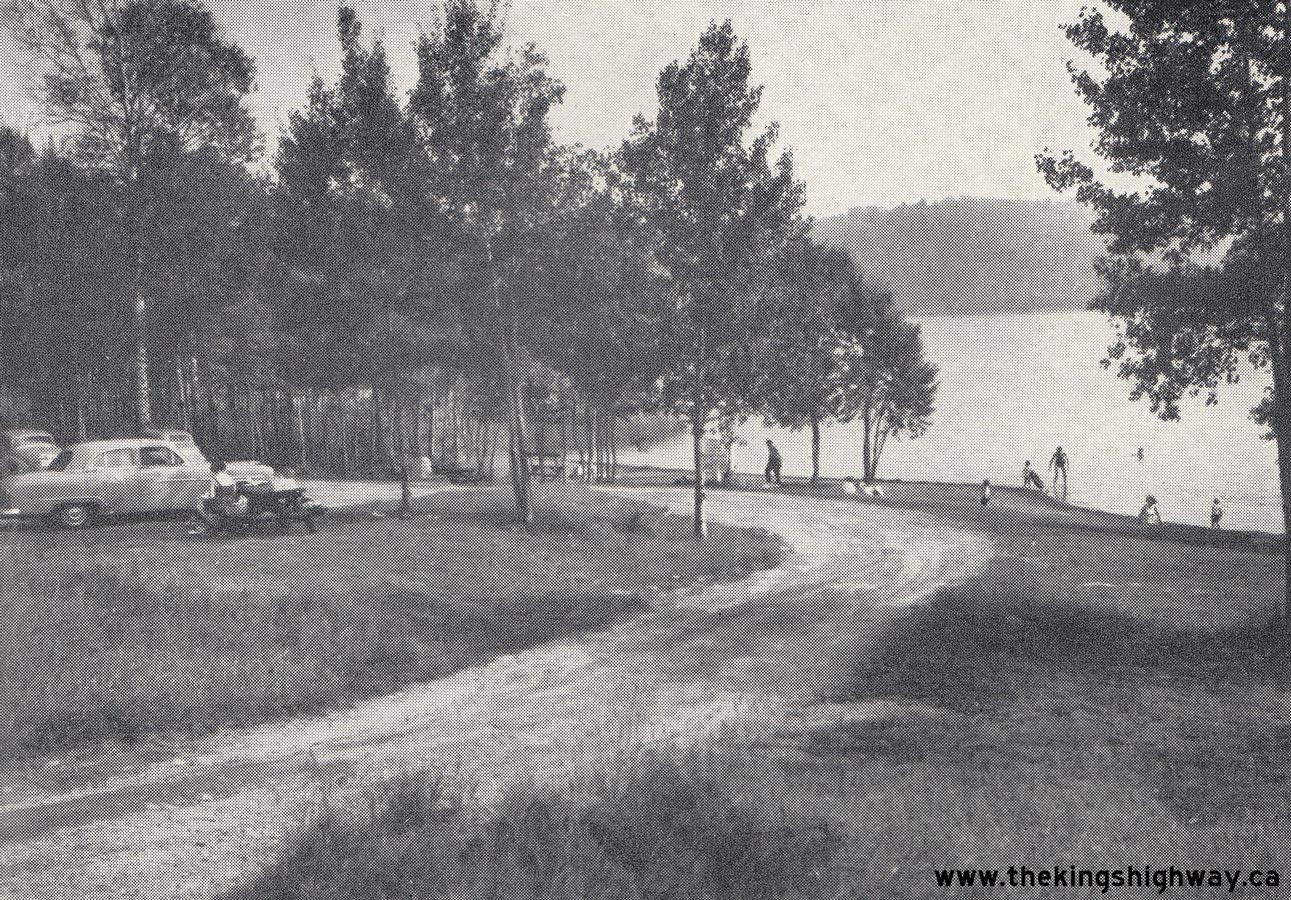
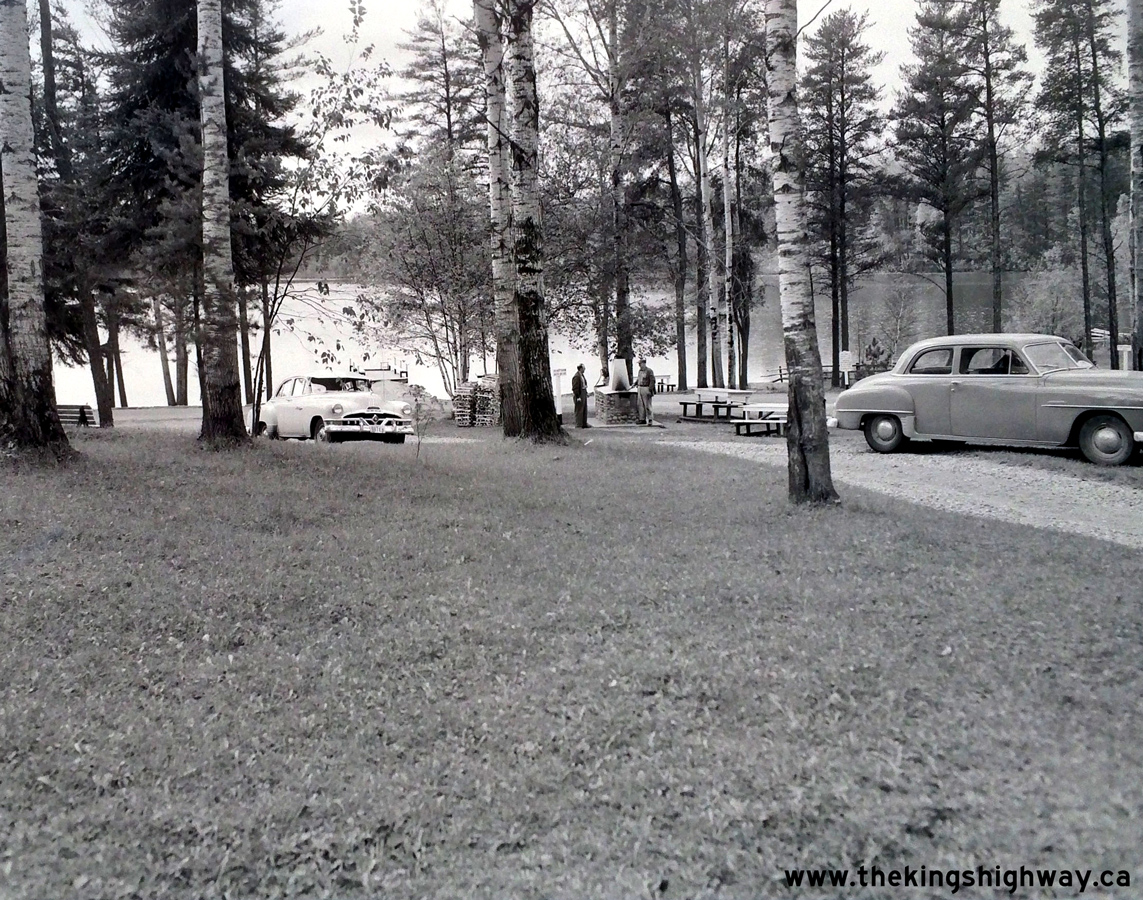
which finally linked Wawa to the rest of the King's Highway system. Photo taken in 1951. (Photo Courtesy of Michipicoten Heritage Committee, Wawa - Special thanks to Howard Whent for this photo) Right - View of the Simon Lake DHO Roadside Park on Hwy 17, located about 13 miles west of Sudbury. This 12 1/2 acre park was built by the DHO in 1939 for the convenience of motorists travelling along Hwy 17. Simon Lake Park's amenities included a beach, campground, washrooms, cooking fireplaces and a picnic area. Jurisdiction over Simon Lake Park was eventually transferred from the province to the Town of Walden. The park is still in operation today on Old Hwy 17 (today's Sudbury Road 55) in Naughton. It is presently operated by the City of Greater Sudbury. See an Enlarged Photo Here. Photo taken on August 30, 1951. (Photo courtesy of Ontario Ministry of Transportation - © King's Printer for Ontario, 1951) 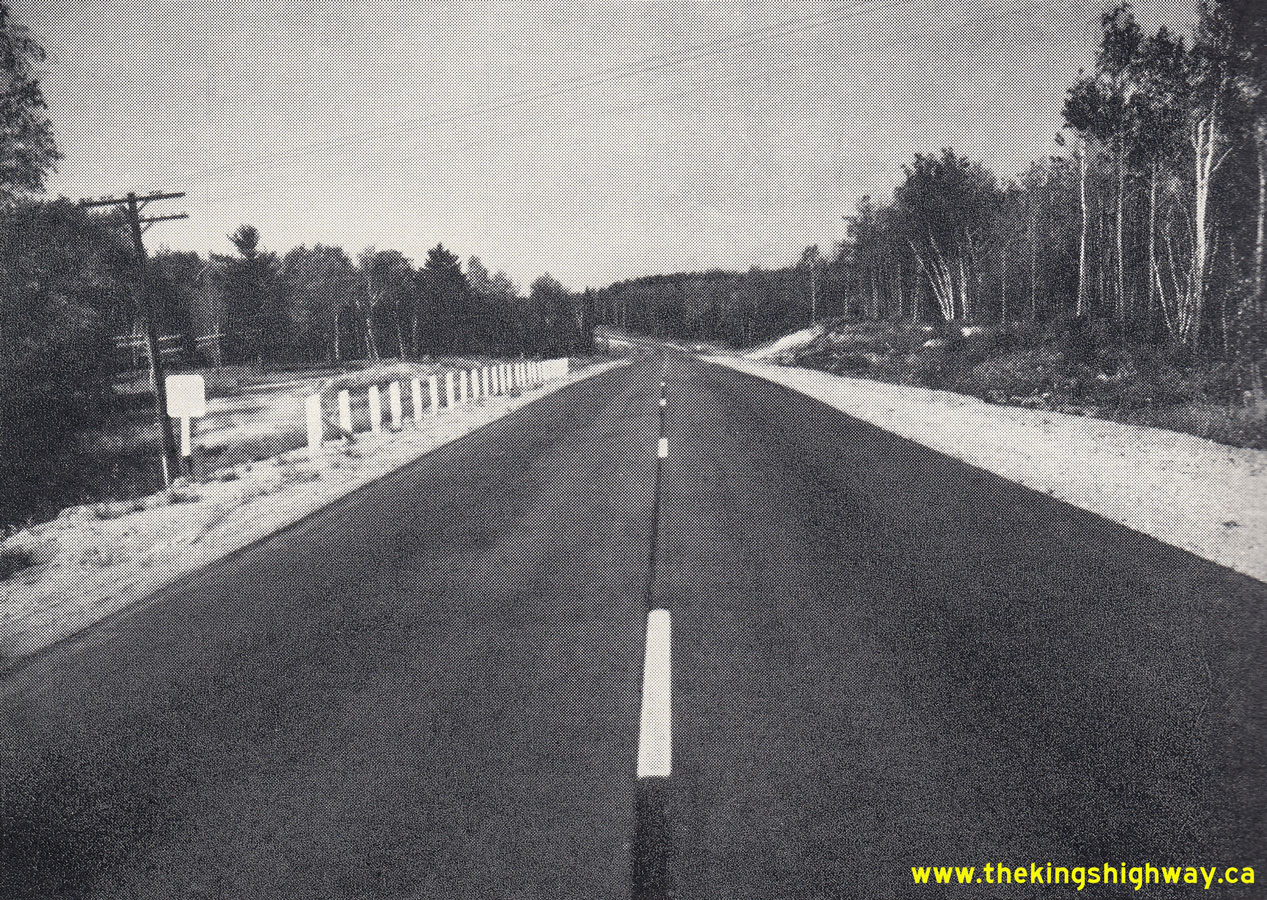
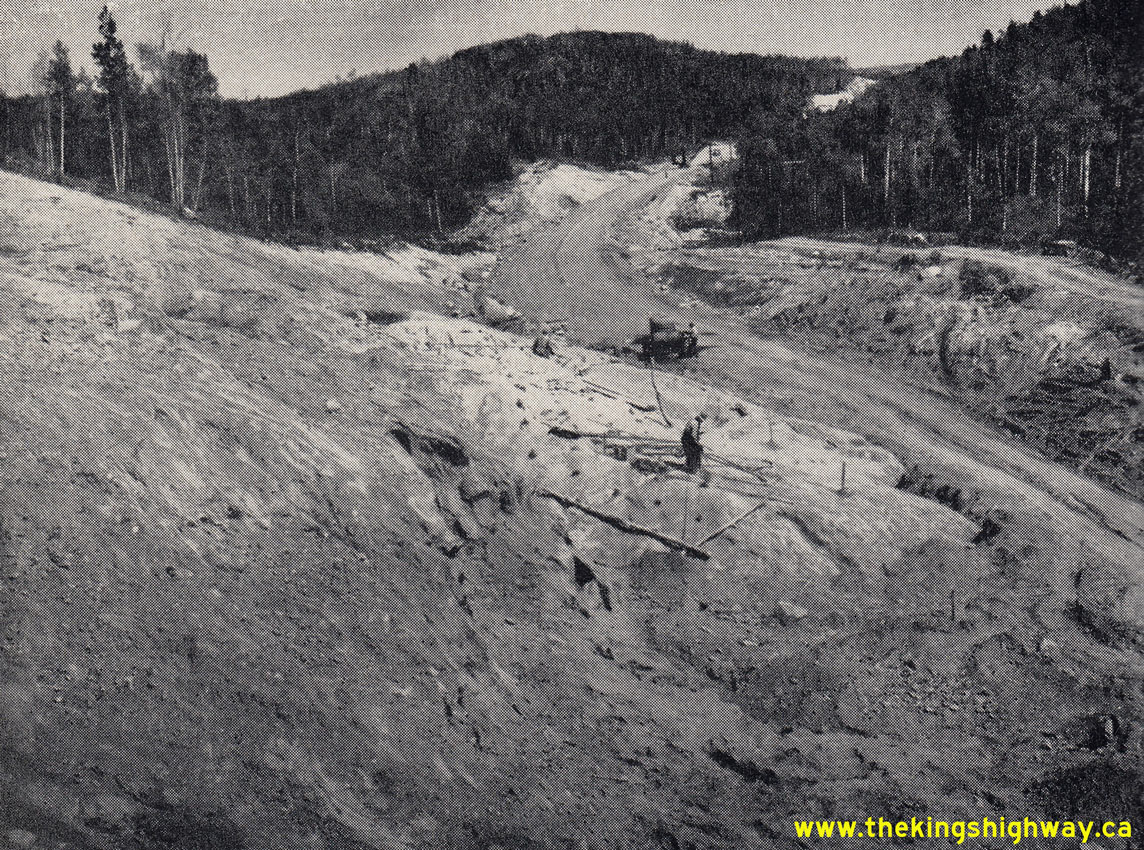
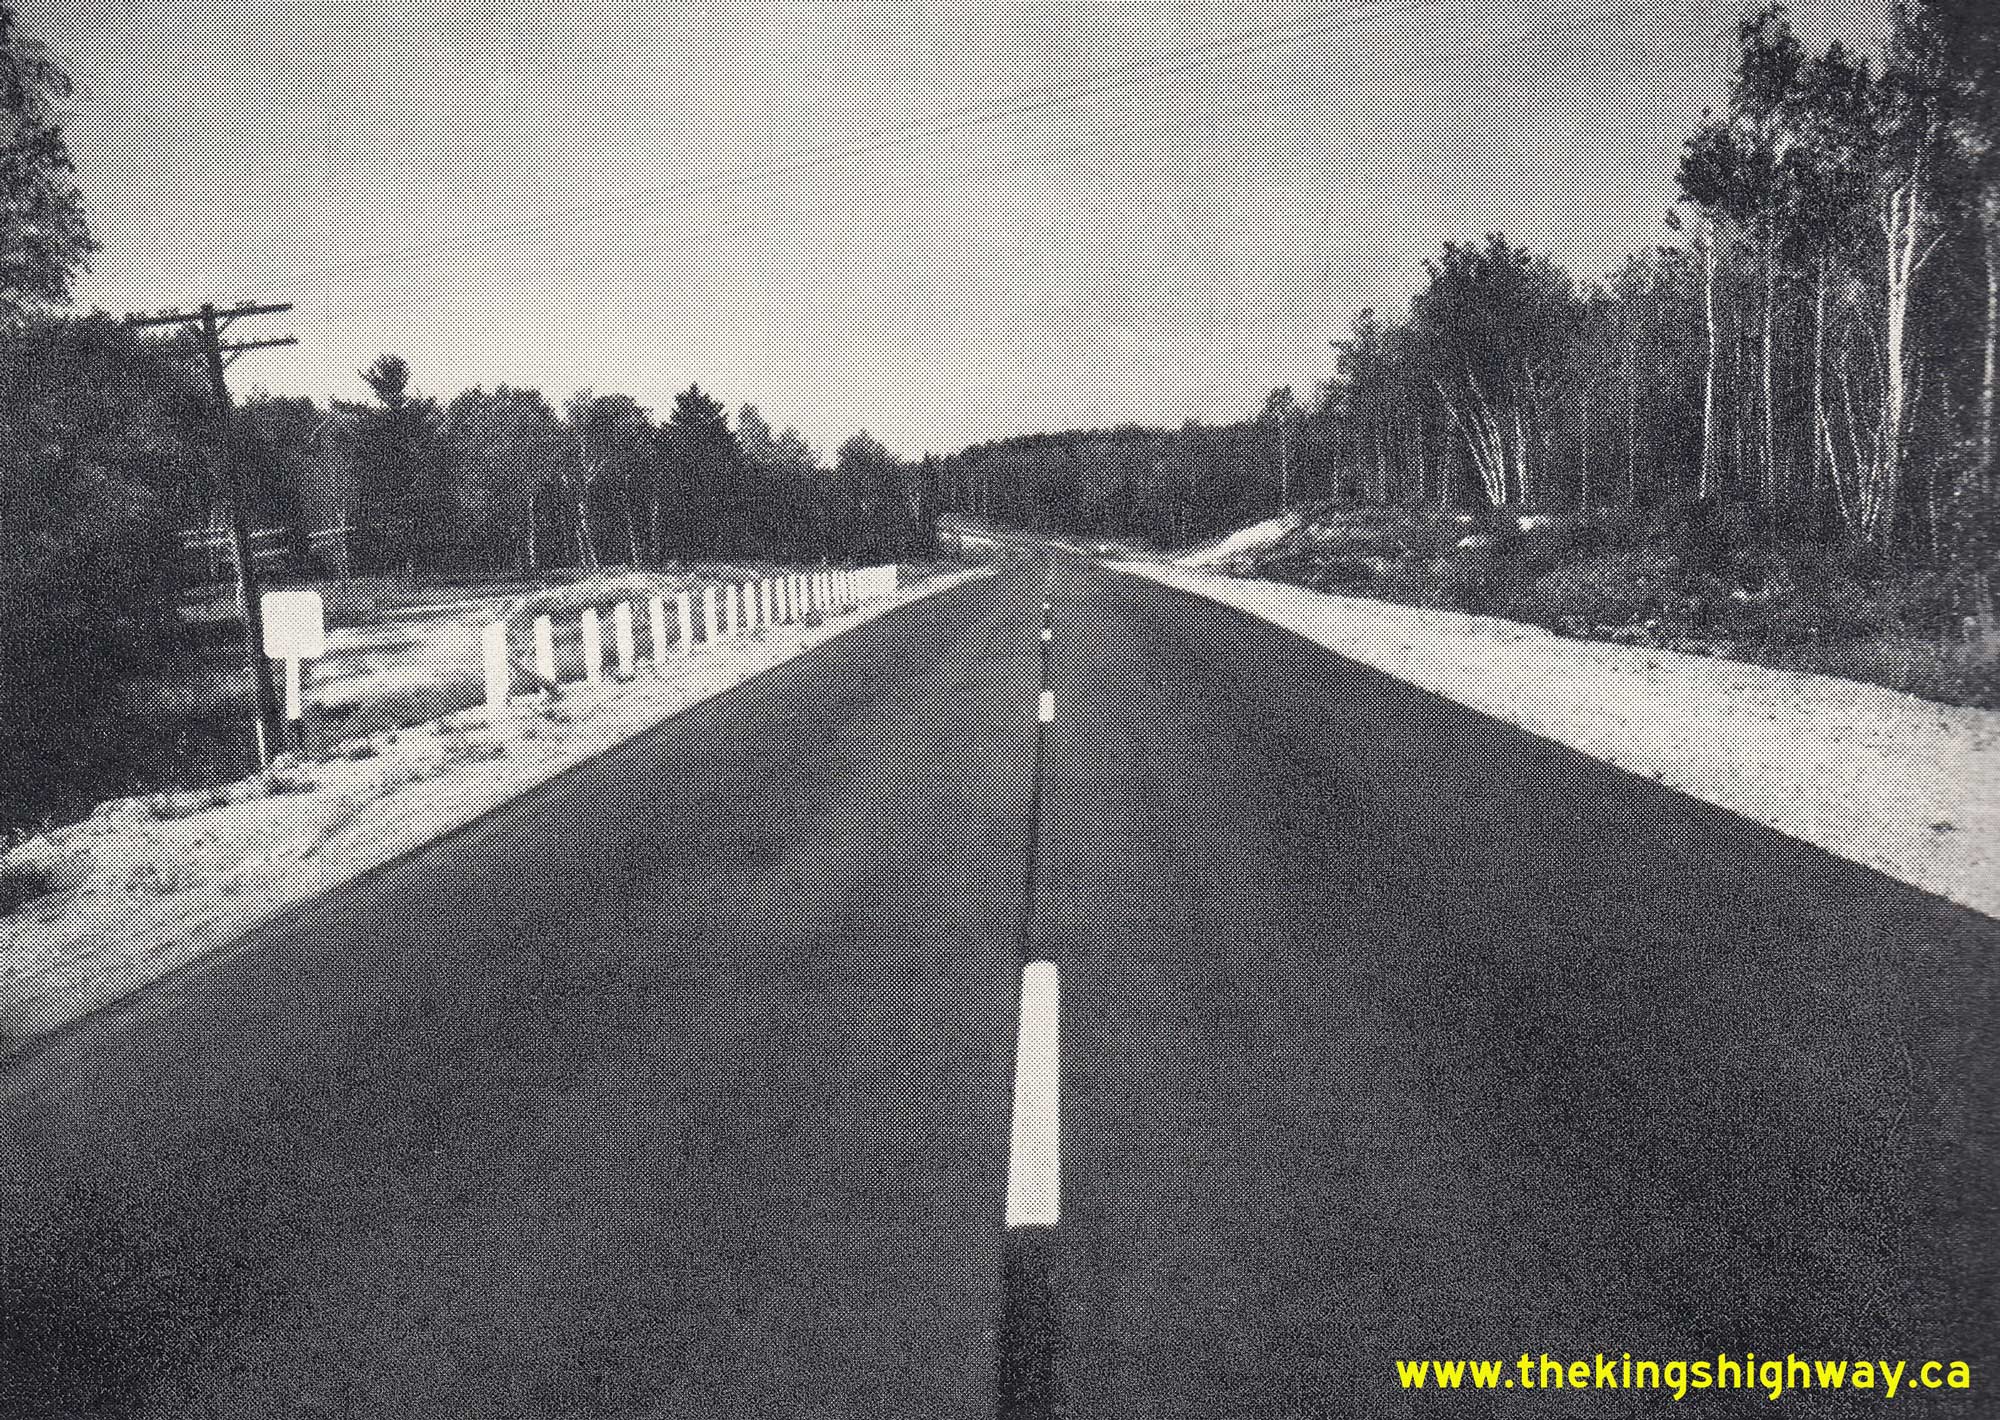
Left - Hot-mix asphalt pavement and zone striping along Hwy 17 about 12 1/2 miles east of Blind River, Contract #1950-129. See an
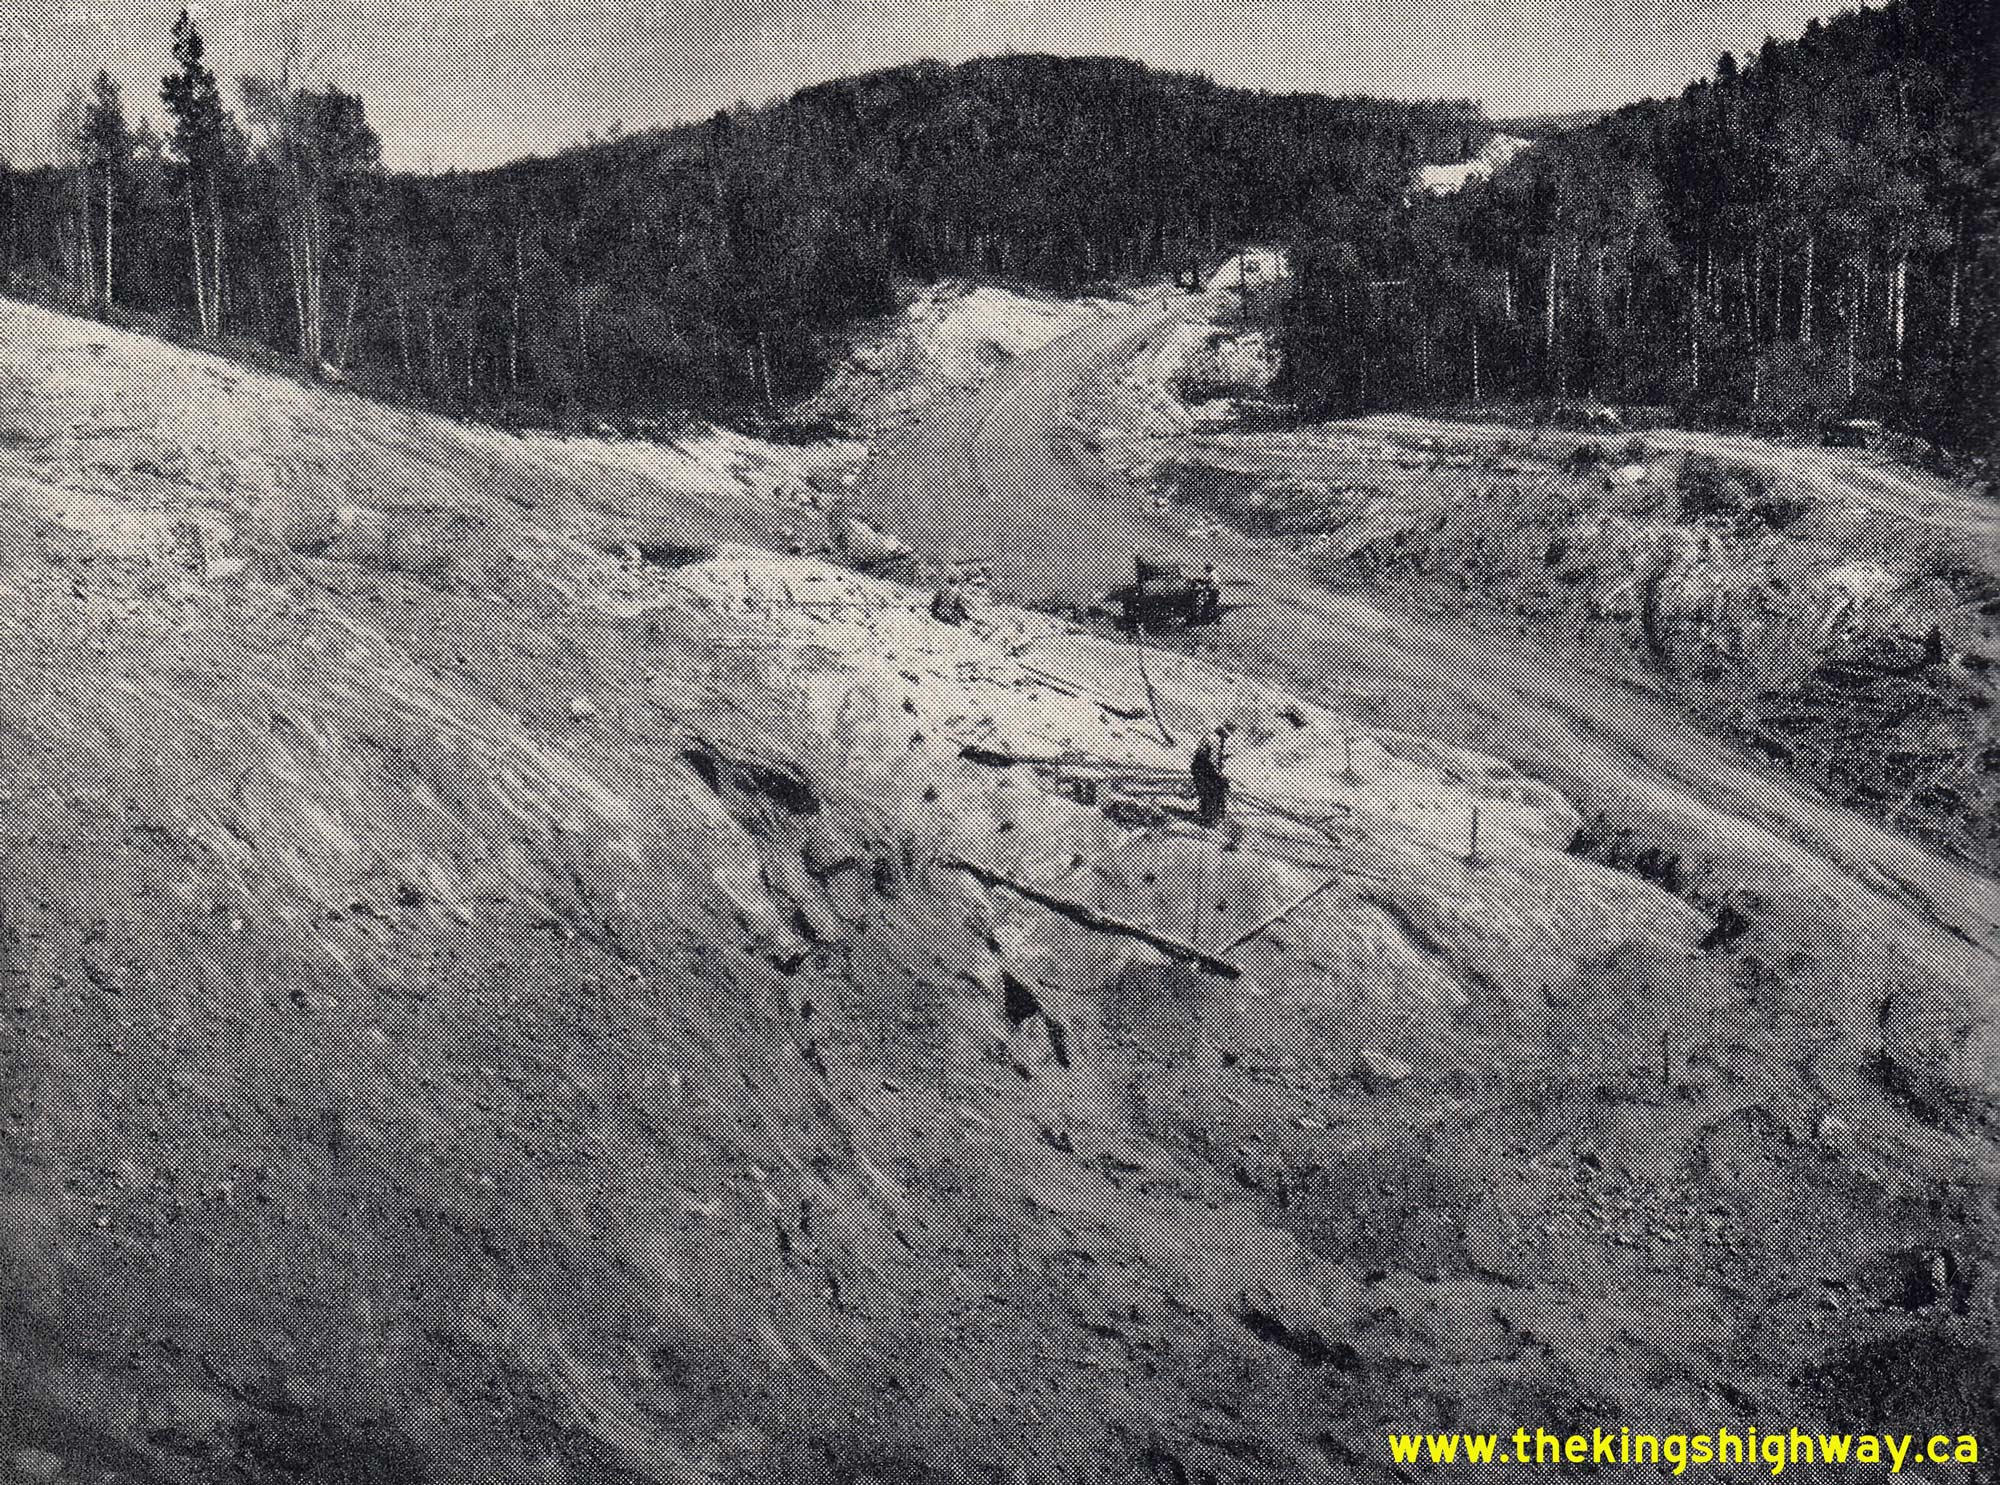
Enlarged Photo Here. Photo taken on August 30, 1951. (Photo courtesy of Ontario Ministry of Transportation - © King's Printer for Ontario, 1951) Right - Preparation for rock blasting by J.N. Pitts Construction Company on a relocated section of Hwy 17 about 5 1/2 miles west of Whitefish, Contract #1950-22. During the early 1950s, a 16-mile section of Hwy 17 was rebuilt on an entirely new alignment between Whitefish and Nairn Centre. See an Enlarged Photo Here. Photo taken on August 30, 1951. (Photo courtesy of Ontario Ministry of Transportation - © King's Printer for Ontario, 1951) 
Above - View of the Rideau Canal Locks on Hwy 17 in Downtown Ottawa in 1952. See an
Enlarged Photo Here. (Photo courtesy of National Film Board of Canada) 
Above - Temporary Bailey Bridge over the Montreal River on Hwy 17 about 75 miles north of Sault Ste Marie in 1952. The rather precarious timber structure in
the foreground was built by Ontario Hydro in the 1930s in order to provide access to a hydro dam situated a short distance to the north. By the late 1940s, planning
was well underway for a northerly extension of Hwy 17 beyond the Montreal River towards Wawa. The DHO constructed a more suitable temporary crossing over the Montreal
River in 1948, so that construction work could proceed north along Hwy 17. This temporary Bailey Bridge remained in service for a decade, until a permanent steel
and concrete bridge was constructed at this location in 1958. See an
Enlarged Photo Here. Photo taken in 1952. (Photo courtesy of Ontario Ministry of Transportation - © King's Printer for Ontario, 1952) 

Left - Postcard view of Hwy 17 near Deep River (1952) (Photo from Cameron Bevers' historical photograph collection - Original photographer unknown) Right - View from the Department of Highways' Roadside Park and Campground on Hwy 17 at Kakabeka Falls (1952) (Photo courtesy of Ontario Ministry of Transportation - © King's Printer for Ontario, 1952) 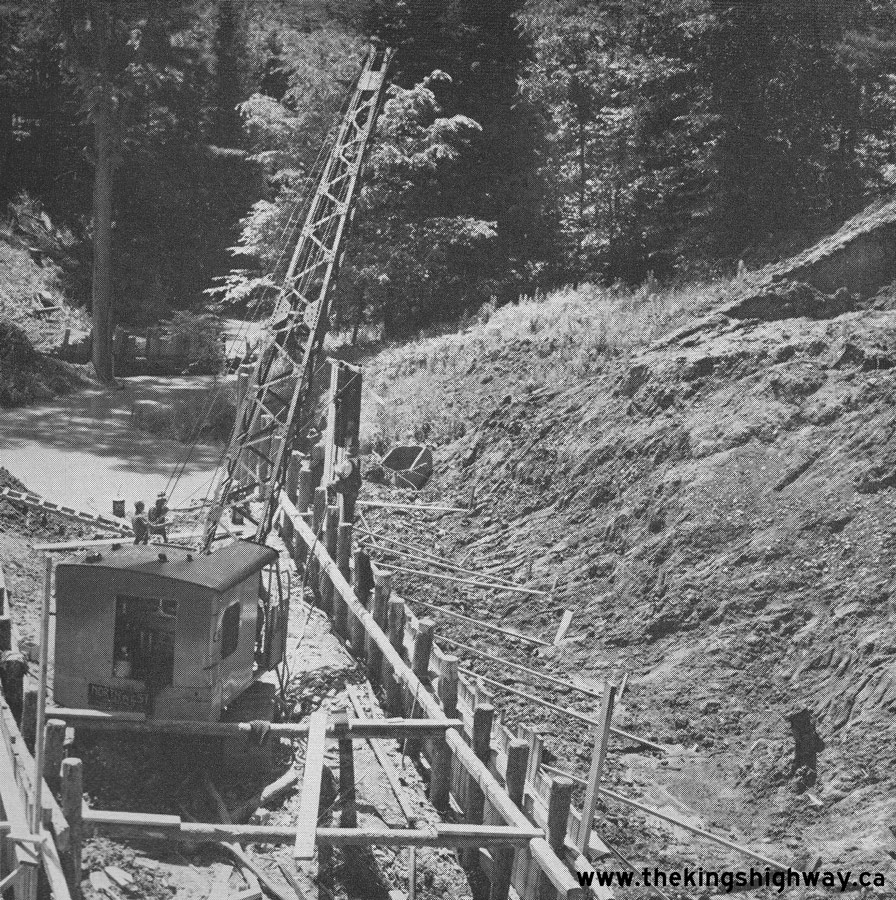
Above - Driving foundation piles for the construction of a large concrete culvert along the Trans-Canada Highway (Hwy 17 Alternate), located about 2 miles west
of Wendover by Dribble Construction Ltd. See an Enlarged Photo Here. Photo taken on June 26,
1952. (Photo courtesy of Ontario Ministry of Transportation - © King's Printer for Ontario, 1952) 
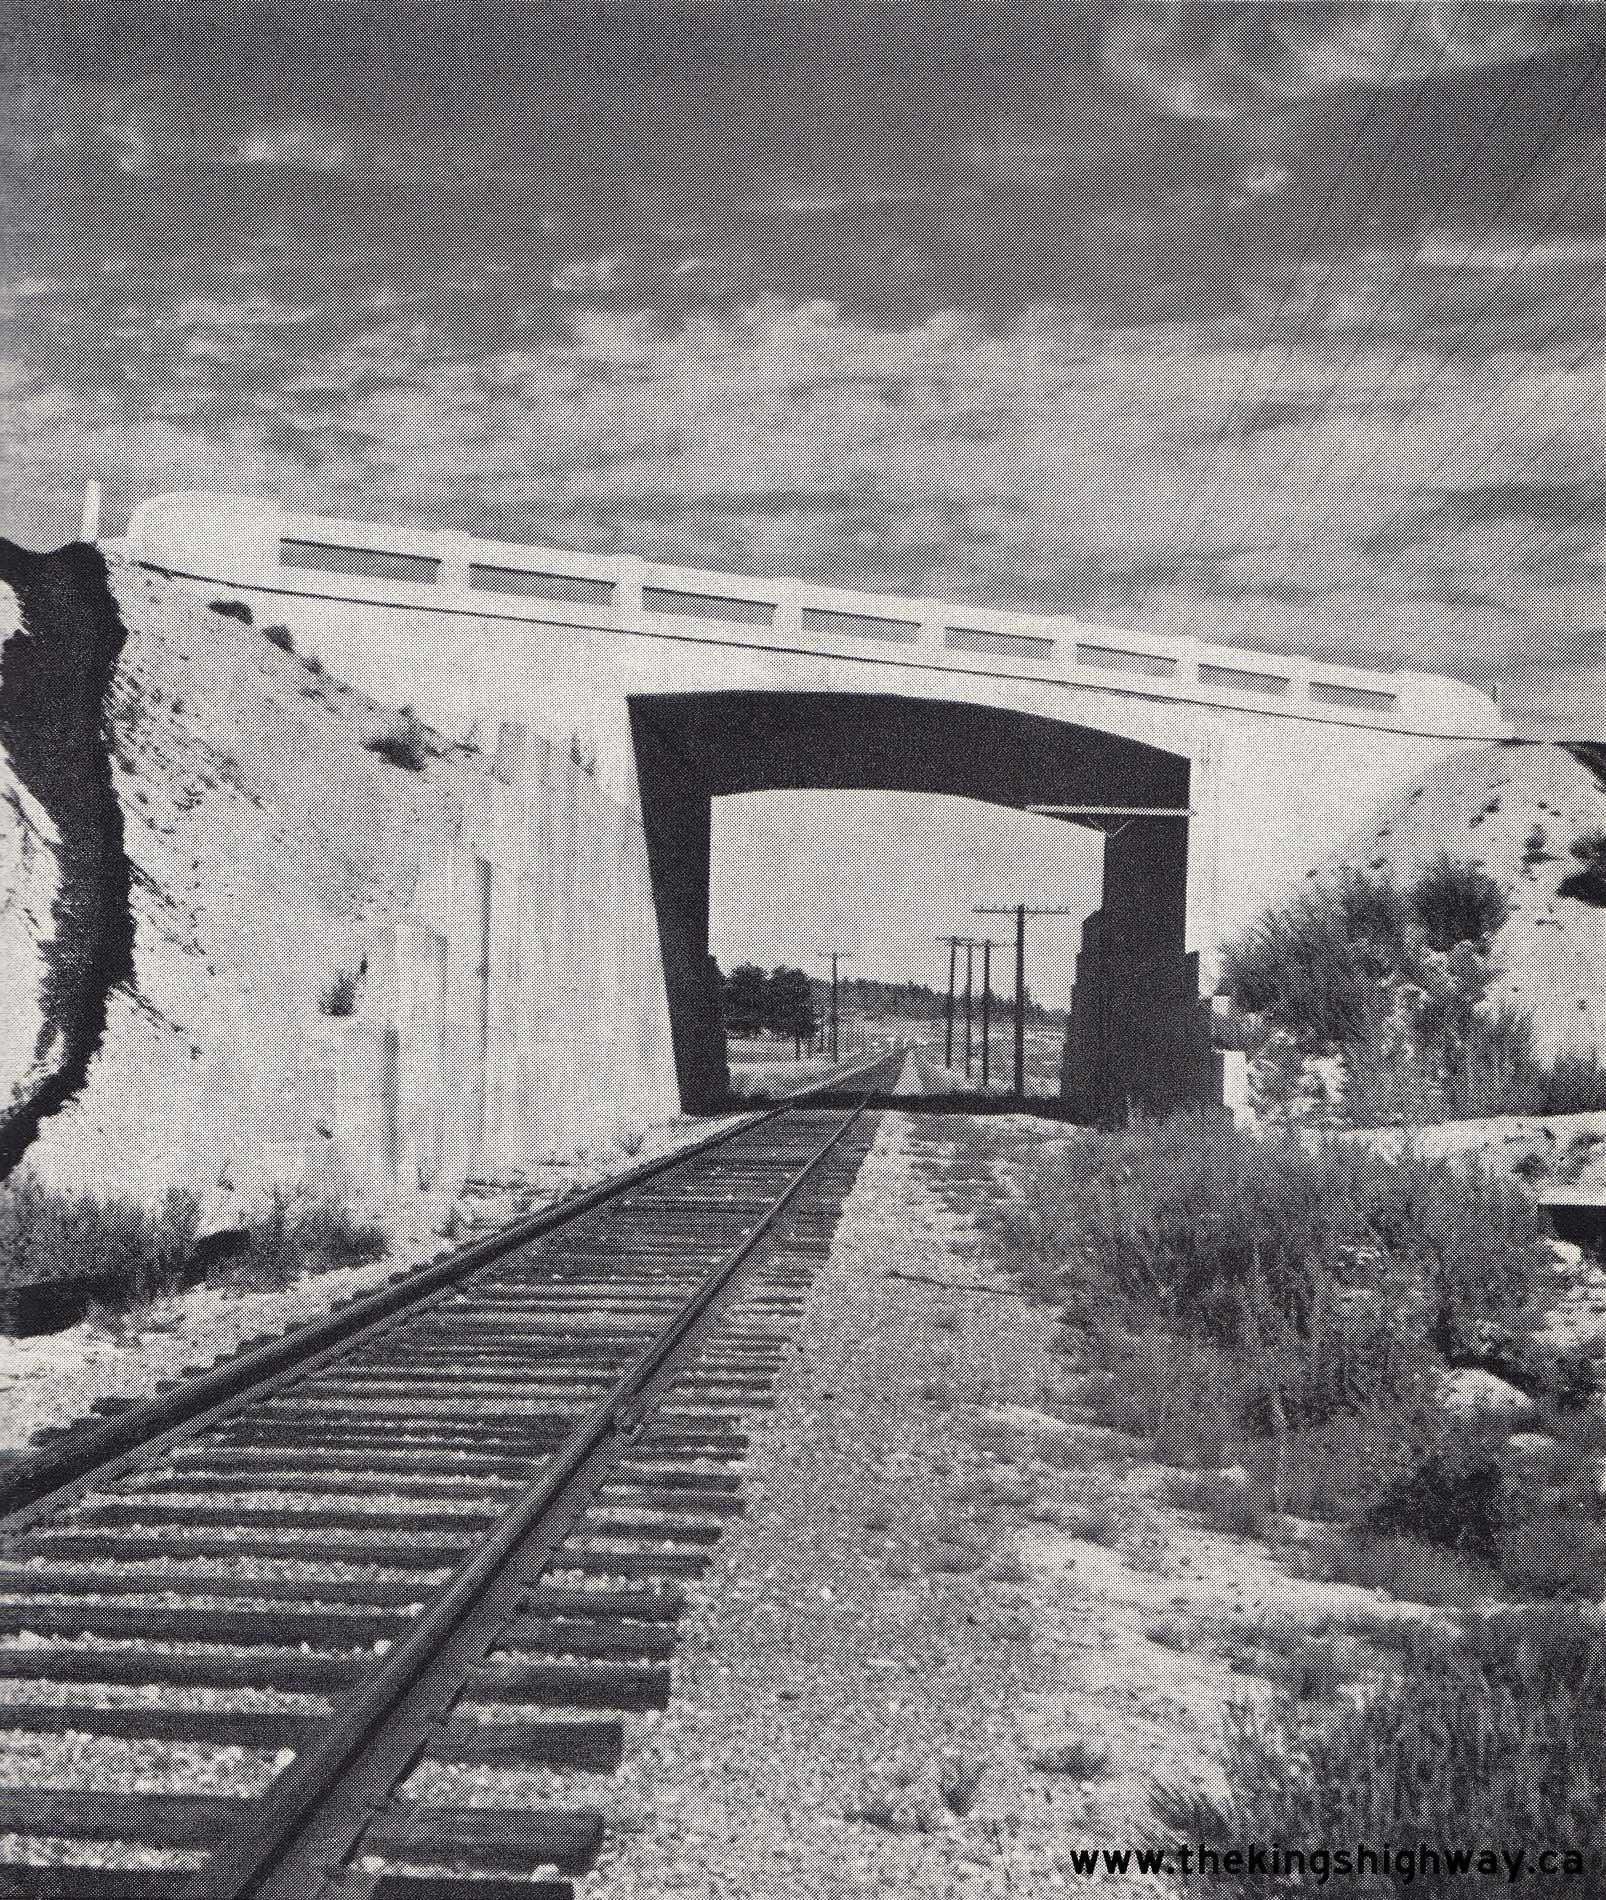
Above - Completed Selim Hill Canadian Pacific Railway (CPR) Overhead on Hwy 17, located about 4 miles east of Rossport. Interestingly, the steel girders used
to construct the main span of the Selim Hill Overhead were salvaged from the Toronto Transit Commission following the construction of the Yonge Subway. Structural
steel was in very short supply in the years following World War II and during the Korean War, so the DHO had to become rather creative in procuring the steel required
for the construction of new highway bridges such as this one. See an Enlarged Photo Here.
Photo taken on September 13, 1952. (Photo courtesy of Ontario Ministry of Transportation - © King's Printer for Ontario, 1952) 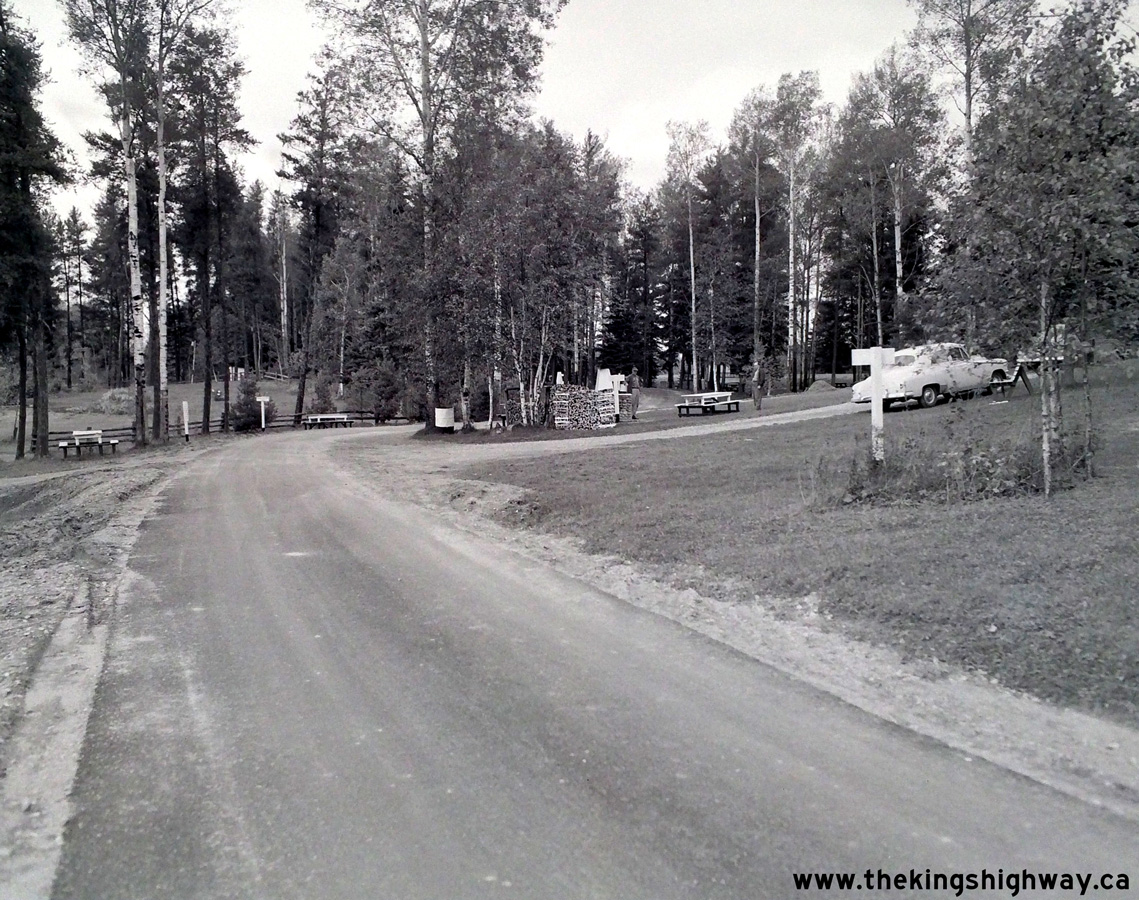
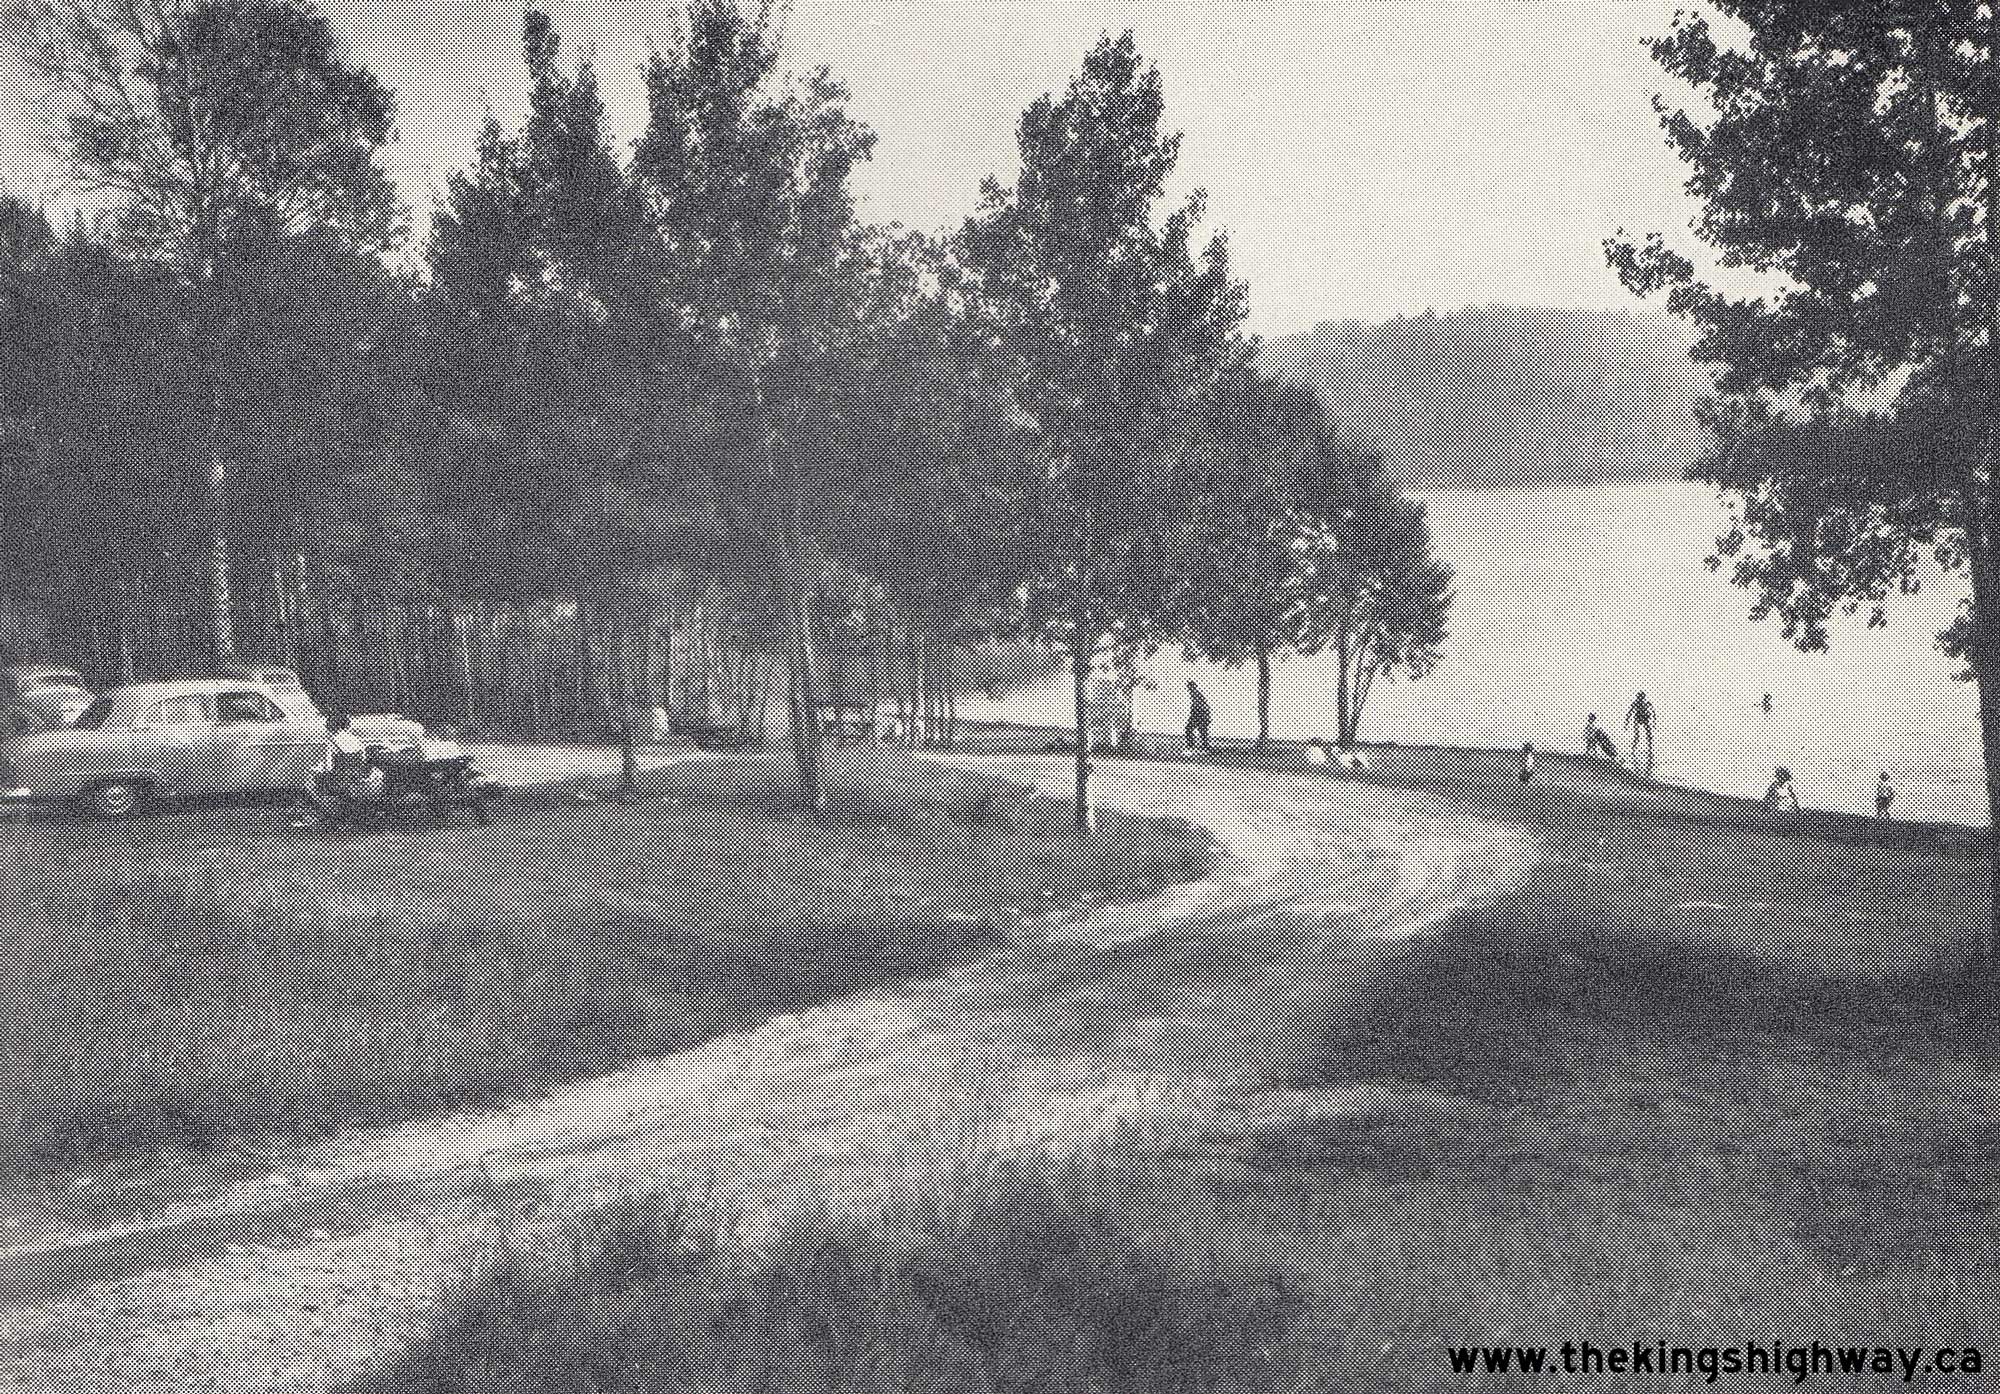
Left - Entrance road into DHO's Inwood Roadside Park. This roadside park was located about 1 mile east of Upsala on Hwy 17. It was established by the
Department of Northern Development in 1936 following the completion of the Trans-Canada Highway between Dryden and the lakehead cities of Port Arthur and Fort William
(today's Thunder Bay). See an Enlarged Photo Here.
Photo taken on September 16, 1952. (Photo courtesy of Ontario Ministry of Transportation - © King's Printer for Ontario, 1952) Right - View of the Inwood DHO Roadside Park on Hwy 17 near Upsala. This large 100-acre park was the second-largest of DHO's roadside parks along Hwy 17, second in size only to Aaron Park near Dryden. The park offered numerous lakeside campsites, picnic tables, cooking fireplaces along with a swimming area. See an Enlarged Photo Here. Photo taken on September 16, 1952. (Photo courtesy of Ontario Ministry of Transportation - © King's Printer for Ontario, 1952) 
Left - Aerial view of Downtown Ottawa and the Parliament Buildings on Hwy 17 in 1952. See an
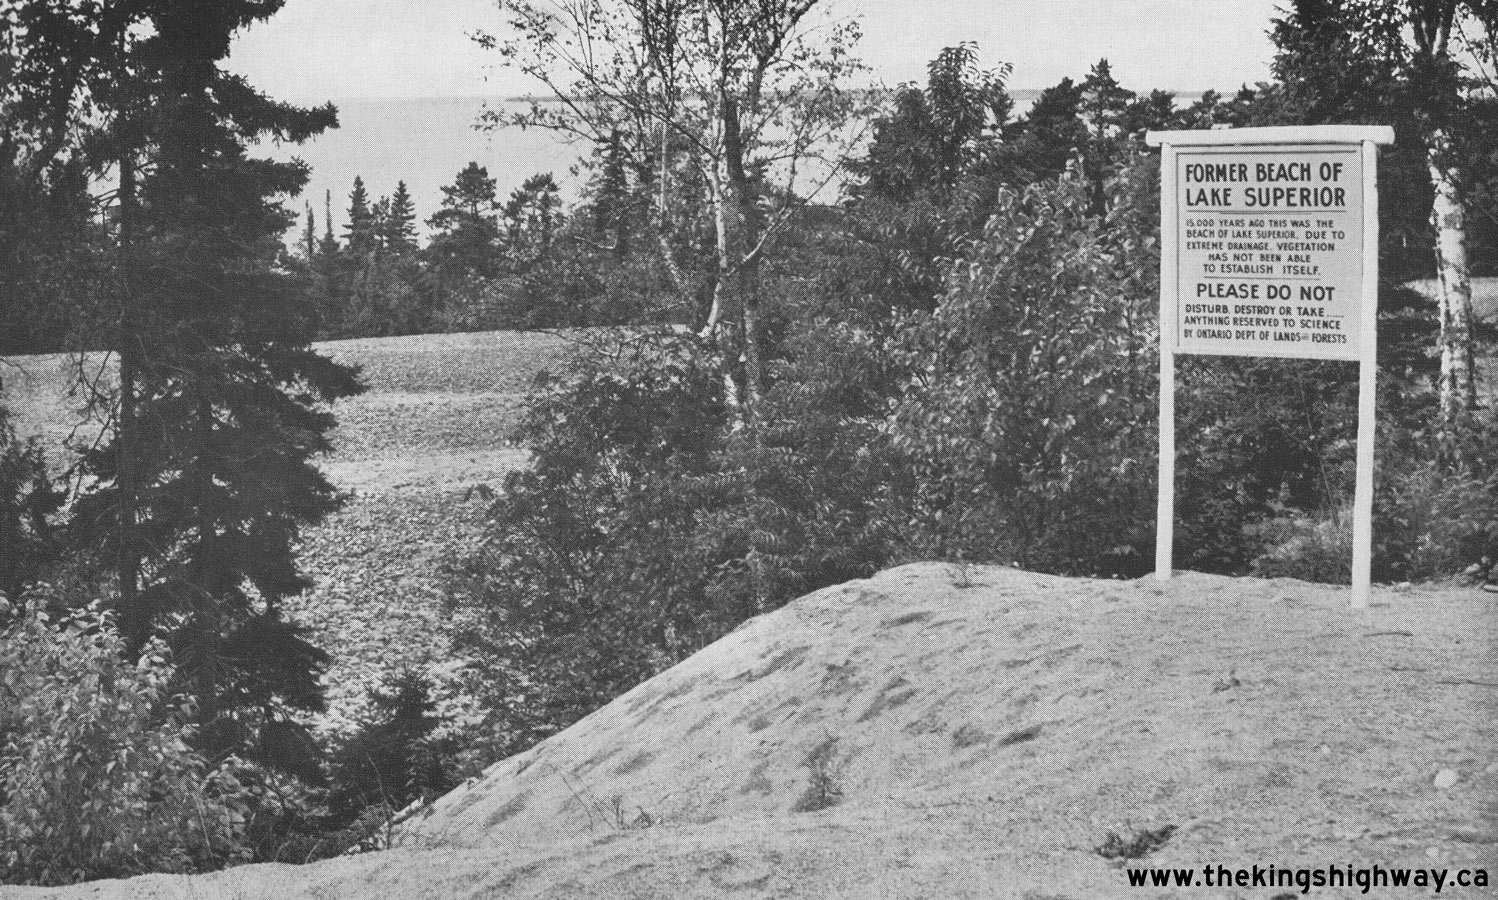
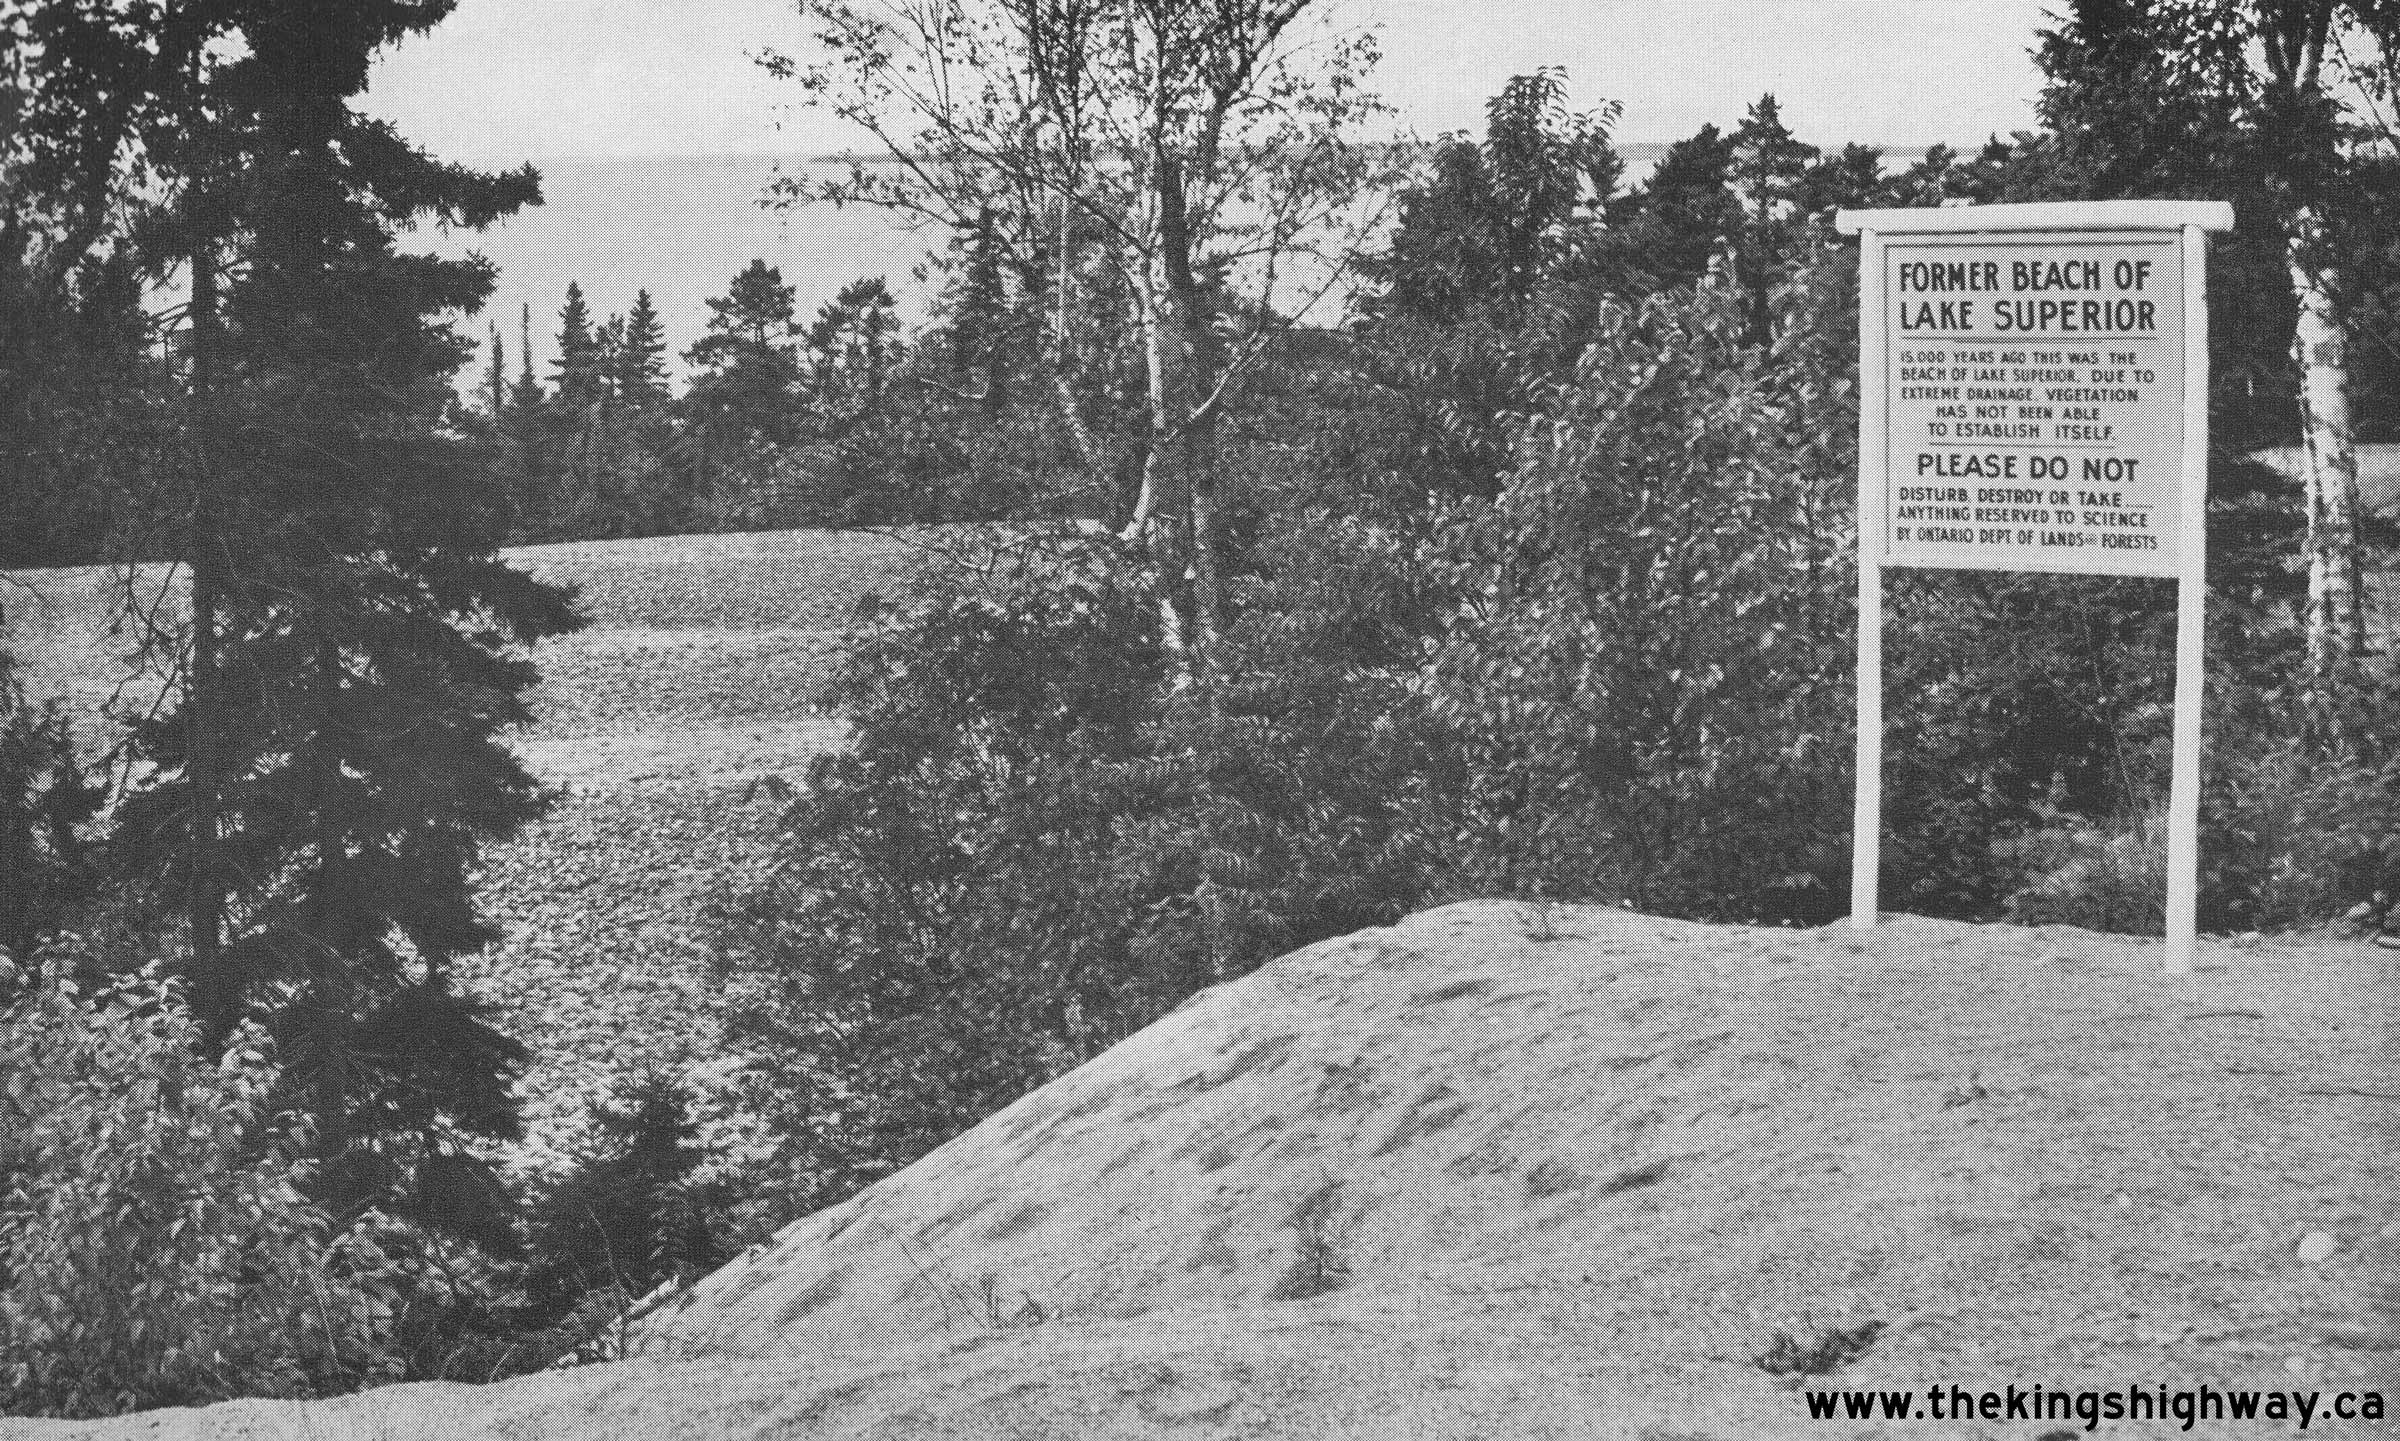
Enlarged Photo Here. (Photo courtesy of National Film Board of Canada) Right - Department of Lands and Forests' Lake Superior Beach interpretive sign on Hwy 17, about 76 miles north of Sault Ste. Marie. See an Enlarged Photo Here. Photo taken on September 24, 1952. (Photo courtesy of Ontario Ministry of Transportation - © King's Printer for Ontario, 1952) 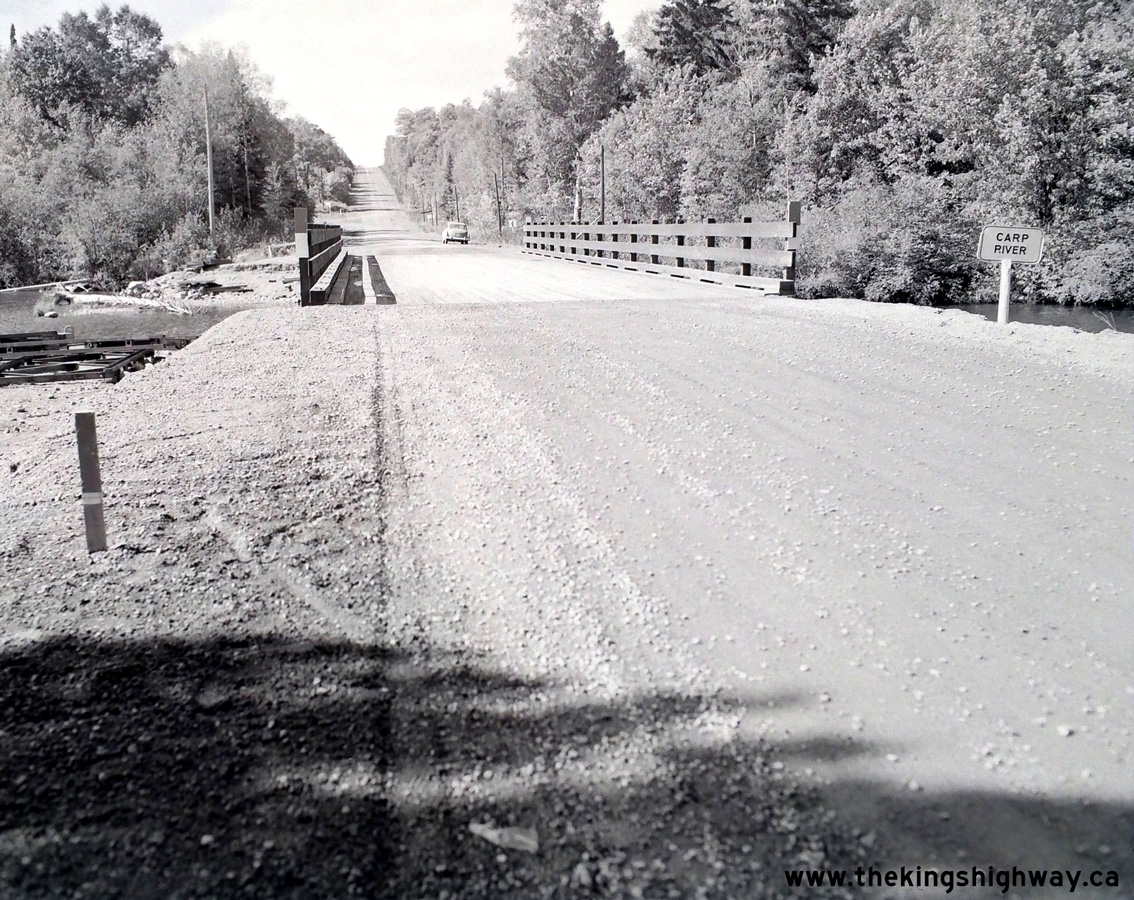
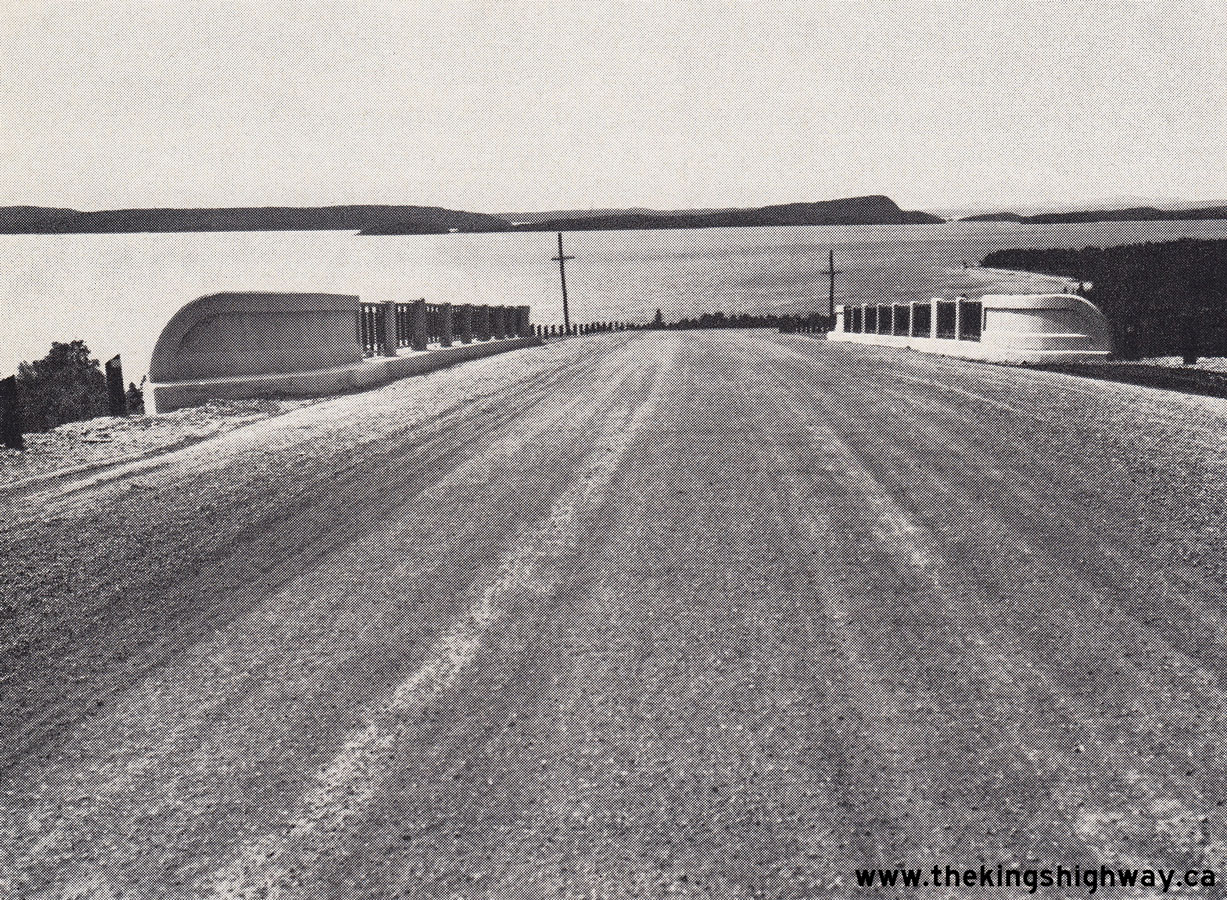
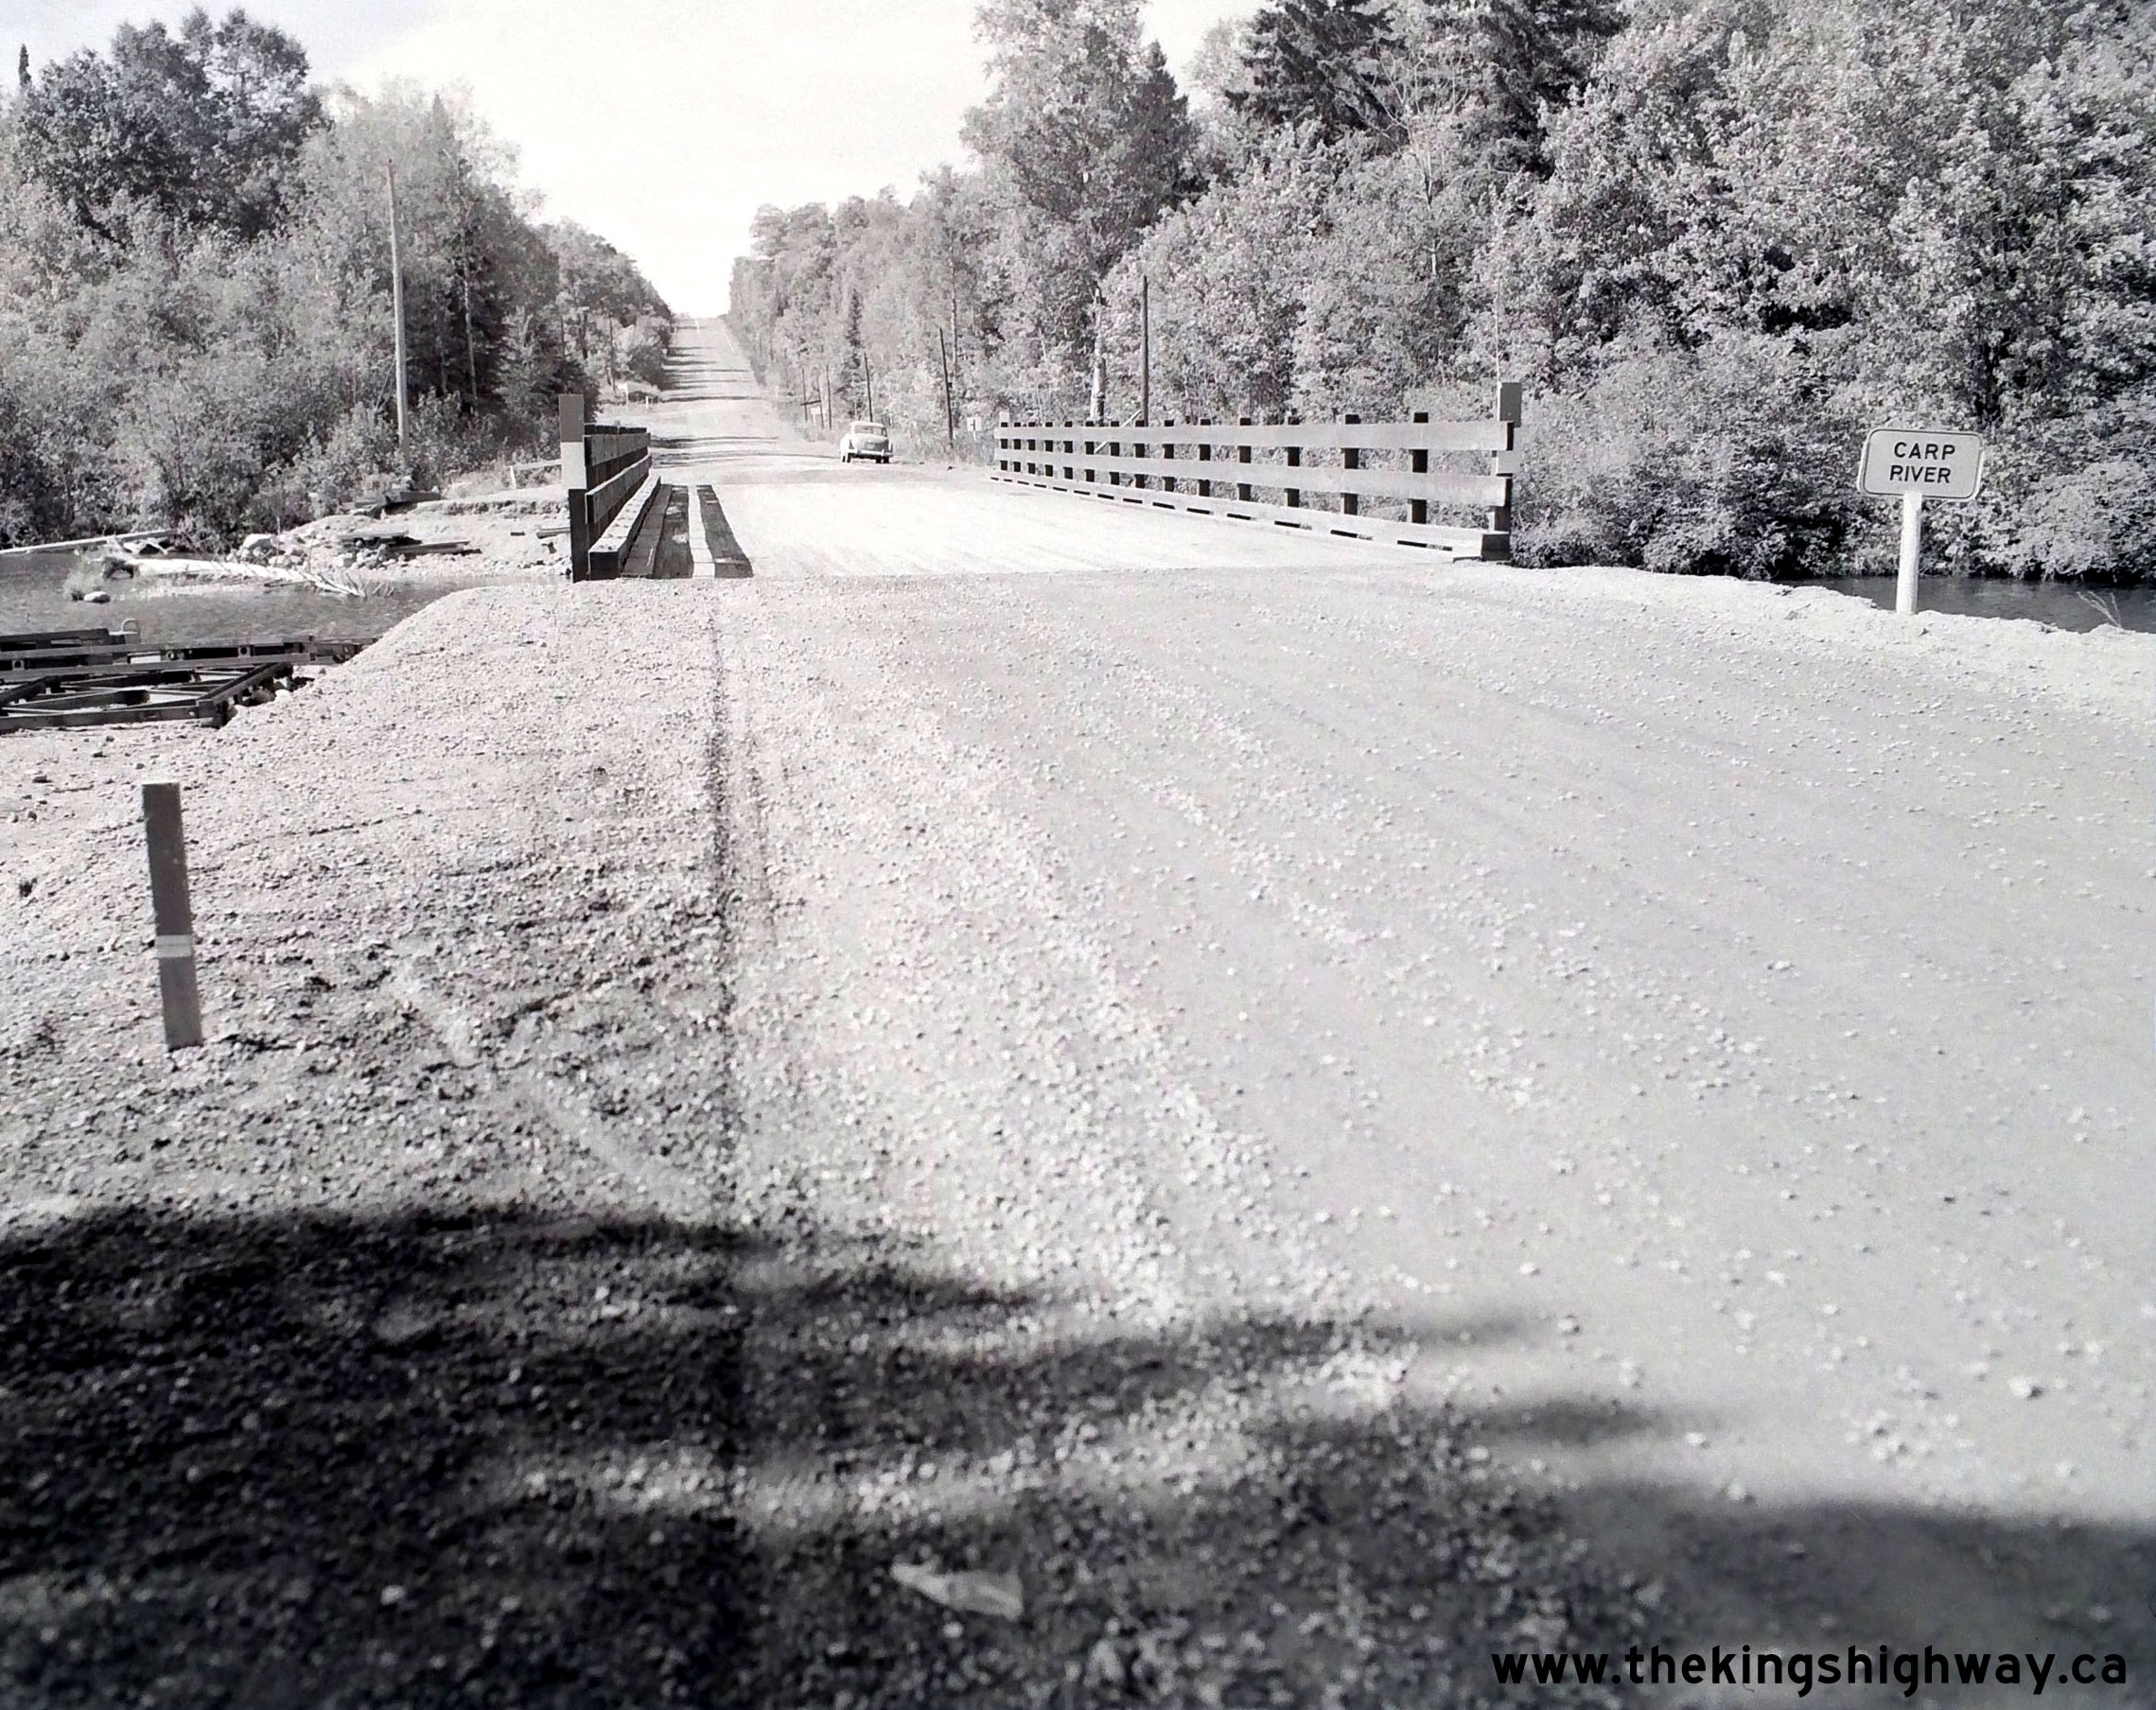
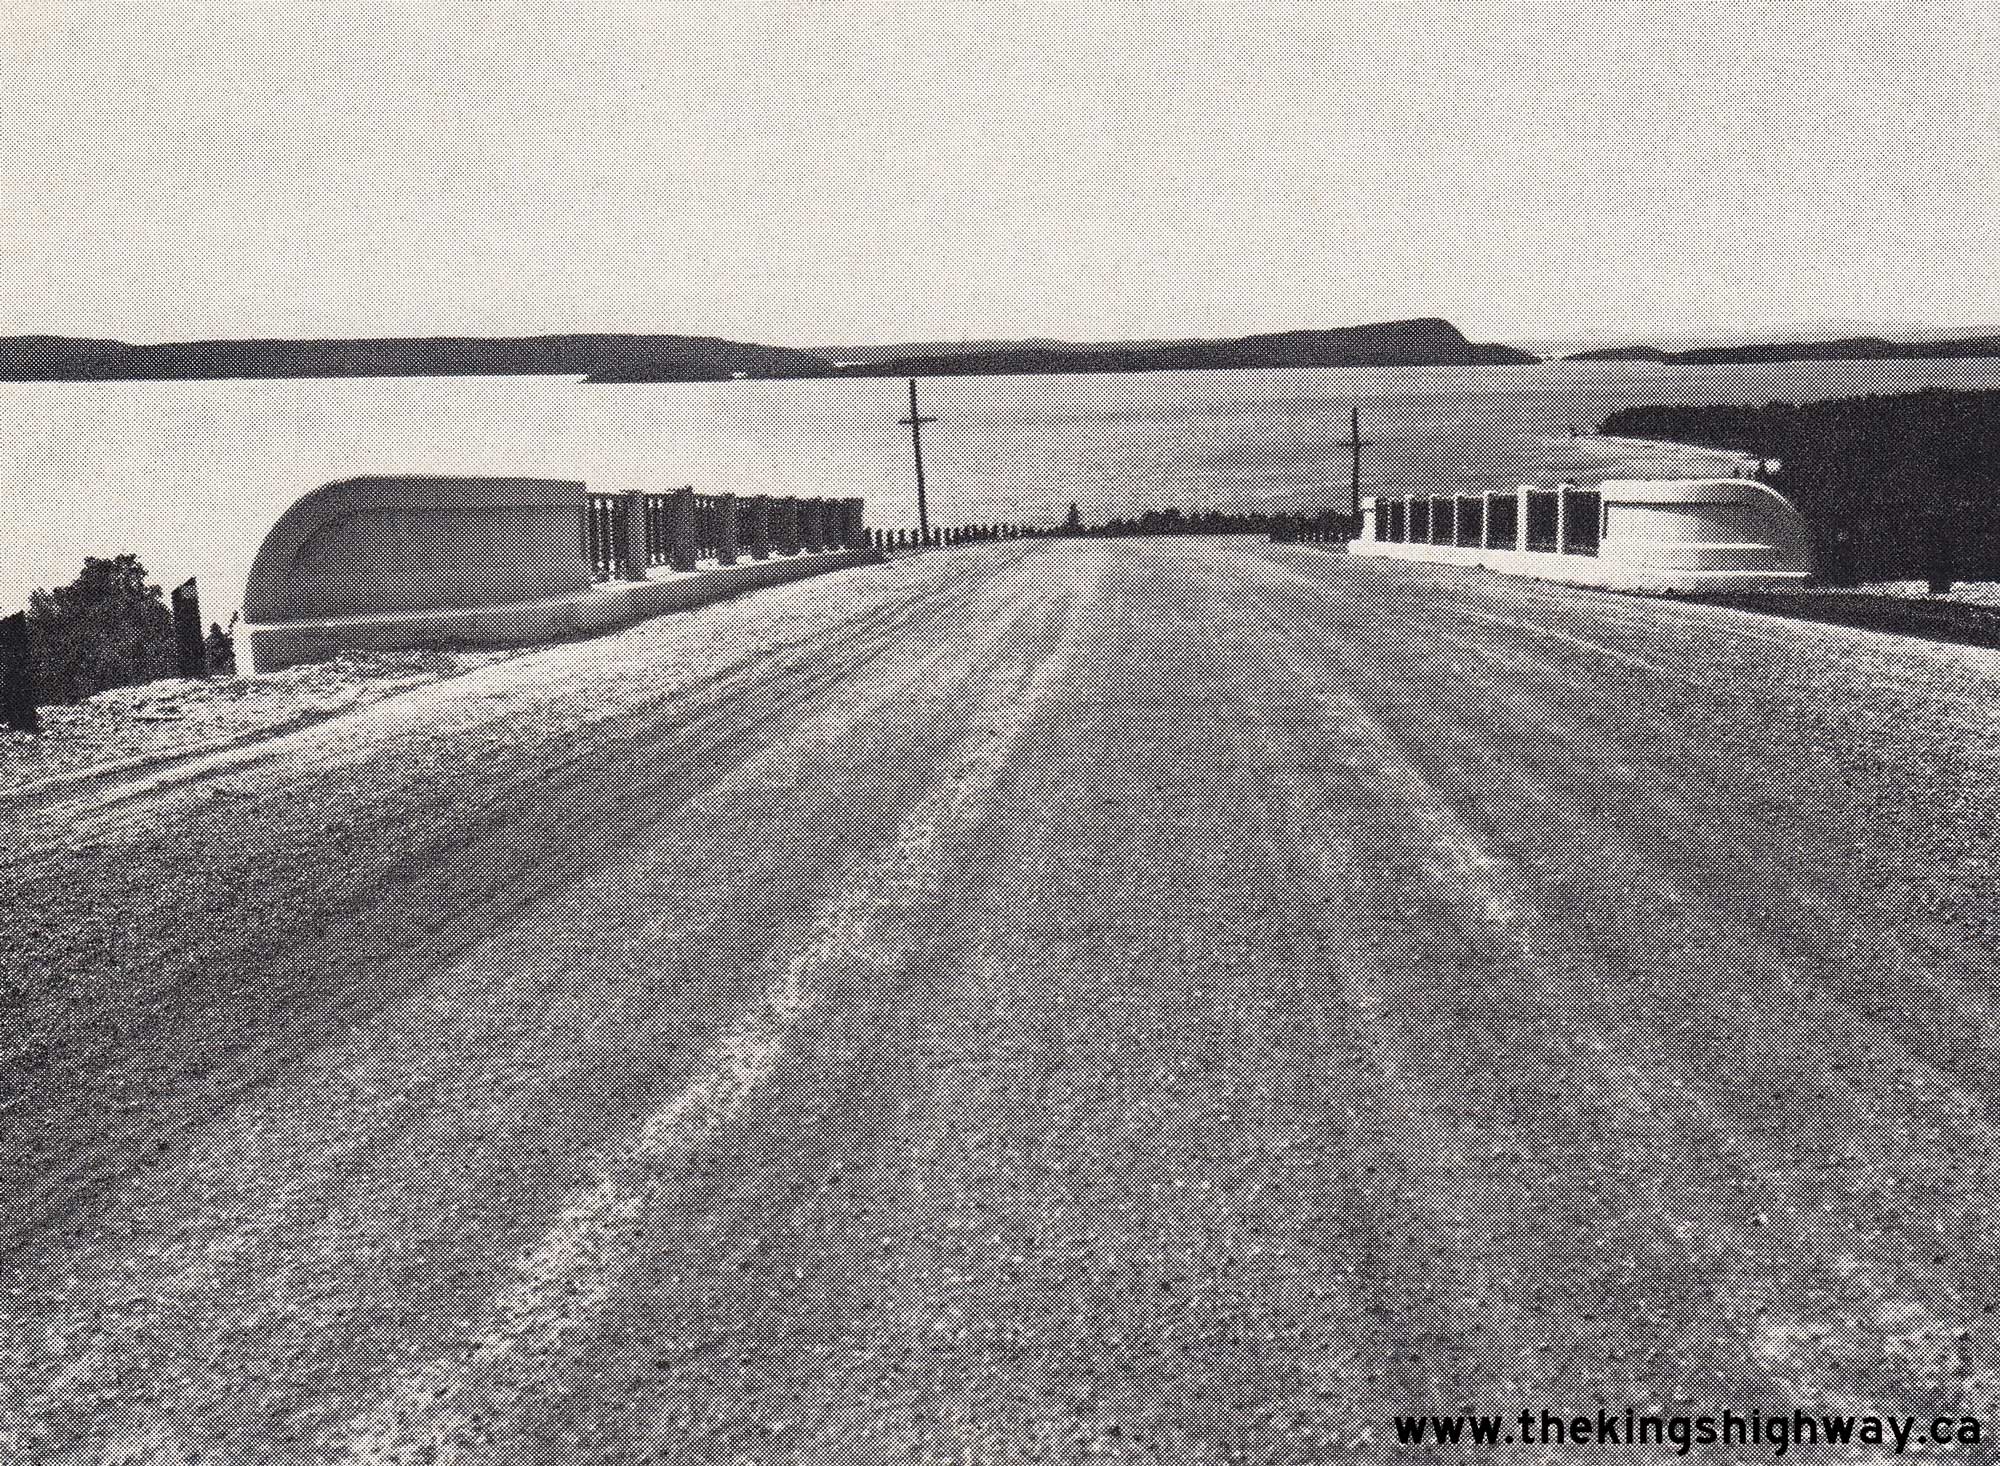
Left - Facing north along Hwy 17 across the new Carp River Bridge near Batchawana Bay, north of Sault Ste. Marie. See an
Enlarged Photo Here. Photo taken on September 24, 1952. (Photo courtesy of Ontario Ministry of Transportation - © King's Printer for Ontario, 1952) Right - Reconstruction and realignment of Hwy 17 about 2 1/2 miles west of Naughton, facing east towards Sudbury. A 5 3/4 mile section of Hwy 17 was reconstructed to Trans-Canada Highway standards from Naughton westerly to the Vermilion River Bridge under Contract #1951-70. See an Enlarged Photo Here. Photo taken on September 27, 1952. (Photo courtesy of Ontario Ministry of Transportation - © King's Printer for Ontario, 1952) 
Above - View of the new Hwy 17 alignment west of Whitefish in 1952. A substantial portion of Hwy 17 between Whitefish and Nairn was relocated onto a new
alignment in the early 1950s, which bypassed the small communities of Worthington and Victoria Mine. At the time this photo was taken, the new Hwy 17 was not yet open to
traffic. See an Enlarged Photo Here. Photo taken on September 27, 1952. (Photo courtesy of Ontario Ministry of Transportation - © King's Printer for Ontario, 1952) 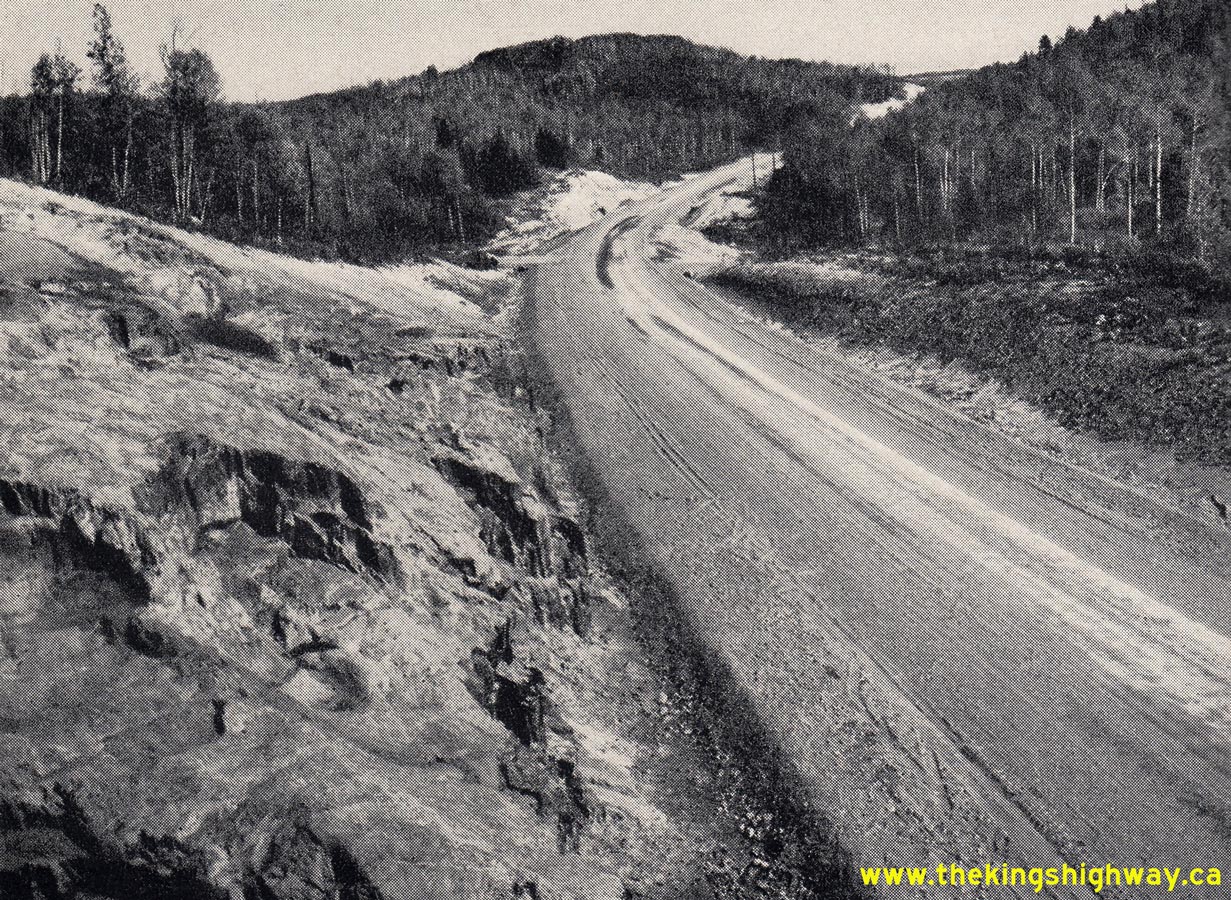
Above - Completed grading on a revised alignment of Hwy 17 built by J.N. Pitts Construction Company about 5 1/2 miles west of Whitefish, Contract
#1950-22. See an Enlarged Photo Here. Photo taken on September 27, 1952. (Photo courtesy of Ontario Ministry of Transportation - © King's Printer for Ontario, 1952) 

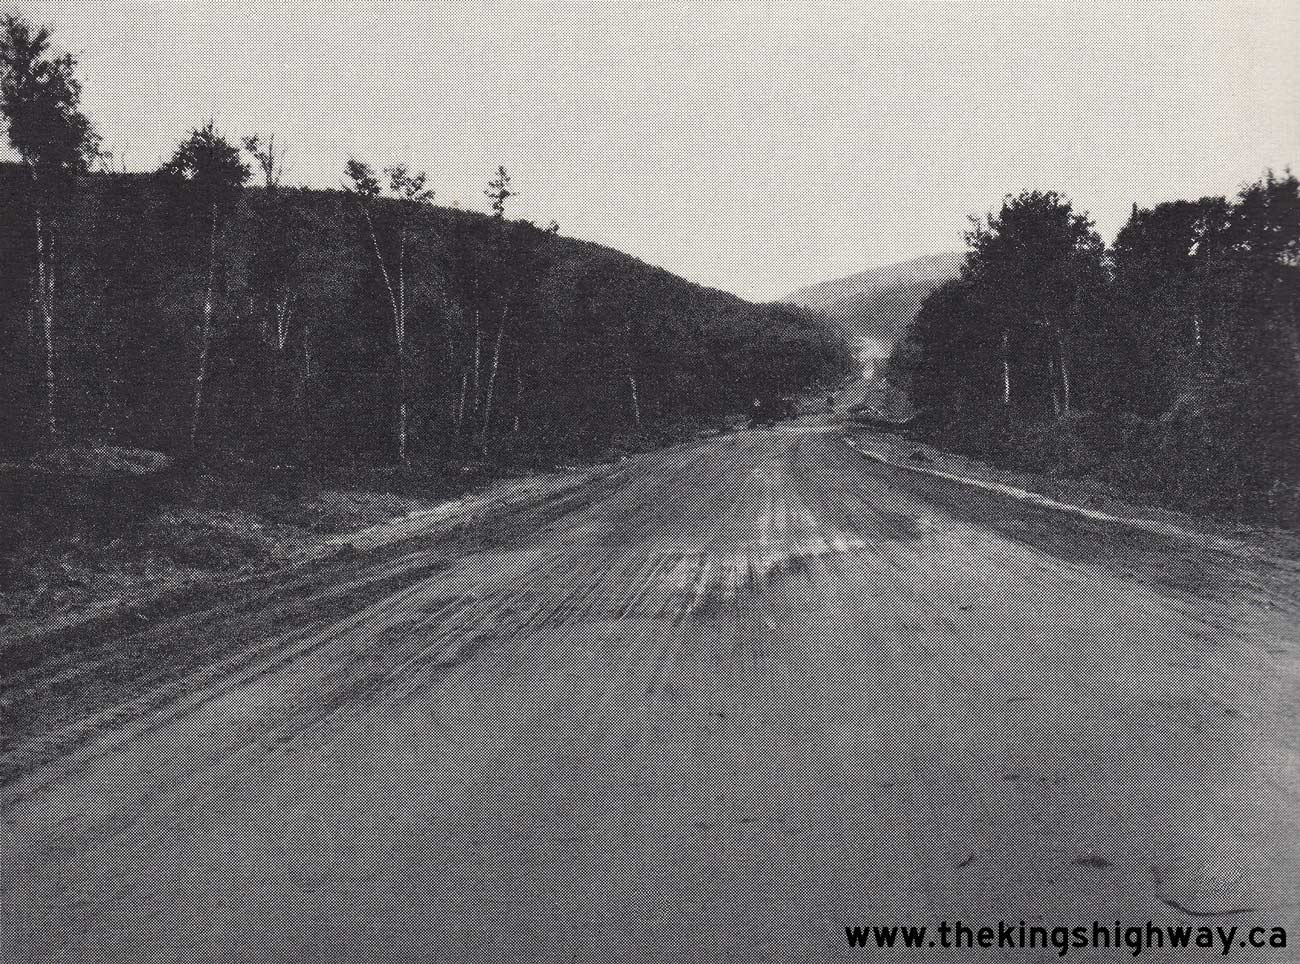
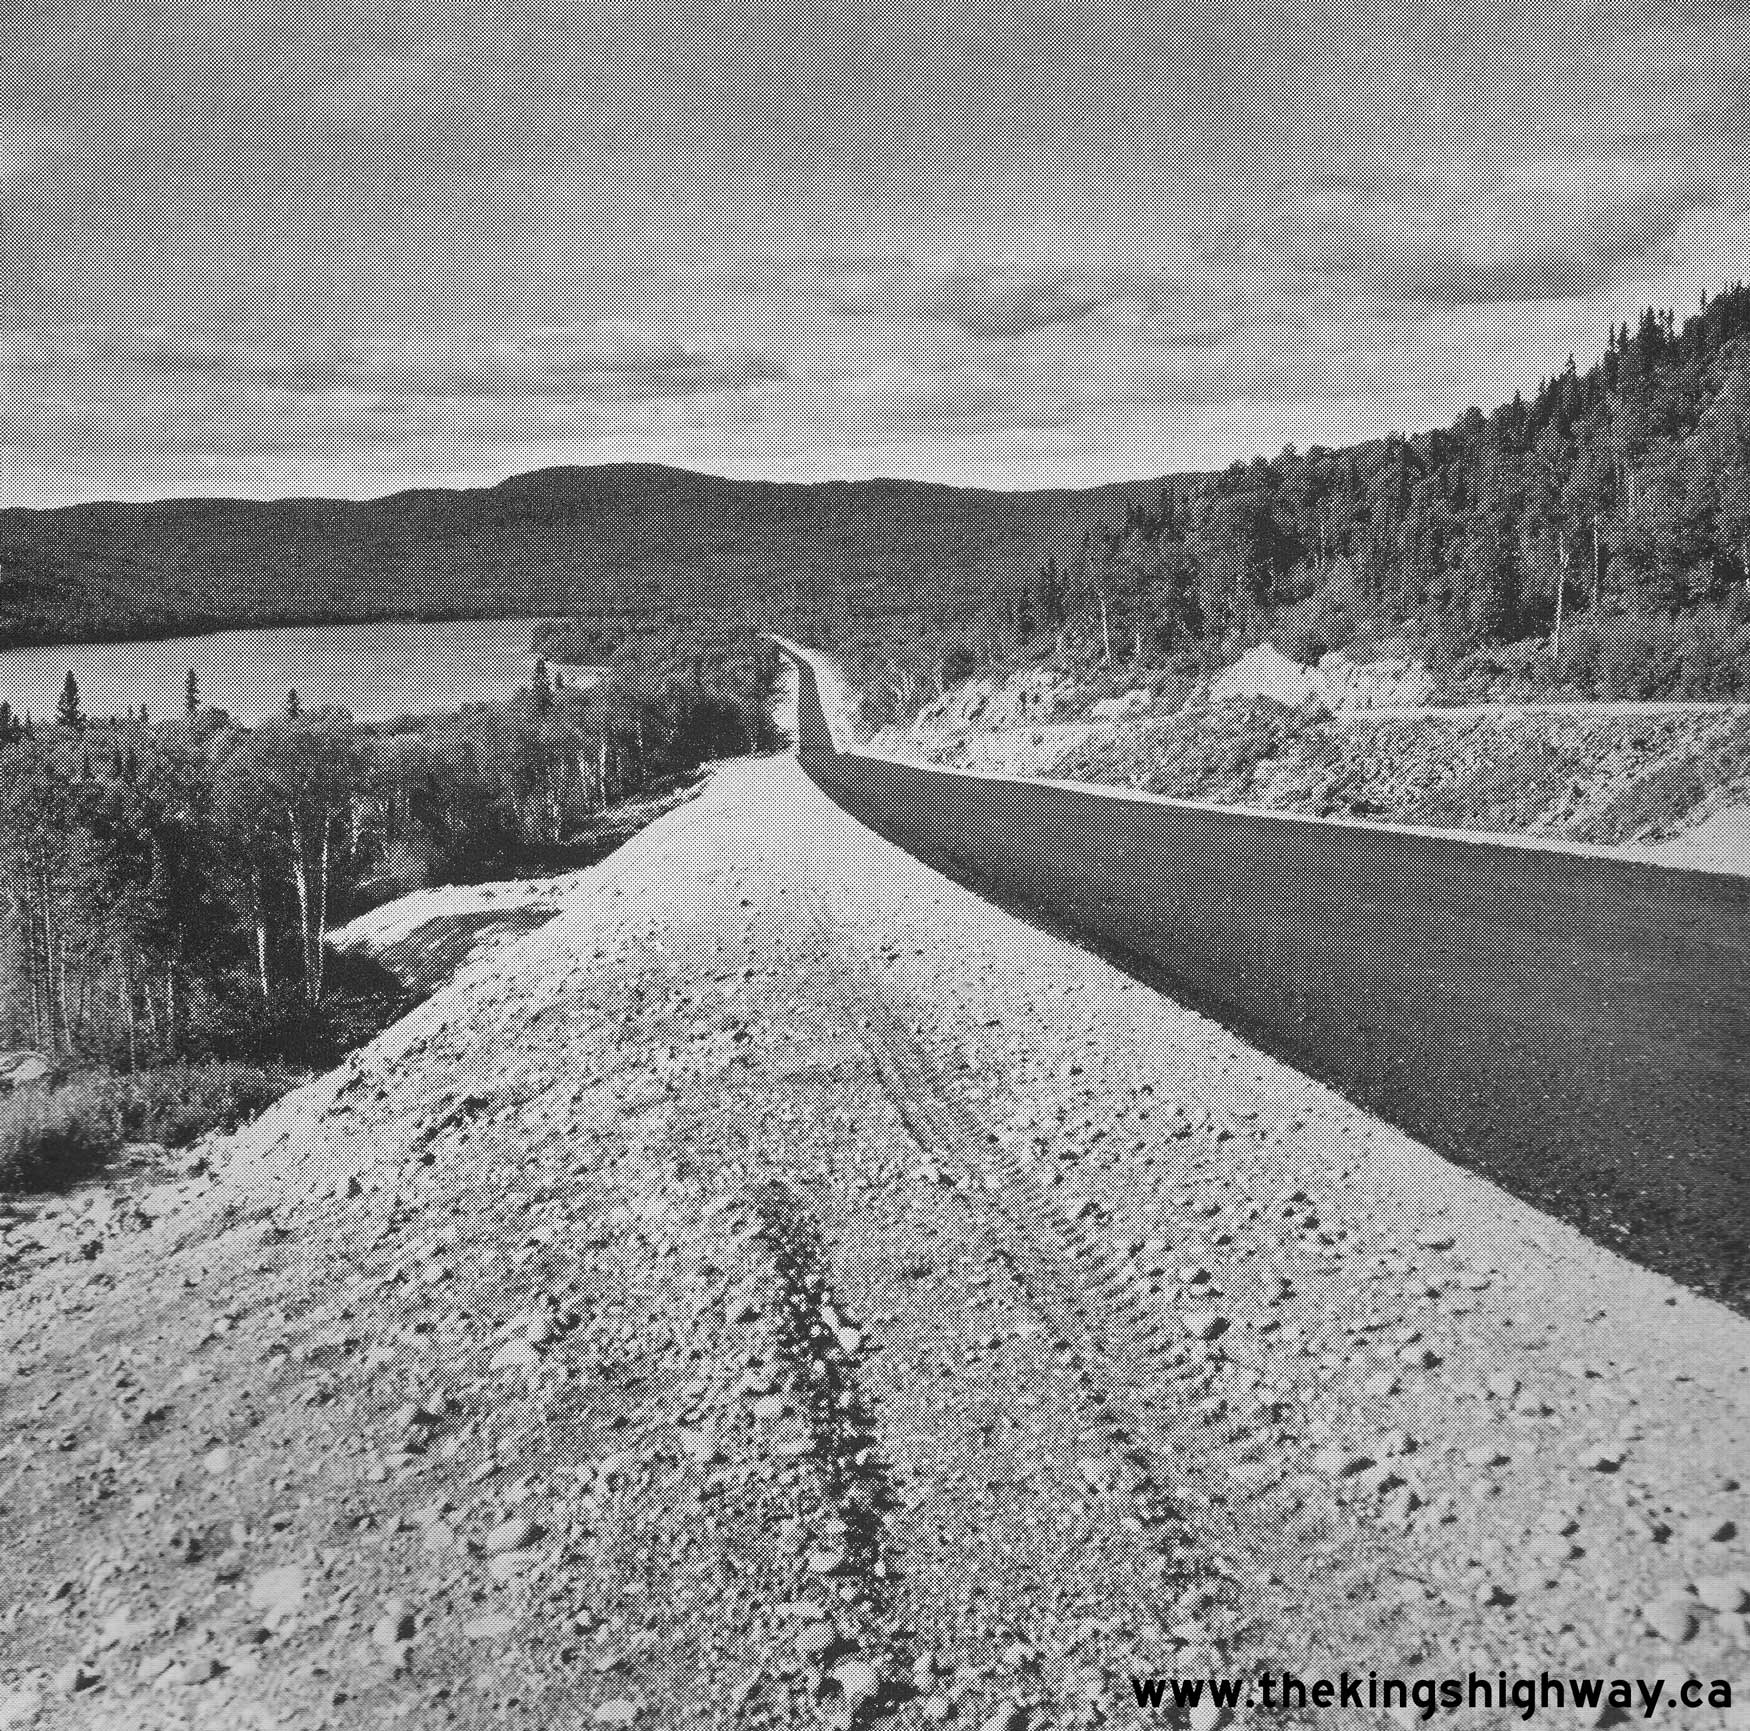
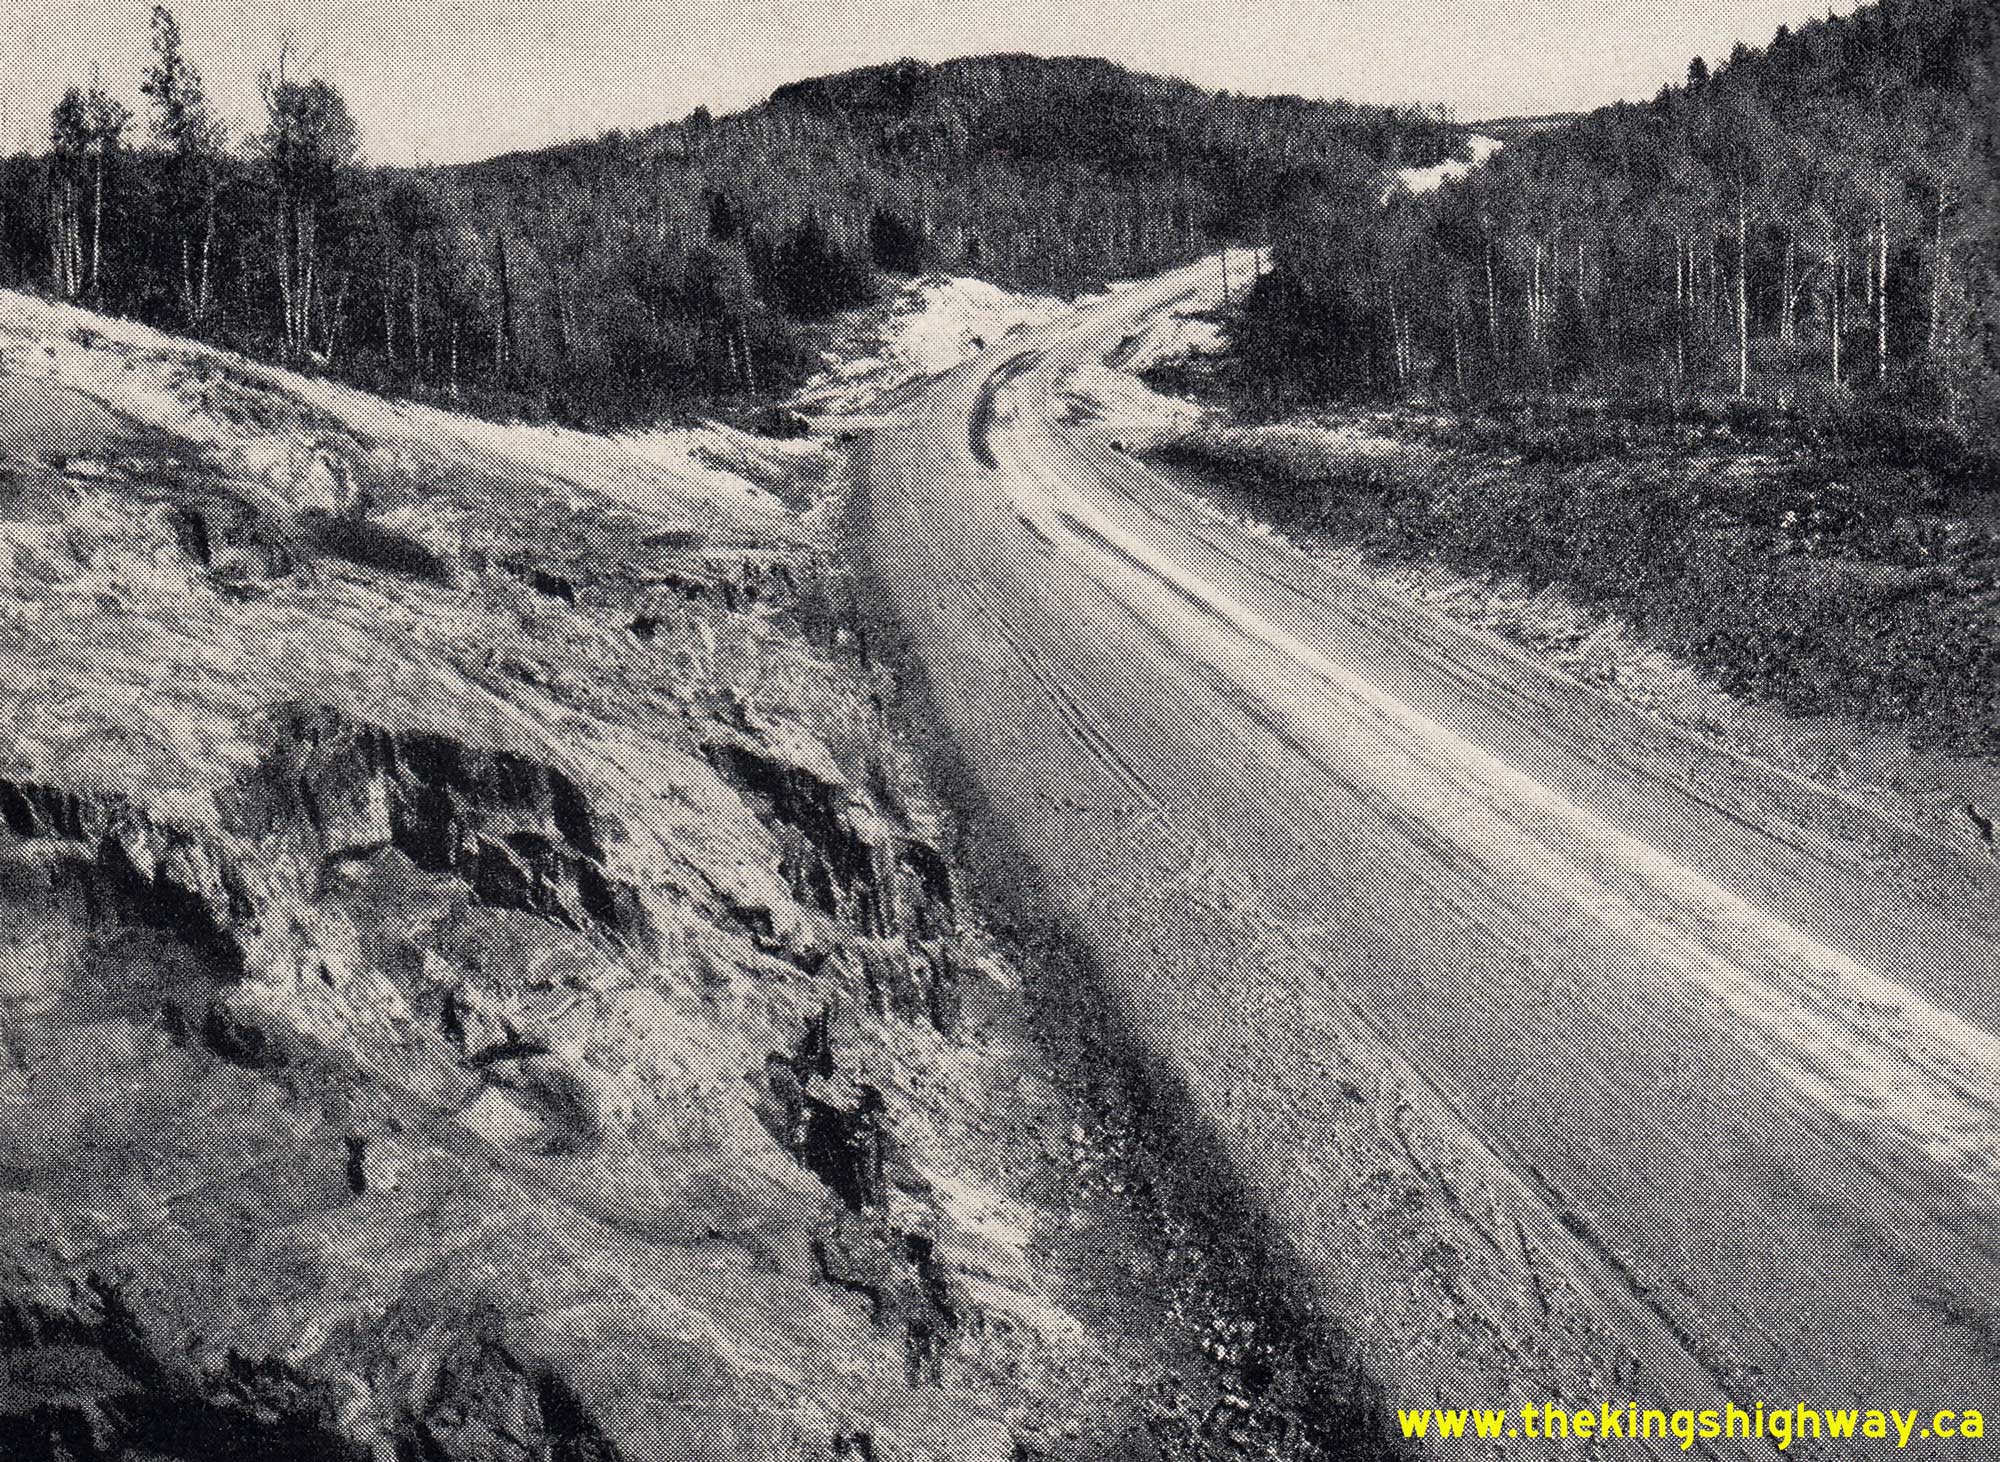
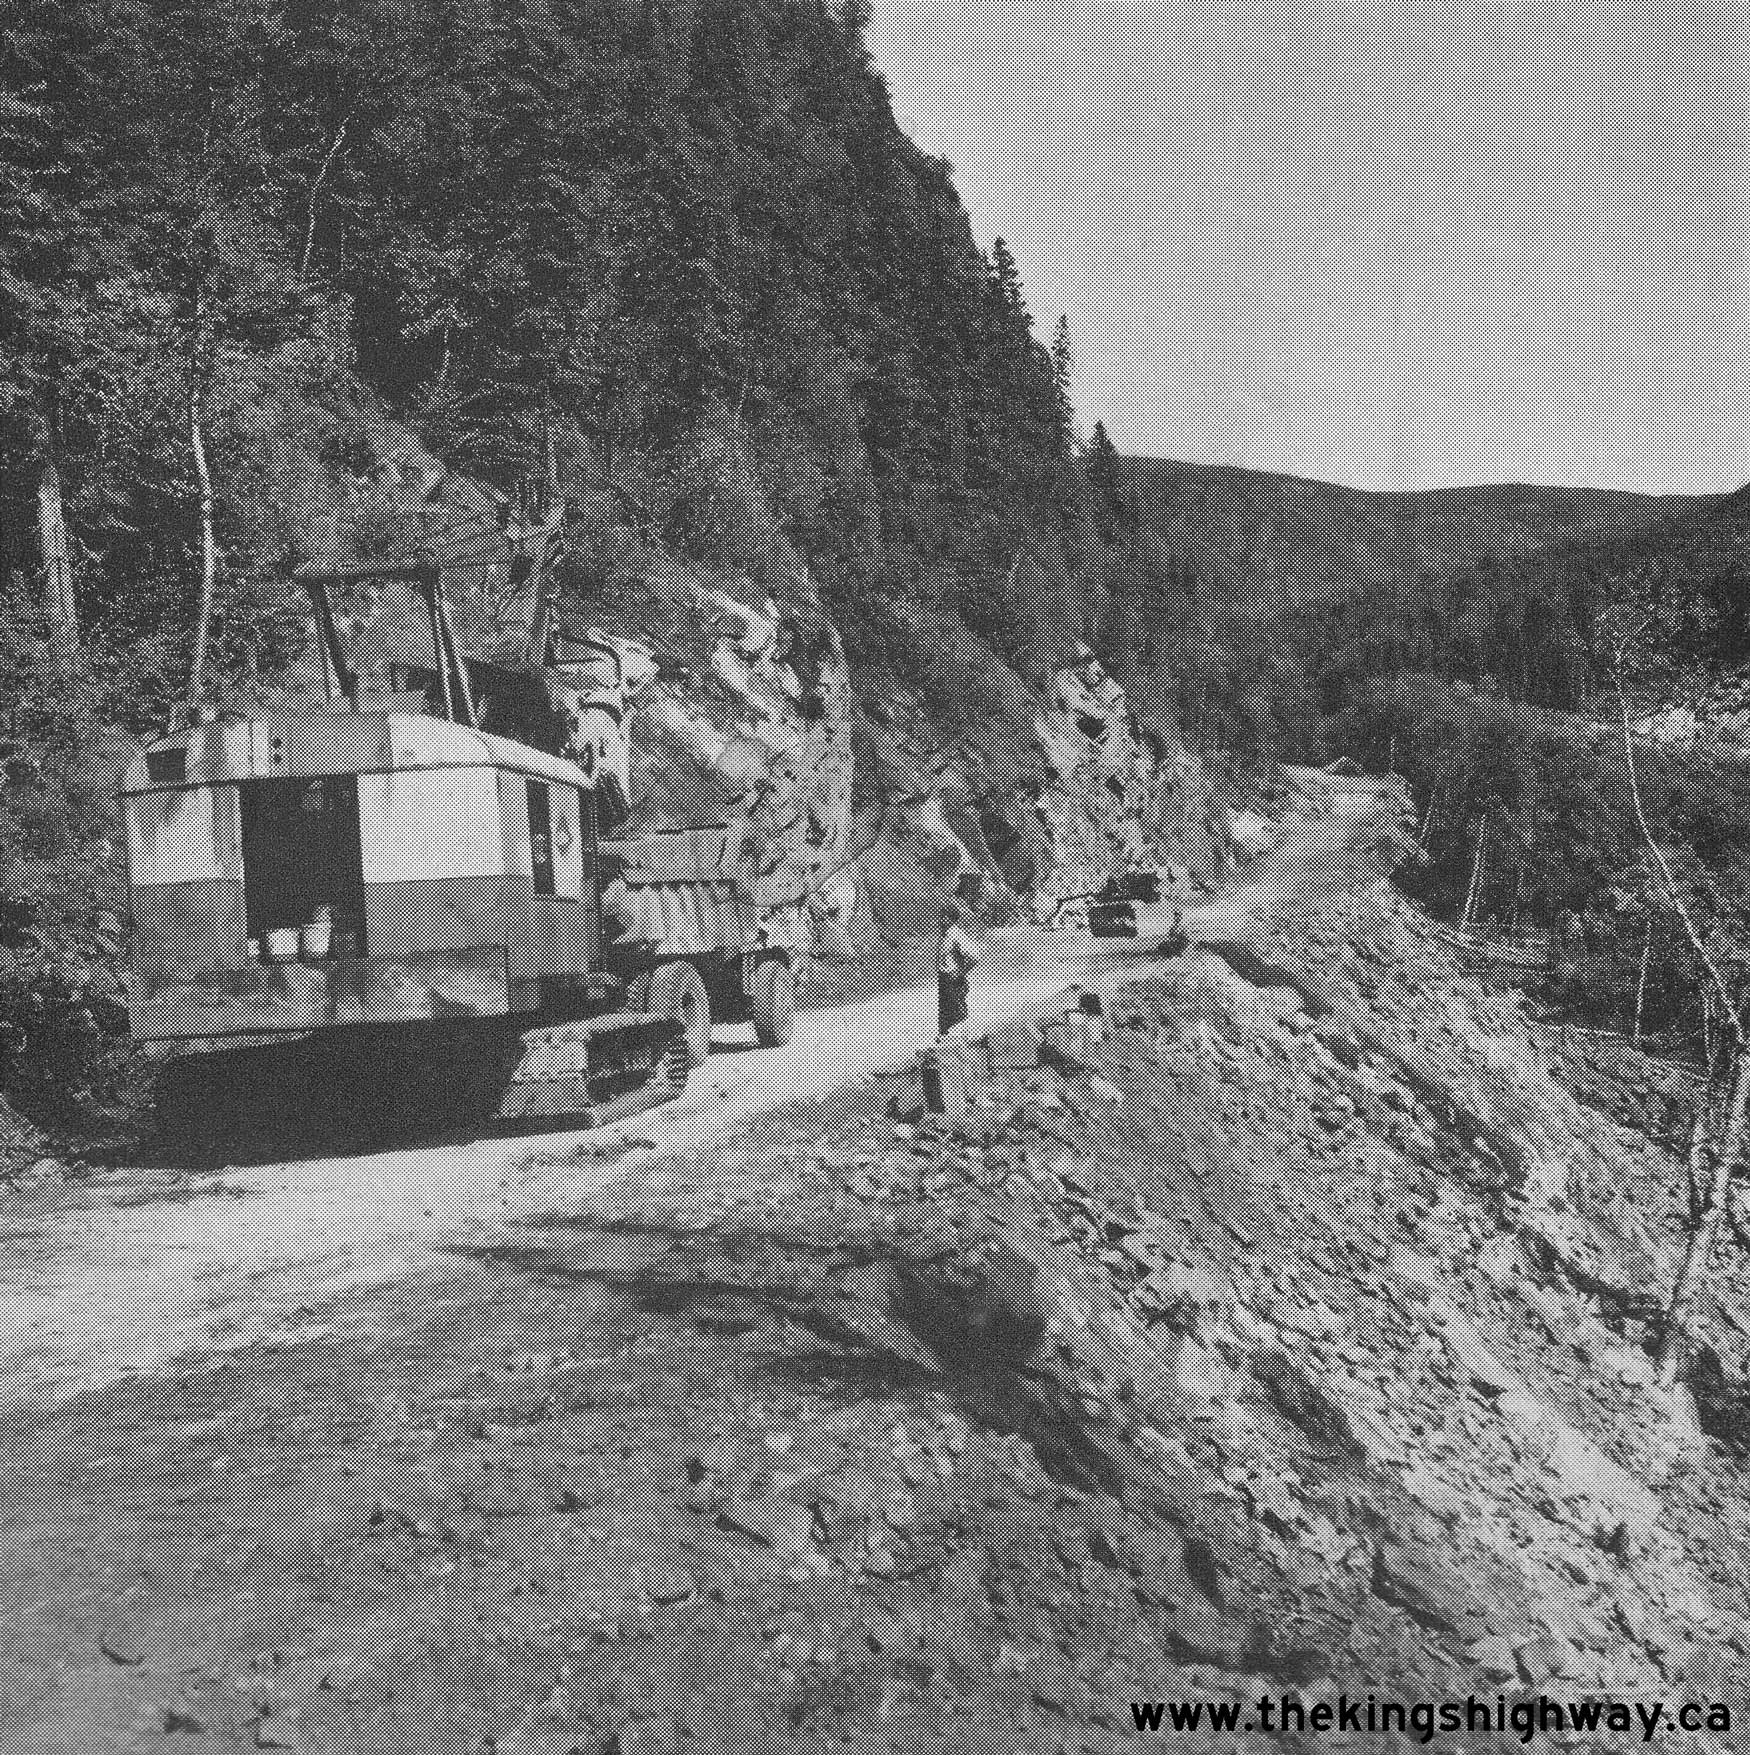
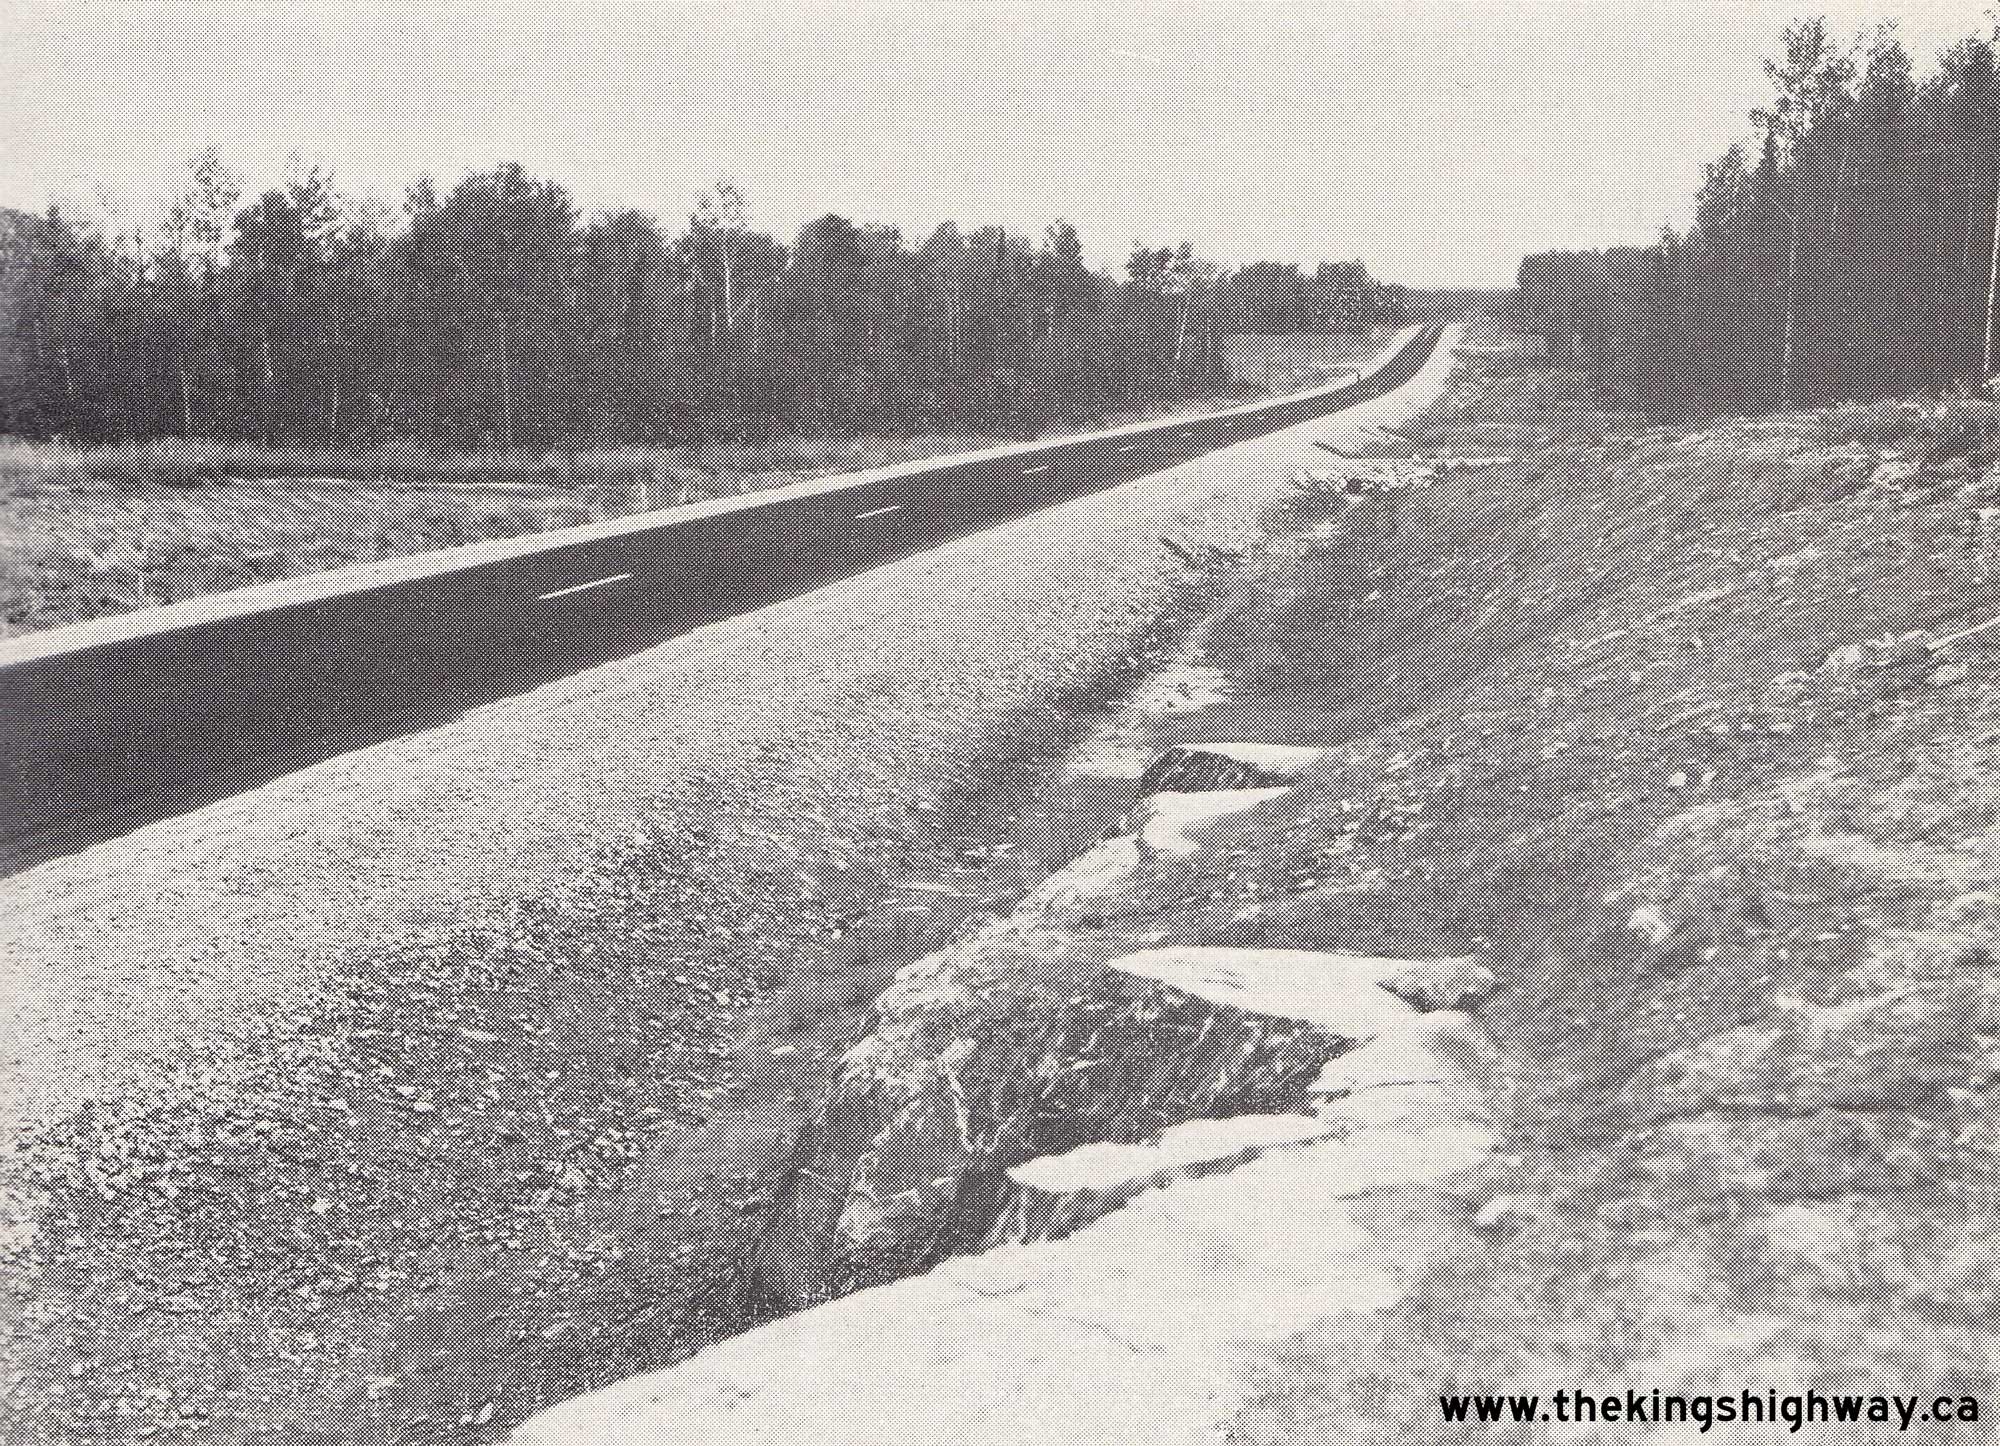
Left - Completed grading along a new section of Hwy 17 in 1953, facing southeast towards Marathon. Between 1948 and 1953, Hwy 17 was gradually extended along
Lake Superior's rugged north shore from Terrace Bay easterly to Marathon. Roughly a month after this photo was taken, Hwy 17 was completed and opened to traffic after
many years of very difficult construction. The grading work for this section of Hwy 17 was completed under Contract #1949-36. See an
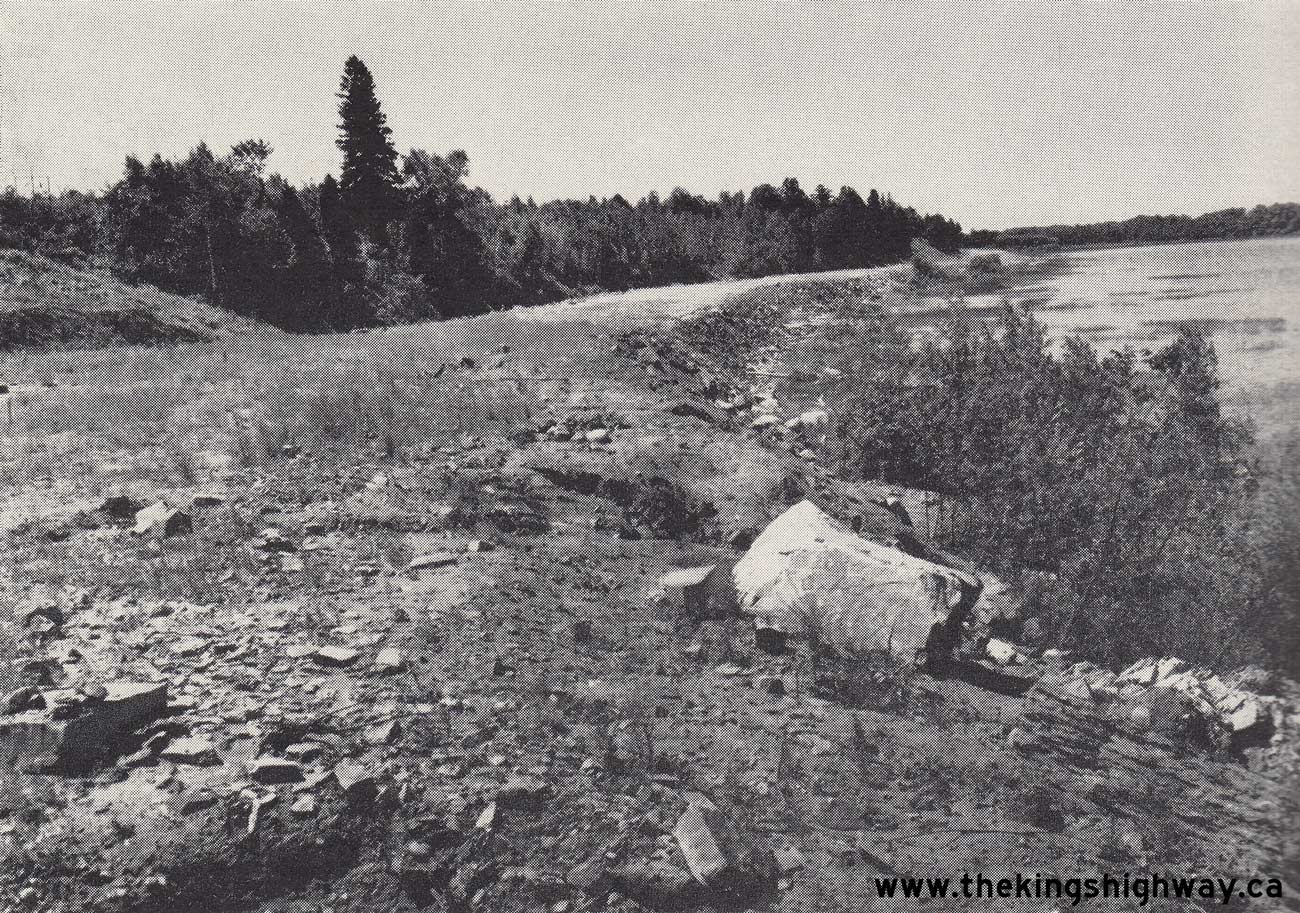
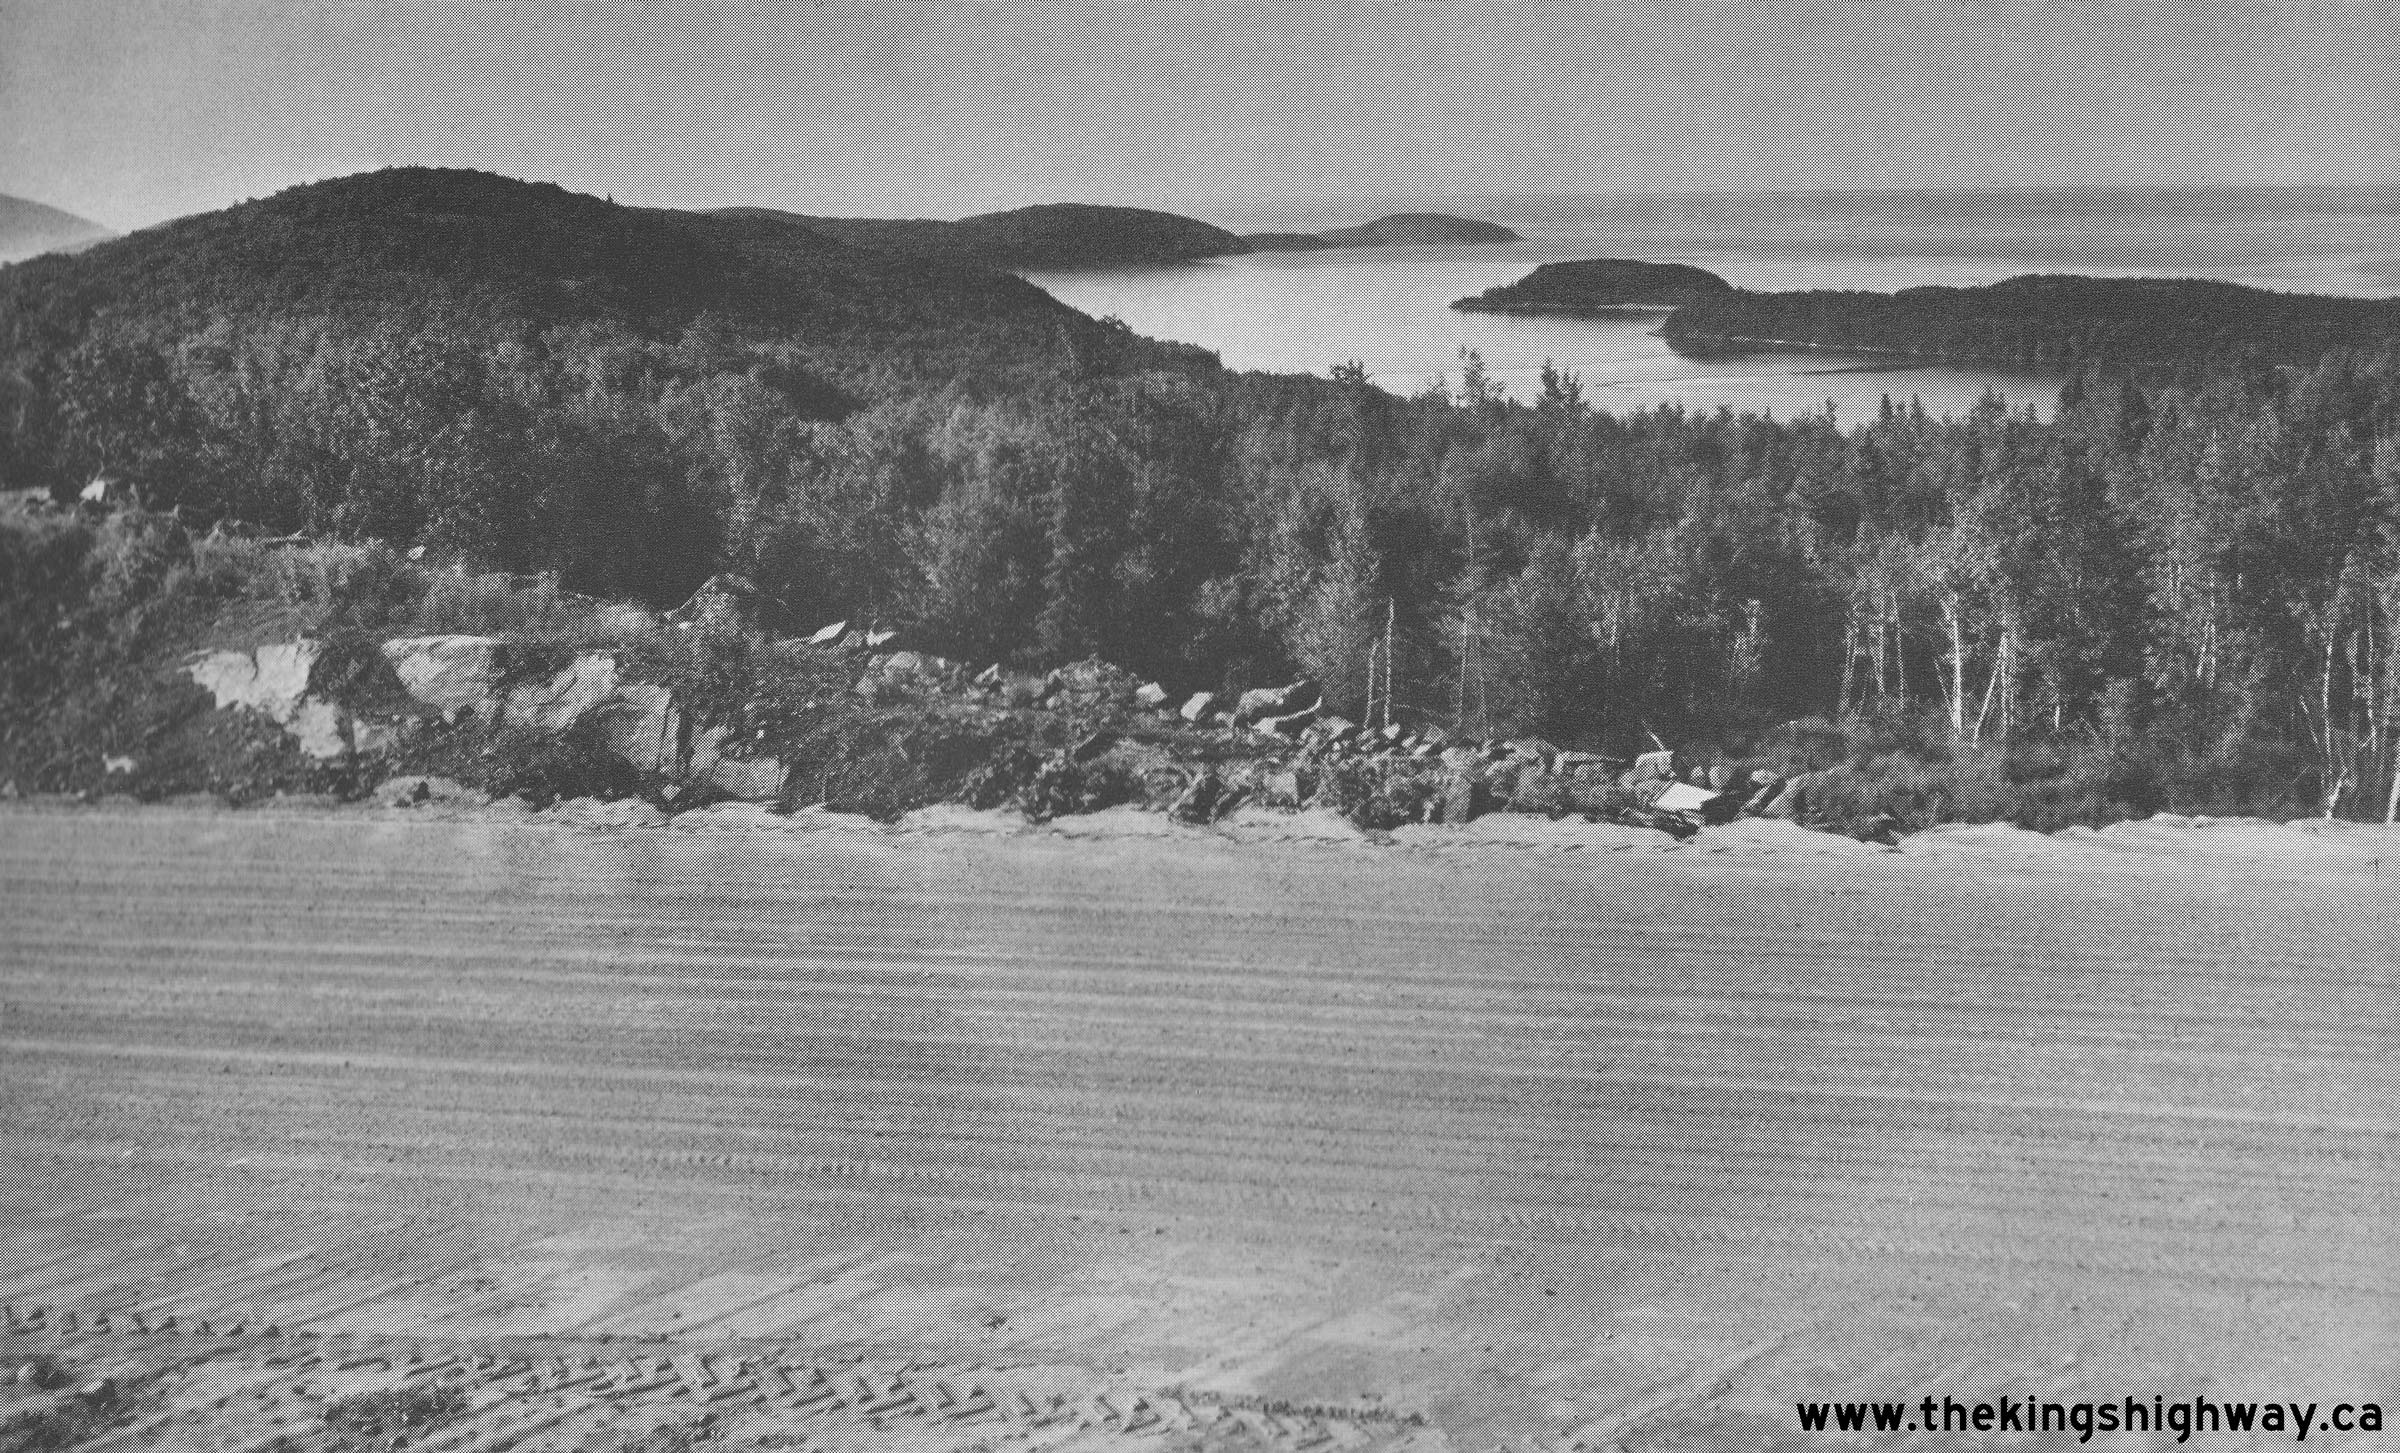
Enlarged Photo Here. Photo taken on August 18, 1953. (Photo courtesy of Ontario Ministry of Transportation - © King's Printer for Ontario, 1953) Right - View of Lake Superior (Port Munro) along Hwy 17, located about 4 miles east of the entrance to Marathon. See an Enlarged Photo Here. Photo taken on August 18, 1953. (Photo courtesy of Ontario Ministry of Transportation - © King's Printer for Ontario, 1953) 

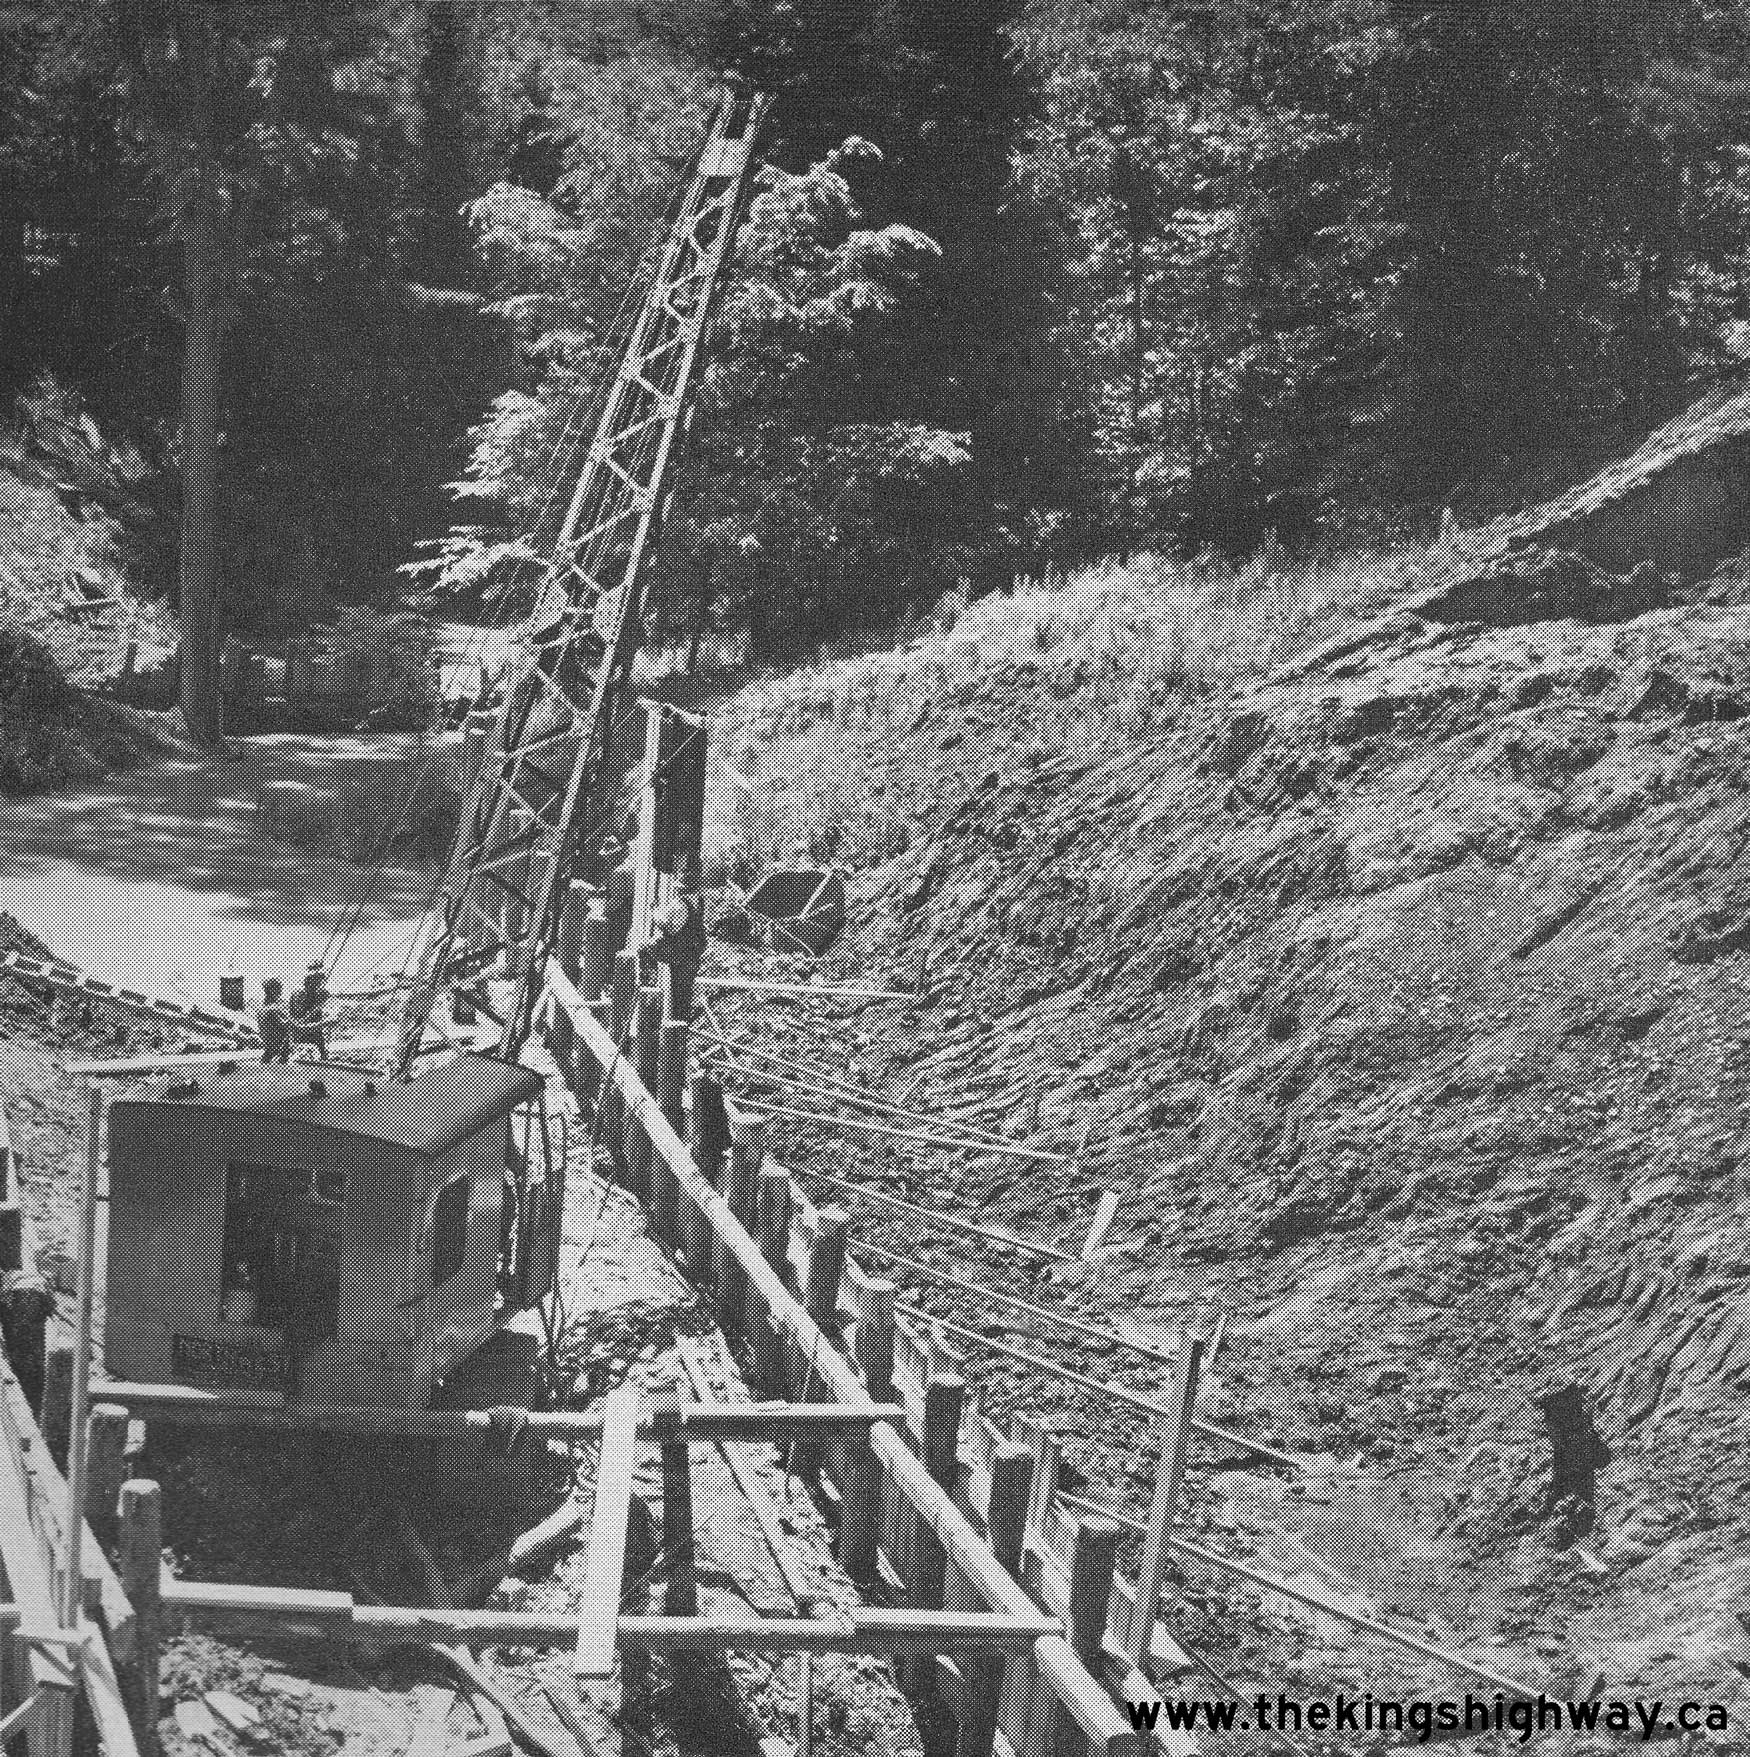
Left - Temporary Bailey Bridge over the Steel River on Hwy 17 east of Terrace Bay in 1953. This Bailey Bridge represents one of the largest structures of this
type ever installed by the Department of Highways. The temporary bridge remained in service until 1958, when it was finally replaced by an equally impressive steel
deck truss bridge which was in use up until 2011. The Steel River Bridge has since been replaced with a newer structure. See an
Enlarged Photo Here Photo taken on August 18, 1953. (Photo courtesy of Ontario Ministry of Transportation - © King's Printer for Ontario, 1953) Right - Heavy grading on Hwy 17 approaching the Little Pic River Bridge at Wagner's Hill near Marathon, Contract #1950-221. See an Enlarged Photo Here. Photo taken on August 18, 1953. (Photo courtesy of Ontario Ministry of Transportation - © King's Printer for Ontario, 1953) 
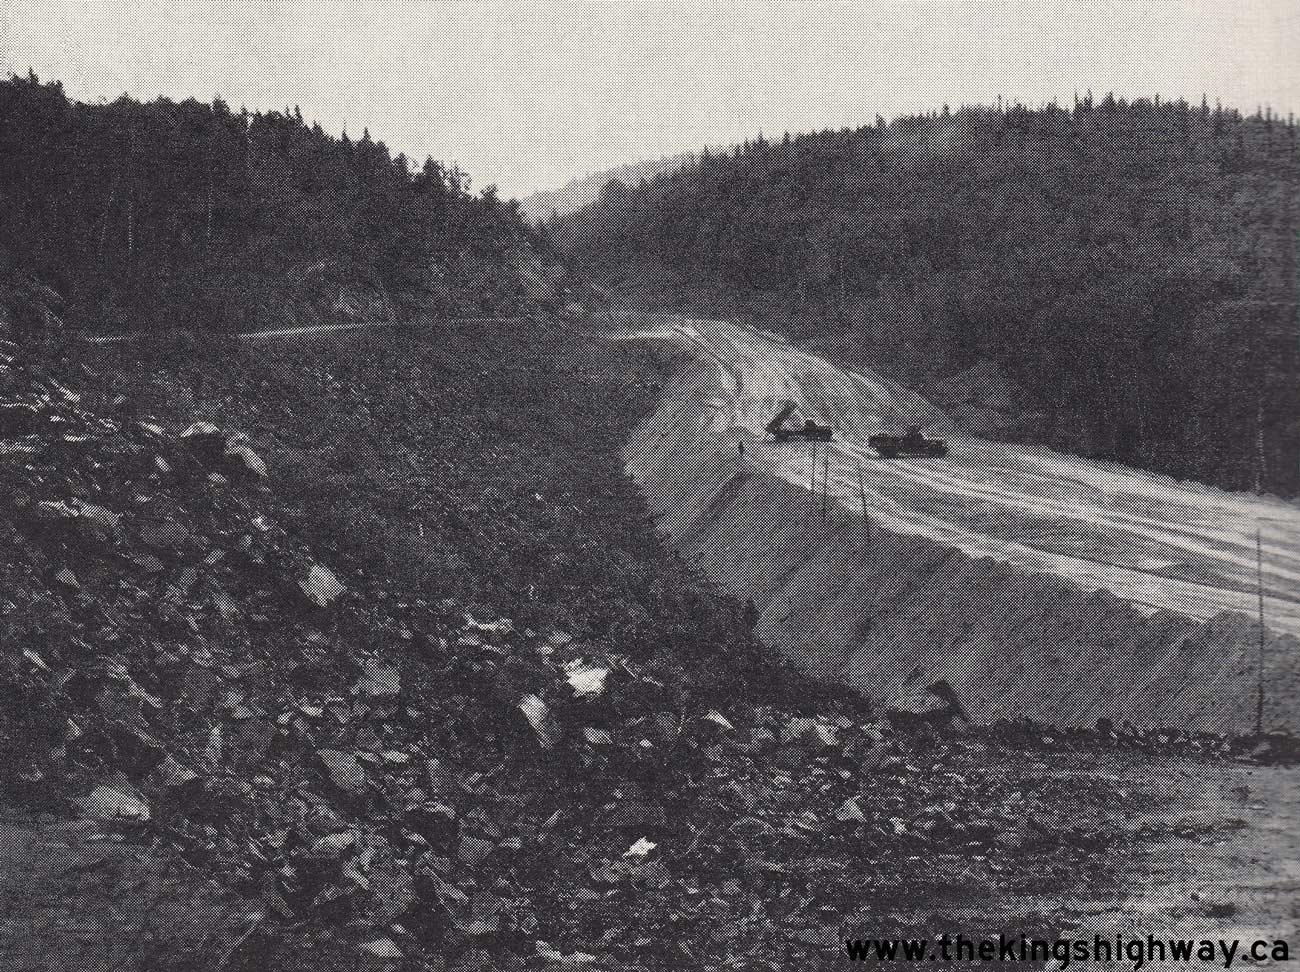
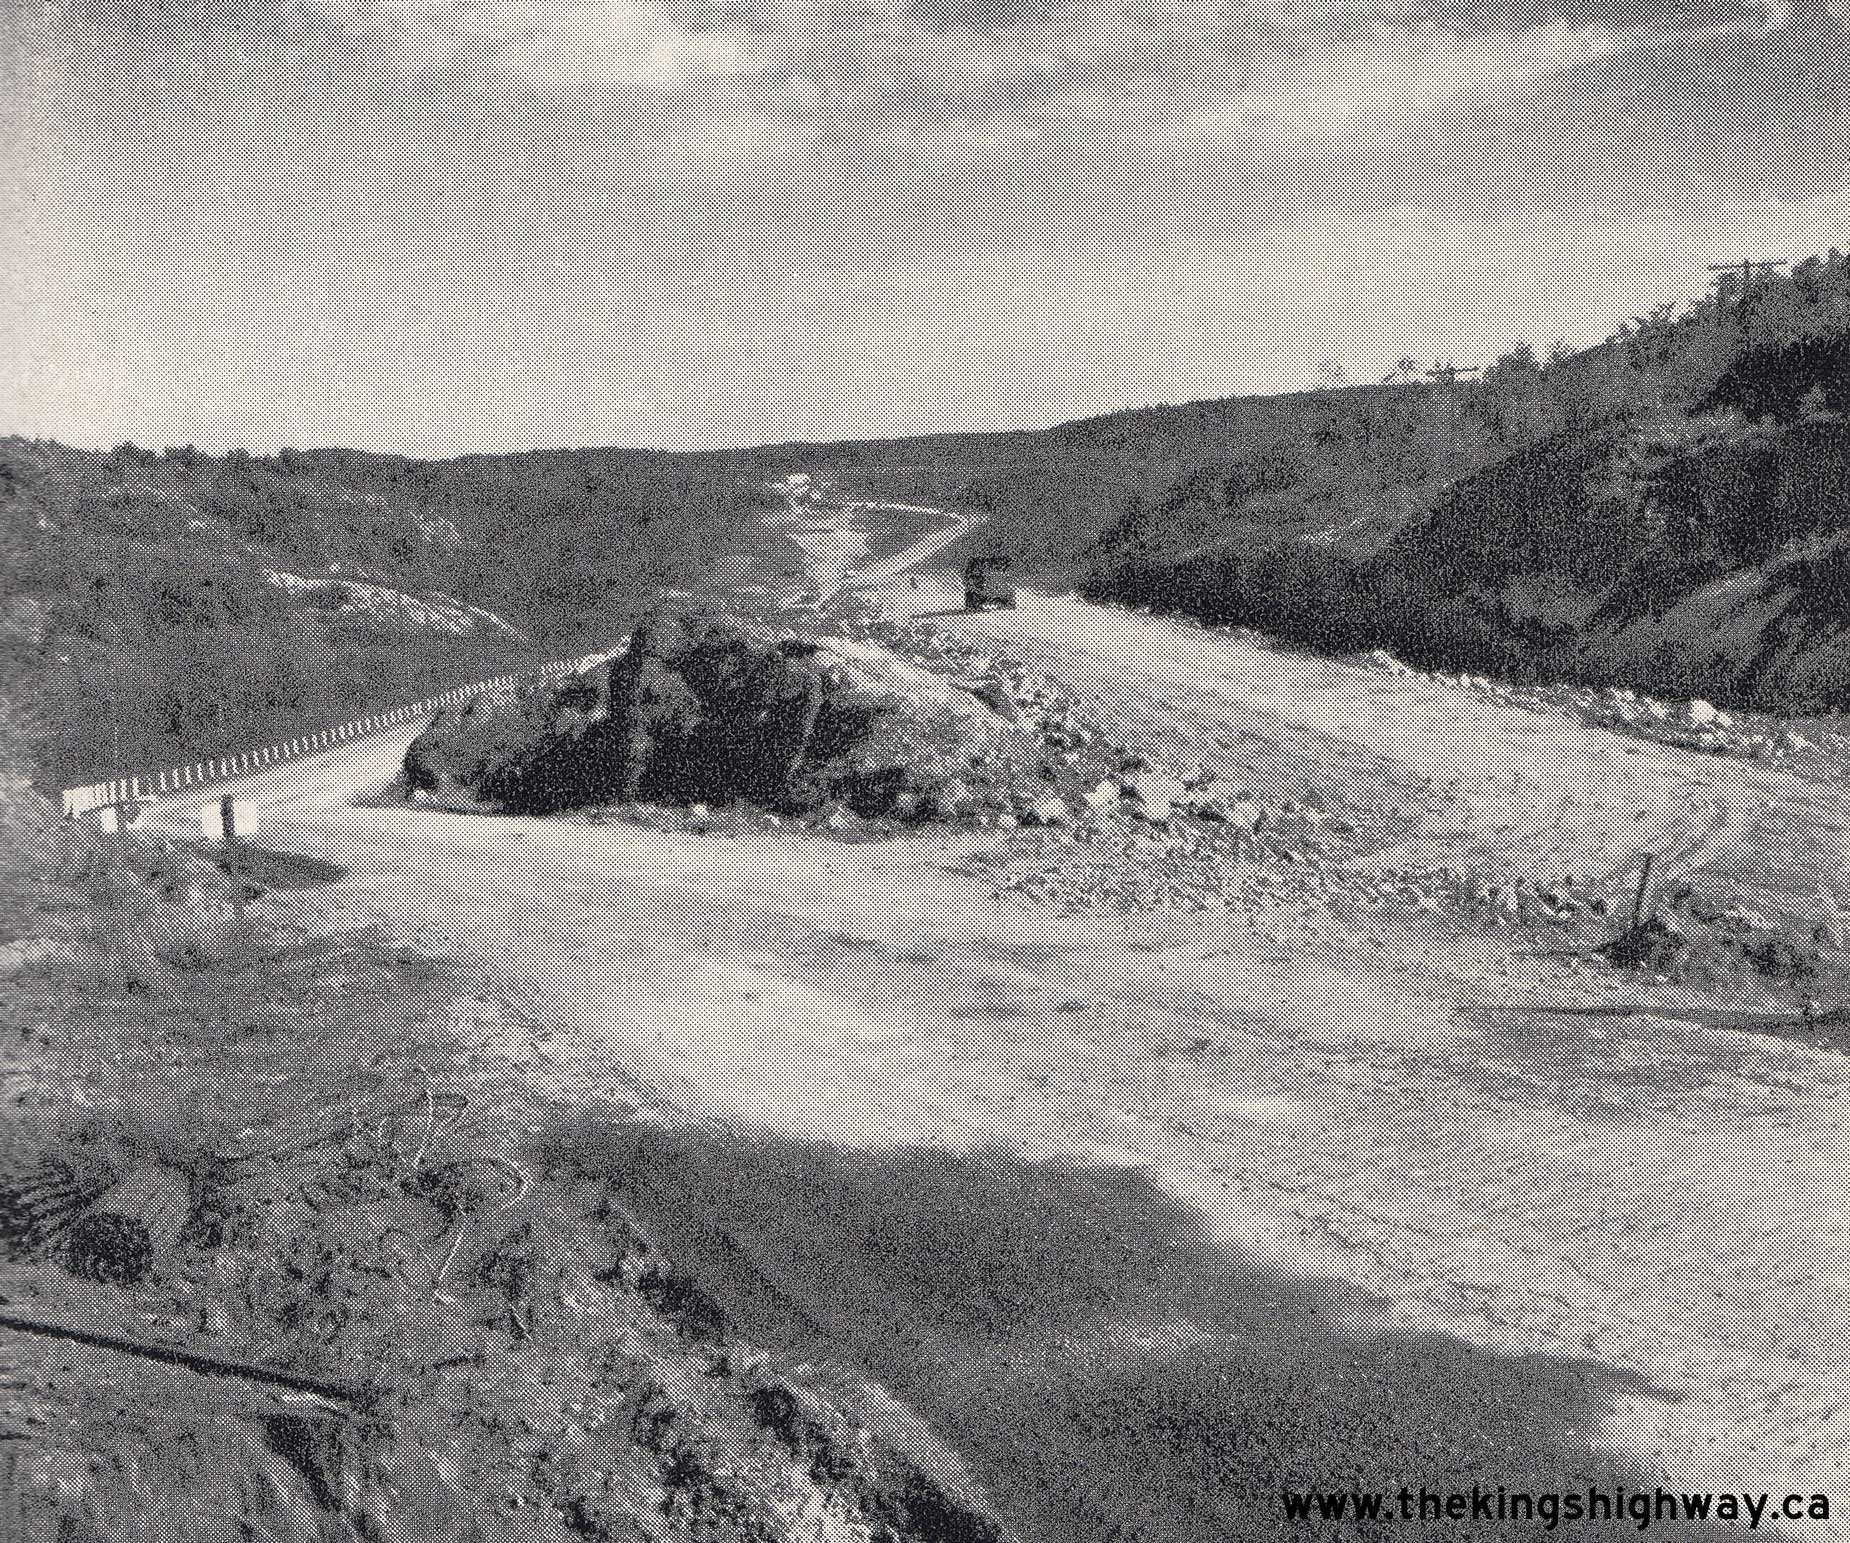
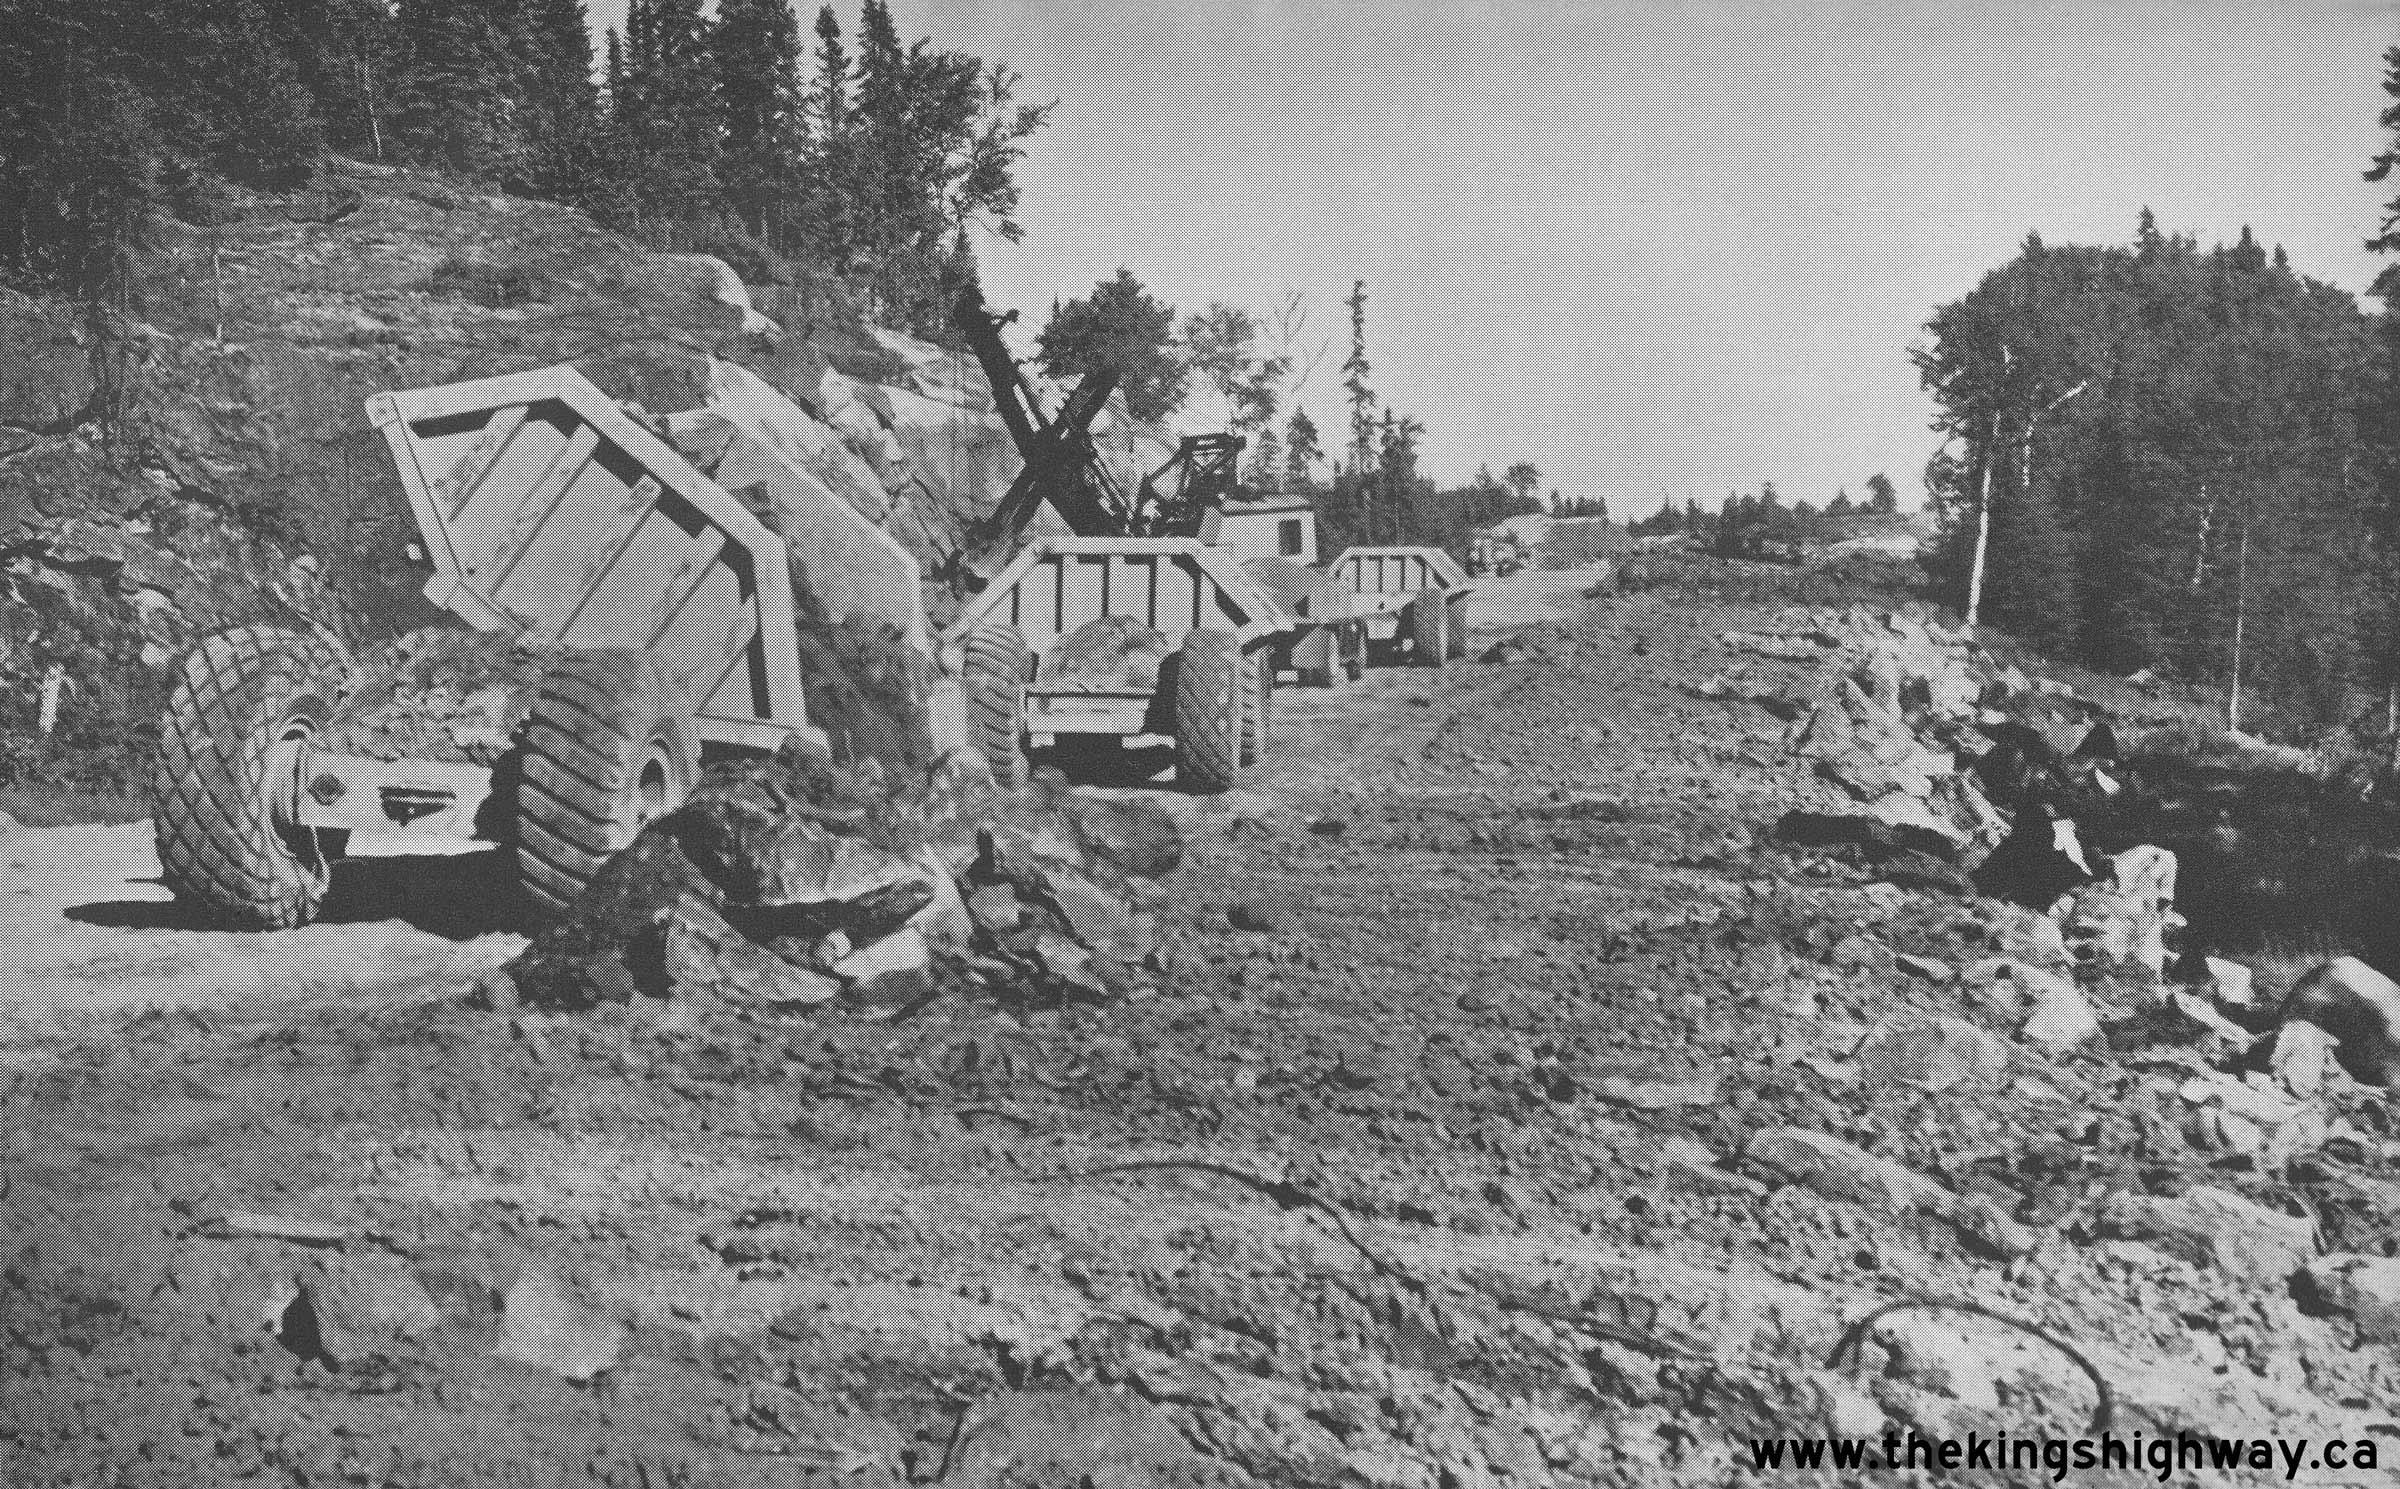
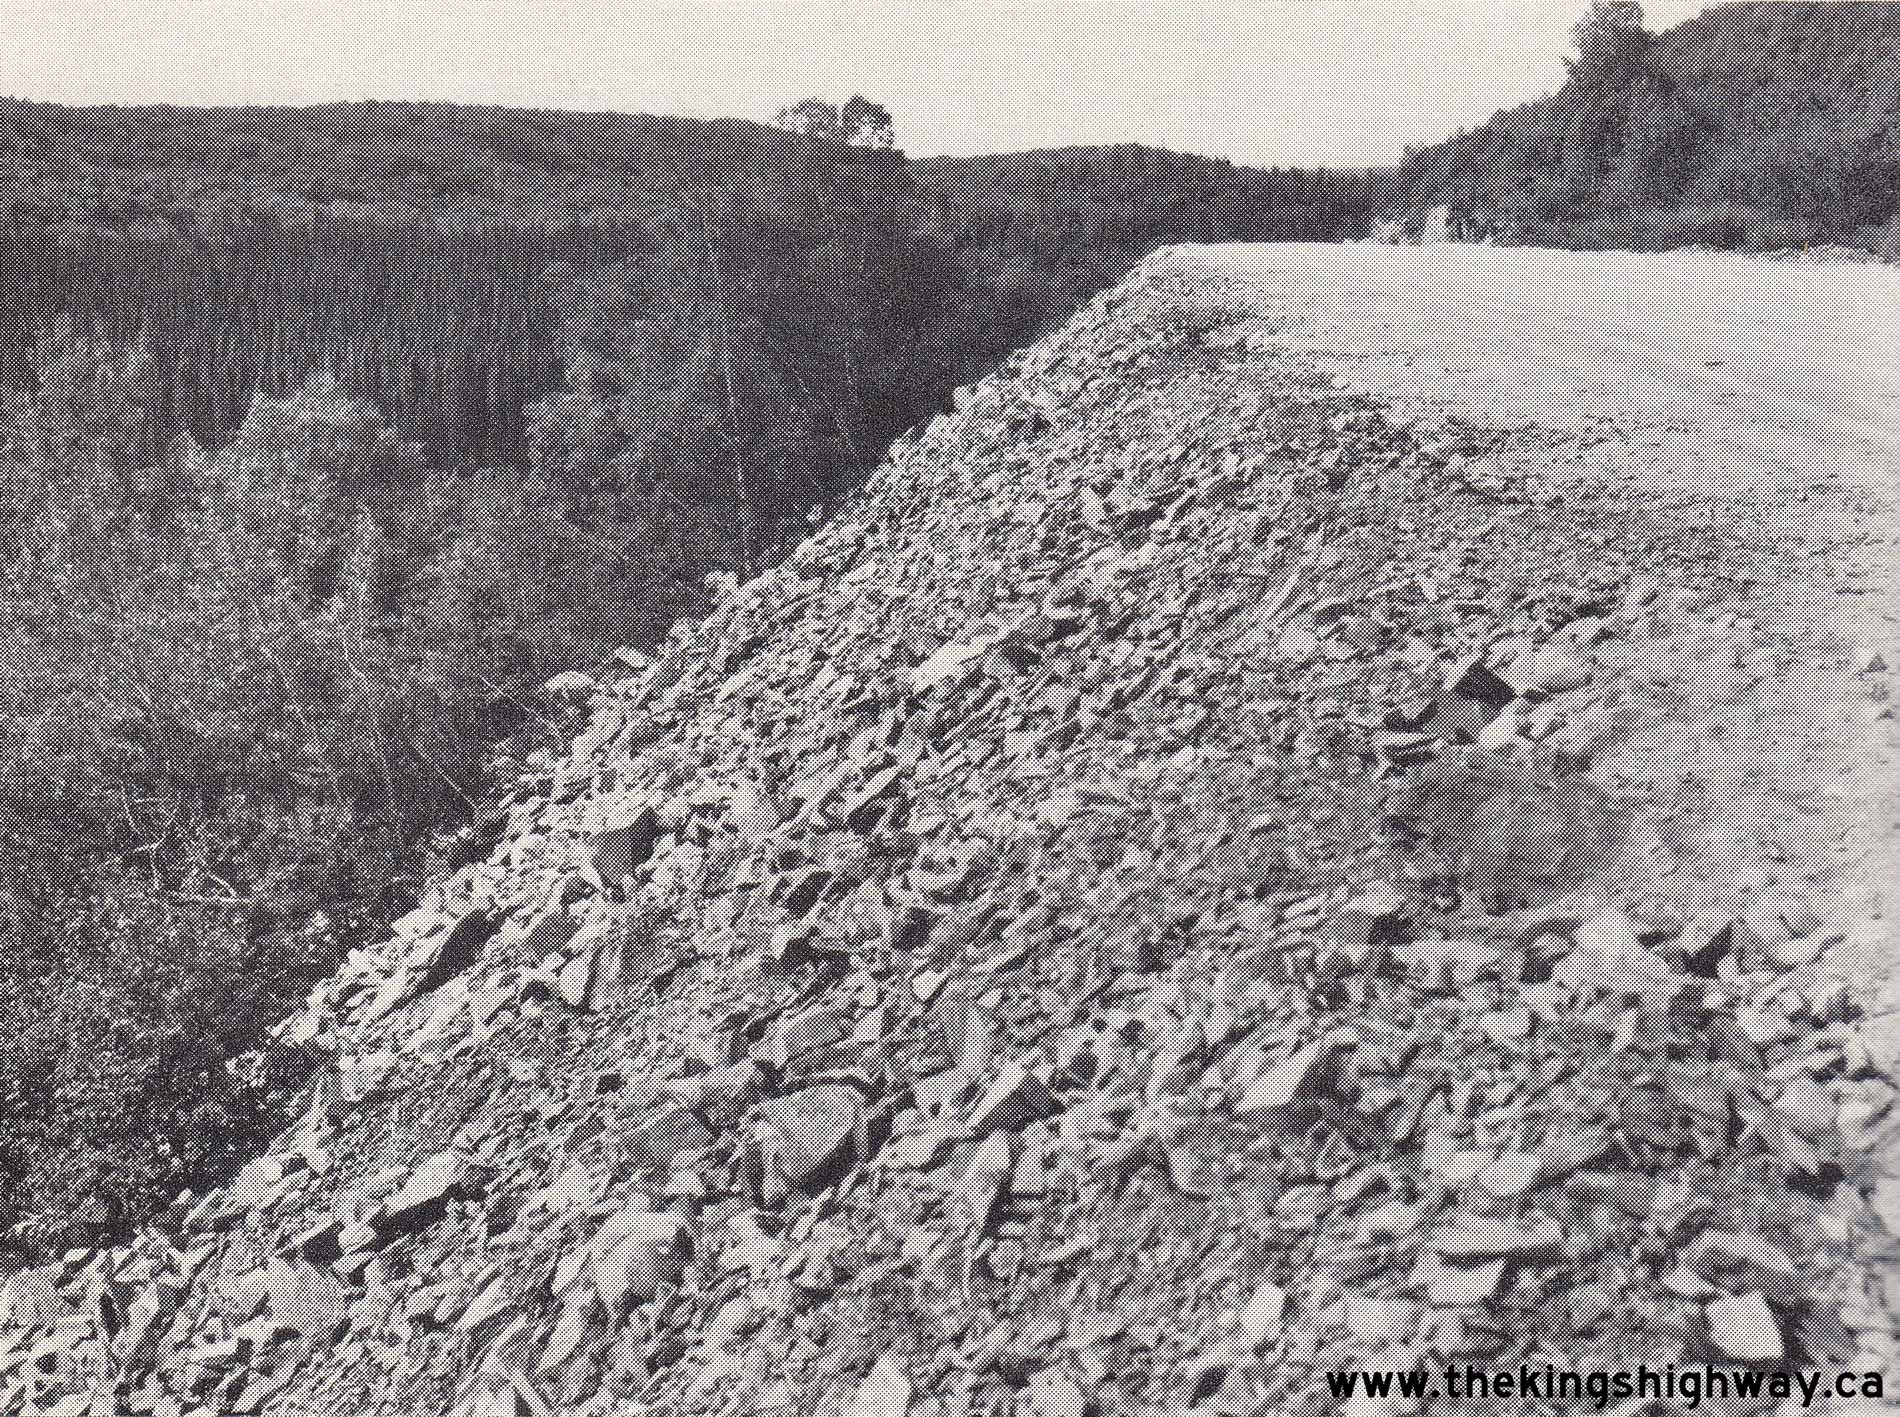
Left - Heavy grading and rock fill on the Hwy 17 Extension to Marathon, facing east from Sta. 633+00. This photo was taken near the Little Pic River and
shows a line of heavy construction vehicles placing rock fill under Contract #1950-220. This was one of three grading contracts called in November 1950 for the
extension of Hwy 17 from the Steel River easterly to Port Coldwell. The extension of Hwy 17 from Terrace Bay to Marathon was among the most challenging sections of
the Trans-Canada Highway to construct in Ontario, as it passed through a very rugged and remote area with mountainous terrain, several deep gorges and difficult
watercourse crossings. Despite these numerous challenges, the Hwy 17 Extension reached Marathon about three years later, in the Fall of 1953. See an
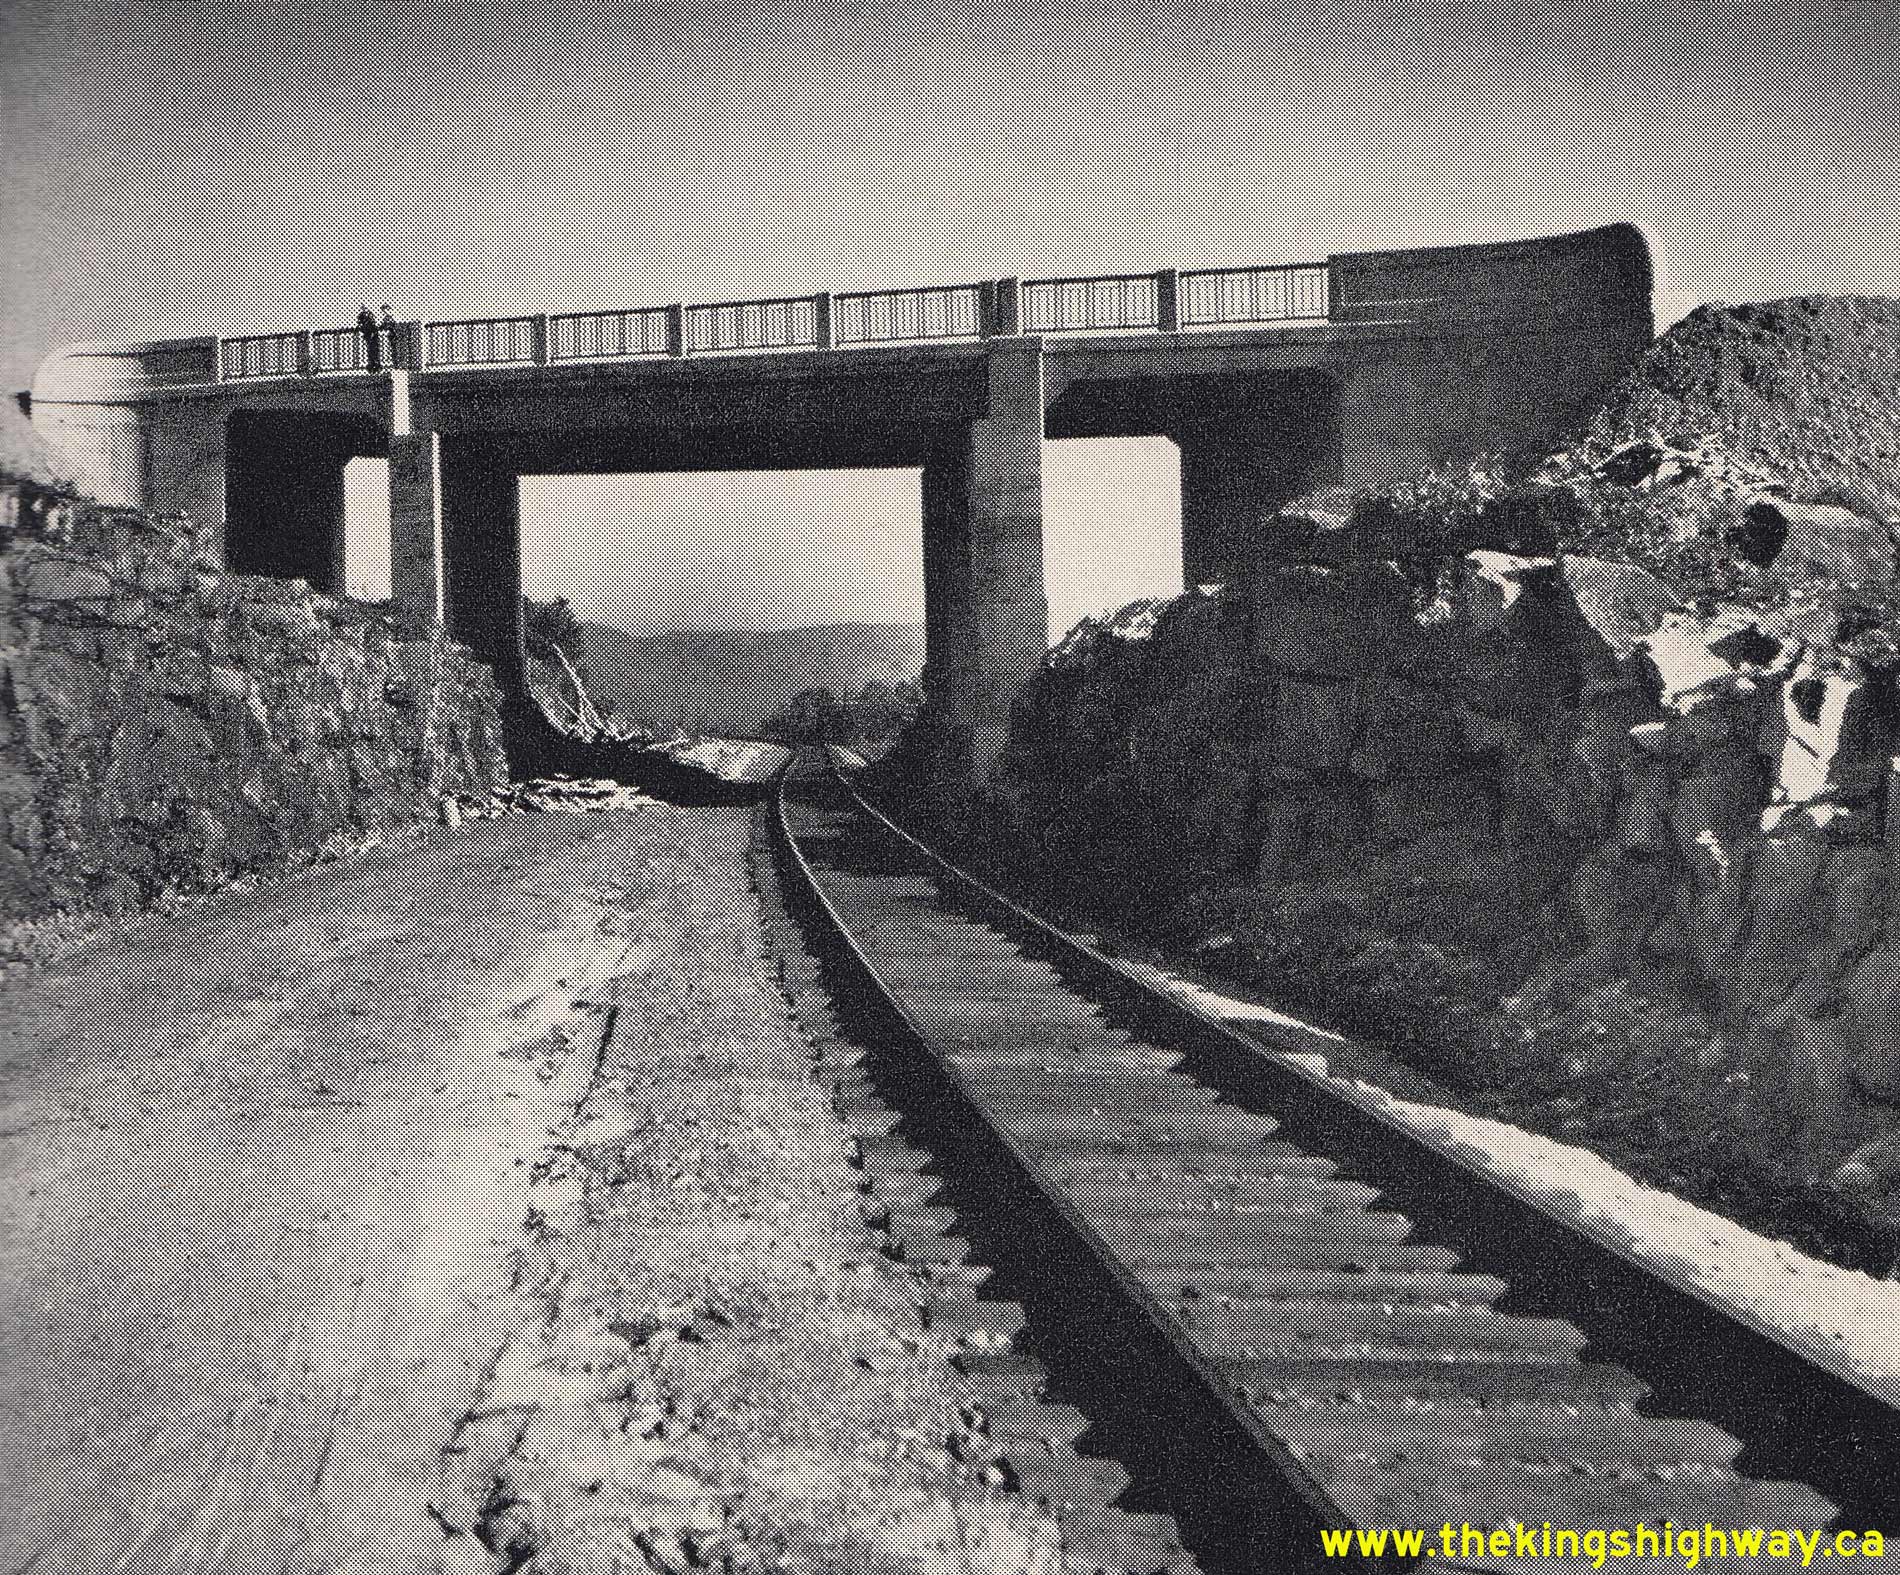
Enlarged Photo Here. Photo taken on August 18, 1953. (Photo courtesy of Ontario Ministry of Transportation - © King's Printer for Ontario, 1953) Right - New Selim Hill Canadian Pacific Railway (CPR) Overhead on Hwy 17 between Schreiber and Rossport. This structure was built under Contract #1951-88 as the final phase of a substantial relocation of Hwy 17 at Selim Hill. Altogether, about 3 1/2 miles of Hwy 17 were relocated onto an improved grade. A very dangerous at-grade railway crossing and several tight switchbacks were eliminated from Hwy 17 as a result of the highway relocation. The completion of the new Selim Hill Overhead also created one of the most memorable highway vistas in Ontario, where Hwy 17 suddenly emerges out onto the rugged shores of Lake Superior, after spending many miles further inland. In fact, the photo featured on the front cover of the 1977 Official Ontario Road Map was taken from the western approach to the Selim Hill Overhead. See an Enlarged Photo Here. Photo taken on August 19, 1953. (Photo courtesy of Ontario Ministry of Transportation - © King's Printer for Ontario, 1953) 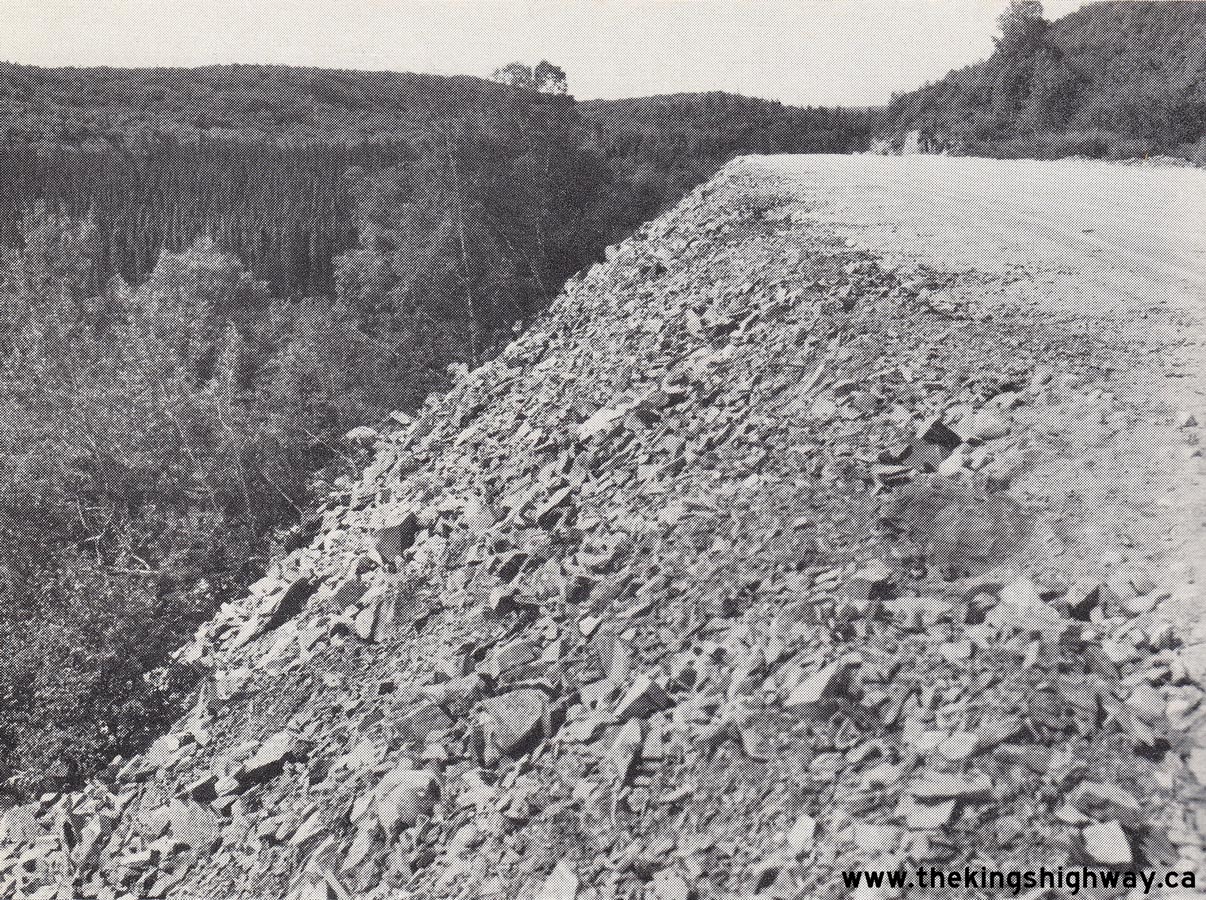
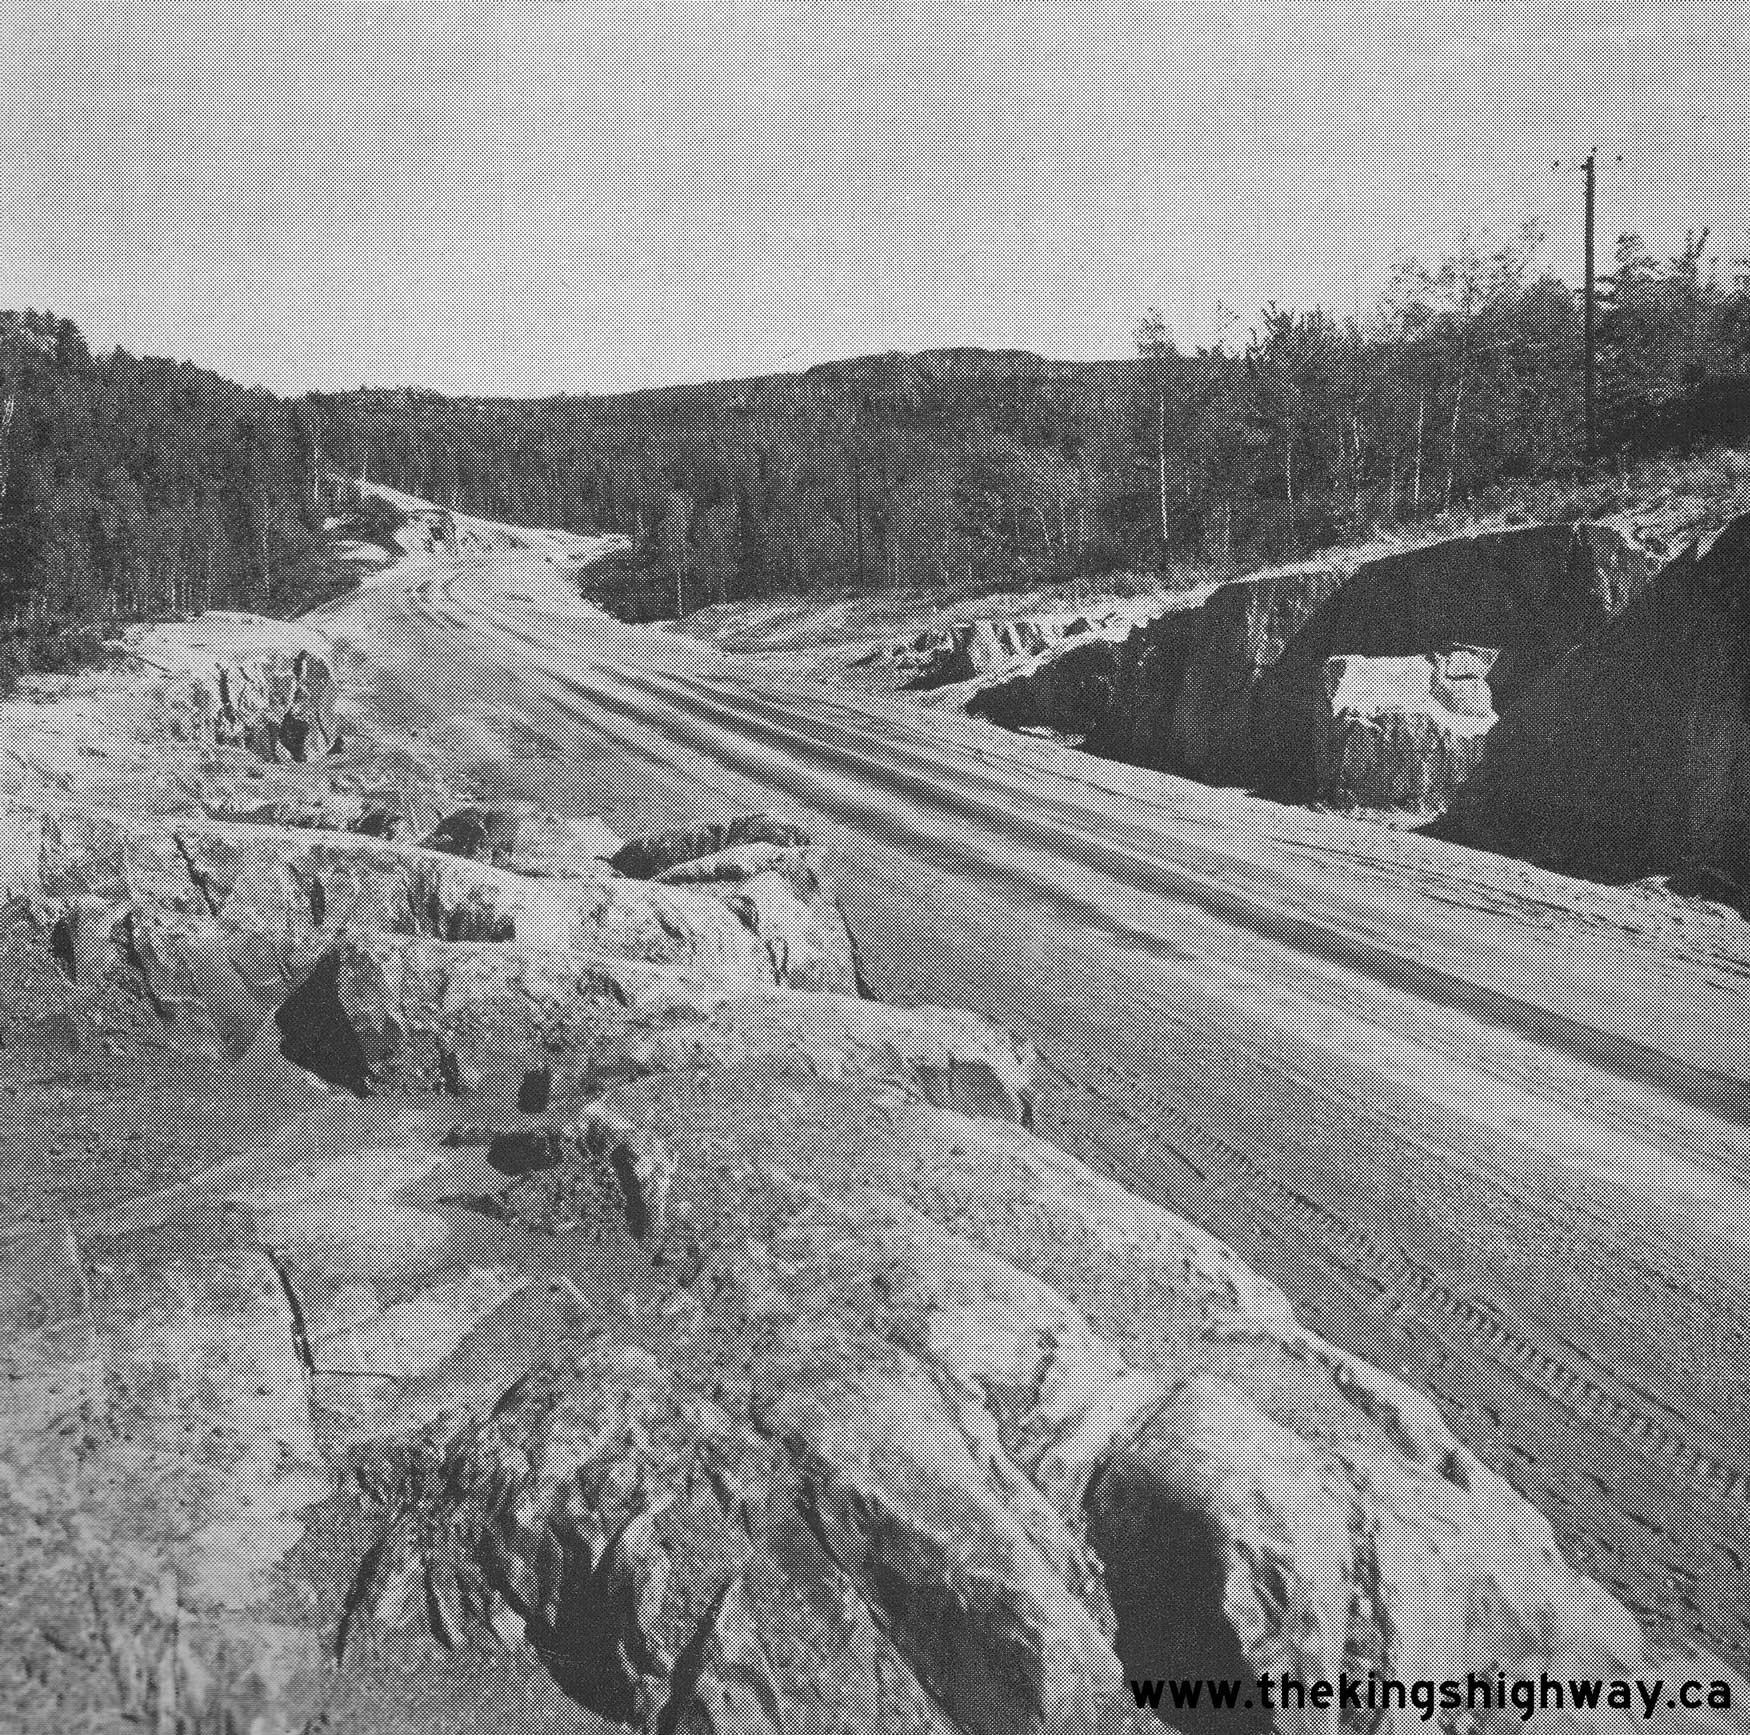
Above - Rock fill and heavy grading at Wagner's Hill, located at the Little Pic River west of Marathon. See an
Enlarged Photo Here. Photo taken on August 19, 1953. (Photo courtesy of Ontario Ministry of Transportation - © King's Printer for Ontario, 1953) 

Left - Newly-completed Bailey Bridge on Hwy 17 at the Little Pic River west of Marathon. Owing to shortages of structural steel and other technical challenges
of constructing a permanent bridge at this location, a Bailey Bridge was put into service on a temporary alignment of Hwy 17 at the foot of Wagner's Hill in 1953. The
implementation of a temporary crossing allowed Hwy 17 to be opened to traffic as far east as Marathon about a month after this photo was taken. As structural steel
shortages eased by the mid-1950s, construction got underway on a high-level bridge over the Little Pic River in 1956. Once the new bridge was completed and opened to
traffic in December 1958, the temporary route of Hwy 17 was closed off to traffic and abandoned, while the Bailey Bridge was taken out of service and removed from the
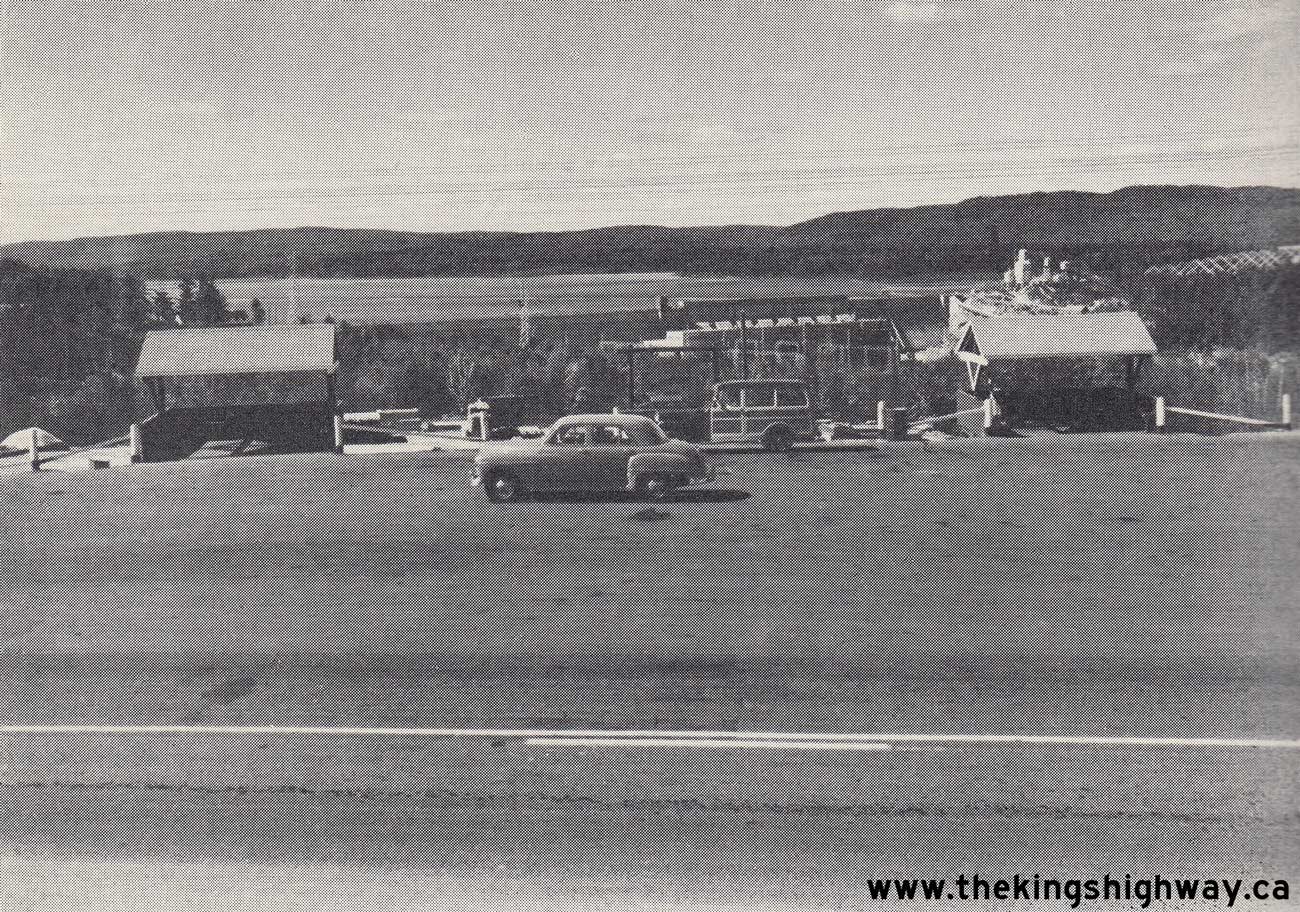
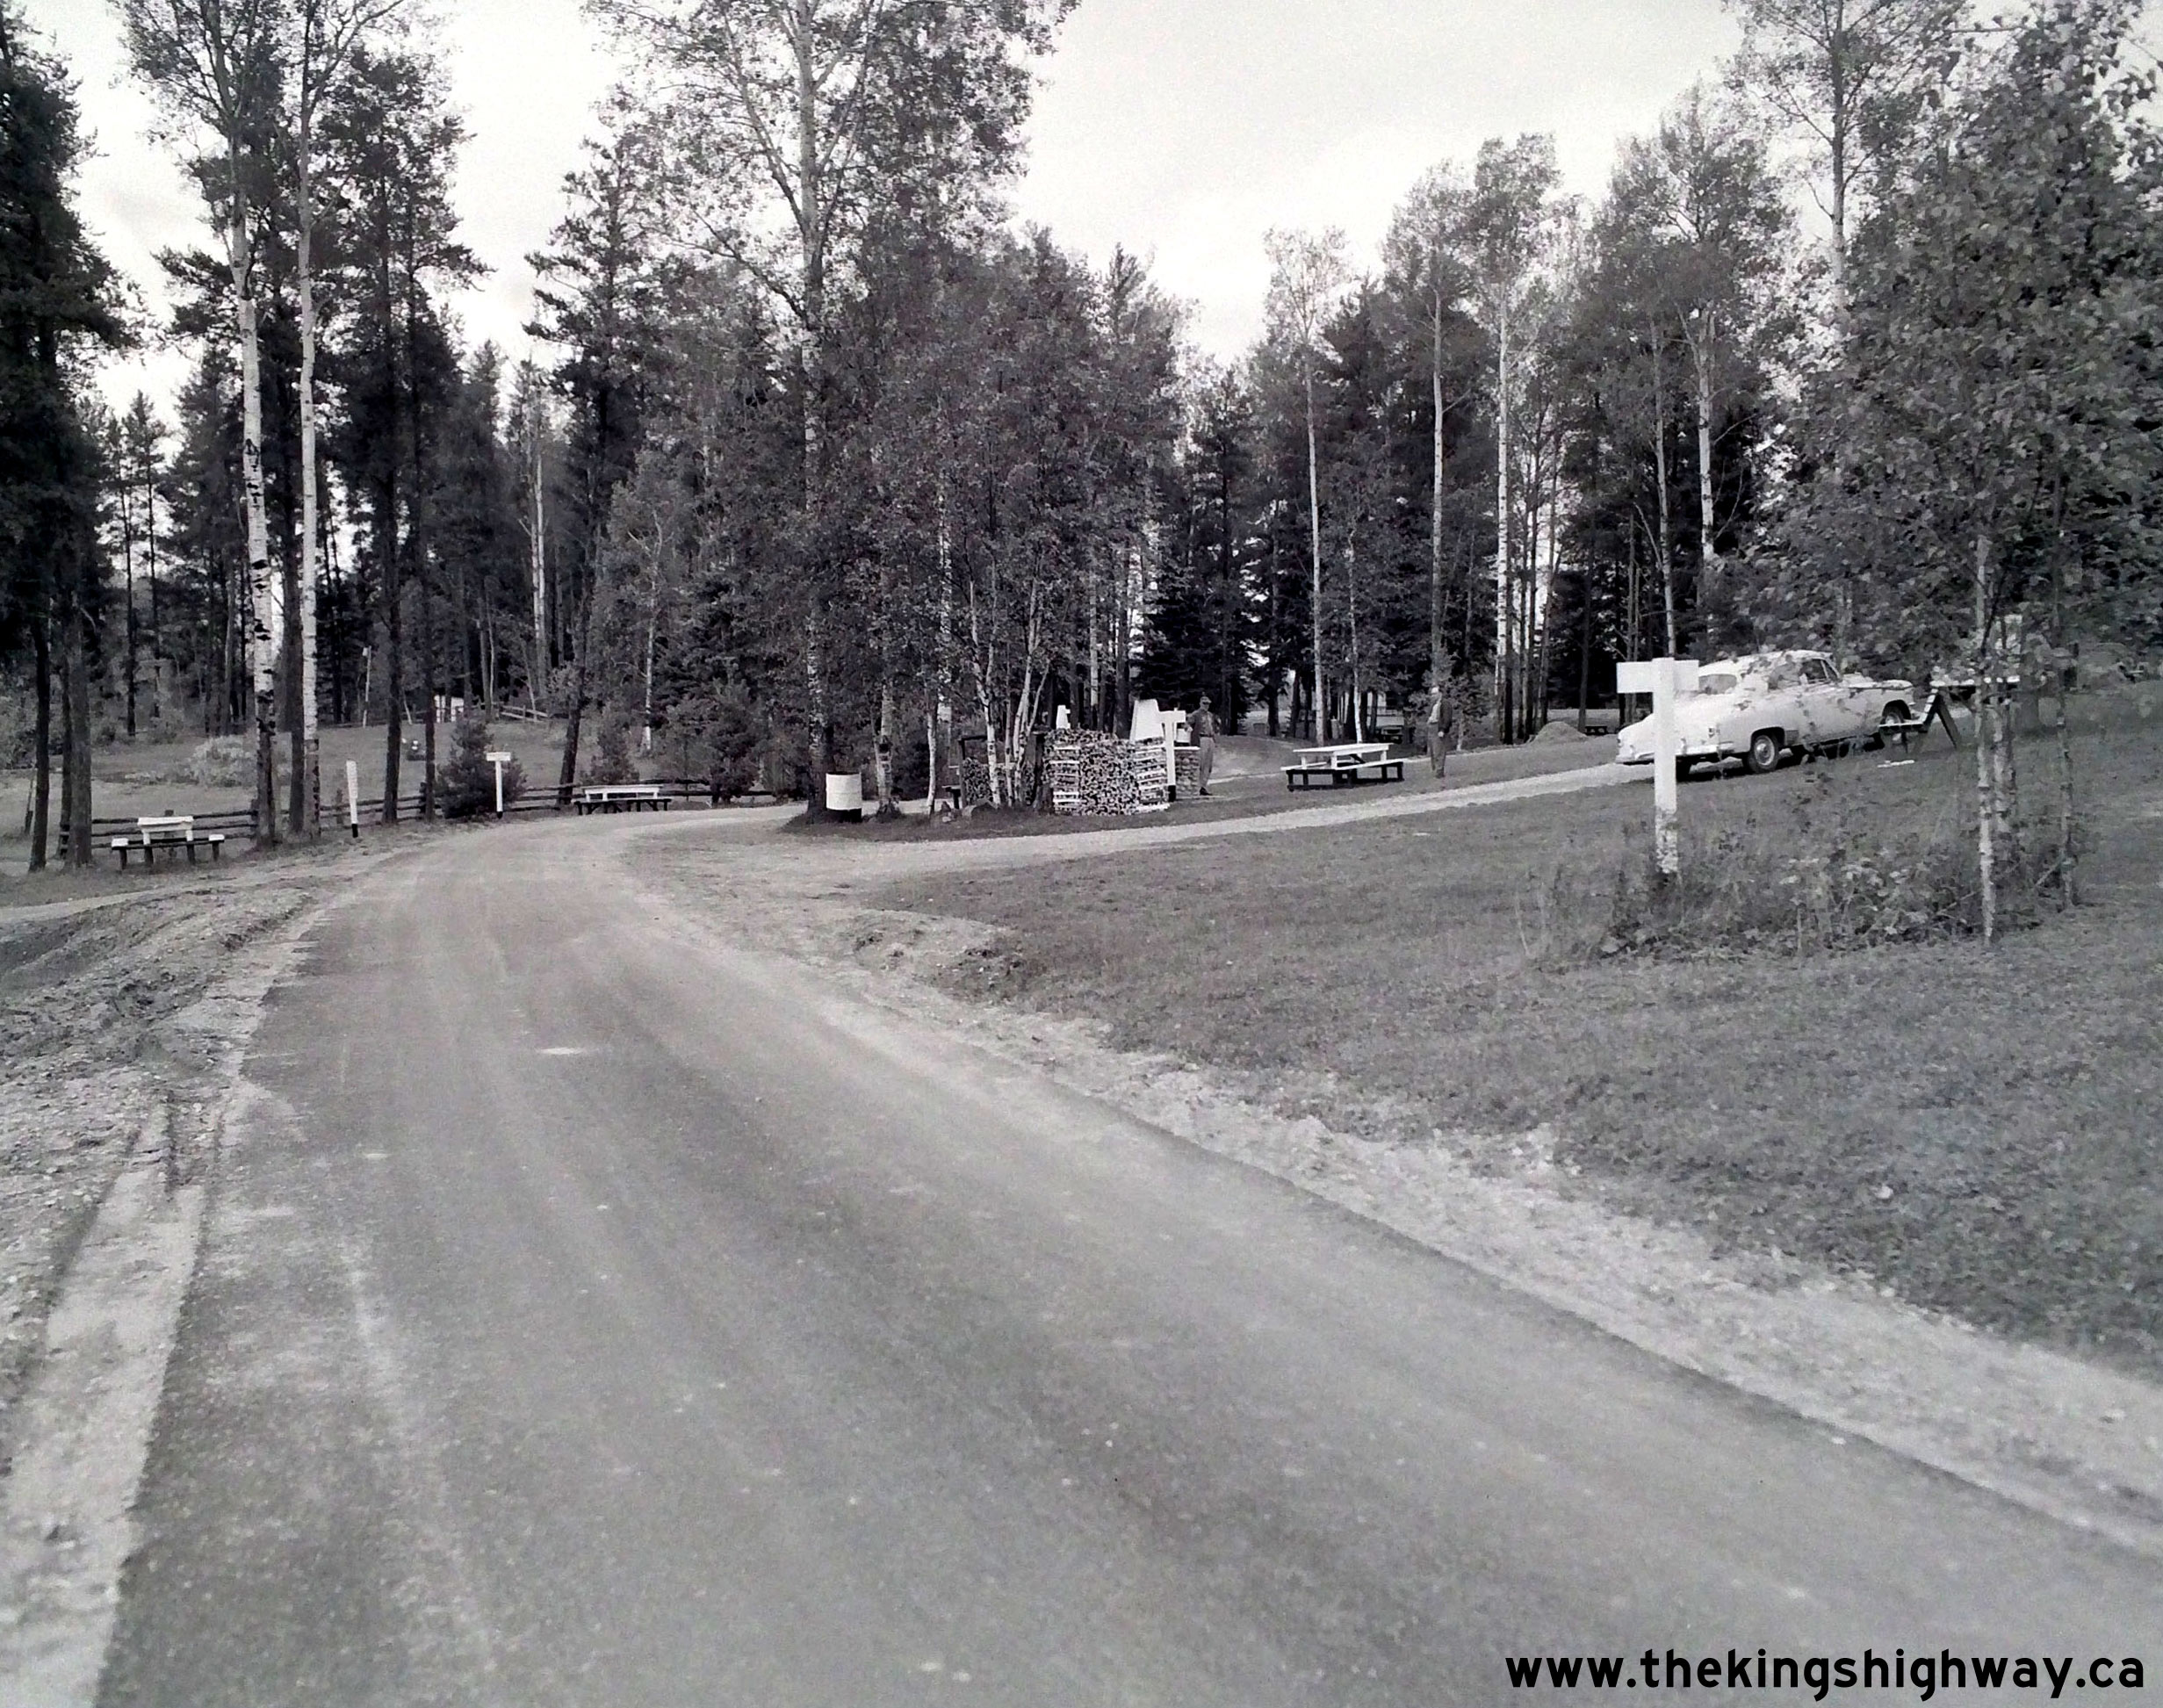
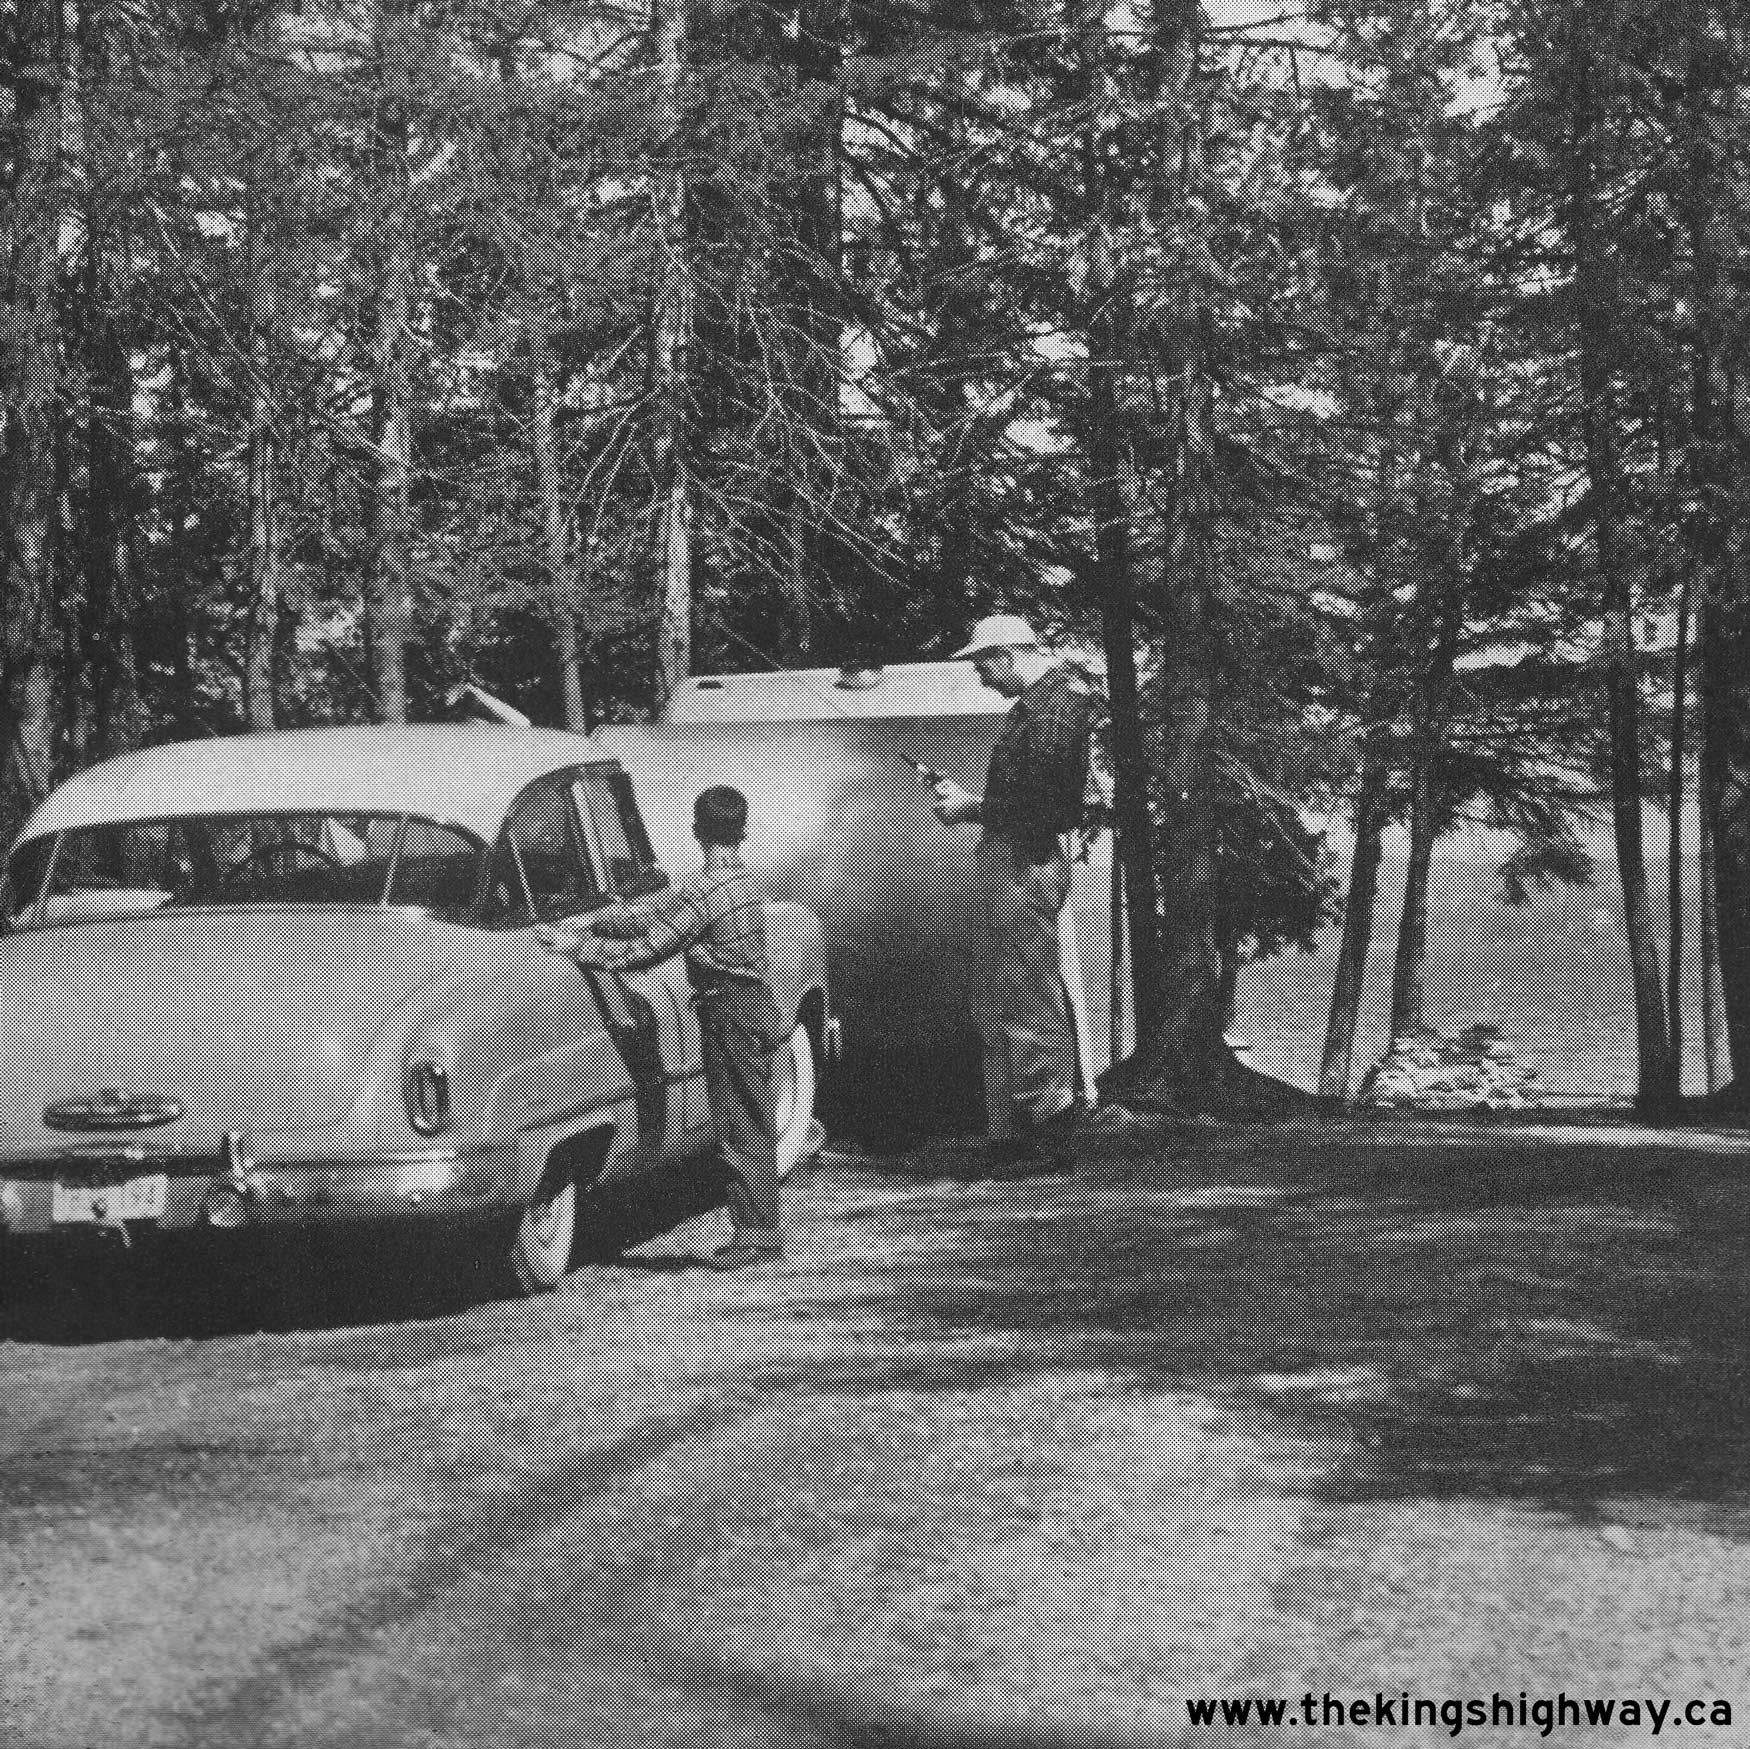
site. See an Enlarged Photo Here. Photo taken on August 19, 1953. (Photo courtesy of Ontario Ministry of Transportation - © King's Printer for Ontario, 1953) Right - Motorists at the Department of Highways' Aaron Park on Hwy 17 near Dryden in 1953. In 1956, this large roadside park and campground was turned over to the Department of Lands and Forests and was designated as Aaron Provincial Park. Many of Ontario's current provincial parks actually began as roadside parks and campgrounds developed and operated by the Department of Highways for the convenience of motorists. See an Enlarged Photo Here. Photo taken on August 25, 1953. (Photo courtesy of Ontario Ministry of Transportation - © King's Printer for Ontario, 1953) 
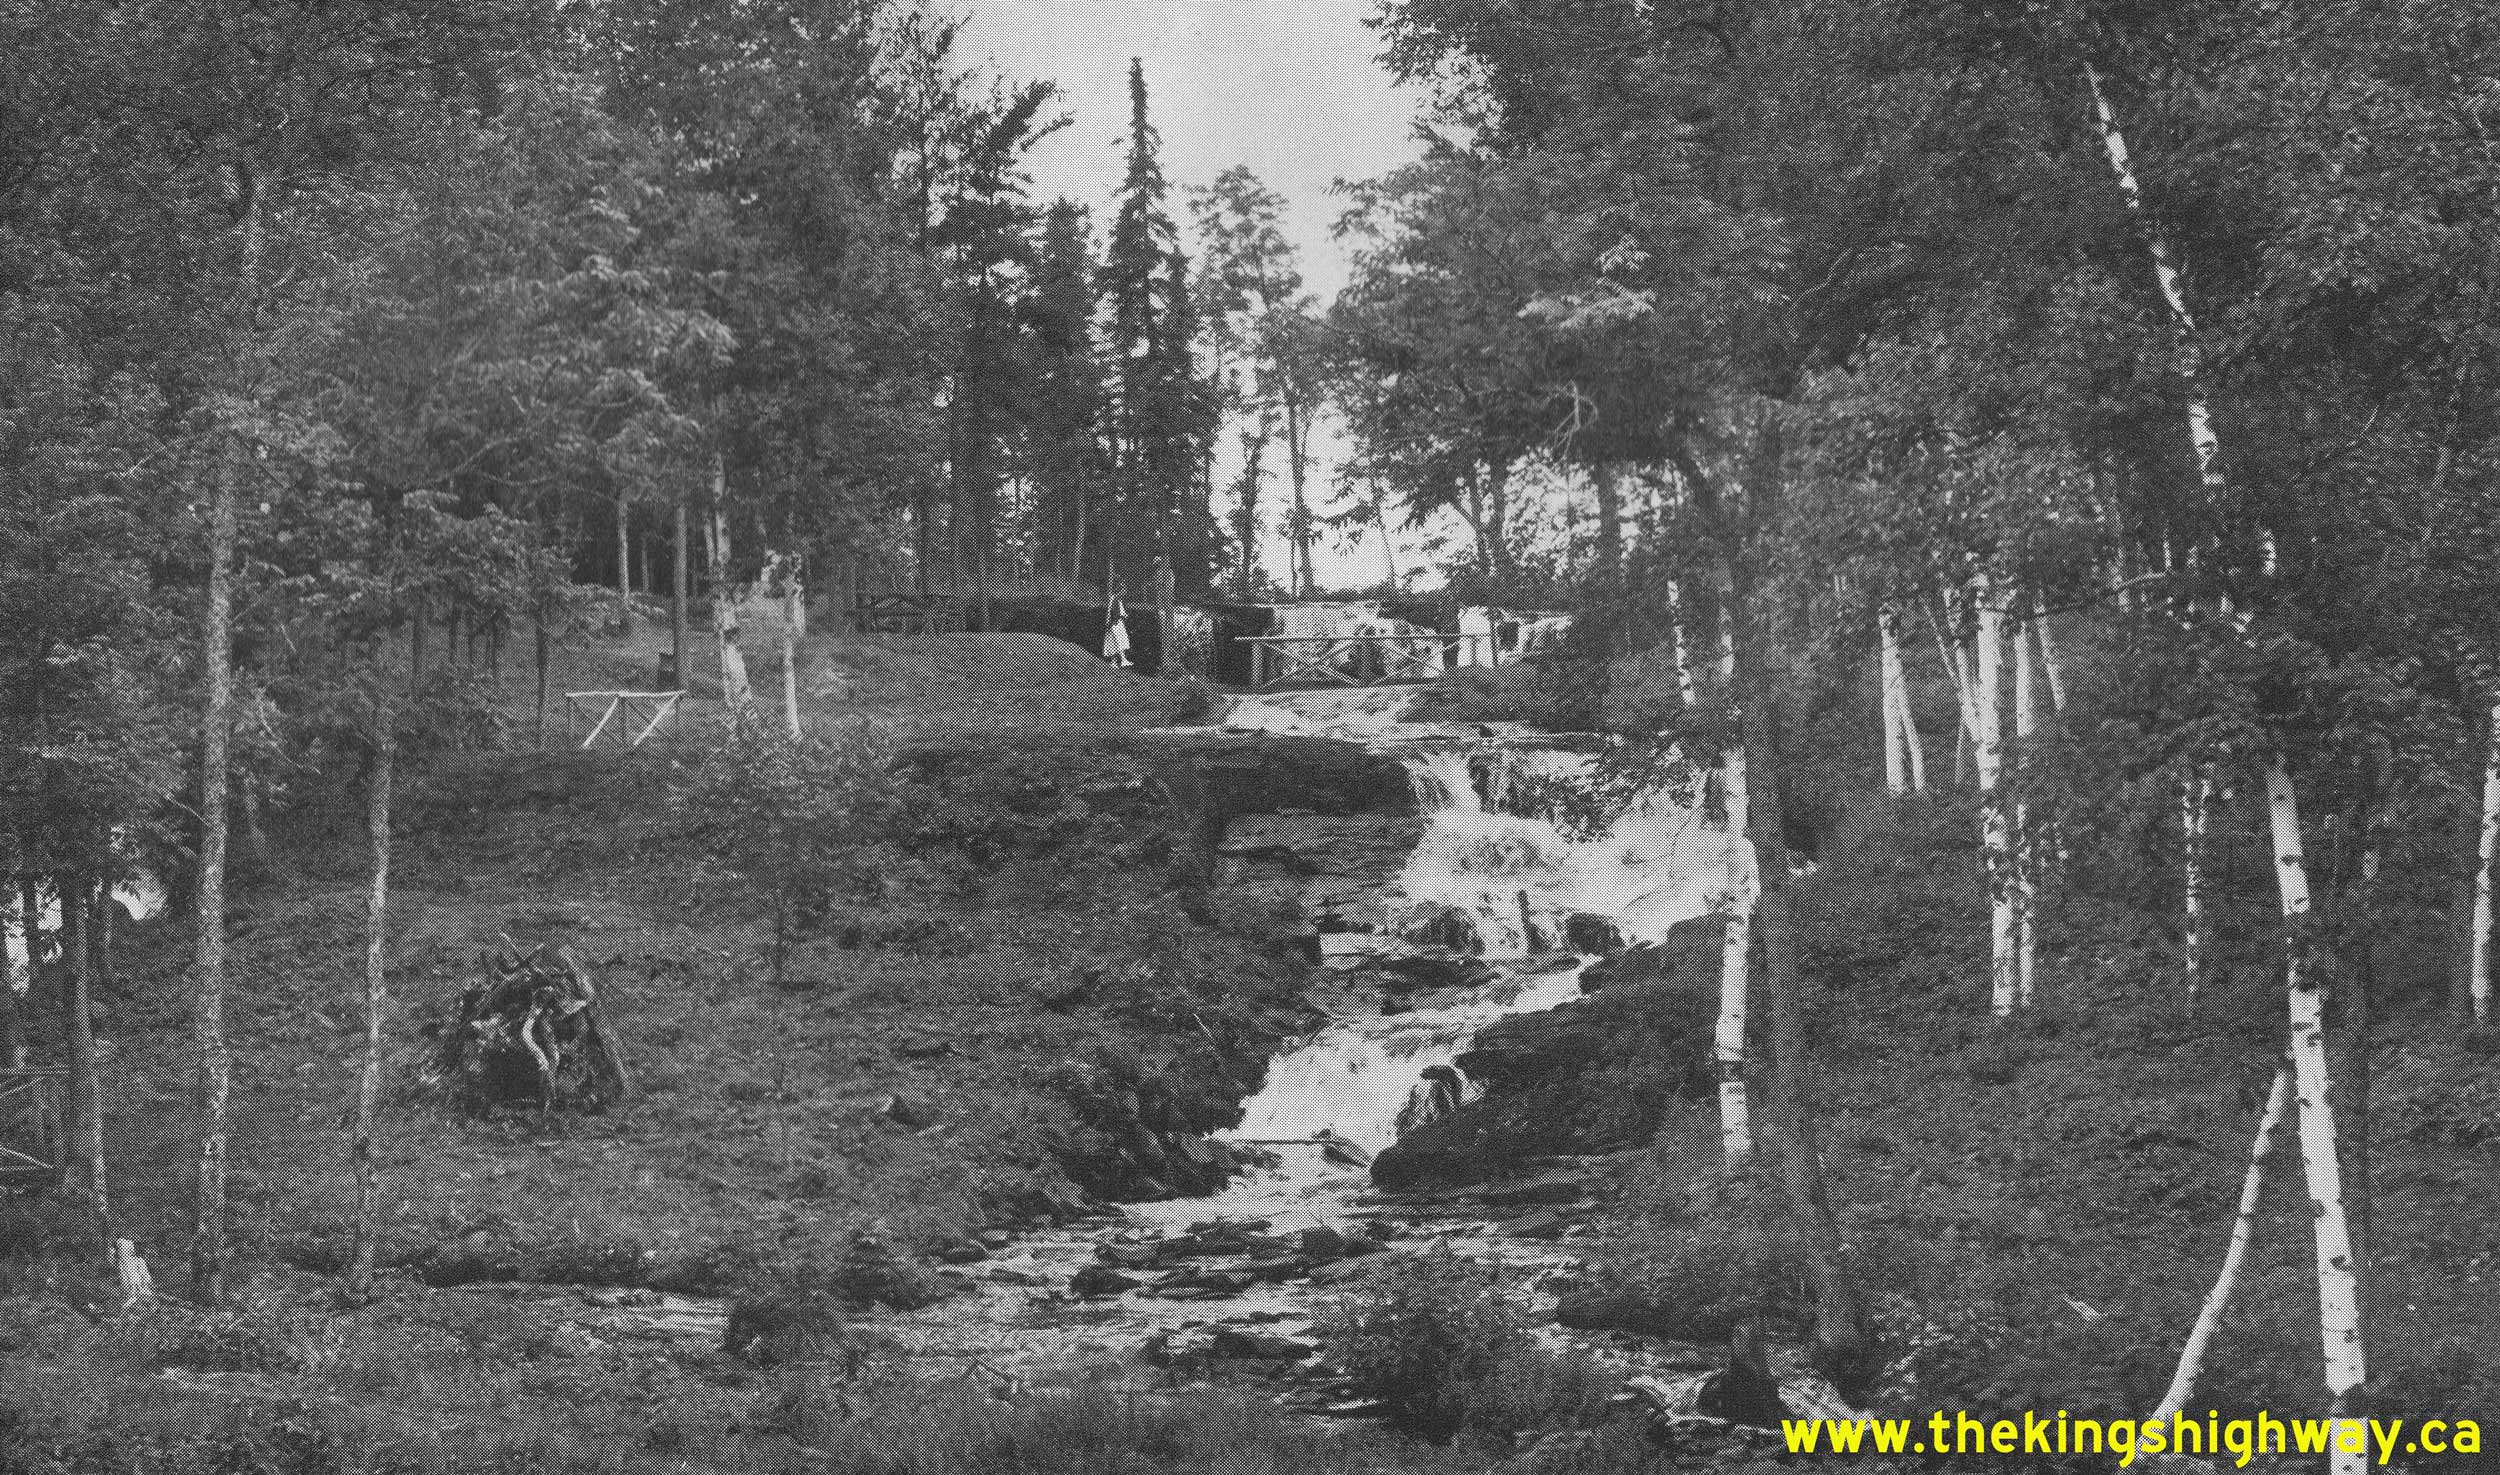
Above - View of Raleigh Falls Roadside Park on Hwy 17 west of Ignace. See an
Enlarged Photo Here. Photo taken on August 24, 1953. (Photo courtesy of Ontario Ministry of Transportation - © King's Printer for Ontario, 1953) 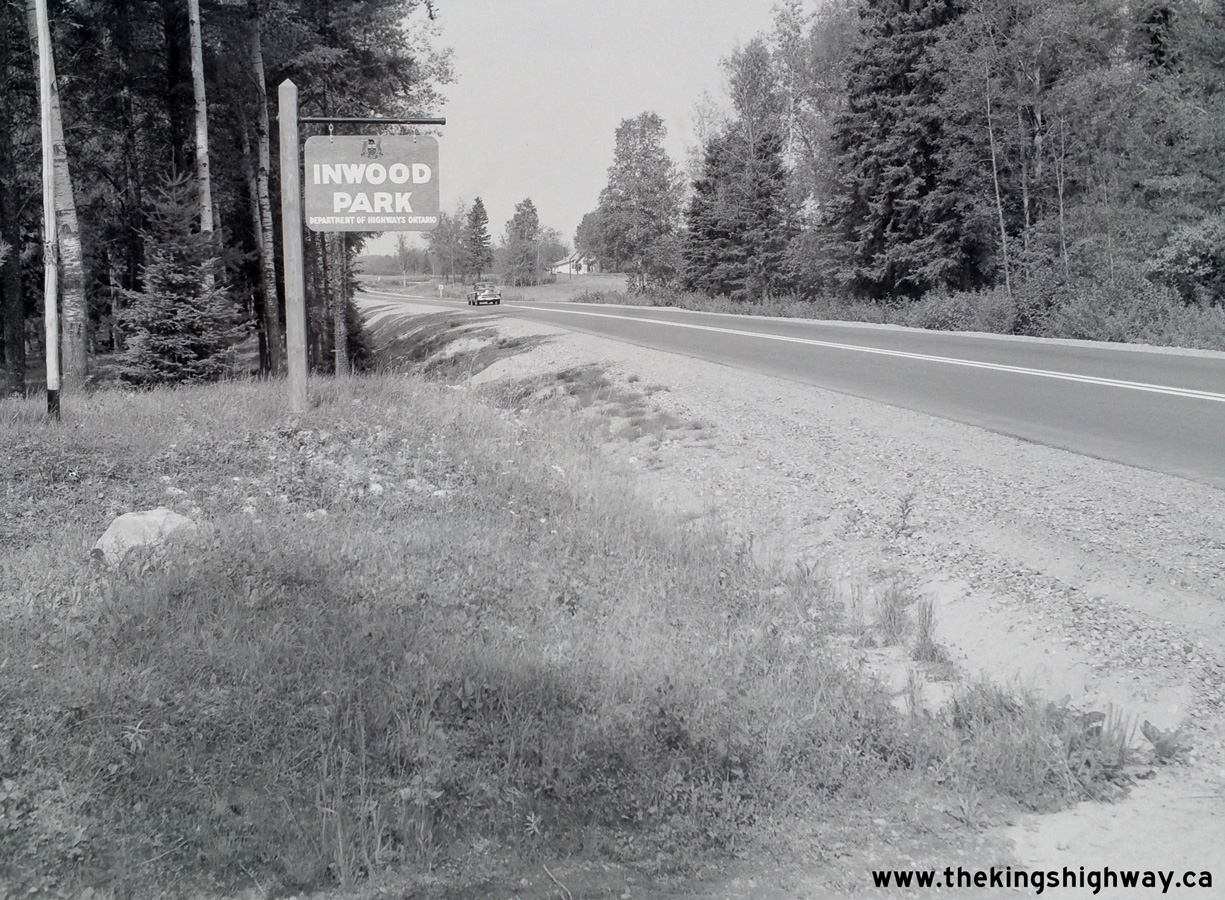
Left - Sign marking the entrance to the DHO's Inwood Roadside Park on Hwy 17, just east of Upsala. See an
Enlarged Photo Here. Photo taken on August 24, 1953. (Photo courtesy of Ontario Ministry of Transportation - © King's Printer for Ontario, 1953) Right - Completed hot-mix asphalt paving and zone striping on Hwy 17 about 1 1/2 miles east of Dinorwic, Contract #1950-75. See an Enlarged Photo Here. Photo taken on August 25, 1953. (Photo courtesy of Ontario Ministry of Transportation - © King's Printer for Ontario, 1953) 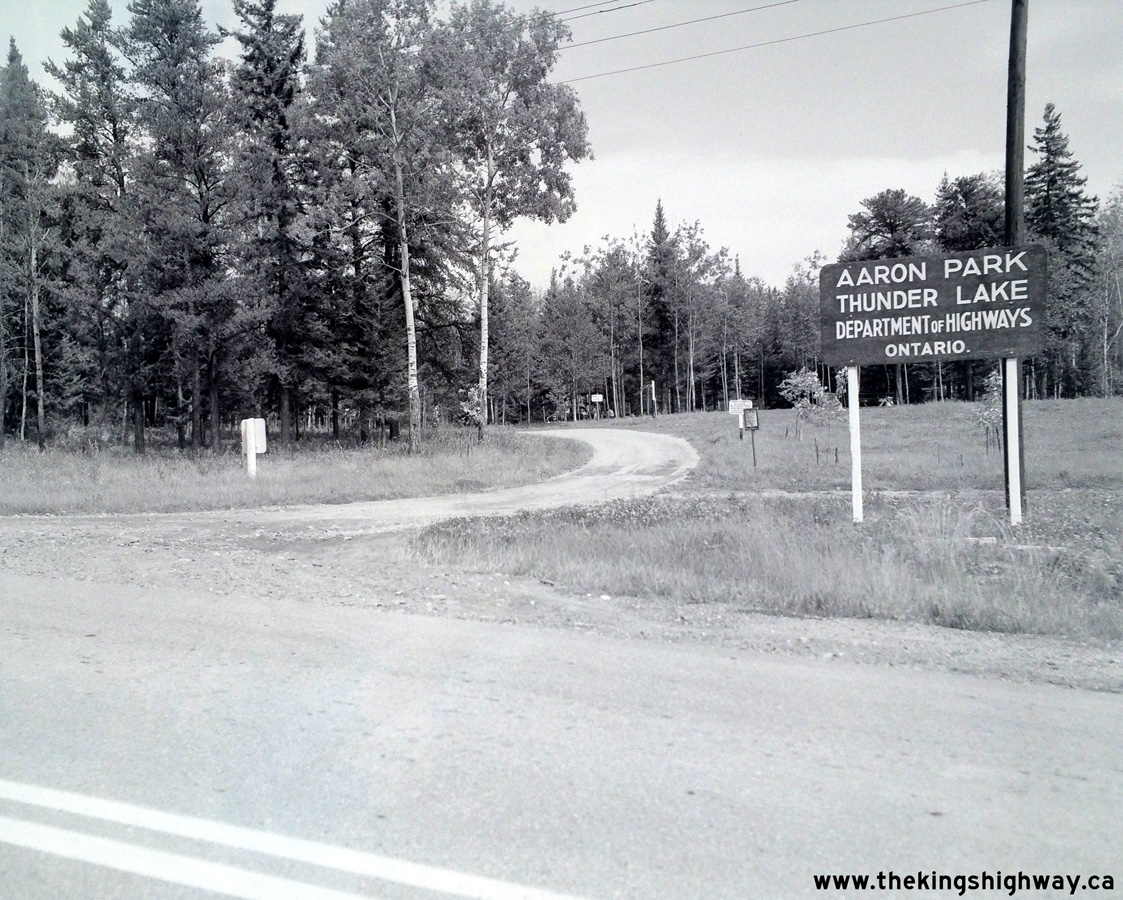
Left - Sign at the entrance to Aaron Park on Hwy 17 east of Dryden. See an
Enlarged Photo Here. Photo taken on August 25, 1953. (Photo courtesy of Ontario Ministry of Transportation - © King's Printer for Ontario, 1953) Right - Completed Birch Creek Diversion on Hwy 17 at the western approach to Webbwood, Contract #1950-107. Note the approach to the now-removed CPR Overhead on the north side of the highway at left. Although this grade separation provided safe passage across the railway line for traffic using the Trans-Canada Highway for many years, there was a hazardous 90-degree turn in Hwy 17 on the western approach to the CPR Overhead. In the early 1950s, a new CPR Overhead was constructed at the western entrance to Webbwood on the relocated route of Hwy 17 under Contract #1952-41, which had improved approach geometry. See an Enlarged Photo Here. Photo taken on August 31, 1953. (Photo courtesy of Ontario Ministry of Transportation - © King's Printer for Ontario, 1953) 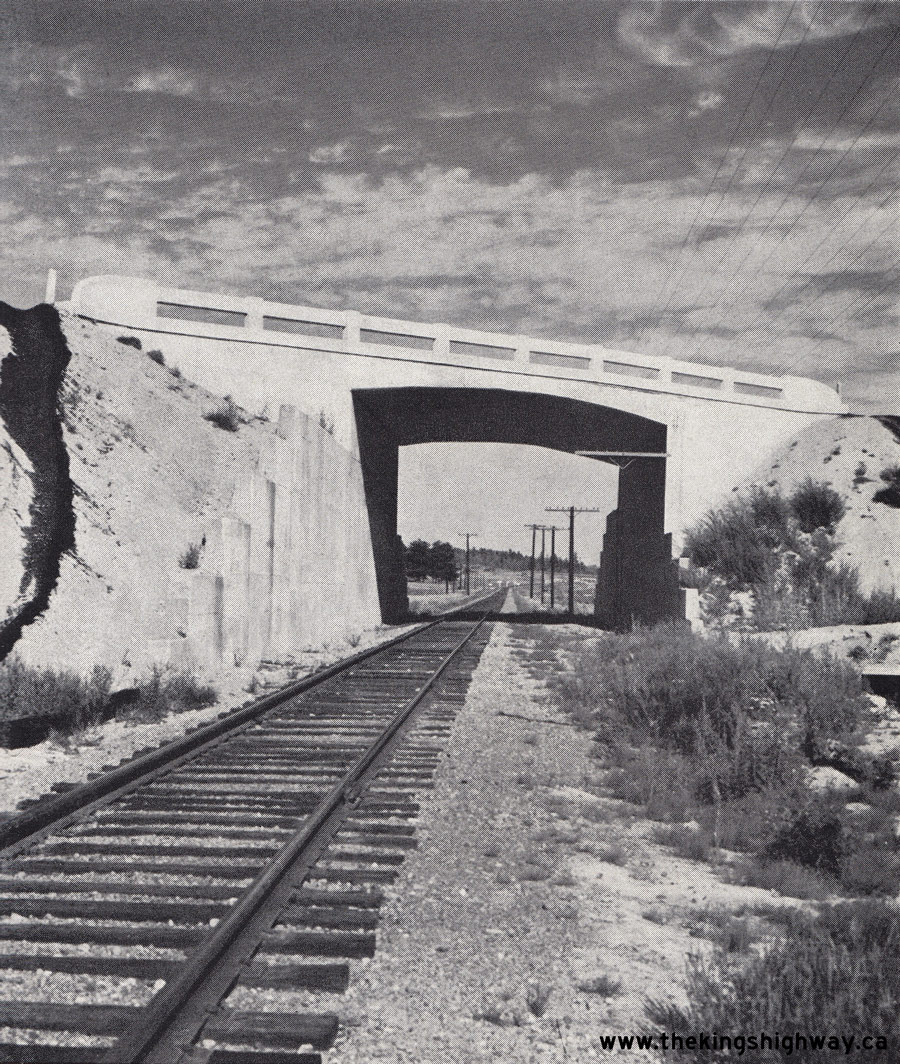
Above - Completed CPR Overhead on Hwy 17 at Walford, located between Massey and Spanish. This new overhead crossing was built under Contract #1952-40 on the
Walford Diversion. The new structure eliminated a skewed at-grade railway crossing on the original route of Hwy 17 within the village. See an
Enlarged Photo Here. Photo taken on August 31, 1953. (Photo courtesy of Ontario Ministry of Transportation - © King's Printer for Ontario, 1953) 
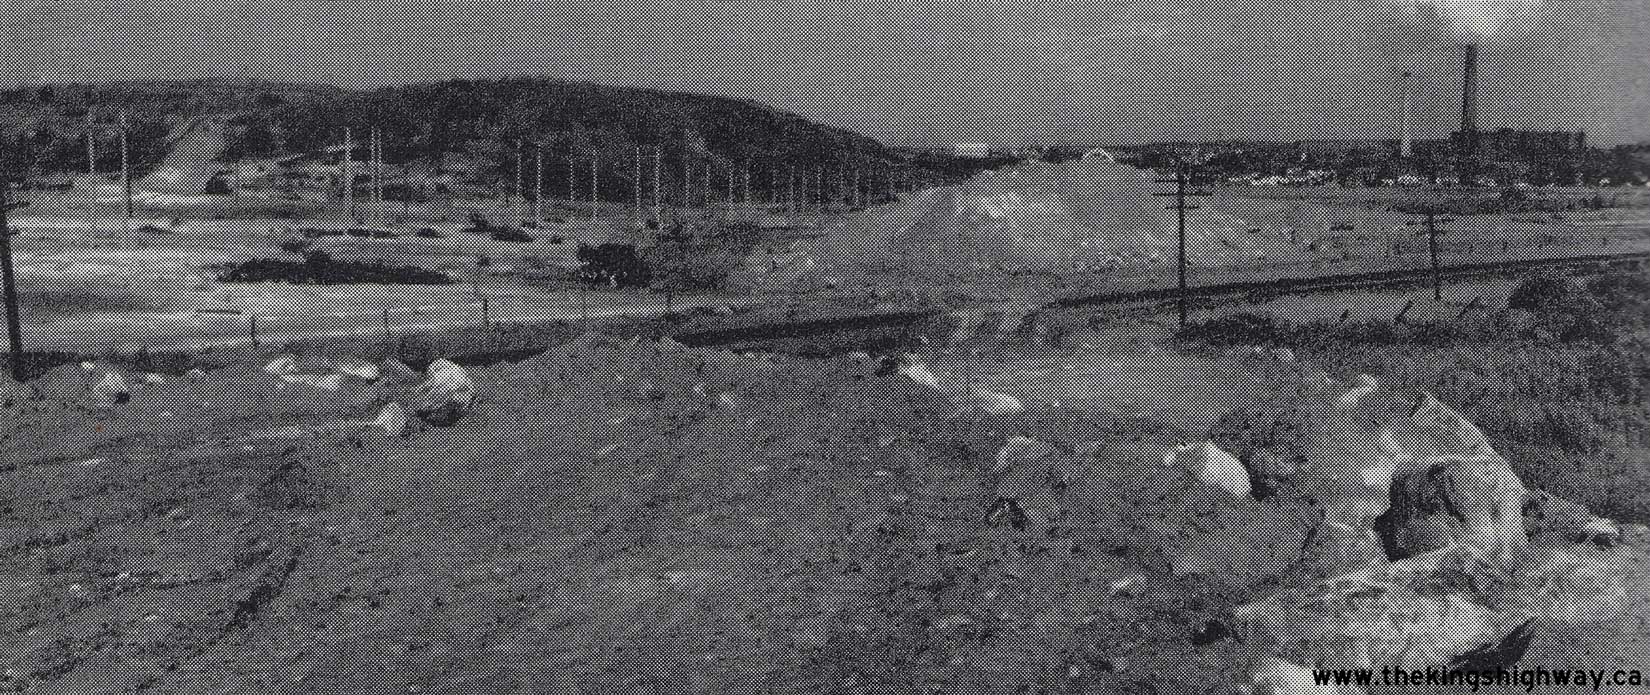
Above - Grading of the approaches to the proposed Copper Cliff CPR Overhead on Hwy 17 west of Sudbury. This section of Hwy 17 west of Sudbury was
reconstructed onto an improved alignment for a distance of 5 3/4 miles between Copper Cliff and Naughton under Contract #1952-31. The new overhead crossing west of
Copper Cliff was completed and opened to traffic in 1955. It eliminated an at-grade railway crossing on the original route of Hwy 17 (today's Power Street) just west
of Copper Cliff. See an Enlarged Photo Here. Photo taken on September 1, 1953. (Photo courtesy of Ontario Ministry of Transportation - © King's Printer for Ontario, 1953) 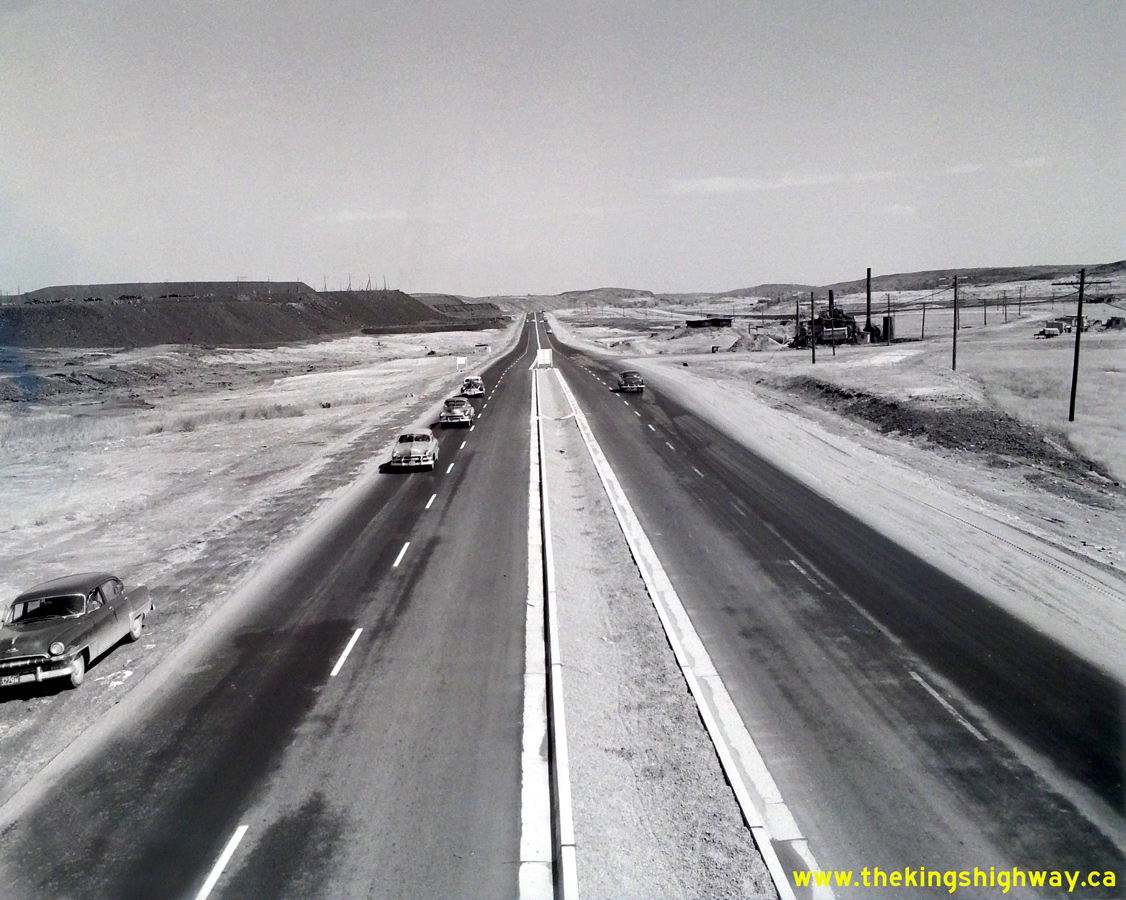
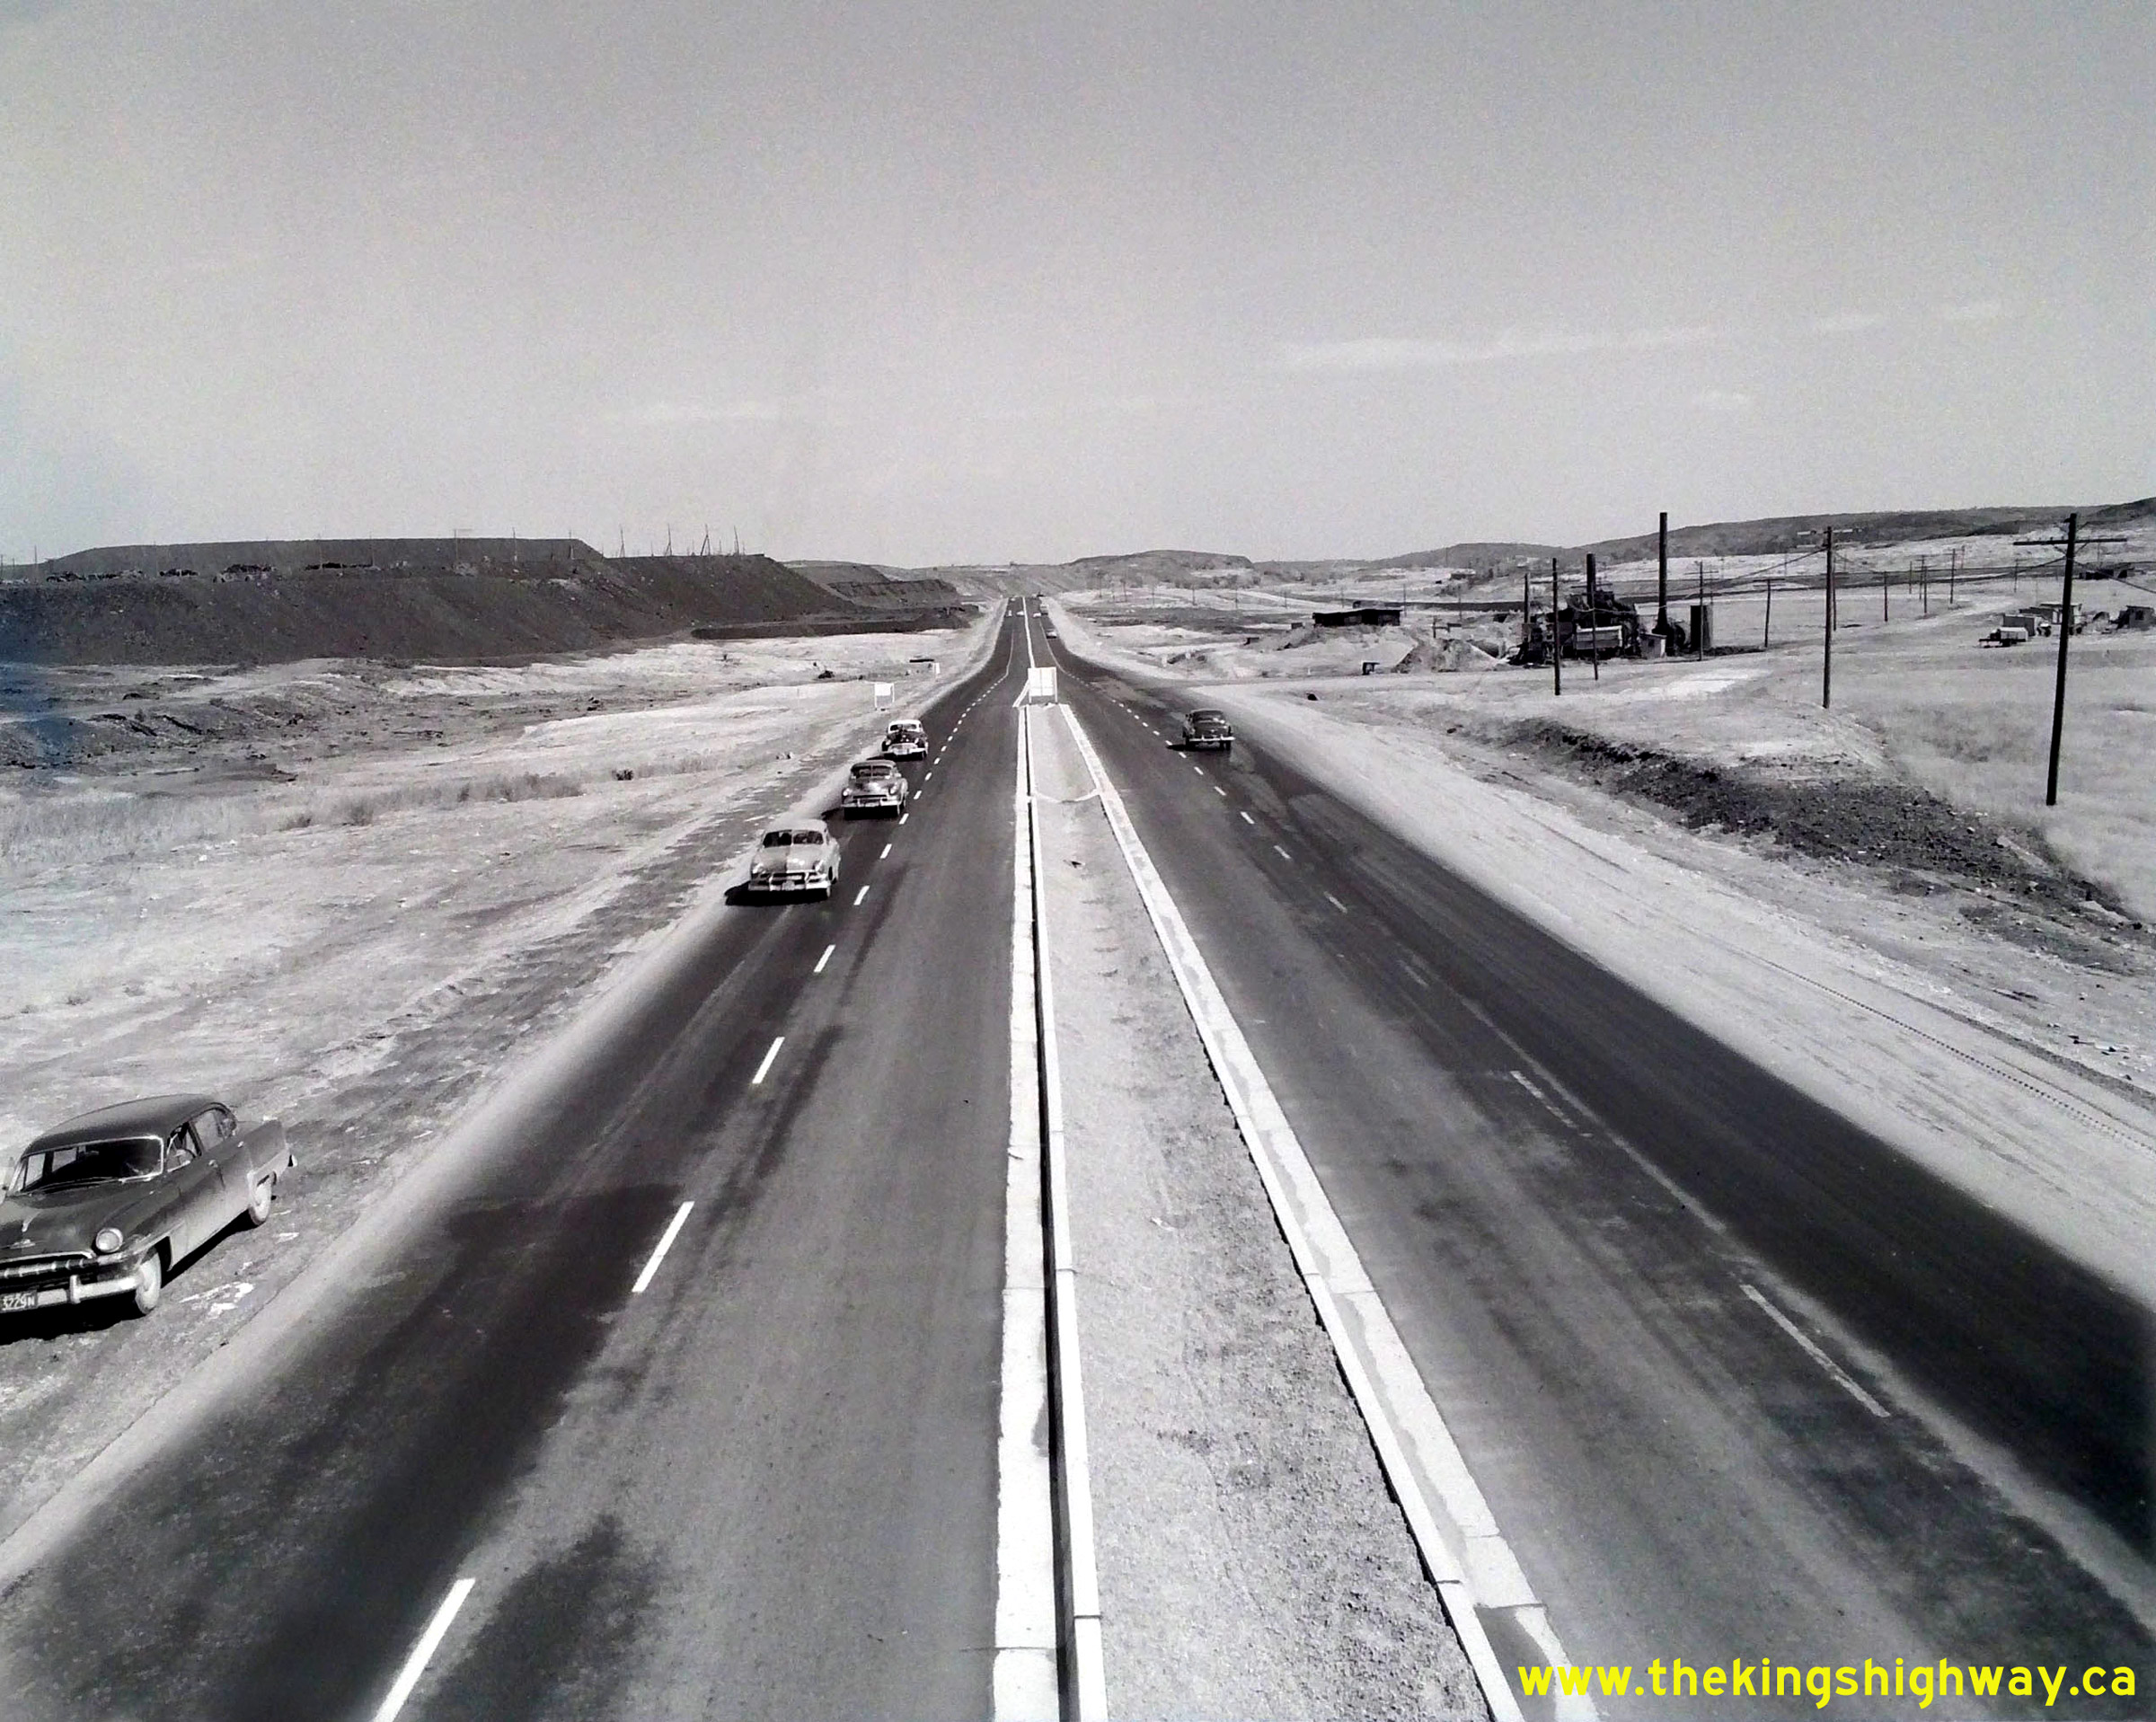
Left - Facing east towards Sudbury along a new four-lane section of Hwy 17 near Copper Cliff in 1953. This interesting photo of the new highway was taken
from the Copper Cliff International Nickel Company (INCO) Railway Subway. When the INCO Subway was first built in 1939, space was provided through the structure to
accommodate a proposed four-lane divided highway. However, due to the outbreak of World War II, the proposed four-lane Hwy 17 between Sudbury and Copper Cliff was not
constructed for many years. By the time the project got underway, the DHO was already planning for the Sudbury Bypass which was to be located even further out of the
city. The expansion of Hwy 17 between Sudbury and Copper Cliff for a distance of just over 3 miles commenced during the Summer of 1951, under Contract #1951-48.
Grading of this new four-lane route was completed in 1952 with final paving completed during 1952 and 1953 under Contract #1952-61. The new highway was ultimately
built as a mostly undivided highway with a minimum pavement width of 40 feet, with a short section of divided highway in the vicinity of the Copper Cliff INCO Subway.
It thus became the first section of dual highway completed in Northern Ontario - with a total length of about 1/4 of a mile! See an
Enlarged Photo Here. Photo taken on September 1, 1953. (Photo courtesy of Ontario Ministry of Transportation - © King's Printer for Ontario, 1953) Right - View of Lake Superior from Hwy 17 at Selim Hill between Schreiber and Rossport. See an Enlarged Photo Here. Photo taken in 1953. (Photo © Archives of Ontario - Series RG-65-35, Photo #I-0005543) 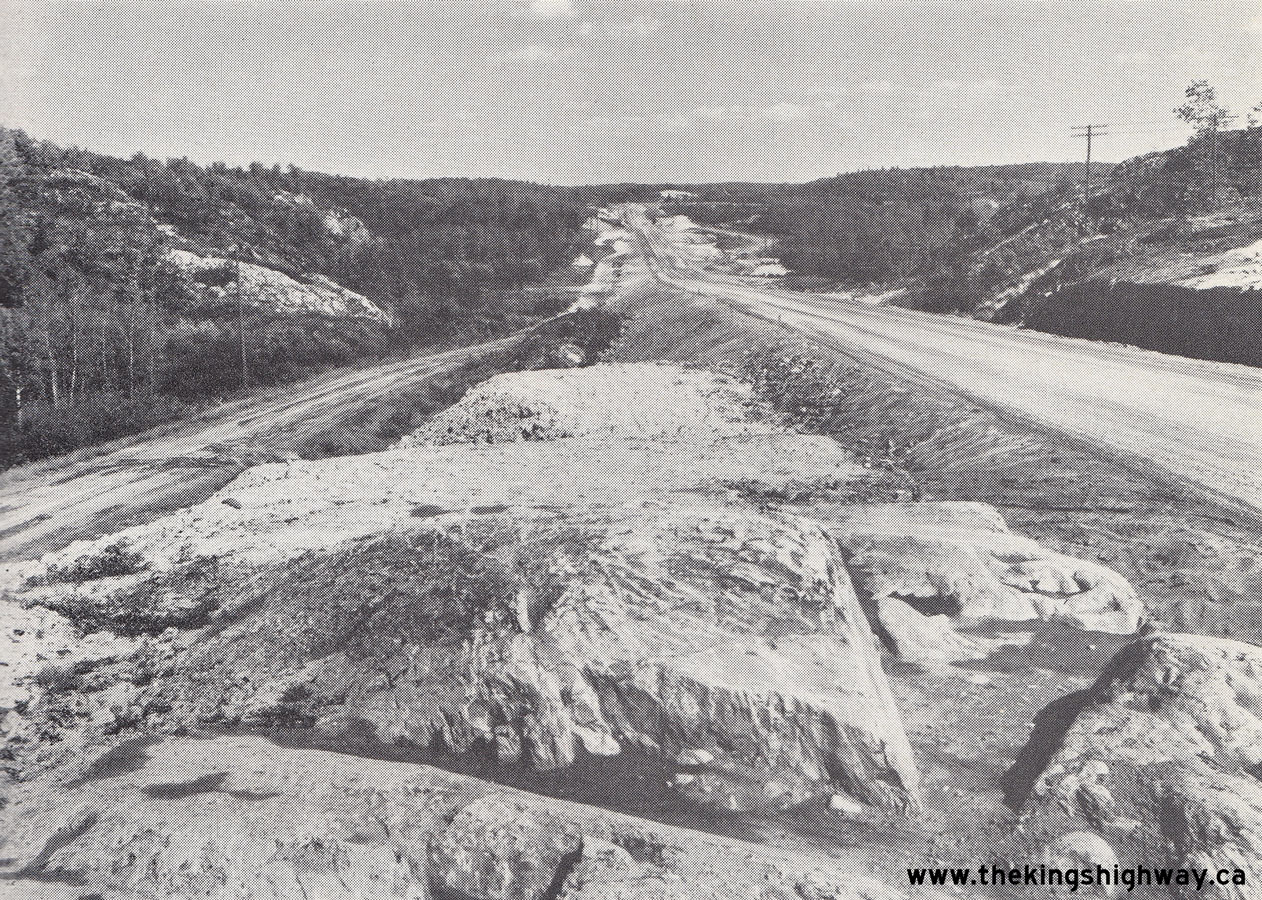
Left - Completed grading on a diversion of Hwy 17 near Naughton in 1953, facing east from Sta. 651+20. See an
Enlarged Photo Here. Photo taken on September 1, 1953. (Photo courtesy of Ontario Ministry of Transportation - © King's Printer for Ontario, 1953) Right - Highway guide signs at Green's Creek east of Ottawa at the eastern entrance to the Trans-Canada Highway. Throughout the late 1940s and early 1950s, a new through route was constructed for Trans-Canada Highway traffic between Ottawa and the Ontario-Quebec Boundary. The original route of Hwy 17 was narrow and winding and wasn't a very suitable route for long-distance through traffic. The new through route was originally known as Hwy 17 Alternate, but was actually signed at either end as the "Trans-Canada Highway". Presumably, this was done to avoid confusion with the existing route of Hwy 17 which not only ran parallel to the new highway for much of its route, but also intersected with it at various points in between. In 1960, the Trans-Canada Highway route at left began to be signed as Hwy 17, rather than as an alternate route. See an Enlarged Photo Here. Photo taken on September 22, 1953. (Photo courtesy of Ontario Ministry of Transportation - © King's Printer for Ontario, 1953) 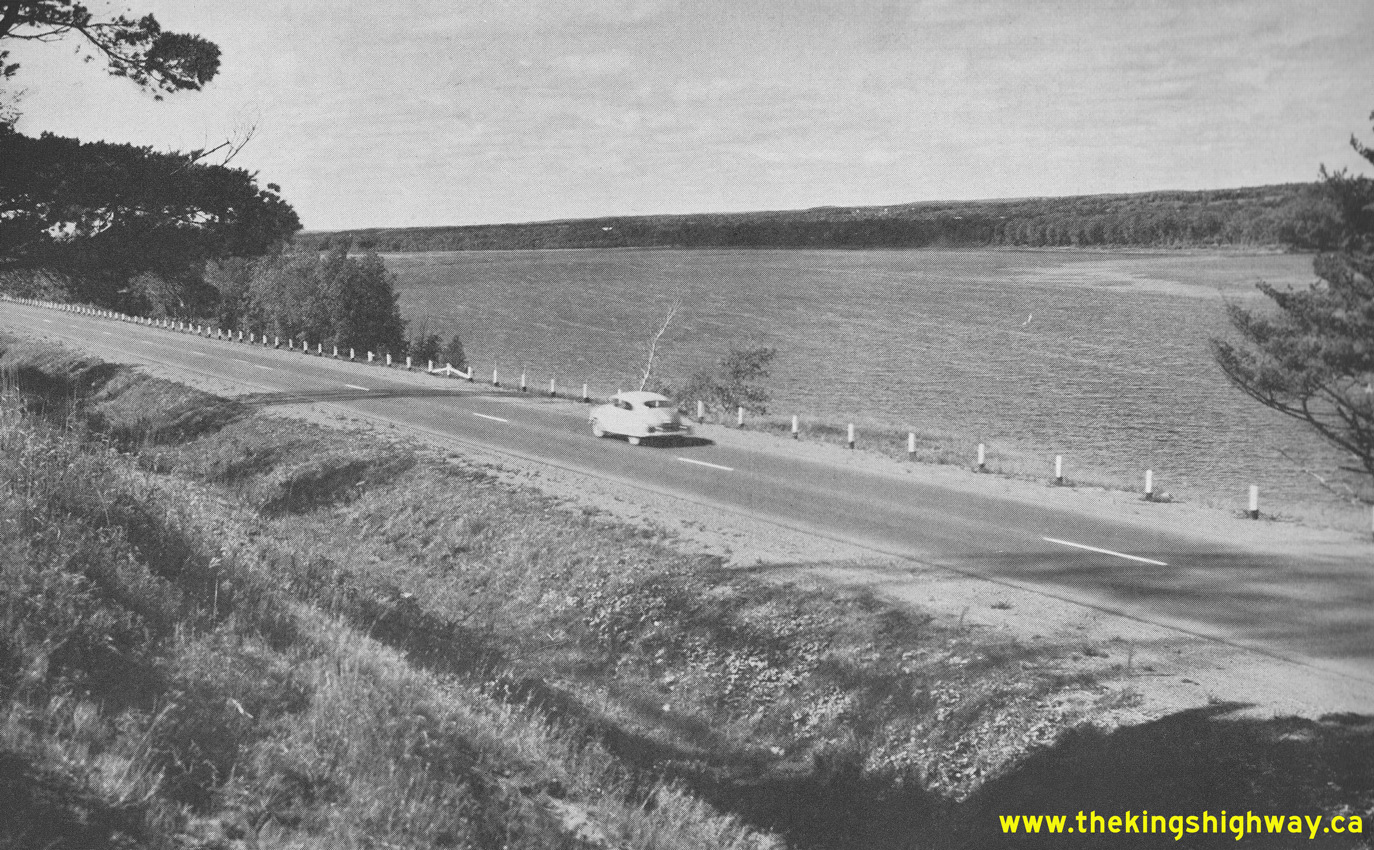
Above - Completed Trans-Canada Highway along the Ottawa River, located about 2 1/2 miles west of Cumberland. This section of the Trans-Canada Highway (known
initially as Hwy 17 Alternate) was built as a 12 1/2-mile diversion of the existing route of Hwy 17 from Green's Creek between Ottawa and Orleans to a point just west
of Rockland near Beckett's Creek. This new diversion greatly expedited traffic flow on the eastern approach to Ottawa, as it bypassed the narrow and meandering old
route of Hwy 17 between Ottawa and Rockland. Hot-mix asphalt pavement was constructed along the new Trans-Canada Highway east of Ottawa during 1951 and 1952 under
Contract #1951-30. See an Enlarged Photo Here. Photo taken on September 22, 1953. (Photo courtesy of Ontario Ministry of Transportation - © King's Printer for Ontario, 1953)
Continue on to King's Highway 17 Photos: Historical Photos: 1954-1956
|
|---|
Links to Adjacent King's Highway Photograph Pages:
Back to Hwy 17 - Historical Photos (1940 to 1949)
Hwy 17 Photo Index
On to Hwy 17 - Historical Photos (1954 to 1956)
Back to King's Highway 16 Photos /
King's Highway 17 History /
On to King's Highway 18 Photos
Ontario Highway History - Main Menu / Back to List of Highways Website contents, photos & text © 2002-2026, Cameron
Bevers (Webmaster) - All Rights Reserved / Contact Me
|
|---|