
| 
| |
|
|
This page contains present day photos (Year 2000 to date) of Ontario's King's Highway 2, arranged by location from
Paris easterly to Hamilton. All photographs displayed on this page were taken by the Webmaster (Cameron Bevers), unless specifically noted otherwise. Click on
any thumbnail to see a larger image!
Please note that all photographs displayed on this
website are protected by copyright. These photographs must not be reproduced, published,
electronically stored or copied, distributed, or posted onto other websites without
my written permission. If you want to use photos from this website, please
email me first for permission. Thank-you!
|
|---|
|
Page 11: Present Day King's Highway 2 Photographs (Paris to Hamilton)


Left - Facing west along Hwy 2 from the Hwy 5 Junction towards the Canadian National (CN) Railway Subway in Paris. See an
Enlarged Photo here. (Photograph taken on August 13, 2006 - © Cameron Bevers) Right - Eastern side of the Paris CN Railway Subway on Hwy 2. Structure completed in 1931. See an Enlarged Photo here. (Photograph taken on August 13, 2006 - © Cameron Bevers) 

Left - Facing east along Hwy 2 at the Paris CN Railway Subway. Until the completion of Hwy 403 between Hwy 2 and Rest Acres Road in the late 1970s, all traffic heading
from Hamilton to London via Paris had to pass through this narrow four-lane structure with limited clearance. Overheight vehicles had to detour around Paris by using
Hwy 53 via Burford. See an Enlarged Photo here. (Photograph taken on August 13, 2006 - © Cameron Bevers) Right - The Paris CN Railway Subway on Hwy 2 is in remarkably good condition, given that it was built over 80 years ago. See an Enlarged Photo here. (Photograph taken on August 13, 2006 - © Cameron Bevers) 

Left - Date stamp (1931) on the Paris CN Railway Subway, just west of the Hwy 5 Junction. See an
Enlarged Photo here. (Photograph taken on August 13, 2006 - © Cameron Bevers) Right - Older green guide sign on Hwy 2 near Brantford directing through traffic to use Hwy 403 to Hamilton. See an Enlarged Photo here. (Photograph taken on August 13, 2006 - © Cameron Bevers) 
Above - Older green guide sign on Hwy 2 indicating the upcoming Brantford Bypass (Hwy 403) Interchange. See an
Enlarged Photo here. (Photograph taken in February 2003 - © Cameron Bevers) 

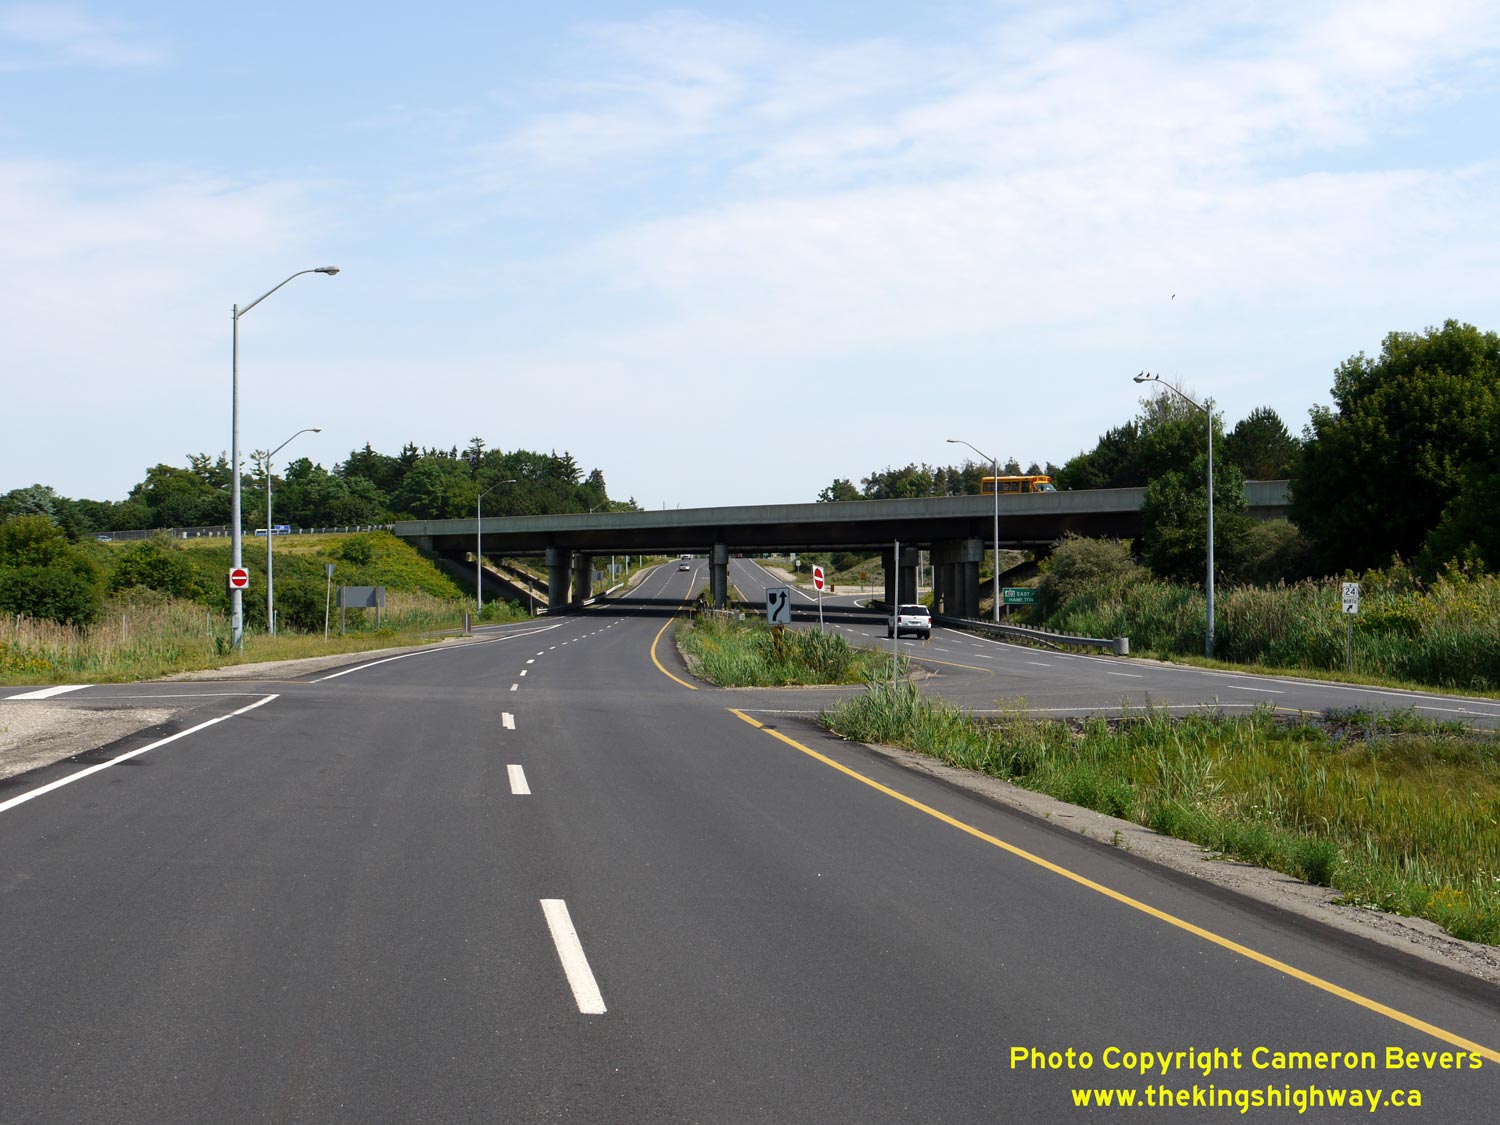
Left - Facing north along a divided section of Hwy 2 at the Hwy 403 & Hwy 24 Interchange in Brantford. Although this route is fairly quiet today, it once
carried the majority of the through traffic between Hamilton and Woodstock. The completion of Hwy 403 to Rest Acres Road (Hwy 24 South) in 1978 bypassed the
Brantford-Paris section of Hwy 2 seen here. See an Enlarged Photo here. (Photograph taken on June 28, 2012 - © Cameron Bevers) Right - Facing north along Paris Road (Hwy 2) towards the Hwy 403 & Hwy 24 Interchange in Brantford. Hwy 2 briefly widens into a four lane divided highway through the interchange. See an Enlarged Photo here. (Photograph taken on June 28, 2012 - © Cameron Bevers) 

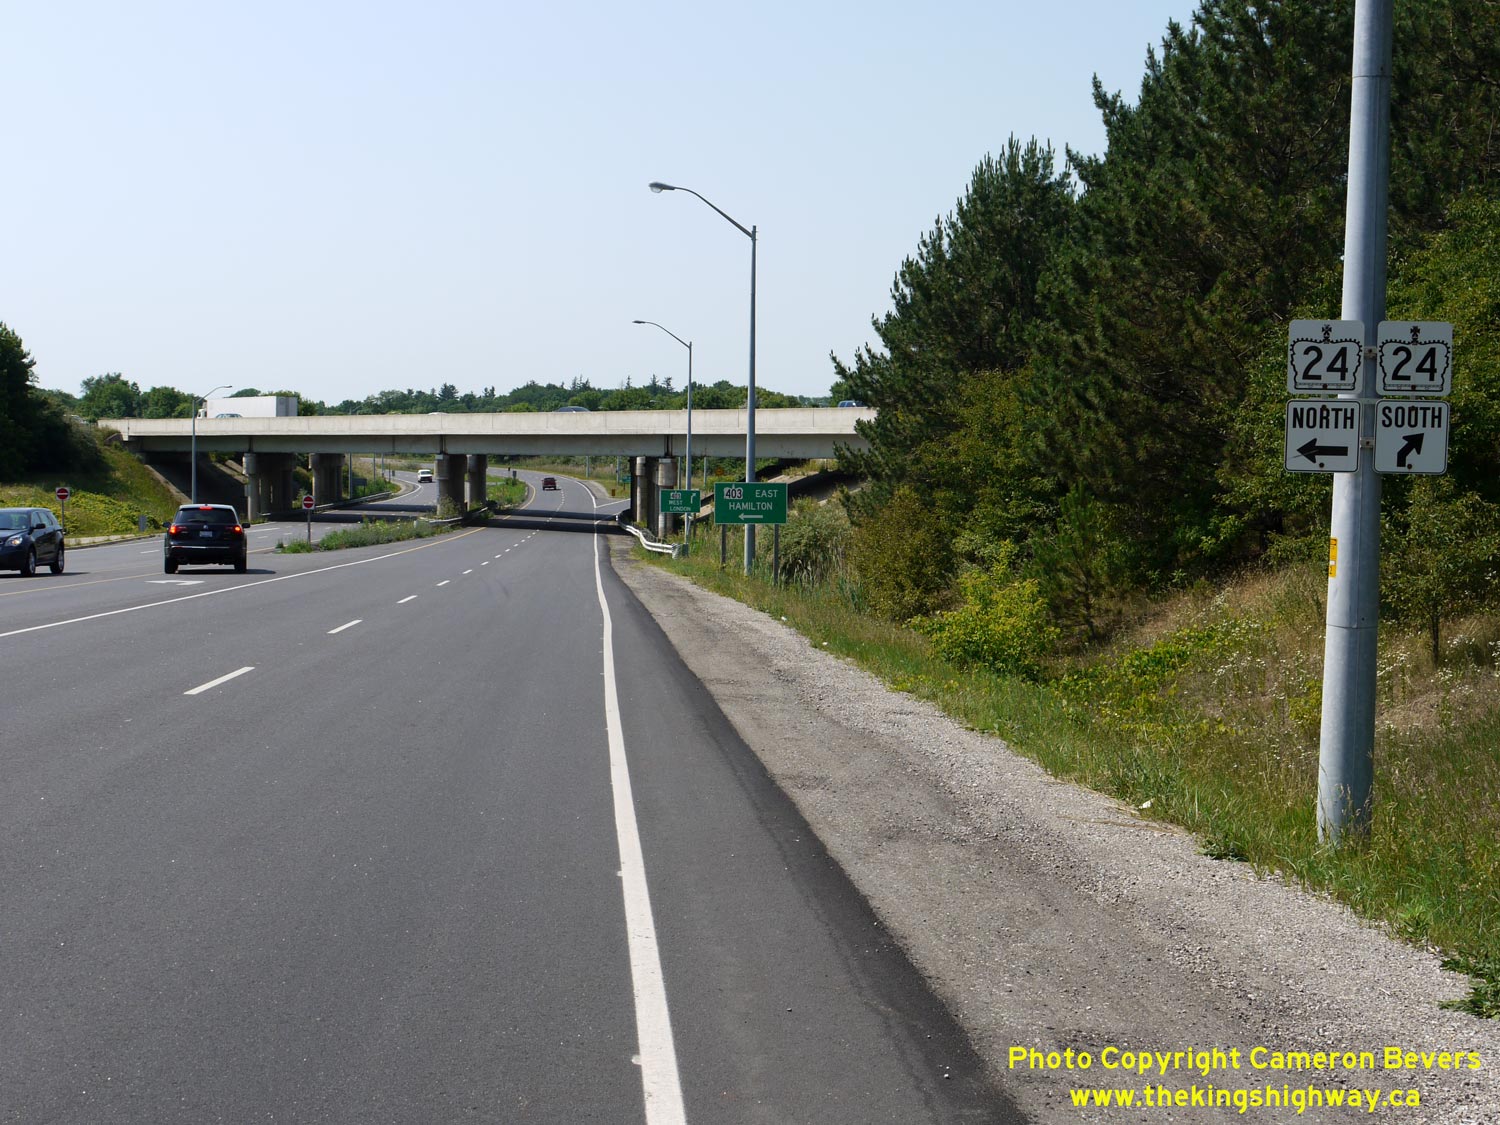
Left - Signs for Hwy 24 at the Paris Road (Hwy 2) Interchange on Hwy 403 & Hwy 24. The route of Hwy 24 runs concurrently with Hwy 403 between Paris and
Brantford. See an Enlarged Photo here. (Photograph taken on June 28, 2012 - © Cameron Bevers) Right - Facing south along Paris Road (Hwy 2) from the Hwy 403 & Hwy 24 Interchange. The sign at right marks the distance to Downtown Brantford from the Brantford Bypass. Signs like this one are rarely seen in urban areas. Typically, these signs are installed on King's Highways as they depart from an urban area. See an Enlarged Photo here. (Photograph taken on June 28, 2012 - © Cameron Bevers) 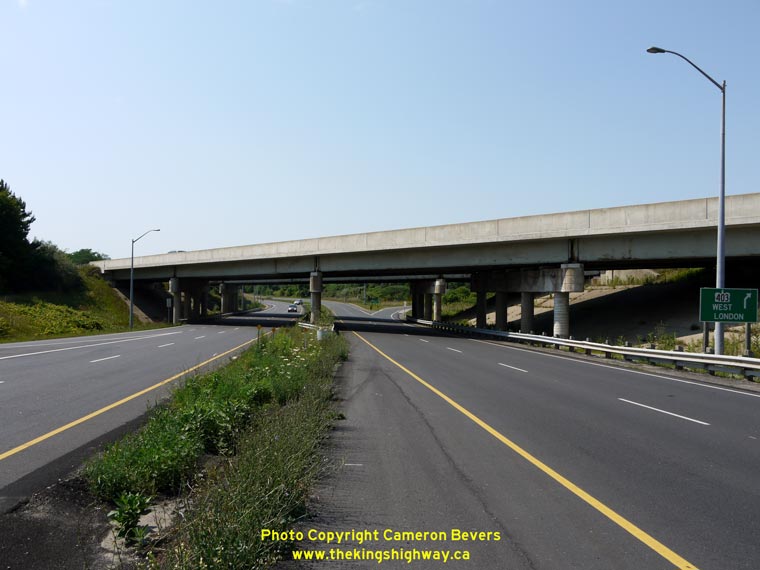

Left - Dual underpass structures at the Hwy 2 Interchange on Hwy 403 & Hwy 24 in Brantford. These twin four-span steel girder structures were both
completed in 1965. See an Enlarged Photo here. (Photograph taken on June 28, 2012 - © Cameron Bevers) Right - Facing south along Hwy 2 towards the Hwy 403 & Hwy 24 Interchange in Brantford. Up until the mid-1960s, all through traffic between Woodstock and Hamilton had to pass through Downtown Brantford. The completion of the Brantford Bypass between this point and Cainsville in 1966 greatly relieved traffic congestion through Brantford. See an Enlarged Photo here. (Photograph taken on June 28, 2012 - © Cameron Bevers) 

Left - There is an interesting 19th Century stone arch culvert underneath Hwy 2 in Ancaster. See an
Enlarged Photo here. (Photograph taken on August 22, 2005 - © Cameron Bevers) Right - Close-up of the southern side of the stone arch culvert at Tiffany Creek in Ancaster. See an Enlarged Photo here. (Photograph taken on August 22, 2005 - © Cameron Bevers) 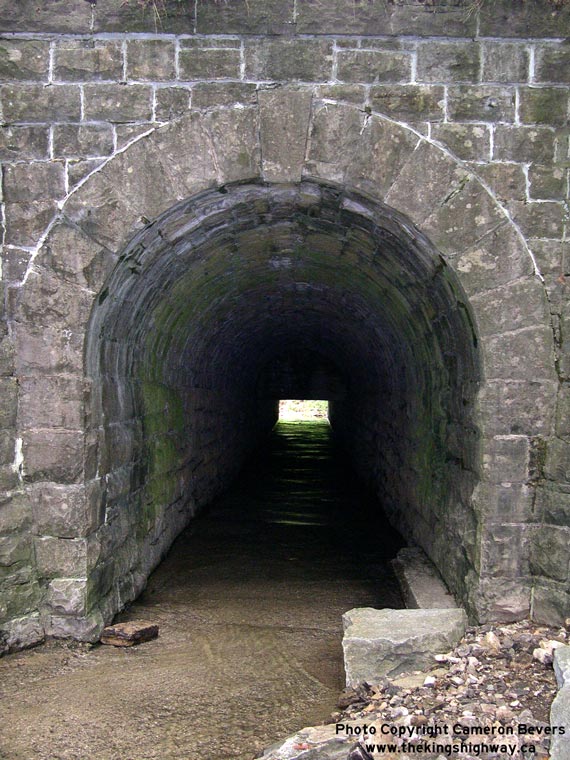
Above - Looking through the Tiffany Creek Culvert under Hwy 2 in Ancaster. See an
Enlarged Photo here. (Photograph taken on August 22, 2005 - © Cameron Bevers) 
Above - Northern side of the Tiffany Creek Culvert under Hwy 2 in Ancaster. The stone arch culvert above was extended with a standard Department of Highways
concrete box culvert as part of a Hwy 2 realignment project on the Ancaster Hill which took place in 1936. See an
Enlarged Photo here. (Photograph taken on August 22, 2005 - © Cameron Bevers)
Continue on to King's Highway 2 Present Day Photos: Hamilton to Toronto
|
|---|
Links to Adjacent King's Highway Photograph Pages:
Back to Tertiary Highway 812 Photos /
King's Highway 2 History /
On to King's Highway 3 Photos
Ontario Highway History - Main Menu / Back to List of Highways Website contents, photos & text © 2002-2026, Cameron
Bevers (Webmaster) - All Rights Reserved / Contact Me
|
|---|