
| 
| |
|
|
This page contains historical photos of Ontario's King's Highway 2 dating from 1975 to 1999. All photographs displayed on
this page were taken by the Ontario Ministry of Transportation, unless specifically noted otherwise. Historical photographs are arranged in approximate chronological
order. Click on any thumbnail to see a larger image!
Please note that all photographs displayed on this
website are protected by copyright. These photographs must not be reproduced, published,
electronically stored or copied, distributed, or posted onto other websites without
my written permission. If you want to use photos from this website, please
email me first for permission. Thank-you!
|
|---|
|
Page 5: Historical King's Highway 2 Photographs (1975 to 1999)


Left - Facing east along Hwy 2 towards Newcastle at the Hwy 35 & Hwy 115 Interchange. In the early 1980s, the loop ramp to northbound Hwy 35 & Hwy 115
at right was removed and the interchange ramps were converted to a diamond configuration. Today, traffic has to turn left in order to access northbound Hwy 35 &
Hwy 115. See an Enlarged Photo Here. Photo taken on August 8, 1977. (Photo courtesy of Ontario Ministry of Transportation - © King's Printer for Ontario, 2018) Right - Northern side of the Hwy 2 Overpass on Hwy 35 & Hwy 115, facing south. See an Enlarged Photo Here. Photo taken on August 8, 1977. (Photo courtesy of Ontario Ministry of Transportation - © King's Printer for Ontario, 2018) 

Left - Facing east along Hwy 403 from the York Boulevard Exit Ramp (Ramp "M") to Hwy 2 & Hwy 6 in Hamilton. The steel handrail of this structure was
damaged during a collision in 1967, and was repaired using steel beam guide rail sections. The steel handrail was eventually removed altogether and replaced with
temporary concrete barriers. See an Enlarged Photo Here. Photo taken on November 29, 1977. (Photo courtesy of Ontario Ministry of Transportation - © King's Printer for Ontario, 2012) Right - Facing west along Hwy 403 towards Downtown Hamilton approaching the York Boulevard (Hwy 2 & Hwy 6) Interchange. Note the cedar post and cable median barrier. The current concrete median barrier along this section of Hwy 403 was installed in the 1990s. See an Enlarged Photo Here. Photo taken on November 29, 1977. (Photo courtesy of Ontario Ministry of Transportation - © King's Printer for Ontario, 2012) 

Left - Old Hwy 6 (Plains Road) Overpass on Hwy 403 between Burlington and Hamilton, facing south towards the Hwy 2 Junction. See an
Enlarged Photo Here. Photo taken on November 29, 1977. (Photo courtesy of Ontario Ministry of Transportation - © King's Printer for Ontario, 2012) Right - Approaching the western terminus of Hwy 403 in Ancaster in 1977. For almost 30 years, Hwy 403 ended at a "trumpet" interchange at Hwy 2 (Wilson Street) just west of Ancaster. All westbound traffic was forced to exit the freeway and follow Hwy 2 westerly to Brantford, where Hwy 403 resumed. During the 1990s, Hwy 403 was extended westerly from Ancaster to link with the completed Woodstock-Brantford section of Hwy 403. The final link of Hwy 403 between Ancaster and Brantford opened to traffic in August 1997, finally completing the last major link in Southern Ontario's freeway network. See an Enlarged Photo Here. Photo taken on November 30, 1977. (Photo courtesy of Ontario Ministry of Transportation - © King's Printer for Ontario, 2012) 
Above - Aerial view of the eastern end of the Brantford Bypass (Hwy 403) at Cainsville in 1978. Hwy 403 ended at this signalized intersection at the Hwy 2
& Hwy 53 Junction for over 30 years. Until 1997, all eastbound traffic on Hwy 403 had to turn left onto Hwy 2 & Hwy 53 in order to continue east towards
Hamilton. By the 1990s, this congested left turn movement had overwhelmed the capacity of the traffic signal, which resulted in long queues on Hwy 403 which often
extended more than a kilometre back from the intersection at peak times. The completion of Hwy 403 between Brantford and Ancaster in 1997 bypassed Hwy 2 & Hwy 53,
thus removing one of the most severe traffic bottlenecks in the province. See an
Enlarged Photo Here. Photo taken in 1978. (Photo courtesy of Ontario Ministry of Transportation - © King's Printer for Ontario, 2016) 

Left - Facing west across the eastbound Hwy 2 & Hwy 8 (Main Street) Overpass on Hwy 403 in Downtown Hamilton. See an
Enlarged Photo Here. Photo taken in July 1979. (Photo courtesy of Ontario Ministry of Transportation - © King's Printer for Ontario, 2014) Right - Facing west across the westbound Hwy 2 & Hwy 8 (King Street) Overpass on Hwy 403 in Downtown Hamilton. See an Enlarged Photo Here. Photo taken in July 1979. (Photo courtesy of Ontario Ministry of Transportation - © King's Printer for Ontario, 2014) 

Left - Old Hwy 6 (Plains Road) Overpass on Hwy 403, facing south towards the Hwy 2 Junction. See an
Enlarged Photo Here. Photo taken in August 1979. (Photo courtesy of Ontario Ministry of Transportation - © King's Printer for Ontario, 2014) Right - Facing west along Hwy 2 towards Bowmanville at the Hwy 35 & Hwy 115 Interchange. See an Enlarged Photo Here. Photo taken on September 6, 1979. (Photo courtesy of Ontario Ministry of Transportation - © King's Printer for Ontario, 2018) 

Left - Niagara-bound lanes of the Queen Elizabeth Way at the Hwy 2 (North Shore Boulevard) Interchange in Burlington, facing southeast. The original underpass
structure at Hwy 2 was constructed in 1956 under Contract #1956-38 with two freeway lanes in each direction plus speed change lanes from the cloverleaf ramps. During
reconstruction of the Hwy 2 Interchange in the early 1980s, the two speed change lanes were converted to through lanes so that the Queen Elizabeth Way had three
through lanes in each direction through the Hwy 2 Interchange. The double-sided steel beam guide rail median barrier in the centre of the highway was actually a
retrofit. When the Hwy 2 Interchange was first built in 1956, the median merely consisted of a curbed traffic island with no physical barrier separating the
Niagara-bound and Toronto-bound lanes. See an Enlarged Photo Here. Photo taken on October 1,
1980. (Photo courtesy of Ontario Ministry of Transportation - © King's Printer for Ontario, 2022) Right - Facing west along Hwy 2 (North Shore Boulevard) at the Queen Elizabeth Way Interchange in Burlington in 1980. This interesting photo shows the Queen Elizabeth Way with its late 1950s lane configuration, with only a single structure spanning Hwy 2. In 1982, construction began on the widening of the Queen Elizabeth Way through this interchange in order to provide separate Collector Lane structures. The Hwy 2 Interchange was fully reconstructed as part of this work, which resulted in the present-day interchange configuration that we see today. See an Enlarged Photo Here. Photo taken on October 1, 1980. (Photo courtesy of Ontario Ministry of Transportation - © King's Printer for Ontario, 2022) 

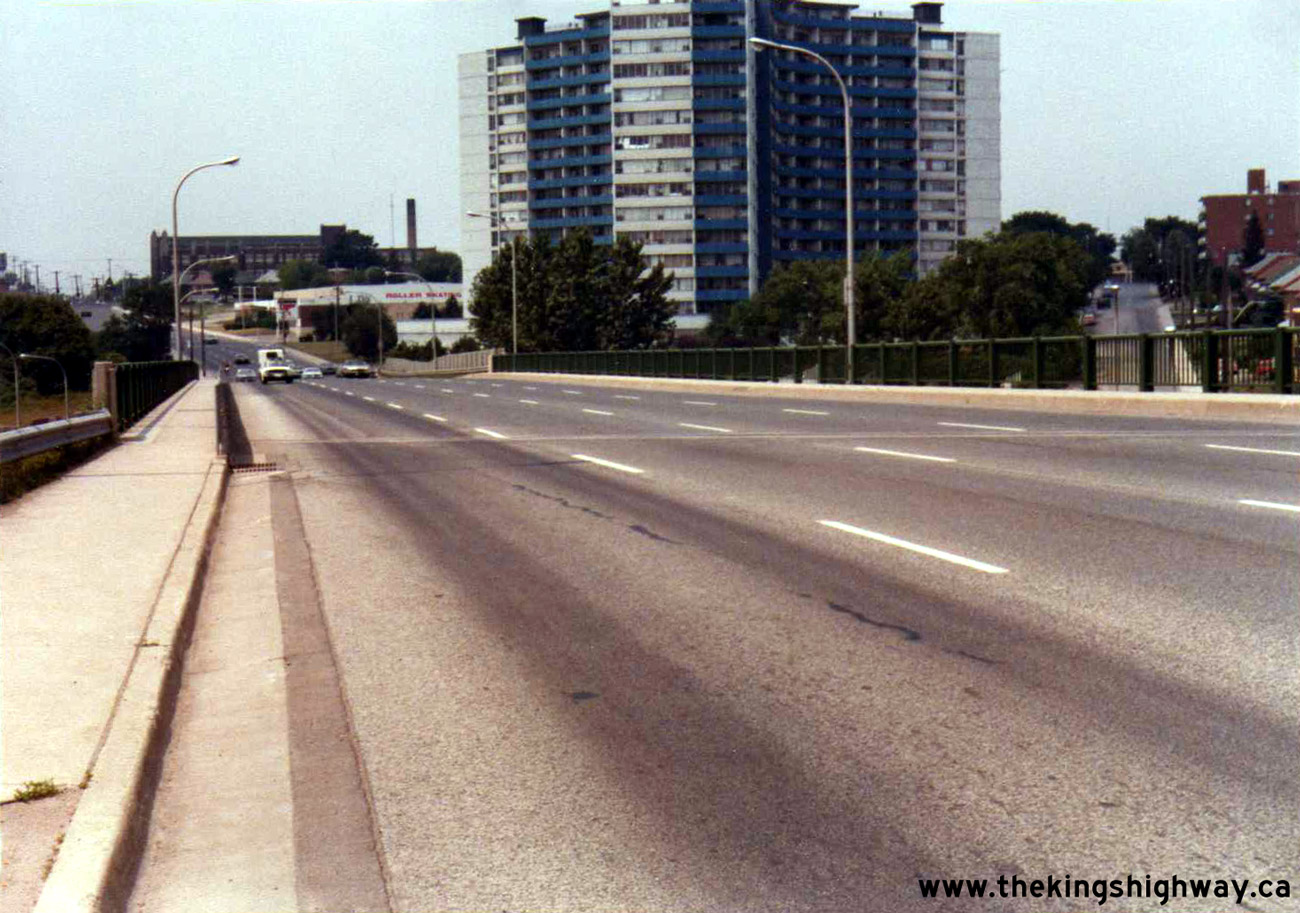
Left - Facing west along Westbound Hwy 2 & Hwy 8 (King Street) at the Hwy 403 Interchange in Downtown Hamilton. See
an Enlarged Photo Here. Photo taken in July 1981. (Photo courtesy of Ontario Ministry of Transportation - © King's Printer for Ontario, 2012) Right - Curved concrete handrail on the Hwy 2 Overpass on Hwy 35 & Hwy 115 near Newcastle. This type of curved treatment was commonly used on Ontario's early freeway structures built in the 1940s and 1950s. See an Enlarged Photo Here. Photo taken on October 28, 1981. (Photo courtesy of Ontario Ministry of Transportation - © King's Printer for Ontario, 2021) 

Left - Facing east along Eastbound Hwy 2 & Hwy 8 (Main Street) at the Hwy 403 Interchange in Hamilton. Photo taken on June 7, 1983. (Photo courtesy of Ontario Ministry of Transportation - © King's Printer for Ontario, 2012) Right - Facing west along Westbound Hwy 2 & Hwy 8 (King Street) at the Hwy 403 Interchange in Hamilton. Photo taken on June 9, 1983. (Photo courtesy of Ontario Ministry of Transportation - © King's Printer for Ontario, 2012) 

Left - Ramp "J" Overpass in Downtown Hamilton, carrying traffic from Westbound Hwy 403 to Eastbound Hwy 2 & Hwy 8. Photo taken on June 9, 1983. (Photo courtesy of Ontario Ministry of Transportation - © King's Printer for Ontario, 2012) Right - Facing east along Westbound Hwy 2 & Hwy 8 (King Street) at the Hwy 403 Interchange in Hamilton. Photo taken on June 9, 1983. (Photo courtesy of Ontario Ministry of Transportation - © King's Printer for Ontario, 2012) 

Left - Ramp from Westbound Hwy 2 & Hwy 8 (King Street) to Westbound Hwy 403 in Hamilton. Photo taken on June 9, 1983. (Photo courtesy of Ontario Ministry of Transportation - © King's Printer for Ontario, 2012) Right - Facing west across the Hwy 2 Overpass at the Hwy 35 & Hwy 115 Interchange near Newcastle in 1983, following reconstruction and widening. As a result of the expansion of Hwy 35 & Hwy 115 from two to four lanes in 1982, the ramps at the Hwy 2 Interchange were changed from a "Parclo A-2" configuration to a diamond configuration. The inner loop ramps and speed change lanes across the Hwy 2 structure were removed and replaced with new left turn lanes. See an Enlarged Photo Here. Photo taken on June 17, 1983. (Photo courtesy of Ontario Ministry of Transportation - © King's Printer for Ontario, 2021) 

Left - Newly-widened section of Hwy 35 & Hwy 115 at the Hwy 2 Interchange near Newcastle, facing north. A new concrete median barrier was installed in 1982
along Hwy 35 & Hwy 115 in conjunction with the highway widening. See an
Enlarged Photo Here. Photo taken on June 17, 1983. (Photo courtesy of Ontario Ministry of Transportation - © King's Printer for Ontario, 2021) Right - View of the Hwy 2 (North Shore Boulevard) Interchange in Burlington in 1983, facing west. This photo was taken part-way through this interchange's multi-year reconstruction under Contract #1982-85. In this view, the newly-built Collector Lane structures can be seen flanking the original 1956 structure. See an Enlarged Photo Here. Photo taken on November 17, 1983. (Photo courtesy of Ontario Ministry of Transportation - © King's Printer for Ontario, 2022) 

Left - Facing south along the future Toronto-bound Collector Lanes on the Queen Elizabeth Way at the Hwy 2 (North Shore Boulevard) Interchange in 1983, prior
to deck waterproofing and final paving. Unfortunately, a temporary construction sign beside the highway at right masks the fact that there was only one Burlington Bay
Skyway in service at the time this photo was taken. The twin Burlington Bay Skyway, which now carries all of the Niagara-bound lanes of the Queen Elizabeth Way,
wasn't completed until 1985. See an Enlarged Photo Here. Photo taken on November 17, 1983. (Photo courtesy of Ontario Ministry of Transportation - © King's Printer for Ontario, 2022) Right - Future Niagara-bound Collector Lanes on the Queen Elizabeth Way at the Hwy 2 (North Shore Boulevard) Interchange in Burlington 1983. Once the new Collector Lanes were opened to traffic, the original 1956 structure at left was closed for rehabilitation. The old concrete bar-and-post handrail was removed along with the double-sided steel beam guide rail median barrier and replaced with solid concrete barriers. This photo also shows the old 1950s-era median illumination system along the Queen Elizabeth Way, which had been installed along the approaches to the Burlington Bay Skyway. This illumination system was removed through the Hwy 2 Interchange in 1984. See an Enlarged Photo Here. Photo taken on November 17, 1983. (Photo courtesy of Ontario Ministry of Transportation - © King's Printer for Ontario, 2022) 

Left - Facing south along Hwy 35 & Hwy 115 from the Hwy 2 Interchange near Newcastle in 1984. Although it isn't too clear in this photo, the
partially-completed Lovekin Road Overpass can be seen under construction in the distance. See an
Enlarged Photo Here. Photo taken on July 31, 1984. (Photo courtesy of Ontario Ministry of Transportation - © King's Printer for Ontario, 2021) Right - View of the Hwy 2 Overpass on Hwy 35 & Hwy 115, facing west towards Bowmanville. See an Enlarged Photo Here. Photo taken on July 31, 1984. (Photo courtesy of Ontario Ministry of Transportation - © King's Printer for Ontario, 2021) 
Above - Hwy 2 Overpass on Hwy 35 & Hwy 115 near Newcastle in 1984, facing north. At the time this photo was taken, Hwy 35 & Hwy 115 narrowed from four
lanes to two lanes just beyond this interchange. The 60 km/h speed limit sign at right was just temporary, to accommodate staged traffic conditions during
construction of an adjacent bridge. See an Enlarged Photo Here. Photo taken on July 31, 1984. (Photo courtesy of Ontario Ministry of Transportation - © King's Printer for Ontario, 2021) 
Above - View of the reconfigured Hwy 2 Interchange on Hwy 35 & Hwy 115 near Newcastle in 1984. The original interchange built here in 1955 was reconfigured
during reconstruction and widening of Hwy 35 & Hwy 115 in the early 1980s. Up until 1982, westbound traffic on Hwy 2 heading southbound to Hwy 401 entered into a
loop ramp just beyond the structure. Following reconstruction, westbound traffic on Hwy 2 wishing to go south towards Hwy 401 had to turn left. See an
Enlarged Photo Here. Photo taken on July 31, 1984. (Photo courtesy of Ontario Ministry of Transportation - © King's Printer for Ontario, 2021) 

Left - Facing east along Hwy 2 & Hwy 6 (York Boulevard) at the Hwy 403 Interchange in Hamilton. Photo taken in October 1984. (Photo courtesy of Ontario Ministry of Transportation - © King's Printer for Ontario, 2012) Right - Hwy 2 Overpass on Hwy 35 & Hwy 115 near Newcastle, showing the completed four-lane widening lying north of the interchange. See an Enlarged Photo Here. Photo taken in 1985. (Photo courtesy of Ontario Ministry of Transportation - © King's Printer for Ontario, 1985) 

Left - Ramp "D" Overpass on Hwy 403 in Hamilton, carrying traffic from Hwy 2 & Hwy 8 to Eastbound Hwy 403. Photo taken on May 24, 1985. (Photo courtesy of Ontario Ministry of Transportation - © King's Printer for Ontario, 2012) Right - Eastbound Hwy 2 & Hwy 8 (Main Street) Overpass on Hwy 403 in Hamilton, facing west towards Ancaster. Photo taken on May 24, 1985. (Photo courtesy of Ontario Ministry of Transportation - © King's Printer for Ontario, 2012) 

Left - Facing north along Hwy 35 & Hwy 115 from the Hwy 2 Interchange near Newcastle, showing the completed four-lane widening lying north of the
interchange. The different shade of asphalt seen on the highway just beyond the Wilmot Creek Culvert makes the southerly limits of new construction under
Contract #1983-67 rather obvious. After more than two years of construction, the widening of Hwy 35 & Hwy 115 to a four-lane divided highway was completed between
Wilmot Creek and the south entrance to Orono in the Summer of 1985. See an Enlarged Photo Here.
Photo taken in September 1985. (Photo courtesy of Ontario Ministry of Transportation - © King's Printer for Ontario, 2021) Right - View of the Hwy 2 Interchange on Hwy 35 & Hwy 115, facing east towards Newcastle. See an Enlarged Photo Here. Photo taken on June 28, 1986. (Photo courtesy of Ontario Ministry of Transportation - © King's Printer for Ontario, 2021) 
Above - Facing west along Hwy 2 approaching the Hwy 106 Junction at Welcome, near Port Hope. See an
Enlarged Photo Here. Photo taken in July 1986. (Photo courtesy of Ontario Ministry of Transportation - © King's Printer for Ontario, 2016) 

Left - Facing east across the Ramp "D" Overpass on Hwy 403 in Hamilton. Photo taken on May 5, 1987. (Photo courtesy of Ontario Ministry of Transportation - © King's Printer for Ontario, 2012) Right - Ramp "D" Overpass on Hwy 403 in Hamilton, facing west towards Dundas. Photo taken on May 5, 1987. (Photo courtesy of Ontario Ministry of Transportation - © King's Printer for Ontario, 2012) 

Left - Rehabilitated Hwy 2 Overpass on Hwy 35 & Hwy 115, Contract #1987-27. See an
Enlarged Photo Here. Photo taken in October 1987. (Photo courtesy of Ontario Ministry of Transportation - © King's Printer for Ontario, 2021) Right - Rehabilitated Hwy 2 Overpass on Hwy 35 & Hwy 115, facing east towards Newcastle. See an Enlarged Photo Here. Photo taken in October 1987. (Photo courtesy of Ontario Ministry of Transportation - © King's Printer for Ontario, 2021) 

Left - Westbound Hwy 403 Exit Ramp to Main Street in Hamilton (Ramp "J"). Note that the off-ramp has now been painted with two lanes. Photo taken on November 19, 1987. (Photo courtesy of Ontario Ministry of Transportation - © King's Printer for Ontario, 2012) Right - Ramp "J" Overpass at the Eastbound Hwy 2 & Hwy 8 (Main Street) Interchange on Hwy 403 in Downtown Hamilton. Photo taken on November 19, 1987. (Photo courtesy of Ontario Ministry of Transportation - © King's Printer for Ontario, 2012) 

Left - Facing east along Ramp "J" at the Main Street Interchange in Hamilton. Photo taken on November 19, 1987. (Photo courtesy of Ontario Ministry of Transportation - © King's Printer for Ontario, 2012) Right - Reconstructed sidewalk and new concrete barrier wall on the northern side of the Hwy 2 Overpass on Hwy 35 & Hwy 115. See an Enlarged Photo Here. Photo taken on July 6, 1988. (Photo courtesy of Ontario Ministry of Transportation - © King's Printer for Ontario, 2021) 

Left - Southern side of the Hwy 2 Overpass on Hwy 35 & Hwy 115, showing the removed steel handrail and new concrete barrier wall. See an
Enlarged Photo Here. Photo taken on July 6, 1988. (Photo courtesy of Ontario Ministry of Transportation - © King's Printer for Ontario, 2021) Right - Ramp "N" Underpass at Hwy 2 (York Boulevard) in Hamilton, carrying traffic from Northbound Hwy 6 to Eastbound Hwy 403. Photo taken on July 12, 1988. (Photo courtesy of Ontario Ministry of Transportation - © King's Printer for Ontario, 2012) 

Left - Depressed grass median on Hwy 403 at the King & Main Street Interchange in Downtown Hamilton in 1989. When Hwy 403 was originally
constructed in the 1960s, some sections of the freeway did not have a median barrier. During the late 1990s, a continuous concrete median barrier was
constructed along Hwy 403 through Downtown Hamilton, in conjunction with the installation of a new high-mast illumination system. Photo taken on July 17,
1989. (Photo courtesy of Ontario Ministry of Transportation - © King's Printer for Ontario, 2012) Right - View of the rehabilitated Hwy 2 Overpass on Hwy 35 & Hwy 115, facing west towards Bowmanville. See an Enlarged Photo Here. Photo taken on October 22, 1992. (Photo courtesy of Ontario Ministry of Transportation - © King's Printer for Ontario, 2021) 

Left - Approaching the Hwy 2 Overpass on Hwy 35 & Hwy 115, facing north towards Orono. See an
Enlarged Photo Here. Photo taken on October 22, 1992. (Photo courtesy of Ontario Ministry of Transportation - © King's Printer for Ontario, 2021) Right - Northern side of the Hwy 2 Overpass on Hwy 35 & Hwy 115, facing south towards Hwy 401. See an Enlarged Photo Here. Photo taken on September 27, 1994. (Photo courtesy of Ontario Ministry of Transportation - © King's Printer for Ontario, 2021) 
Above - Facing west across the Hwy 2 Overpass on Hwy 35 & Hwy 115. See an
Enlarged Photo Here. Photo taken on September 27, 1994. (Photo courtesy of Ontario Ministry of Transportation - © King's Printer for Ontario, 2021) 

Left - Facing south along Hwy 35 & Hwy 115 towards the Hwy 2 Interchange near Newcastle. See an
Enlarged Photo Here. Photo taken on July 17, 1996. (Photo courtesy of Ontario Ministry of Transportation - © King's Printer for Ontario, 2012) Right - Facing west towards Bowmanville at the Hwy 2 Interchange on Hwy 35 & Hwy 115. See an Enlarged Photo Here. Photo taken on July 17, 1996. (Photo courtesy of Ontario Ministry of Transportation - © King's Printer for Ontario, 2021) 

Left - Southern side of the Hwy 2 Overpass on Hwy 35 & Hwy 115 between Bowmanville and Newcastle. See an
Enlarged Photo Here. Photo taken on July 17, 1996. (Photo courtesy of Ontario Ministry of Transportation - © King's Printer for Ontario, 2021) Right - Facing west across the Hwy 2 Overpass on Hwy 35 & Hwy 115 near Newcastle. See an Enlarged Photo Here. Photo taken on July 14, 1998. (Photo courtesy of Ontario Ministry of Transportation - © King's Printer for Ontario, 2021) 
Above - Southern side of the Hwy 2 Overpass on Hwy 35 & Hwy 115 near Newcastle. See an
Enlarged Photo Here. Photo taken on July 14, 1998. (Photo courtesy of Ontario Ministry of Transportation - © King's Printer for Ontario, 2021)
Continue on to King's Highway 2 Present Day Photos: Windsor to Tilbury
|
|---|
Links to Adjacent King's Highway Photograph Pages:
Back to Tertiary Highway 812 Photos /
King's Highway 2 History /
On to King's Highway 3 Photos
Ontario Highway History - Main Menu / Back to List of Highways Website contents, photos & text © 2002-2026, Cameron
Bevers (Webmaster) - All Rights Reserved / Contact Me
|
|---|