
| 
| |
|
|
This page contains present day photos (Year 2000 to date) of Ontario's King's Highway 2, arranged by location from
Chatham easterly to London. All photographs displayed on this page were taken by the Webmaster (Cameron Bevers), unless specifically noted otherwise. Click on
any thumbnail to see a larger image!
Please note that all photographs displayed on this
website are protected by copyright. These photographs must not be reproduced, published,
electronically stored or copied, distributed, or posted onto other websites without
my written permission. If you want to use photos from this website, please
email me first for permission. Thank-you!
|
|---|
|
Page 8: Present Day King's Highway 2 Photographs (Chatham to London)


Left - Hwy 2 & Hwy 21 Junction in Downtown Thamesville, facing east. For a number of years in the 1960s, Hwy 78 was signed concurrently with Hwy 21 between
Thamesville and Dresden. The overlapped route of Hwy 21 & Hwy 78 was discontinued in 1969. See an
Enlarged Photo Here. (Photograph taken on September 10, 2010 - © Cameron Bevers) Right - Facing west along London Road (Hwy 2) towards Chatham from Victoria Street (Hwy 21) in Downtown Thamesville. See an Enlarged Photo Here. (Photograph taken on September 10, 2010 - © Cameron Bevers) 

Left - Junction of Hwy 2 & Hwy 21 in Downtown Thamesville, facing south. This once-important highway junction clearly shows the effects of the construction
of improved parallel highways. Most of the long distance through traffic in this part of Ontario is now carried by Hwy 40, Hwy 401 and Hwy 402. This intersection was
once the eastern terminus of Hwy 78, which was signed concurrently with Hwy 21 from Thamesville to Dresden for a number of years during the 1960s. See an
Enlarged Photo Here. (Photograph taken on September 10, 2010 - © Cameron Bevers) Right - Facing north along Victoria Street (Hwy 21) towards Dresden from London Road (Hwy 2) in Downtown Thamesville. See an Enlarged Photo Here. (Photograph taken on September 10, 2010 - © Cameron Bevers) 

Left - Approaching Victoria Street (Hwy 21) on London Road (Hwy 2) in Downtown Thamesville, facing west. See an
Enlarged Photo Here. (Photograph taken on September 10, 2010 - © Cameron Bevers) Right - Facing east along London Road (Hwy 2) from Victoria Street (Hwy 21) in Downtown Thamesville. Once considered the "Main Street" of Ontario, the importance of Hwy 2 was greatly diminished in Southwestern Ontario by the completion of nearby Hwy 401 in 1963. Traffic volumes on Hwy 2 fell by more than 50 percent immediately after Hwy 401 was opened to traffic. In fact, many sections of Hwy 2 in Southwestern Ontario carried far more traffic in the 1950s and early 1960s than they do today. See an Enlarged Photo Here. (Photograph taken on September 10, 2010 - © Cameron Bevers) 

Left - Facing south along Victoria Street (Hwy 21) from the Hwy 2 Junction in Thamesville. As is the case on northbound Hwy 21 departing Ridgetown, Hwy 401 is
marked with green and white trailblazer markers along southbound Hwy 21 departing Thamesville. See an
Enlarged Photo Here. (Photograph taken on September 10, 2010 - © Cameron Bevers) Right - Abandoned curve on a former Hwy 2 alignment near Thamesville. See an Enlarged Photo Here. (Photograph taken on September 12, 2004 - © Cameron Bevers) 

Left - Old culvert under an abandoned Hwy 2 curve near Thamesville. See an
Enlarged Photo Here. (Photograph taken on September 12, 2004 - © Cameron Bevers) Right - This curve near Thamesville has actually been realigned twice. Traces of an even older former Hwy 2 alignment can be seen here, lying to the right of the tree. The more recent abandoned alignment passes to the left of the tree. See an Enlarged Photo Here. (Photograph taken on September 12, 2004 - © Cameron Bevers) 

Left - Date stamp (1922) on an old culvert on the abandoned curve near Thamesville. See an
Enlarged Photo Here. (Photograph taken on September 12, 2004 - © Cameron Bevers) Right - Approaching the Hwy 79 Junction on Hwy 2 near Bothwell, facing east towards London. See an Enlarged Photo Here. (Photograph taken on September 10, 2010 - © Cameron Bevers) 

Left - Sign marking the junction of Hwy 2 & (Former) Hwy 79 near Bothwell. The entire route of Hwy 79 from Bothwell to Hwy 7 was transferred in 1997 to the
Counties of Lambton and the Municipality of Chatham-Kent. For some reason, Chatham-Kent elected to number their downloaded portion of Hwy 79 as Chatham-Kent Road 16.
Based on the numerous overlay patches on this sign, Chatham-Kent's route number choice has obviously confused a lot of motorists who are looking for Hwy 79.
Neighbouring Lambton County wisely decided to keep the route of former King's Highway 79 numbered as County Road 79. Note that Lambton County Road 79 is essentially
trailblazed along Chatham-Kent Road 16. See an Enlarged Photo Here. (Photograph taken on September 10, 2010 - © Cameron Bevers) Right - Junction of Hwy 2 & Hwy 79 near Bothwell, facing northeast. Although the alignment of Hwy 79 has been "squared up" approaching the Hwy 2 Junction, it is quite likely that this intersection was historically a "Y" junction. Although quite common on Ontario's early highways, the design of "Y" junctions is avoided by highway designers today. This intersection layout creates a situation where drivers have to look far beyond their normal range of neck movement to see approaching traffic. Not surprisingly, "Y" junctions typically have a poor safety record. See an Enlarged Photo Here. (Photograph taken on September 10, 2010 - © Cameron Bevers) 

Left - Facing north along Hwy 79 towards Watford from the Hwy 2 Junction near Bothwell. See an
Enlarged Photo Here. (Photograph taken on September 10, 2010 - © Cameron Bevers) Right - Facing south along Hwy 79 approaching the Hwy 2 Junction near Bothwell. Up until 1997, this intersection marked the southern terminus of Hwy 79. See an Enlarged Photo Here. (Photograph taken on September 10, 2010 - © Cameron Bevers) 

Left - Hwy 2 junction sign assembly on southbound Hwy 79 approaching the southern terminus of the highway near Bothwell. See an
Enlarged Photo Here. (Photograph taken on September 10, 2010 - © Cameron Bevers) Right - Old fingerboard guide signs at the southern terminus of Hwy 79 at Hwy 2. See an Enlarged Photo Here. (Photograph taken on September 10, 2010 - © Cameron Bevers) 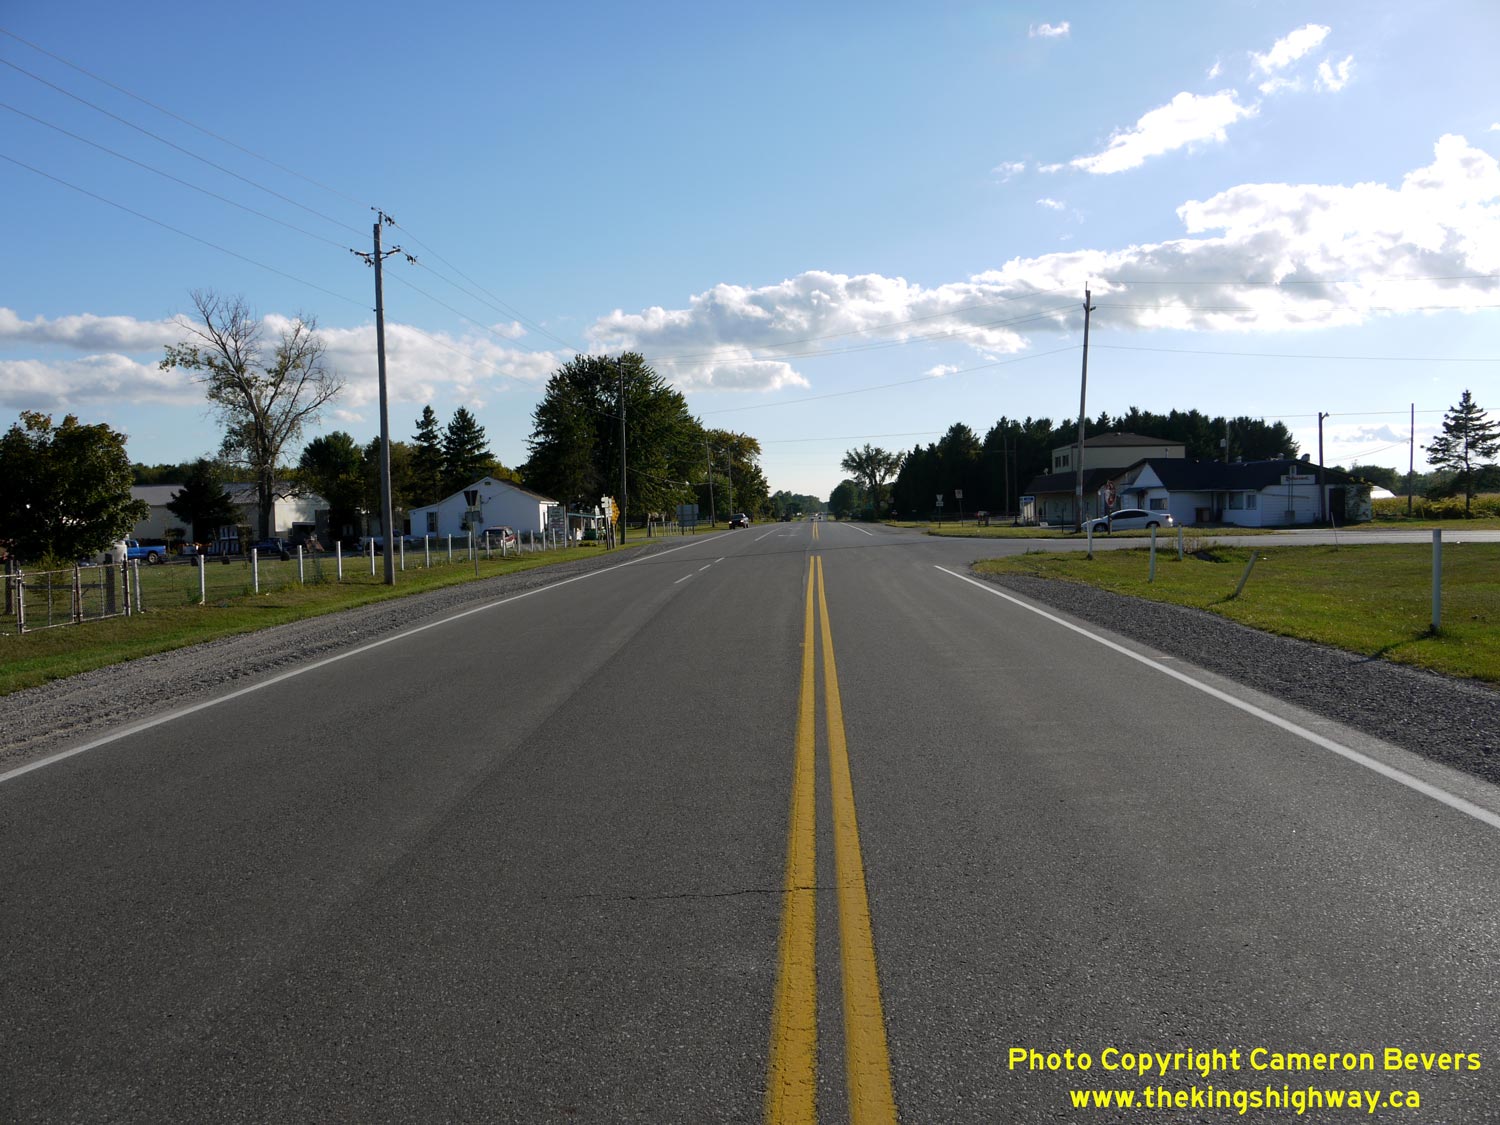
Left - Facing west along Hwy 2 towards Chatham at the Hwy 79 Junction near Bothwell. See an
Enlarged Photo Here. (Photograph taken on September 10, 2010 - © Cameron Bevers) Right - Facing east along Hwy 2 towards London from the Hwy 79 Junction. See an Enlarged Photo Here. (Photograph taken on September 10, 2010 - © Cameron Bevers) 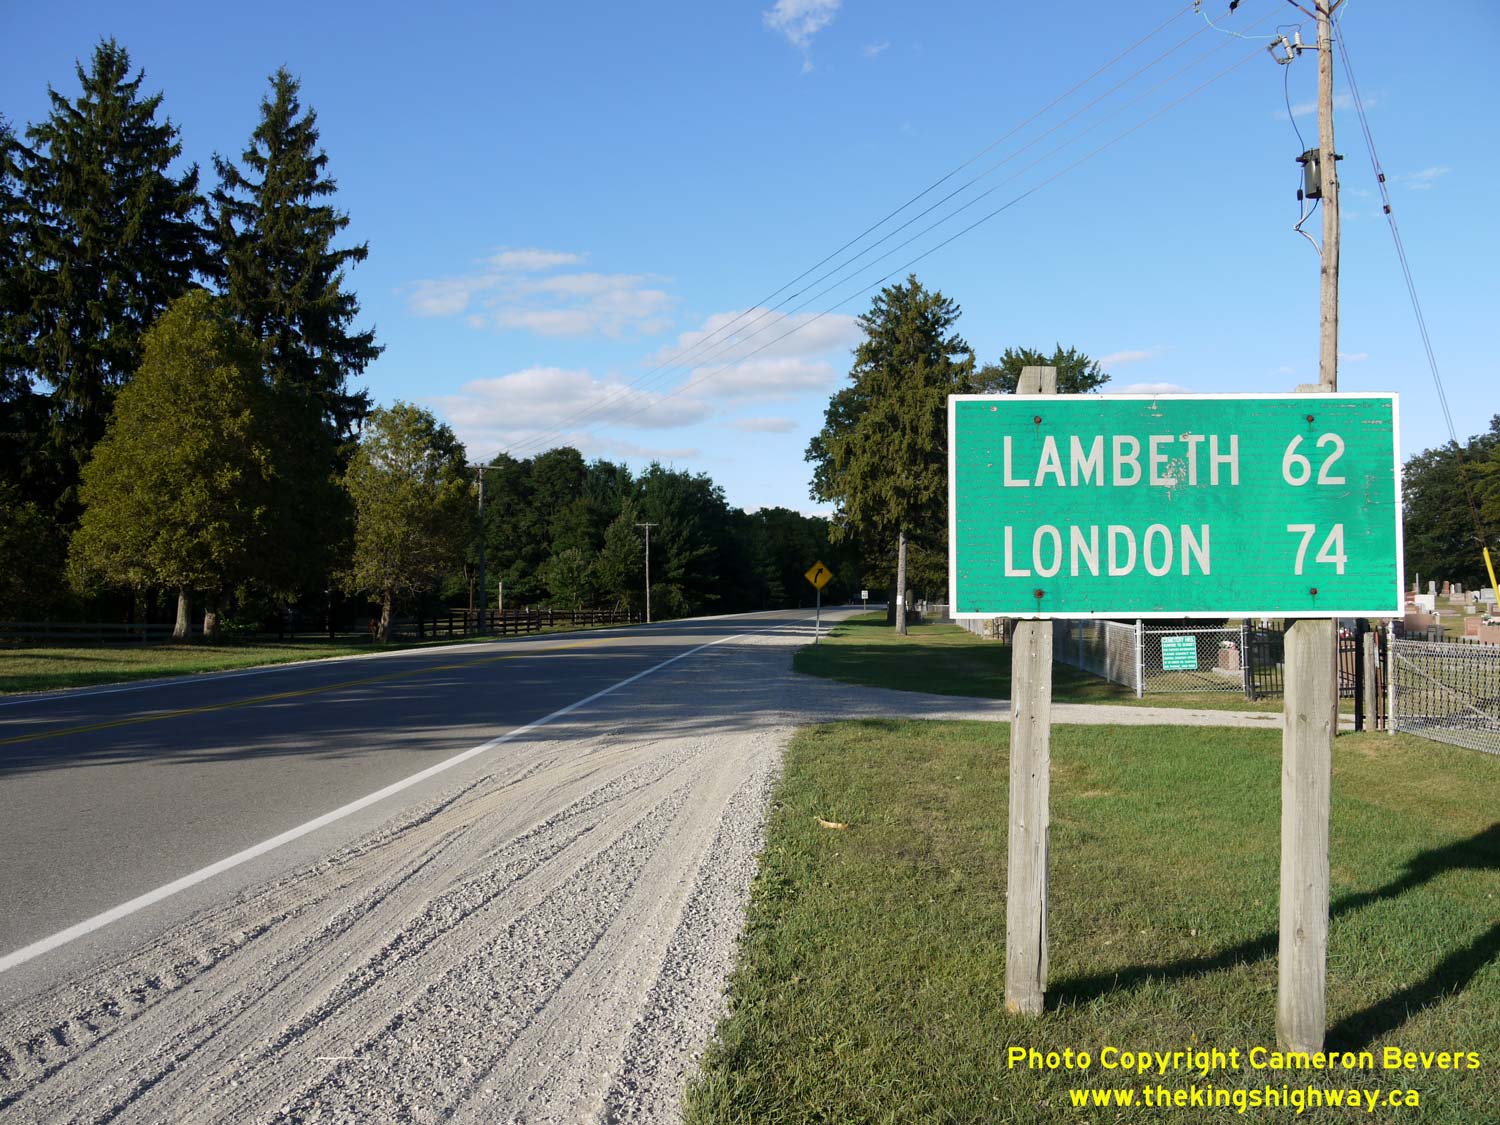

Left - Distance guide sign on eastbound Hwy 2 near the Hwy 79 Junction. Prior to the completion of Hwy 401 through Southwestern Ontario in the 1960s, the
majority of motorists heading eastbound across Ontario from the Windsor area would have passed by signs just like this one on Hwy 2, slowly counting down the miles to
London and other major Ontario destinations. See an Enlarged Photo Here. (Photograph taken on September 10, 2010 - © Cameron Bevers) Right - An overgrown former alignment on Hwy 2, just east of the Hwy 79 Junction near Bothwell. This was one of several sections of Hwy 2 abandoned in the Bothwell area in the late 1940s and early 1950s, when new alignments were built in an effort to improve the highway's geometry. See an Enlarged Photo Here. (Photograph taken on September 12, 2004 - © Cameron Bevers) 

Left - This former alignment of Hwy 2 about 2 km west of Wardsville passes right below the current alignment. The highway's vertical alignment was changed
rather dramatically in some places. This resulted in the final grade of the new highway being raised several metres above the original road, as was the case here. See
an Enlarged Photo Here. (Photograph taken on September 12, 2004 - © Cameron Bevers) Right - Approaching the Hwy 2 Junction at the northern terminus of Hwy 76. See an Enlarged Photo Here. (Photograph taken on September 10, 2010 - © Cameron Bevers) 

Left - Northern terminus of Hwy 76 at the Hwy 2 Junction at Woodgreen. These two highways meet about half-way between Chatham and London. See an
Enlarged Photo Here. (Photograph taken on September 10, 2010 - © Cameron Bevers) Right - Facing south along Hwy 76 towards West Lorne from the Hwy 2 Junction at Woodgreen. See an Enlarged Photo Here. (Photograph taken on September 10, 2010 - © Cameron Bevers) 

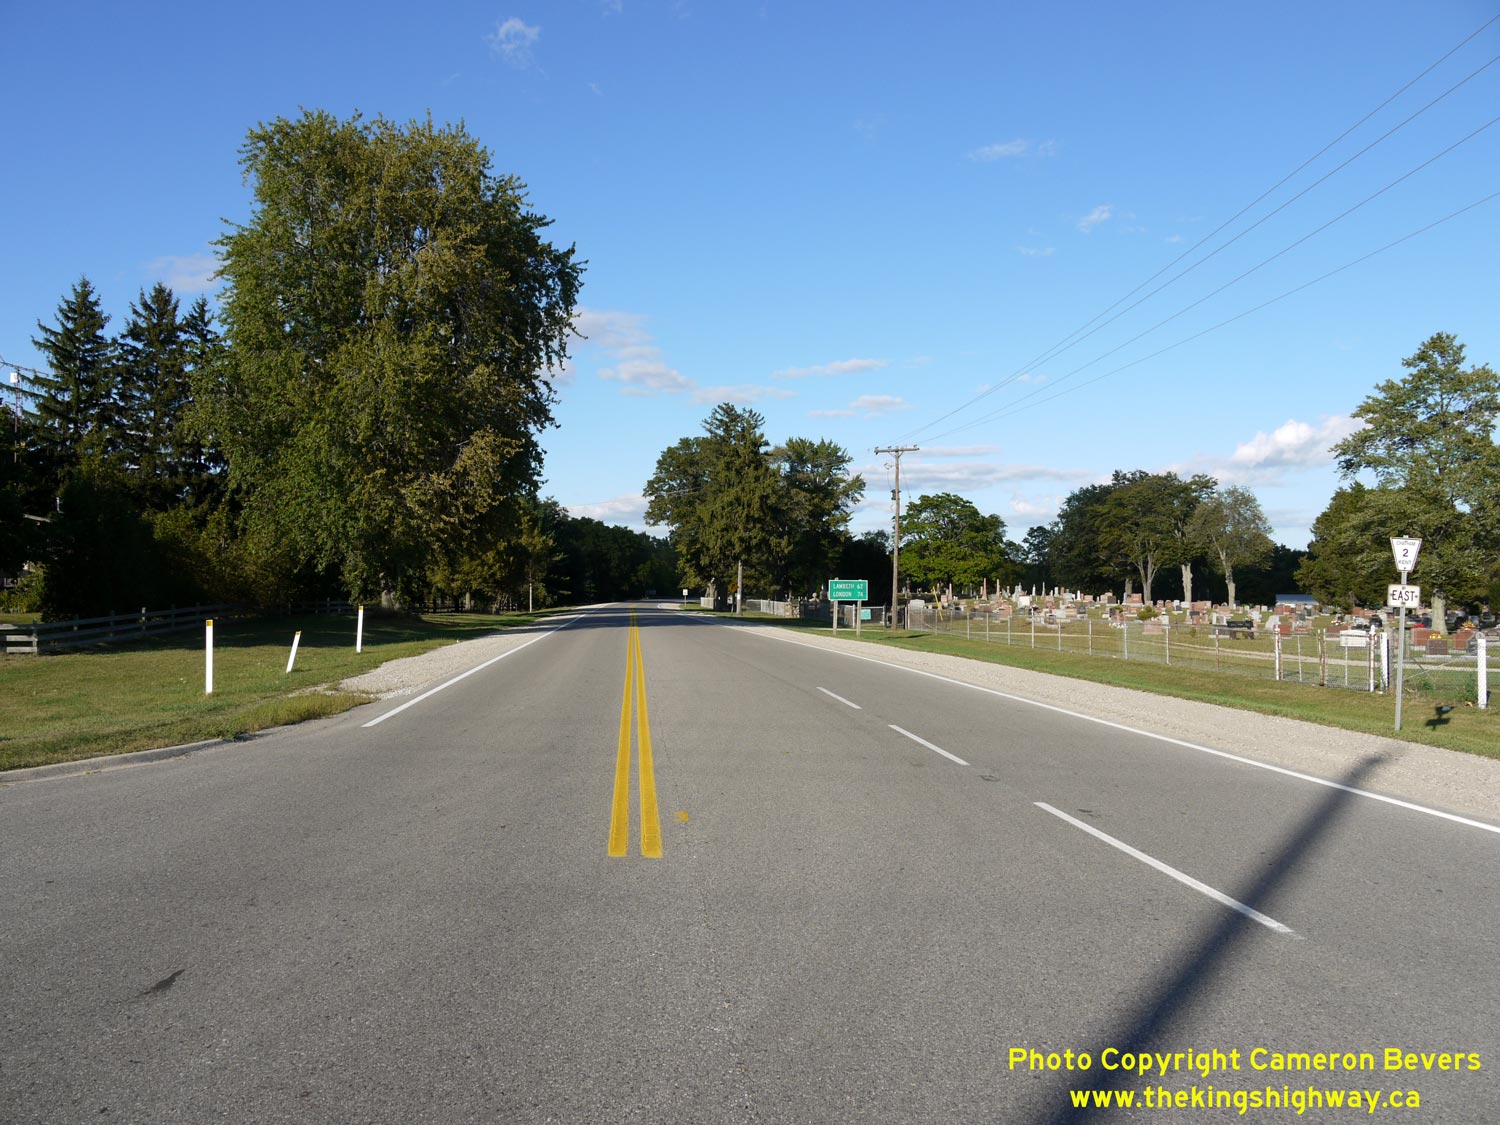
Left - Green destination guide signs approaching the Hwy 76 Junction on Hwy 2 at Woodgreen, facing east towards London. See an
Enlarged Photo Here. (Photograph taken on September 10, 2010 - © Cameron Bevers) Right - View of the Hwy 76 Junction on Hwy 2 at Woodgreen, facing east towards London. See an Enlarged Photo Here. (Photograph taken on September 10, 2010 - © Cameron Bevers) 

Left - Approaching the Hwy 76 Junction on Hwy 2 at Woodgreen, facing west towards Chatham. See an
Enlarged Photo Here. (Photograph taken on September 10, 2010 - © Cameron Bevers) Right - Facing east along Hwy 2 towards London from the Hwy 76 Junction at Woodgreen. See an Enlarged Photo Here. (Photograph taken on September 10, 2010 - © Cameron Bevers) 
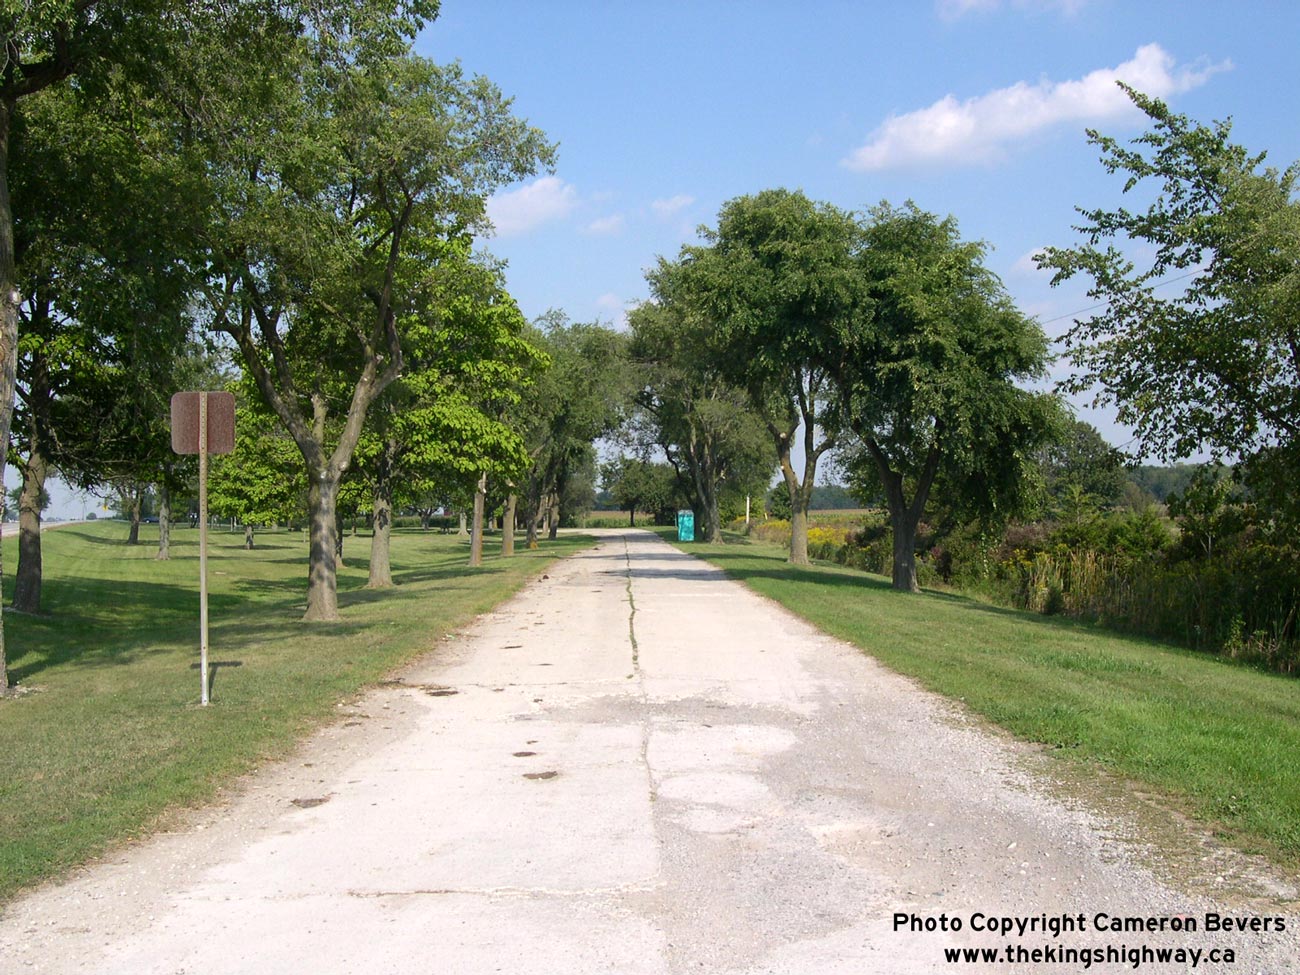
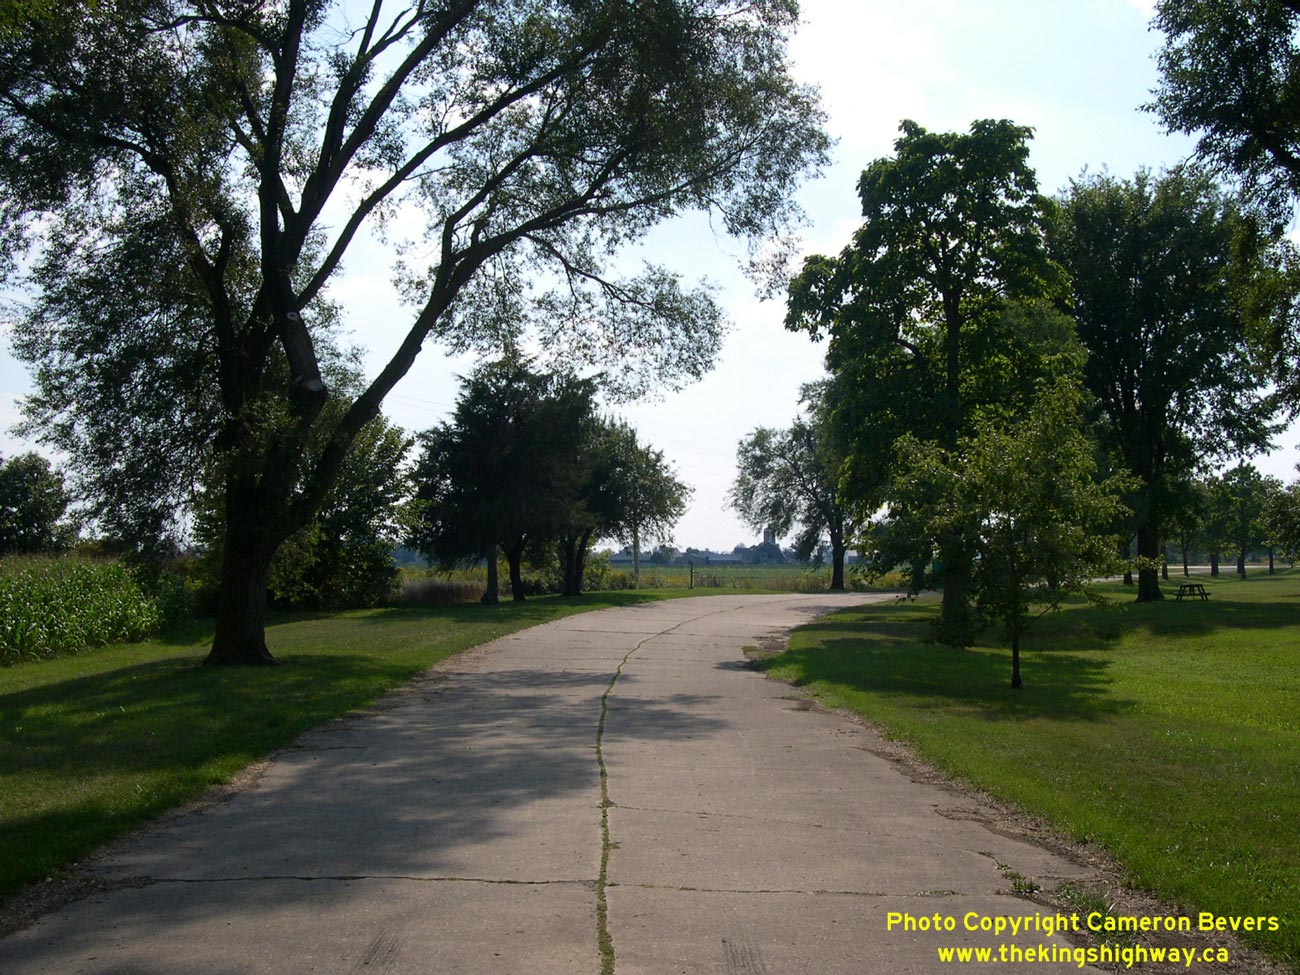
Left - Old alignment of Hwy 2 at the Strathburn Roadside Park, located about 3 km east of the Hwy 80 Junction. See an
Enlarged Photo Here. (Photograph taken on September 12, 2004 - © Cameron Bevers) Right - The entrance to the Strathburn Roadside Park is actually an old alignment of Hwy 2. This concrete highway was initially built under contract for the Department of Public Highways of Ontario (DPHO) during the 1920s, as part of an effort to construct a paved highway link across Ontario via the Trans-Provincial Highway (Hwy 2). This concrete pavement was constructed in 1925. See an Enlarged Photo Here. (Photograph taken on September 12, 2004 - © Cameron Bevers) 
Left - There is a well-preserved superelevated curve on the old Hwy 2 alignment in the Strathburn Roadside Park. See an
Enlarged Photo Here. (Photograph taken on September 12, 2004 - © Cameron Bevers) Right - The old Hwy 2 alignment at the Strathburn Roadside Park is the best surviving example of a 1920s Ontario twin-slab concrete highway. The concrete was laid on this section of Hwy 2 during a highway improvement contract which took place in 1925. That year, just over 9 miles of concrete pavement was constructed along Hwy 2 between Melbourne and Strathburn under DPHO Contract #1192. It is very rare to see a concrete highway of this vintage without an asphalt or bituminous overlay. See an Enlarged Photo Here. (Photograph taken on September 12, 2004 - © Cameron Bevers) 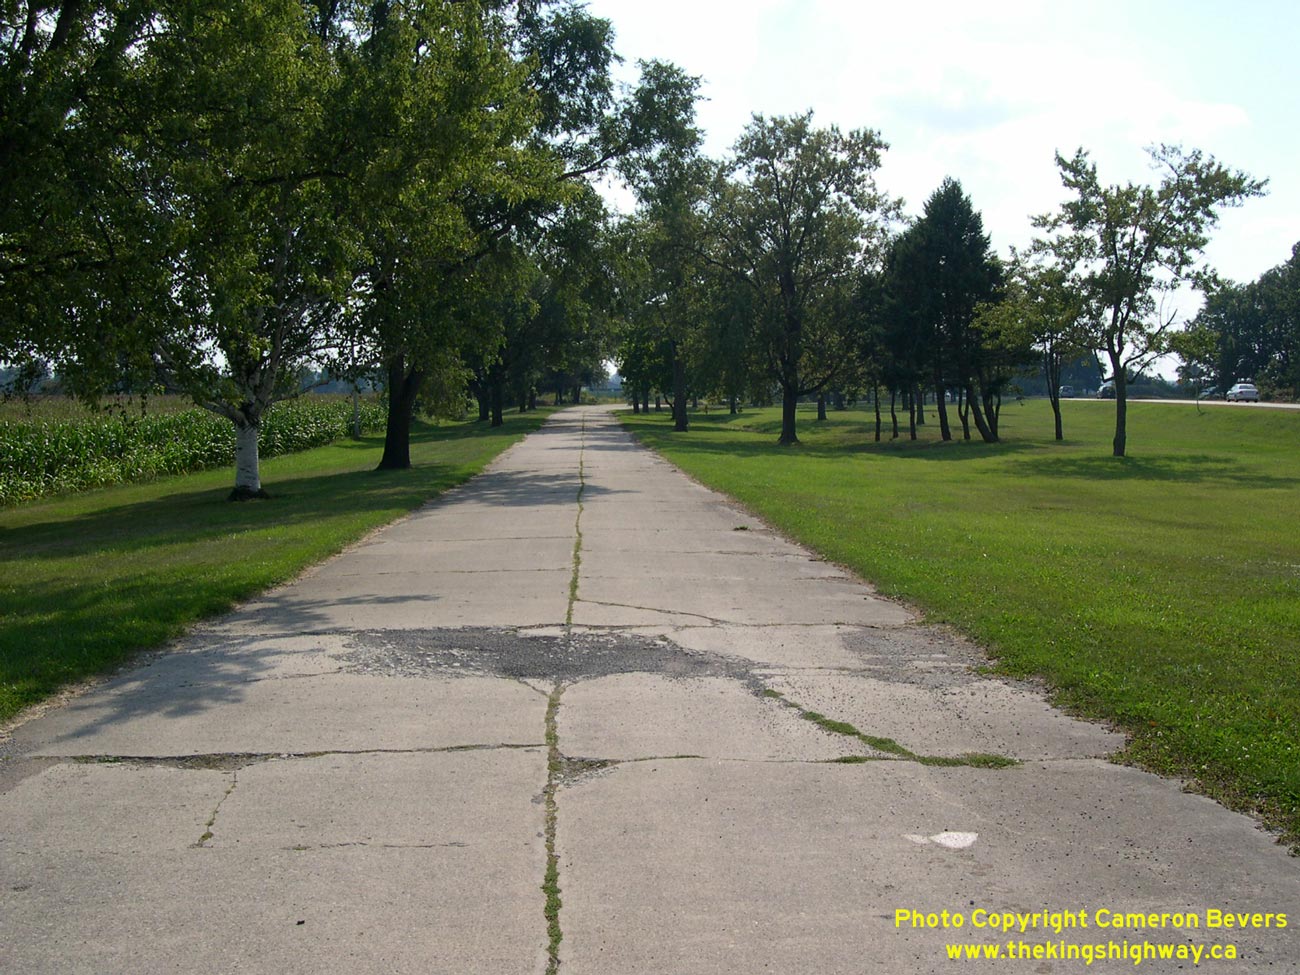

Left - The original alignment of Hwy 2 at the Strathburn Roadside Park was bypassed in 1950 by a new alignment, which can be seen at right. What makes this
section of the old highway particularly interesting is that the original concrete highway surface was never overlaid with any bituminous material. It was common
practice in Ontario during the 1940s and early 1950s to overlay a thin bituminous layer on old concrete highways when it became necessary to improve the ride quality
and restore pavement friction. See an Enlarged Photo Here. (Photograph taken on September 12, 2004 - © Cameron Bevers)  Right - Facing west along Hwy 402 approaching the Hwy 2 Interchange near Delaware. See an
Enlarged Photo Here. Right - Facing west along Hwy 402 approaching the Hwy 2 Interchange near Delaware. See an
Enlarged Photo Here.(Photograph taken on May 18, 2009 - © Cameron Bevers) 
 Left - View of Hwy 402 at the Hwy 2 Interchange near Delaware, facing east towards London. This freeway was built in the late 1970s and early 1980s, with a
wide depressed grass median between the eastbound and westbound carriageways. The construction of Hwy 402 greatly diminished the importance of several of the area's
King's Highways, including sections of Hwy 2 near Lambeth and Delaware. See an
Enlarged Photo Here. Left - View of Hwy 402 at the Hwy 2 Interchange near Delaware, facing east towards London. This freeway was built in the late 1970s and early 1980s, with a
wide depressed grass median between the eastbound and westbound carriageways. The construction of Hwy 402 greatly diminished the importance of several of the area's
King's Highways, including sections of Hwy 2 near Lambeth and Delaware. See an
Enlarged Photo Here.(Photograph taken on May 18, 2009 - © Cameron Bevers) Right - Dual underpass structures (Site #19-535) on Hwy 402 at the Hwy 2 Interchange near Delaware. See an
Enlarged Photo Here.(Photograph taken on September 16, 2012 - © Cameron Bevers) 
 Left - Date stamp (1978) and structure identification number (Site #19-535) on the Hwy 2 Underpass on Hwy 402. The grading of Hwy 402 and construction of the
dual Hwy 2 underpass structures were all constructed under Contract #1978-66. Final paving of the freeway between Hwy 401 and Hwy 2 was completed under Contract
#1981-54. See an Enlarged Photo Here. Left - Date stamp (1978) and structure identification number (Site #19-535) on the Hwy 2 Underpass on Hwy 402. The grading of Hwy 402 and construction of the
dual Hwy 2 underpass structures were all constructed under Contract #1978-66. Final paving of the freeway between Hwy 401 and Hwy 2 was completed under Contract
#1981-54. See an Enlarged Photo Here.(Photograph taken on September 16, 2012 - © Cameron Bevers) Right - Green guide sign marking the on-ramp to eastbound Hwy 402 at the Hwy 2 Interchange near Delaware. Interestingly, the highway route number was displayed
in a Helvetica font on this sign. The Ministry of Transportation of Ontario (MTO) briefly experimented with Helvetica fonts on green-and-white highway signs in the
late 1980s and early 1990s, but subsequently discontinued the font's use. The vast majority of green-and-white highway guide signs in Ontario use the Federal Highways
Administration (FHWA) Highway Gothic font series for lettering. The ramps at the Hwy 2 Interchange on Hwy 402 are in a "Parclo B-2" configuration, whereby traffic
wishing to access the freeway on-ramps has to turn left from Hwy 2 in one of the two directions. See an
Enlarged Photo Here.(Photograph taken on May 18, 2009 - © Cameron Bevers) 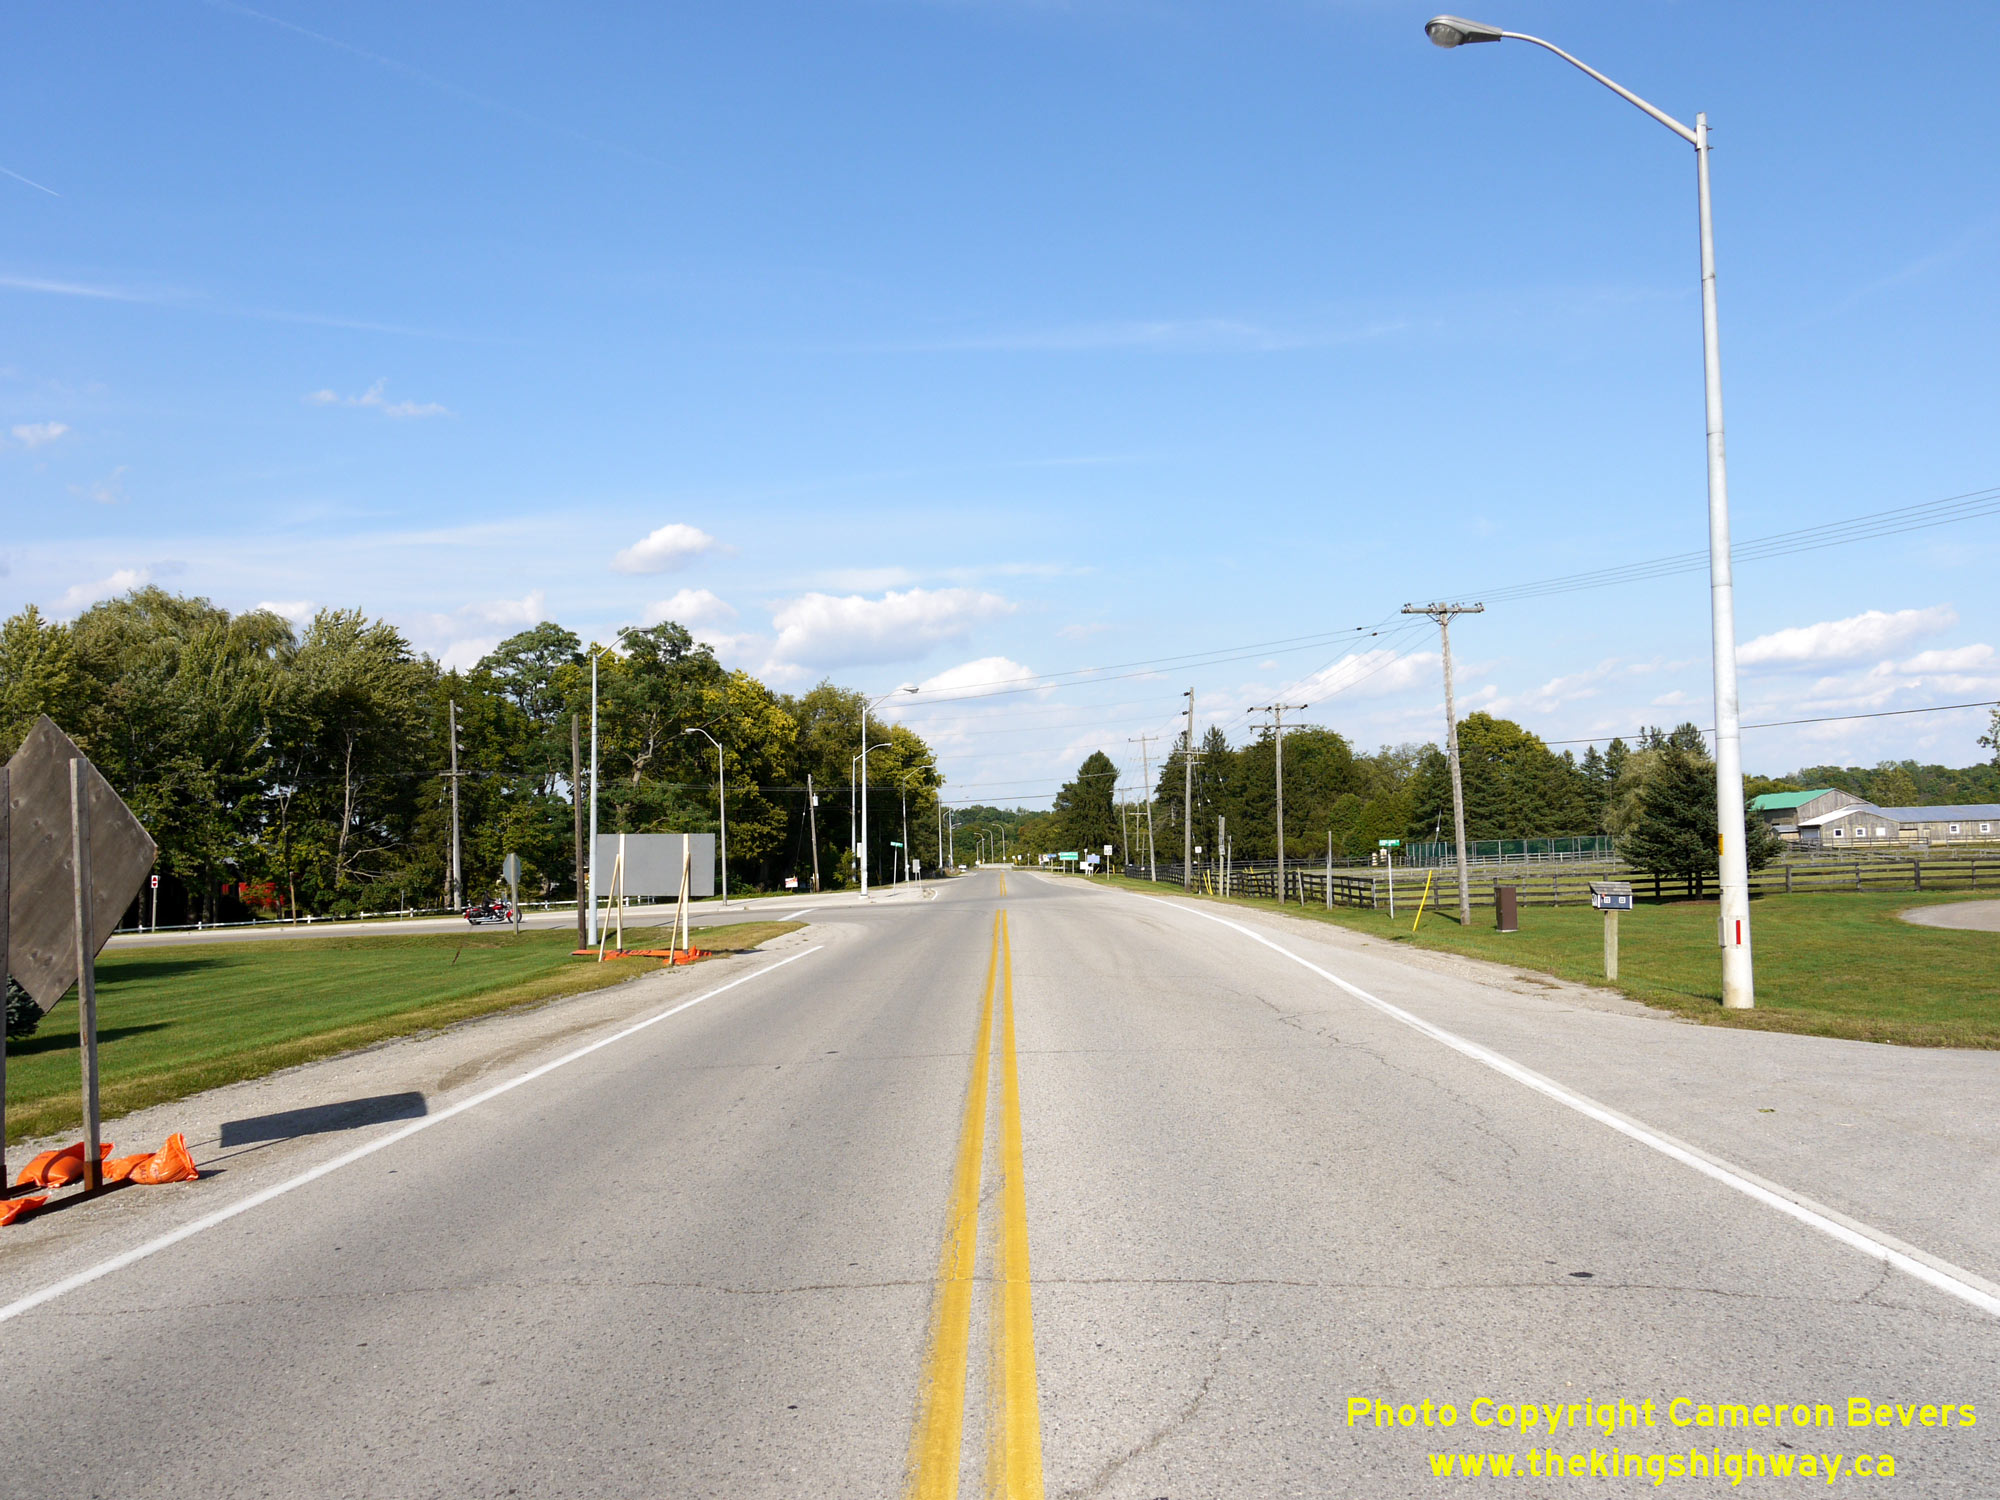
 Left - Facing east along Hwy 2 approaching the Hwy 81 Junction near Delaware. The route of Hwy 81 begins at Delaware and heads northwesterly to Grand Bend via
Mount Brydges and Strathroy. Prior to the completion of Hwy 402 in the early 1980s, Hwy 81 served as part of a connecting route between Hwy 7 and Hwy 22 west of
London and Hwy 401. At one time, this would have been a fairly busy highway junction. Following the completion of Hwy 402, traffic volumes through the Hwy 2 &
Hwy 81 Junction subsided considerably. See an Enlarged Photo Here. Left - Facing east along Hwy 2 approaching the Hwy 81 Junction near Delaware. The route of Hwy 81 begins at Delaware and heads northwesterly to Grand Bend via
Mount Brydges and Strathroy. Prior to the completion of Hwy 402 in the early 1980s, Hwy 81 served as part of a connecting route between Hwy 7 and Hwy 22 west of
London and Hwy 401. At one time, this would have been a fairly busy highway junction. Following the completion of Hwy 402, traffic volumes through the Hwy 2 &
Hwy 81 Junction subsided considerably. See an Enlarged Photo Here.(Photograph taken on September 16, 2012 - © Cameron Bevers) Right - View of the Hwy 2 & Hwy 81 Junction, facing west towards Chatham. The right-turn lane from westbound Hwy 2 to northbound Hwy 81 is channelized, to
better serve the predominant east-to-north traffic movement. Historically, this was a major decision point in the King's Highway system. Motorists wishing to head
west towards Sarnia had to keep right to follow Hwy 81 up to Hwy 7 and Hwy 22, while through traffic heading towards Chatham and Windsor could continue straight ahead
via Hwy 2. See an Enlarged Photo Here.(Photograph taken on September 16, 2012 - © Cameron Bevers) 
 Left - Facing north along Hwy 81 towards Strathroy from the Hwy 2 Junction at Delaware. The route of Hwy 81 was first established in 1936 as a connecting
highway between Hwy 2 at Delaware and Hwy 22 in Strathroy. For years, Hwy 81 served as a convenient cut-off route for traffic bound for Sarnia. However, this highway
became largely redundant as a result of the completion of nearby Hwy 402 in 1982. Provincial jurisdiction over Hwy 81 ceased in 1997, when ownership of the highway
was transferred over to the County of Middlesex. See an Enlarged Photo Here. Left - Facing north along Hwy 81 towards Strathroy from the Hwy 2 Junction at Delaware. The route of Hwy 81 was first established in 1936 as a connecting
highway between Hwy 2 at Delaware and Hwy 22 in Strathroy. For years, Hwy 81 served as a convenient cut-off route for traffic bound for Sarnia. However, this highway
became largely redundant as a result of the completion of nearby Hwy 402 in 1982. Provincial jurisdiction over Hwy 81 ceased in 1997, when ownership of the highway
was transferred over to the County of Middlesex. See an Enlarged Photo Here.(Photograph taken on September 16, 2012 - © Cameron Bevers) Right - Approaching the southern terminus of Hwy 81 at the Hwy 2 Junction at Delaware. See an
Enlarged Photo Here.(Photograph taken on September 16, 2012 - © Cameron Bevers) 
 Left - Junction sign assembly at the southern terminus of Hwy 81 at the Hwy 2 Junction at Delaware. See an
Enlarged Photo Here. Left - Junction sign assembly at the southern terminus of Hwy 81 at the Hwy 2 Junction at Delaware. See an
Enlarged Photo Here.(Photograph taken on September 16, 2012 - © Cameron Bevers) Right - Approaching the Hwy 81 Junction on Hwy 2, facing west towards Chatham. Today, Hwy 81 is officially known as Middlesex County Road 81 and is also known
as Adelaide Road. Motorists who wish to access Strathroy from Hwy 402 won't have to travel too far out of their way, as the Hwy 402 Interchange lies only 600 metres
to the west of the Hwy 81 Junction. Although Hwy 81 crosses over Hwy 402 west of Delaware, there is no interchange between the two highways at that location. Access
to Hwy 402 can only be obtained from Hwy 2 in the Delaware area. See an Enlarged Photo Here.(Photograph taken on September 16, 2012 - © Cameron Bevers) 
 Left - View of Hwy 2 facing east towards London from the Hwy 81 Junction at Delaware. While Hwy 2 curves slightly to the left today, the highway originally
continued straight ahead. A new bridge was constructed over the Thames River on a diversion of Hwy 2 during the late 1950s. See an
Enlarged Photo Here. Left - View of Hwy 2 facing east towards London from the Hwy 81 Junction at Delaware. While Hwy 2 curves slightly to the left today, the highway originally
continued straight ahead. A new bridge was constructed over the Thames River on a diversion of Hwy 2 during the late 1950s. See an
Enlarged Photo Here.(Photograph taken on September 16, 2012 - © Cameron Bevers) Right - Facing east across the Thames River Bridge (Site #19-339) on Hwy 2 at Delaware. This lengthy structure was constructed under Contracts #1958-213
(structural steel) and #1958-266 (concrete substructure and approaches) and was completed in 1959. This bridge is the longest along Hwy 2 in Southwestern Ontario,
with a total length of 501 feet. The roadway across the structure has a width of 30 feet. This new bridge replaced a narrow through truss bridge located just
downstream, which was too narrow to allow two directions of traffic to cross at one time. See an
Enlarged Photo Here.(Photograph taken on September 16, 2012 - © Cameron Bevers) 
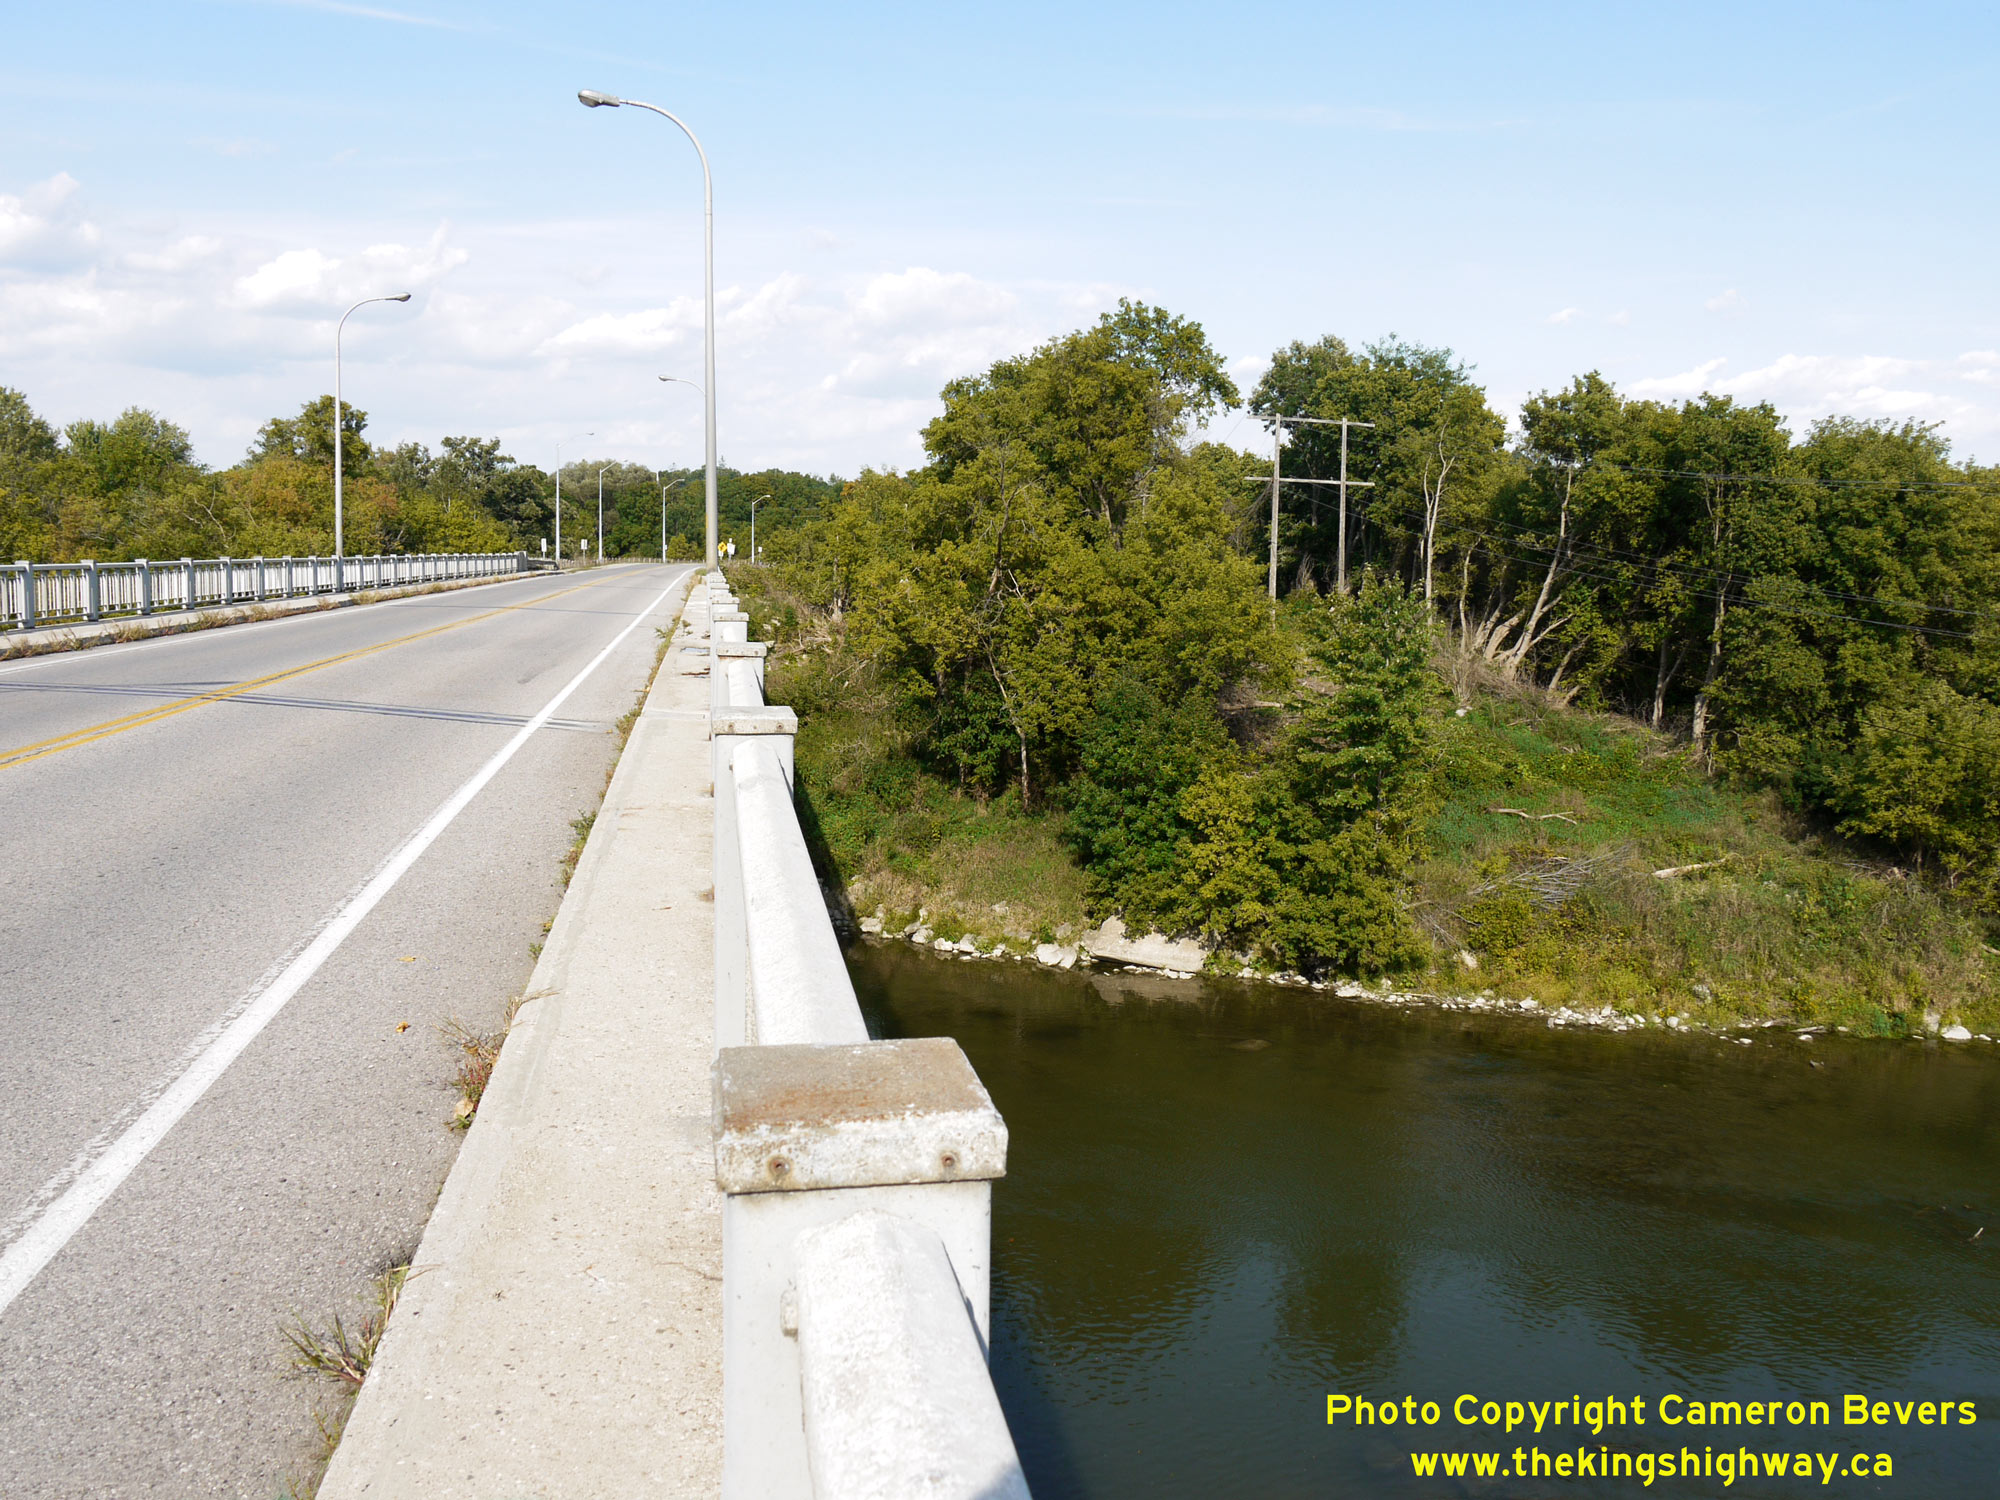 Left - Southern side of the Thames River Bridge on Hwy 2 at Delaware. This five-span continuous steel plate girder structure was officially opened to traffic
on November 19, 1959. The completion of this new two-lane bridge removed a serious traffic bottleneck from the King's Highway system. See an
Enlarged Photo Here. Left - Southern side of the Thames River Bridge on Hwy 2 at Delaware. This five-span continuous steel plate girder structure was officially opened to traffic
on November 19, 1959. The completion of this new two-lane bridge removed a serious traffic bottleneck from the King's Highway system. See an
Enlarged Photo Here.(Photograph taken on September 16, 2012 - © Cameron Bevers) Right - Site of the old Thames River Bridge on Hwy 2, facing east towards the eastern riverbank. The old bridge effectively operated as a single-lane
structure, as it was not quite wide enough for two vehicles to cross simultaneously in opposing directions. The bridge also had a vertical clearance limitation due to
the diagonal overhead truss members. Outside vertical clearance on the old bridge was 12 feet, 6 inches (3.81 metres) while the centreline vertical clearance was
14 feet, 6 inches (4.42 metres). See an Enlarged Photo Here.(Photograph taken on September 16, 2012 - © Cameron Bevers) 
 Left - Facing west across the Thames River Bridge on Hwy 2 at Delaware. The new bridge allowed for simultaneous two-way traffic in opposing directions and also
greatly improved the alignment of Hwy 2 through Delaware. Previously, Hwy 2 rounded a sharp curve at the eastern end of the Thames River Bridge. See an
Enlarged Photo Here. Left - Facing west across the Thames River Bridge on Hwy 2 at Delaware. The new bridge allowed for simultaneous two-way traffic in opposing directions and also
greatly improved the alignment of Hwy 2 through Delaware. Previously, Hwy 2 rounded a sharp curve at the eastern end of the Thames River Bridge. See an
Enlarged Photo Here.(Photograph taken on September 16, 2012 - © Cameron Bevers) Right - The Department of Highways of Ontario (DHO) dedicated the Delaware Bridge as the "Harry M. Allen Bridge" in 1965, several years after the bridge was
originally completed. A small commemorative plaque was affixed to the northeastern concrete handrail. See an
Enlarged Photo Here.(Photograph taken on September 16, 2012 - © Cameron Bevers) 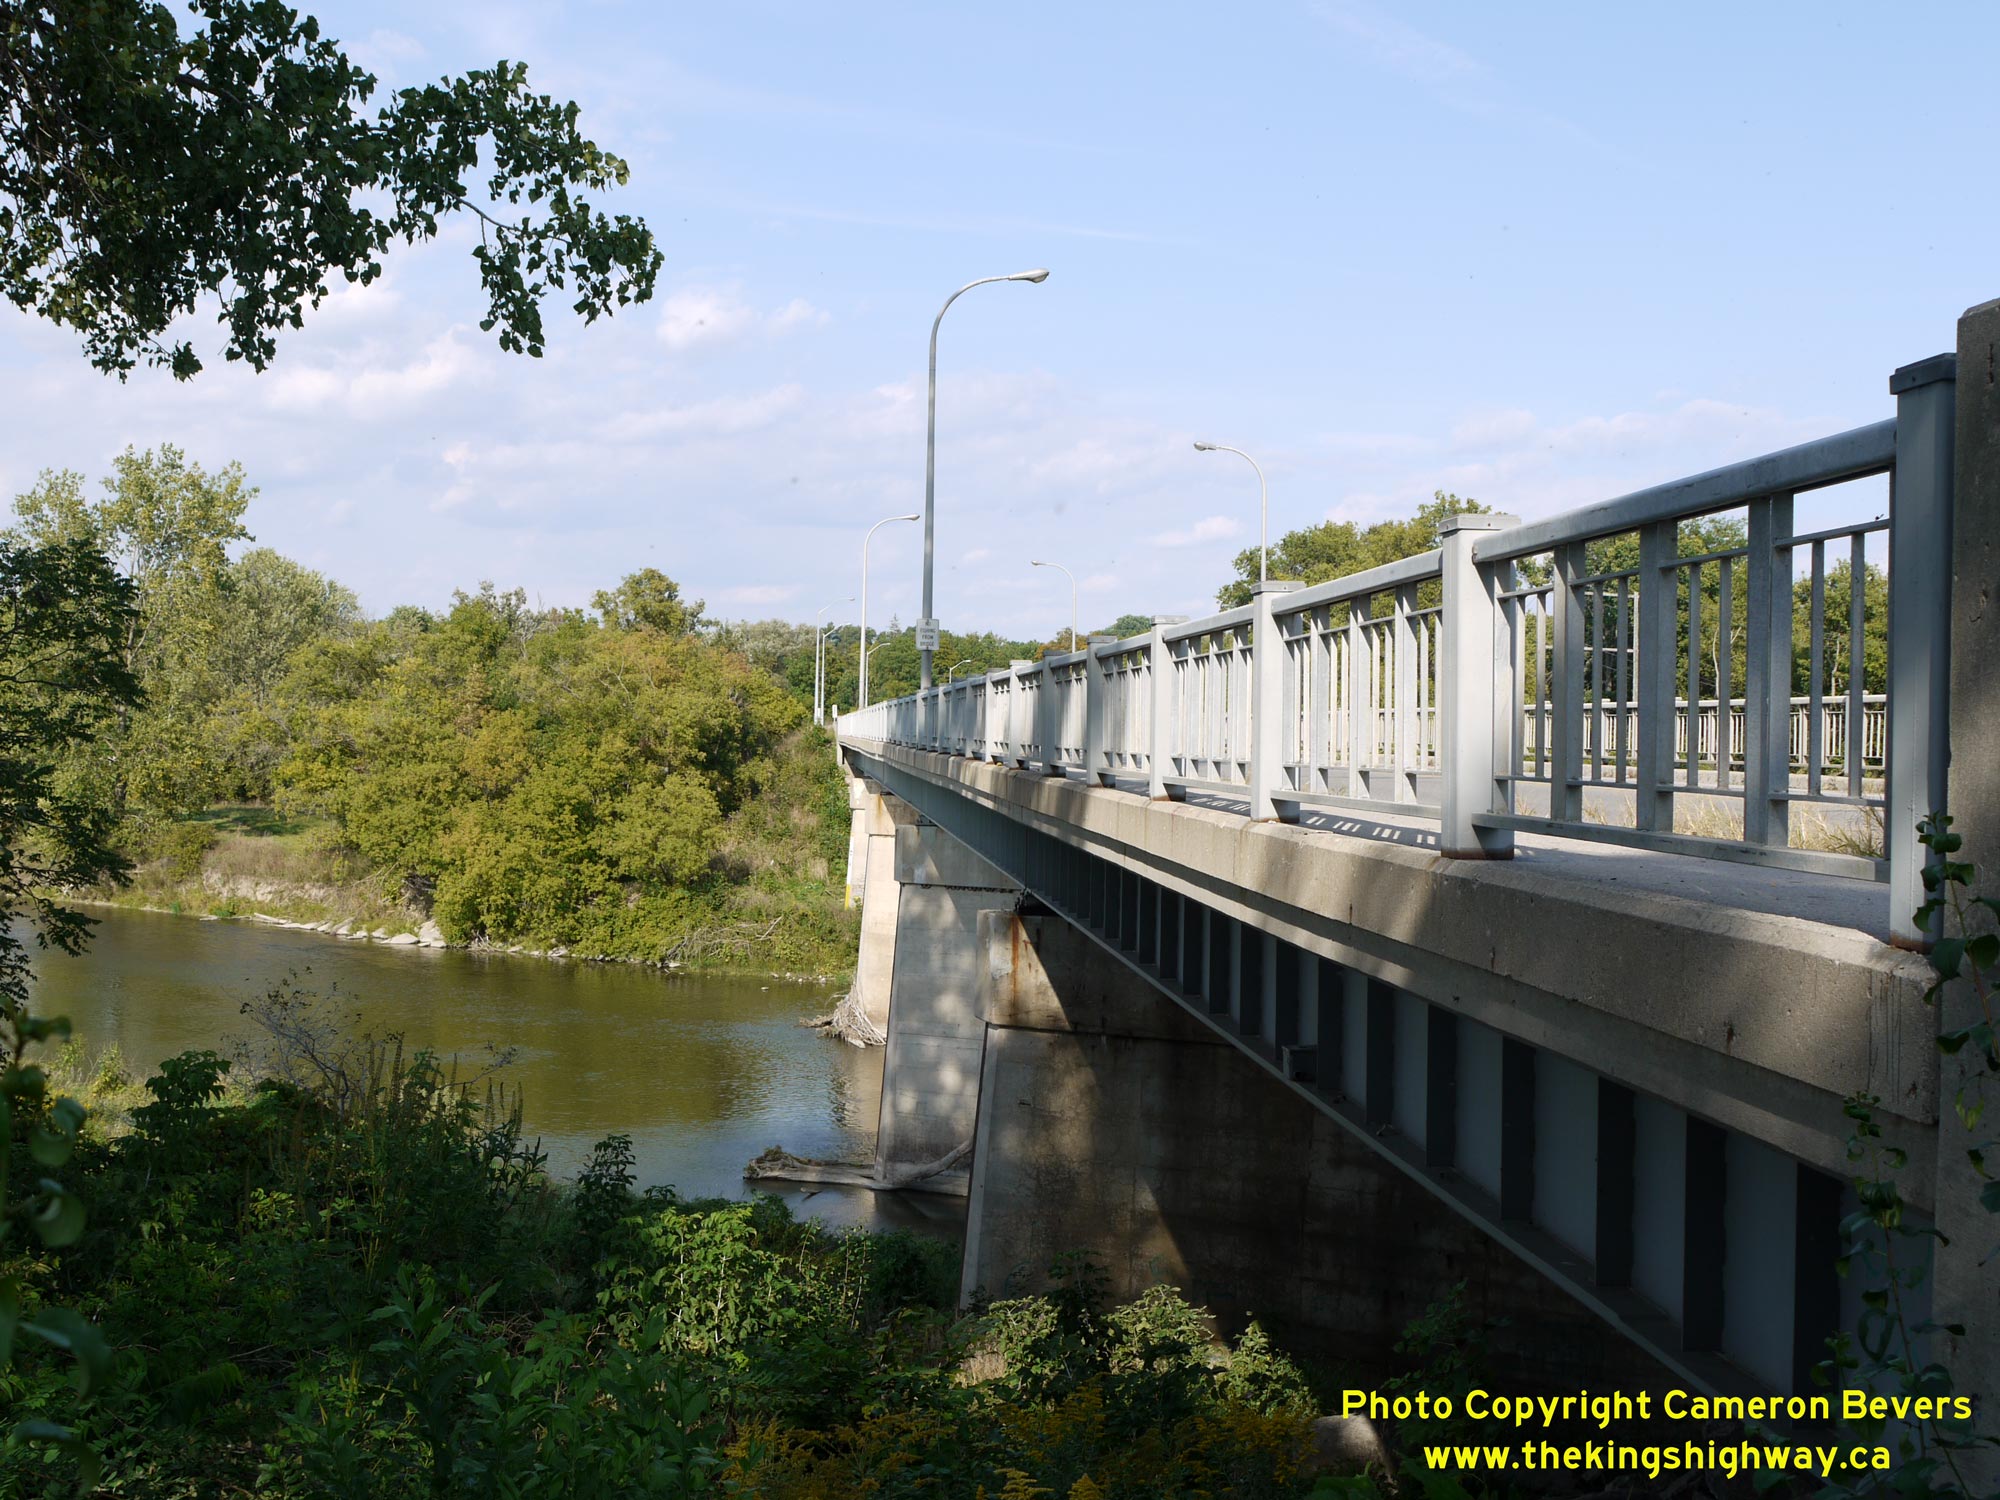 Above - Northern side of the Thames River Bridge on Hwy 2 at Delaware. See an
Enlarged Photo Here. Above - Northern side of the Thames River Bridge on Hwy 2 at Delaware. See an
Enlarged Photo Here.(Photograph taken on September 16, 2012 - © Cameron Bevers)
Continue on to King's Highway 2 Present Day Photos: London to Woodstock
|
|---|
Links to Adjacent King's Highway Photograph Pages:
Back to Tertiary Highway 812 Photos /
King's Highway 2 History /
On to King's Highway 3 Photos
Ontario Highway History - Main Menu / Back to List of Highways Website contents, photos & text © 2002-2026, Cameron
Bevers (Webmaster) - All Rights Reserved / Contact Me
|
|---|