
| 
| |
|
|
This page contains present day photos (Year 2000 to date) of Ontario's King's Highway 35, arranged by location from Lindsay
northerly to Coboconk. All photographs displayed on this page were taken by the Webmaster (Cameron Bevers), unless specifically noted otherwise. Click on any
thumbnail to see a larger image!
Please note that all photographs displayed on this
website are protected by copyright. These photographs must not be reproduced, published,
electronically stored or copied, distributed, or posted onto other websites without
my written permission. If you want to use photos from this website, please
email me first for permission. Thank-you!
|
|---|
|
Page 6: Present Day King's Highway 35 Photographs (Lindsay to Coboconk)


Left - Facing east across the widened Scugog River Bridge on Hwy 7 & Hwy 35 in Lindsay. The intersection seen in the background is the Hwy 35 South
Junction to Newcastle. (Photograph taken on October 10, 2010 - © Cameron Bevers) Right - Southern side of the Scugog River Bridge on Hwy 7 & Hwy 35 in Lindsay. The original structure was completed in 1958, but it was rehabilitated and widened in 2009. (Photograph taken on October 10, 2010 - © Cameron Bevers) 

Left - Facing east across the widened Scugog River Bridge on Hwy 7 & Hwy 35 in Lindsay. The new roadway deck is capable of accommodating a four-lane
highway. (Photograph taken on October 10, 2010 - © Cameron Bevers) Right - This wide shoulder on the Scugog River Bridge will eventually become a new westbound lane on Hwy 7 & Hwy 35 when the adjacent highway sections are also widened. (Photograph taken on October 10, 2010 - © Cameron Bevers) 

Left - Facing west along the Lindsay Bypass (Hwy 7 & Hwy 35) from the Scugog River Bridge. (Photograph taken on October 10, 2010 - © Cameron Bevers) Right - Northern side of the widened Scugog River Bridge on the Lindsay Bypass (Hwy 7 & Hwy 35). (Photograph taken on October 10, 2010 - © Cameron Bevers) 

Left - Approaching the widened section of the Lindsay Bypass at the Scugog River Bridge, facing east towards the Hwy 35 South Junction. (Photograph taken on October 10, 2010 - © Cameron Bevers) Right - Widened section of the Lindsay Bypass approaching the Scugog River Bridge. The original two-lane highway was recently widened as part of a bridge rehabilitation project. Although only two lanes are currently marked, the highway has extra-wide shoulders which will eventually be marked as a four-lane highway. See an Enlarged Photo Here. (Photograph taken on October 10, 2010 - © Cameron Bevers) 
Above - Dual King's Highway route markers for Hwy 7 & Hwy 35 on the Lindsay Bypass. (Photograph taken on October 10, 2010 - © Cameron Bevers) 

Left - Facing east along the Lindsay Bypass (Hwy 7 & Hwy 35) from the Kawartha Lakes Road 4 Junction. See an
Enlarged Photo Here. (Photograph taken on October 10, 2010 - © Cameron Bevers) Right - Facing west along the Lindsay Bypass (Hwy 7 & Hwy 35) towards the Kawartha Lakes Road 4 Junction. This is the only major intersection located along the Lindsay Bypass, other than the north and south junctions with Hwy 35 at each end of the bypass. (Photograph taken on October 10, 2010 - © Cameron Bevers) 

Left - Facing east along the Lindsay Bypass (Hwy 7 & Hwy 35) approaching the Kawartha Lakes Road 4 Junction. See an
Enlarged Photo Here. (Photograph taken on October 10, 2010 - © Cameron Bevers) Right - Kawartha Lakes Road 4 Junction on the Lindsay Bypass (Hwy 7 & Hwy 35), facing east. During the construction of the Lindsay Bypass in the late 1950s, the original county road alignment leading south from Lindsay to Little Britain was closed off and relocated onto a new alignment further to the south. The Lindsay Bypass was then constructed on a portion of the old county road alignment, which used to be located here. (Photograph taken on October 10, 2010 - © Cameron Bevers) 

Left - Facing east across the Ops Township Railway Overhead on the Lindsay Bypass (Hwy 7 & Hwy 35). (Photograph taken on October 10, 2010 - © Cameron Bevers) Right - Facing west along the Lindsay Bypass (Hwy 7 & Hwy 35) from the Kawartha Lakes Road 4 Junction. (Photograph taken on October 10, 2010 - © Cameron Bevers) 

Left - Southern side of the Ops Township Railway Overhead on the Lindsay Bypass (Hwy 7 & Hwy 35). Lindsay was once a major railway hub, with multiple
lines all intersecting in town. As the railways declined in importance over the past 50 years, the tracks were slowly abandoned. Today, there are no railway lines
serving Lindsay. Along the Lindsay Bypass and the associated diversions of Hwy 35 and Hwy 36 approaching town, there are no fewer than four former railway
overheads that serve as a reminder of Lindsay's historical role as an important railway junction. (Photograph taken on October 10, 2010 - © Cameron Bevers) Right - Facing west across the Ops Township Railway Overhead on the Lindsay Bypass (Hwy 7 & Hwy 35). (Photograph taken on October 10, 2010 - © Cameron Bevers) 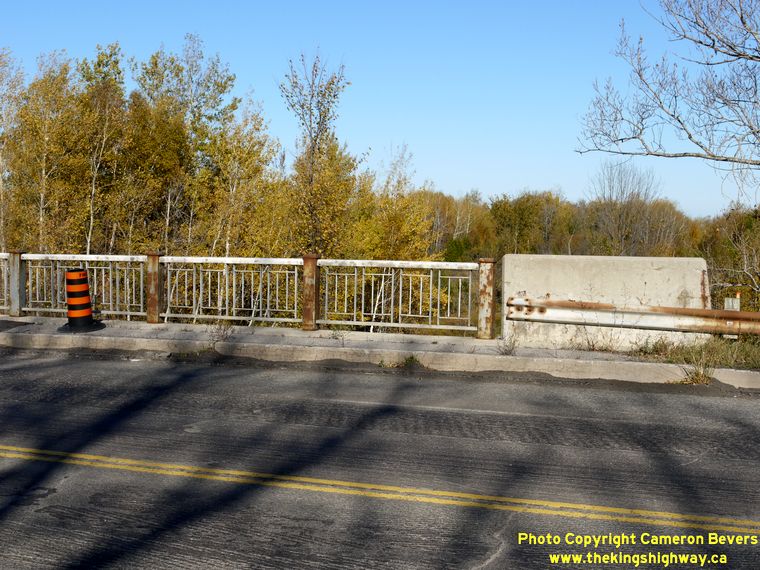

Left - The milled asphalt surface across the bridge deck was repaved in 2010. The fact that this bridge was repaved suggests that the bridge is not in
imminent risk of being replaced. However, given that the railway line below the highway is long gone, this structure will likely be replaced during the next major
highway construction contract. (Photograph taken on October 10, 2010 - © Cameron Bevers) Right - Steel handrail design on the Ops Township Railway Overhead on the Lindsay Bypass (Hwy 7 & Hwy 35). (Photograph taken on October 10, 2010 - © Cameron Bevers) 

Left - Ops Township Railway Overhead on the Lindsay Bypass (Hwy 7 & Hwy 35). Structure completed in 1957. (Photograph taken on October 10, 2010 - © Cameron Bevers) Right - Northern side of the Ops Township Railway Overhead on the Lindsay Bypass (Hwy 7 & Hwy 35). This former railway line has been converted into a multi-use trail. (Photograph taken on October 10, 2010 - © Cameron Bevers) 

Left - Facing west along the Lindsay Bypass (Hwy 7 & Hwy 35) from the Ops Township Railway Overhead. The Lindsay Bypass allows through traffic on Hwy 7
& Hwy 35 to bypass the busy downtown area. The bypass also provided grade-separated crossings of all of Lindsay's major railway lines. The at-grade railway
crossings within town caused serious traffic congestion, particularly in the 1950s and 1960s when the railways were still quite active. The completion of the Lindsay
Bypass in 1958 removed some of the most serious traffic bottlenecks in Central Ontario. See an
Enlarged Photo Here. (Photograph taken on October 10, 2010 - © Cameron Bevers) Right - Facing east along the Lindsay Bypass (Hwy 7 & Hwy 35) towards the Ops Township Railway Overhead. (Photograph taken on October 10, 2010 - © Cameron Bevers) 

Left - Approaching the Hwy 7B & Hwy 35 North Junction on the Lindsay Bypass (Hwy 7 & Hwy 35), facing west. (Photograph taken on October 10, 2010 - © Cameron Bevers) Right - Green guide sign marking the upcoming Hwy 7B & Hwy 35 North Junction on the Westbound Lindsay Bypass (Hwy 7 & Hwy 35). (Photograph taken on October 10, 2010 - © Cameron Bevers) 

Left - Junction assembly on the Westbound Lindsay Bypass (Hwy 7 & Hwy 35) at the Hwy 7B & Hwy 35 North Junction. (Photograph taken on October 10, 2010 - © Cameron Bevers) Right - Facing east along the Lindsay Bypass (Hwy 7 & Hwy 35) towards Peterborough, east of the Hwy 7B Junction. The Lindsay Bypass was completed and officially opened to traffic on October 10, 1958, following nearly three years of construction. (Photograph taken on October 10, 2010 - © Cameron Bevers) 

Left - Turn-off guide signs for the Hwy 7B & Hwy 35 North Junction on the Westbound Lindsay Bypass (Hwy 7 & Hwy 35). (Photograph taken on October 10, 2010 - © Cameron Bevers) Right - Facing west at the Hwy 7B & Hwy 35 North Junction on the Westbound Lindsay Bypass (Hwy 7 & Hwy 35). See an Enlarged Photo Here. (Photograph taken on October 10, 2010 - © Cameron Bevers) 

Left - Distance sign on the Lindsay Bypass (Hwy 7 & Hwy 35), facing east. (Photograph taken on October 10, 2010 - © Cameron Bevers) Right - Facing west along the Lindsay Bypass (Hwy 7 & Hwy 35) towards the Hwy 7B & Hwy 35 North Junction. (Photograph taken on October 10, 2010 - © Cameron Bevers) 

Left - Facing east along Hwy 7B and Hwy 35 from the Hwy 7 Junction. Note the former Hwy 7 alignment near the Honda dealership at right, which once crossed a
railway line at-grade. The newer diversion at left carries the highway over a grade separation. The railway line below the structure was subsequently abandoned. See
an Enlarged Photo Here. (Photograph taken on October 10, 2010 - © Cameron Bevers) Right - Facing east towards Peterborough along the Lindsay Bypass (Hwy 7 & Hwy 35) from the Hwy 7B Junction. (Photograph taken on October 10, 2010 - © Cameron Bevers) 

Left - Junction assembly at the western terminus of Hwy 7B at the Hwy 7 Junction. At the traffic signals, Hwy 35 turns left and runs concurrently with Hwy 7
along the Lindsay Bypass for 5 km before resuming its route south towards Newcastle. (Photograph taken on October 10, 2010 - © Cameron Bevers) Right - Green guide sign marking the Hwy 7 Junction on Hwy 7B & Hwy 35. Note the abandoned alignment of Hwy 7 at right, which was closed off to traffic in 1958, once the Lindsay Bypass was completed. (Photograph taken on October 10, 2010 - © Cameron Bevers) 

Left - Facing east at the Hwy 7B & Hwy 35 North Junction on Eastbound Hwy 7 near Lindsay. See an
Enlarged Photo Here. (Photograph taken on October 10, 2010 - © Cameron Bevers) Right - Facing east along Hwy 7B & Hwy 35 from the Hwy 7 Junction west of Lindsay. The routes of Hwy 7B & Hwy 35 run concurrently for 800 metres, before Hwy 35 turns north again towards Fenelon Falls and Minden. Hwy 7B then continues east into Downtown Lindsay via Kent Street. (Photograph taken on October 10, 2010 - © Cameron Bevers) 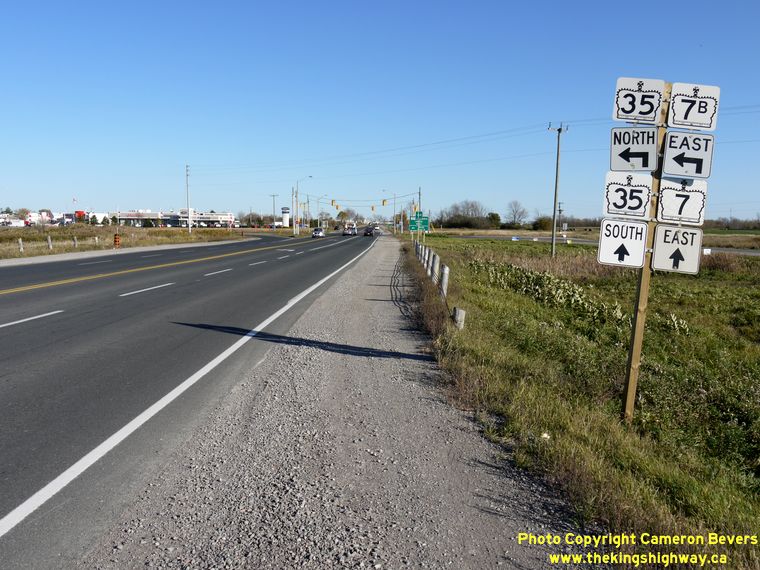

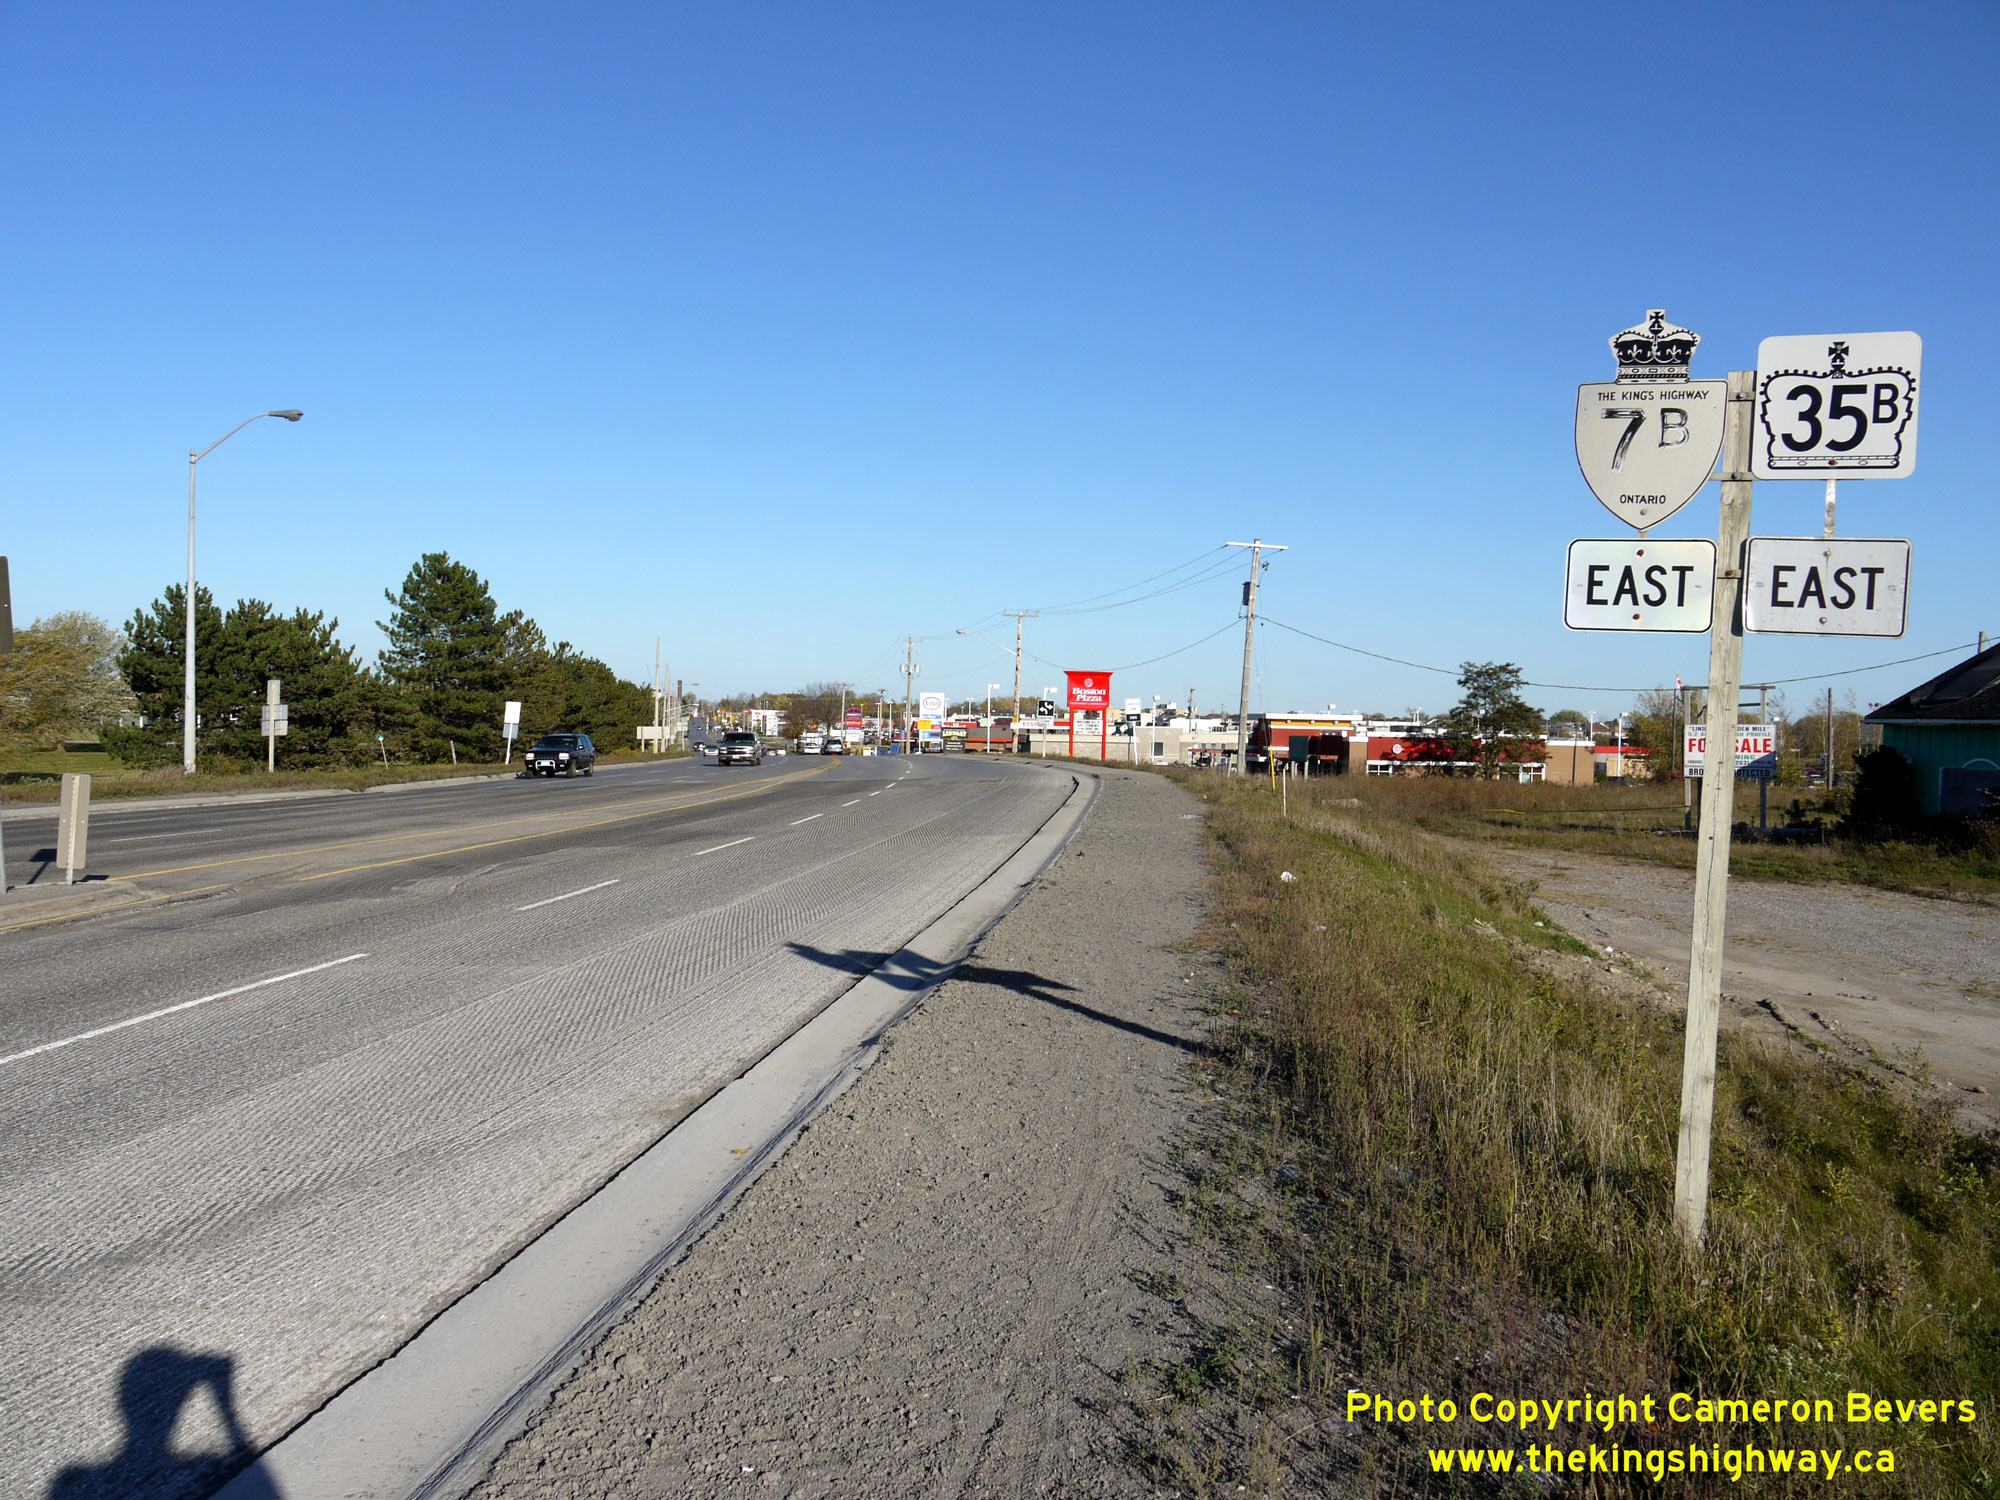
Left - Hwy 7B & Hwy 35 North Junction Assembly on Eastbound Hwy 7 near Lindsay. Until the 1990s, Lindsay had three different "B" Business Routes leading
into downtown from adjacent Hwy 7, Hwy 35 and Hwy 36. Although many of these business routes are still signed today, only a small section of Hwy 7B west of Lindsay
is still under provincial jurisdiction. (Photograph taken on October 10, 2010 - © Cameron Bevers) Right - Turn-off guide signs for the Hwy 7B & Hwy 35 North Junction on Eastbound Hwy 7 near Lindsay. The route of Hwy 7B generally follows the original alignment of Hwy 7 through Lindsay, before the Lindsay Bypass was opened to traffic in 1958. The route of Hwy 7B is still signed through Lindsay, although the only portion of the highway that is under provincial jurisdiction is the short 800-metre section that runs concurrently with Hwy 35 North. (Photograph taken on October 10, 2010 - © Cameron Bevers) 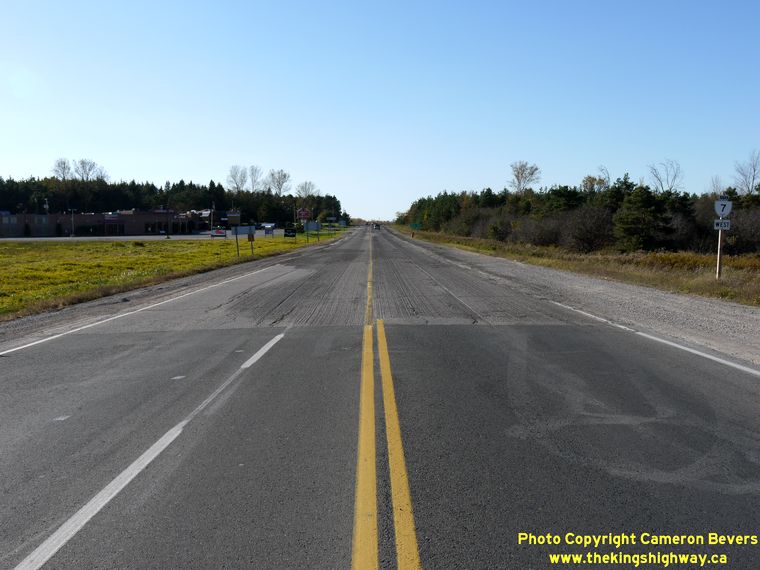

Left - Facing west along Hwy 7 towards Oakwood from the Hwy 7B & Hwy 35 North Junction near Lindsay. (Photograph taken on October 10, 2010 - © Cameron Bevers) Right - Facing east along Hwy 7 towards the Hwy 7B & Hwy 35 North Junction near Lindsay. (Photograph taken on October 10, 2010 - © Cameron Bevers) 

Left - Approaching Lindsay on Hwy 7, facing east towards the Hwy 7B & Hwy 35 North Junction. (Photograph taken on October 10, 2010 - © Cameron Bevers) Right - Green guide sign marking the upcoming Hwy 7B & Hwy 35 North Junction on Eastbound Hwy 7. (Photograph taken on October 10, 2010 - © Cameron Bevers) 

Left - Guide sign marking the Hwy 35 North Junction on Hwy 35 & Hwy 7B, facing east towards Lindsay. (Photograph taken on October 10, 2010 - © Cameron Bevers) Right - Junction assembly approaching the Hwy 35 & Hwy 7B Junction near Lindsay, facing east. (Photograph taken on October 10, 2010 - © Cameron Bevers) 
Left - Facing east across the Lindsay Overhead on Hwy 35 & Hwy 7B. (Photograph taken on October 10, 2010 - © Cameron Bevers) Right - Northern side of the Lindsay Overhead on Hwy 35 & Hwy 7B. This tunnel-type concrete rigid frame structure was completed in 1957, during the construction of the Lindsay Bypass. Originally, it spanned a Canadian Pacific Railway line. The railway was abandoned many years ago, making this structure redundant. (Photograph taken on October 10, 2010 - © Cameron Bevers) 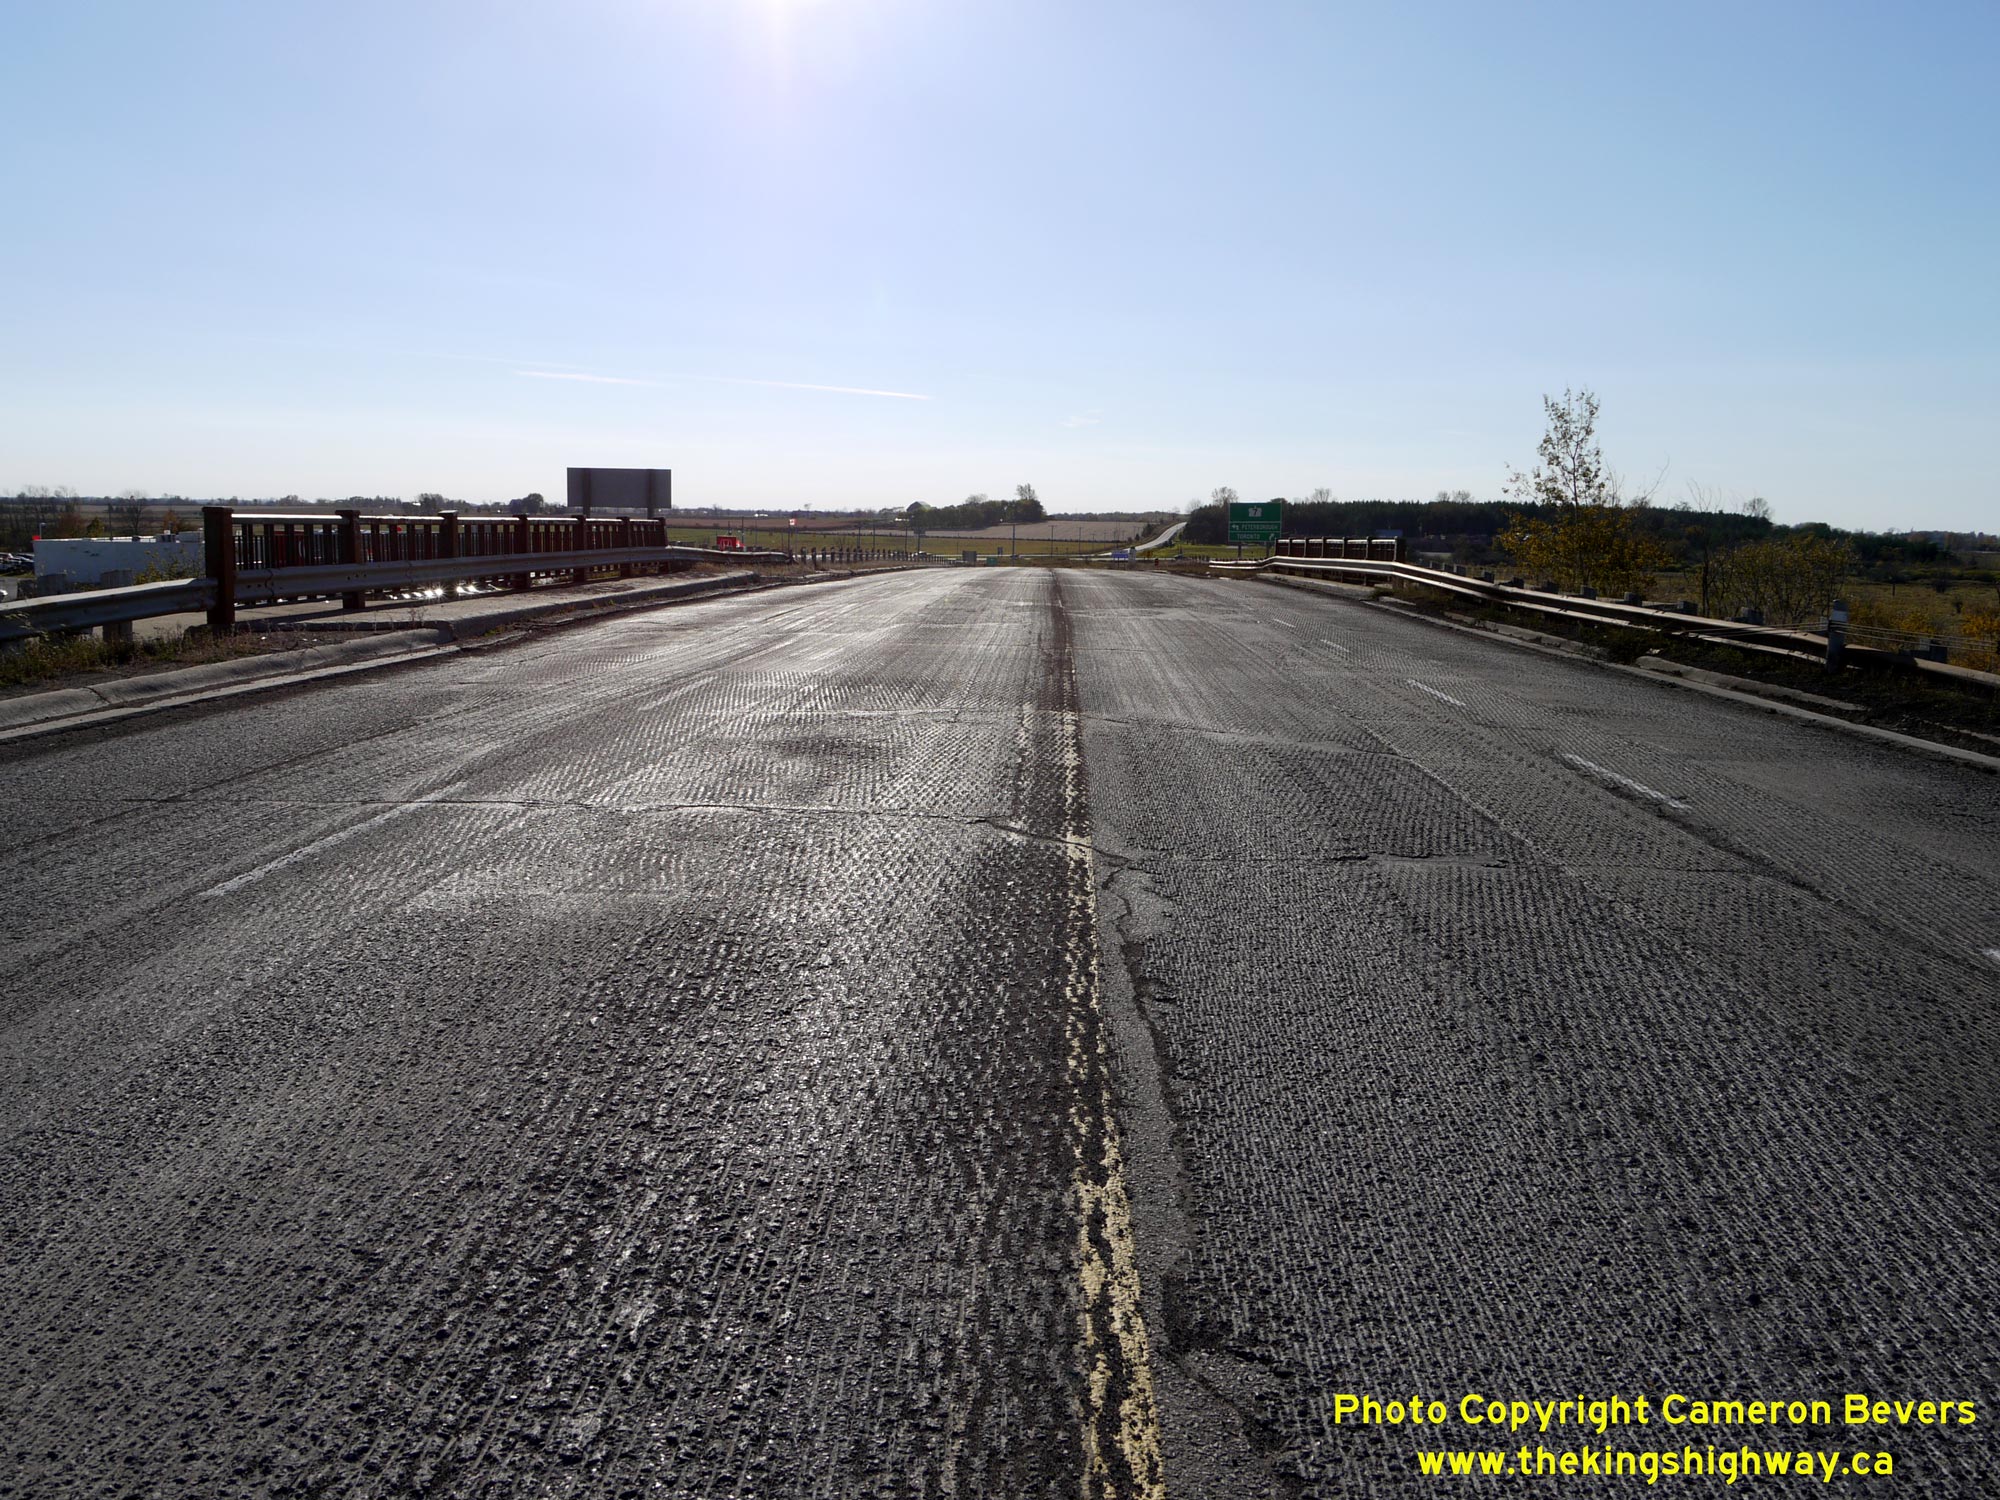

Left - View of the Lindsay Overhead on Hwy 35 & Hwy 7B, facing west from the Hwy 35 North and Hwy 35B Junction in Lindsay. See an
Enlarged Photo Here. (Photograph taken on October 10, 2010 - © Cameron Bevers) Right - The railway tracks below the Lindsay Overhead were removed decades ago. (Photograph taken on October 10, 2010 - © Cameron Bevers) 

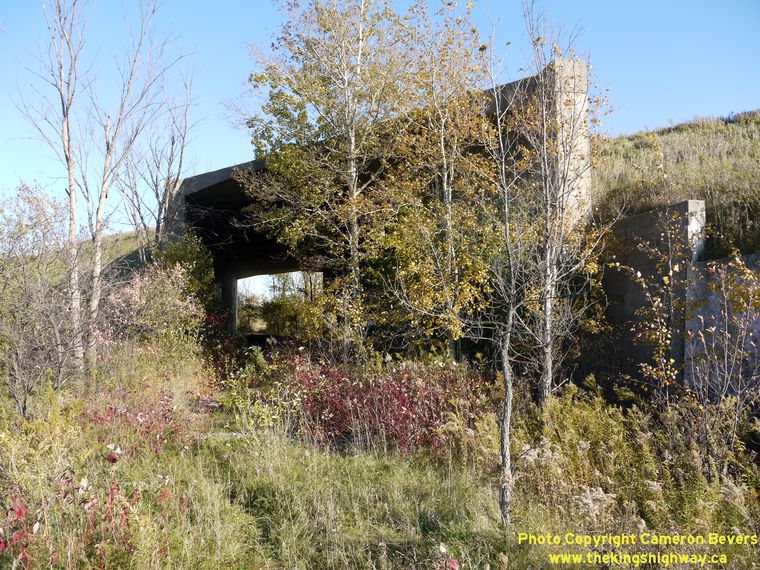
Left - The Lindsay Overhead on Hwy 35 & Hwy 7B is one of four abandoned railway structures on the various legs of the Lindsay Bypass. The overgrown portal
at the southern end of the Lindsay Overhead adds to the ghostly aura of this interesting historic structure. (Photograph taken on October 10, 2010 - © Cameron Bevers) Right - The former railway line passed below the highway at a considerable skew. As a result, a substantial portion of the bridge deck is actually not occupied by the roadway itself. (Photograph taken on October 10, 2010 - © Cameron Bevers) 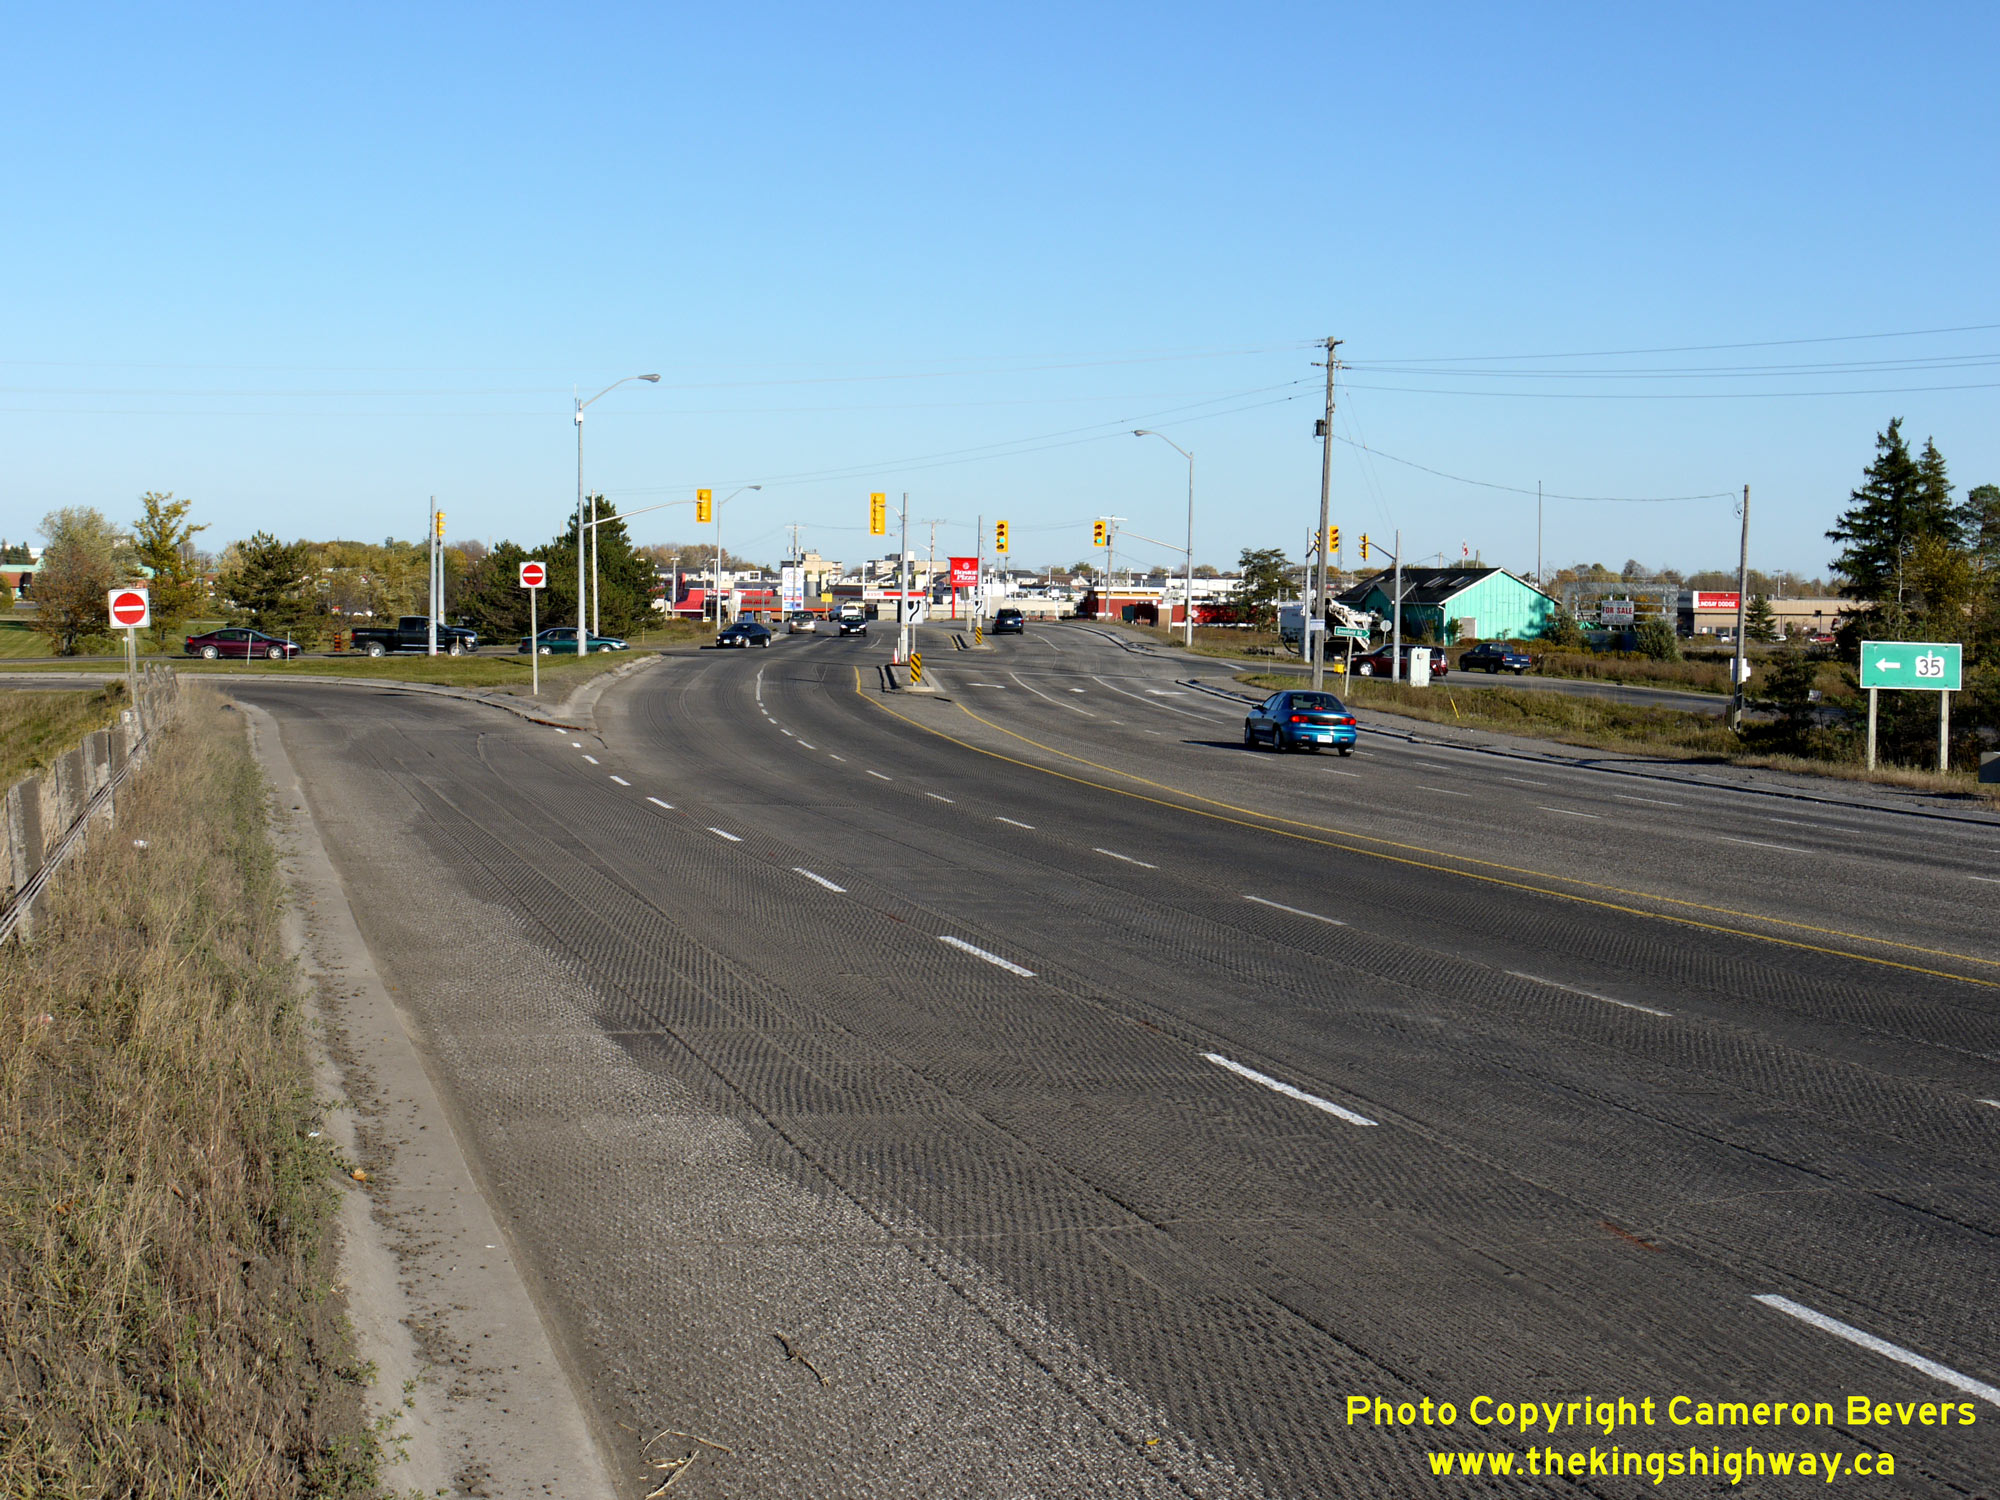
Left - Junction of Hwy 35 North and Hwy 7B, facing east towards Lindsay. At this junction, Lindsay's Hwy 35B Business Route also begins. It follows Kent
Street into Downtown Lindsay, concurrently with Hwy 7B. The route of Hwy 35 turns left here off of Hwy 7B, and resumes its route north towards Fenelon Falls. See an
Enlarged Photo Here. (Photograph taken on October 10, 2010 - © Cameron Bevers) Right - Dual King's Highway route markers for Hwy 7B & Hwy 35B on Kent Street approaching Lindsay. See an Enlarged Photo Here. (Photograph taken on October 10, 2010 - © Cameron Bevers) 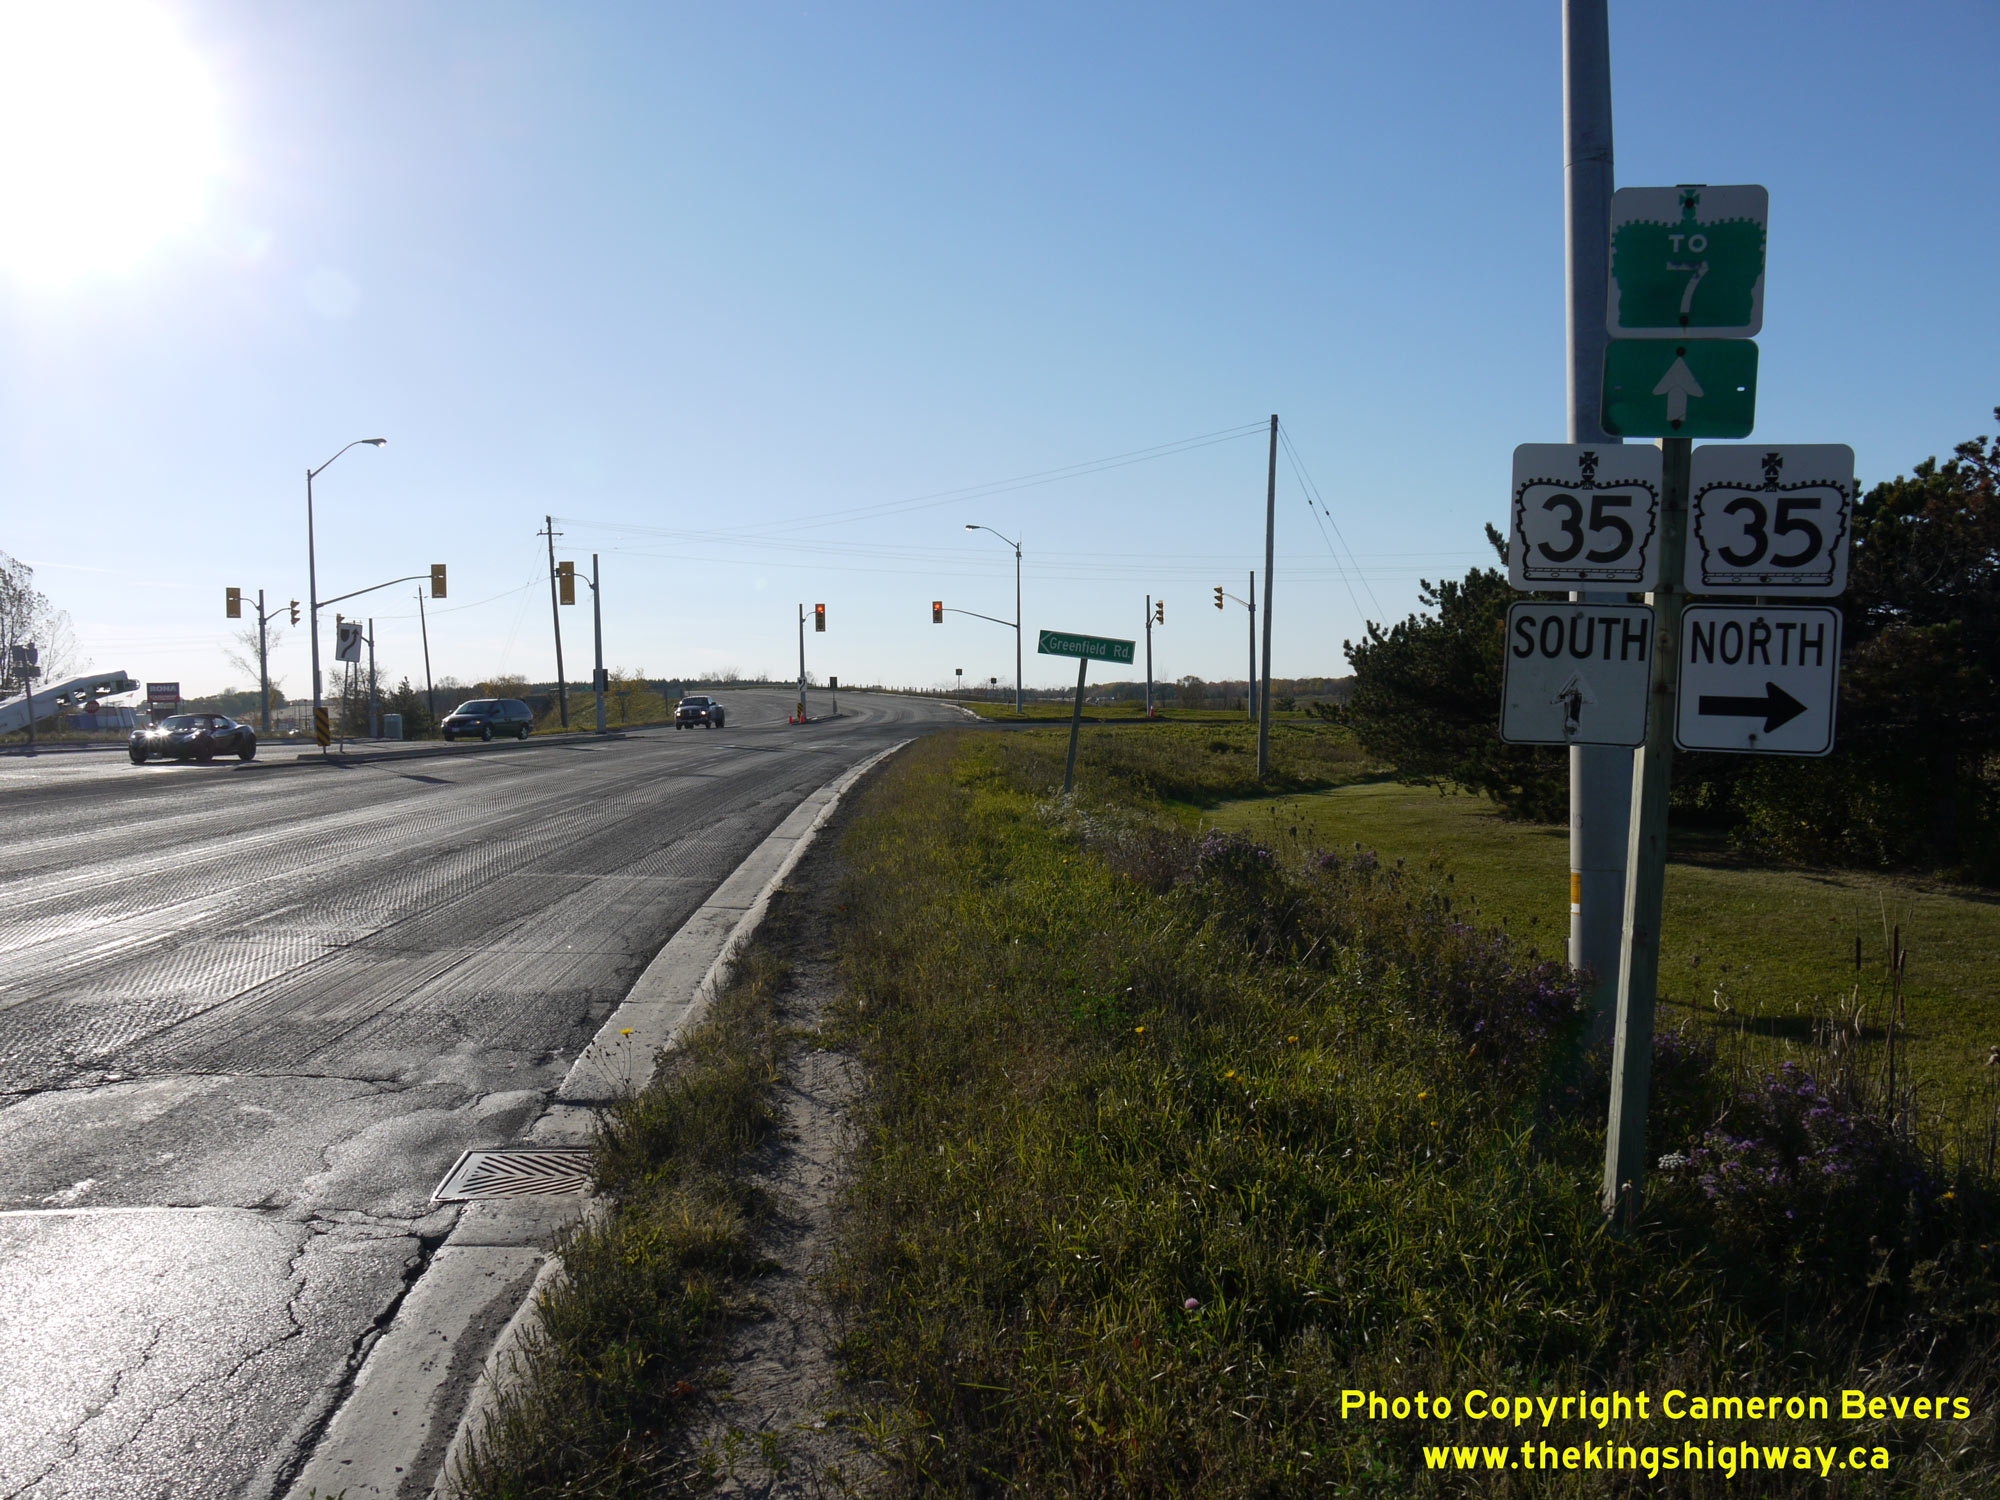

Left - Facing west along Kent Street (Hwy 7B & Hwy 35B) towards the Hwy 35 Junction. Note that Hwy 7 is trailblazed along the route of Hwy 35 South.
Although it is not signed, this intersection marks the western terminus of Hwy 35B. However, the route of Hwy 7B continues west for another 800 metres before
terminating at nearby Hwy 7. See an Enlarged Photo Here. (Photograph taken on October 10, 2010 - © Cameron Bevers) Right - Looking north from the Lindsay Overhead. The route of Hwy 35 can be seen heading north from Lindsay towards Fenelon Falls and Minden. See an Enlarged Photo Here. (Photograph taken on October 10, 2010 - © Cameron Bevers) 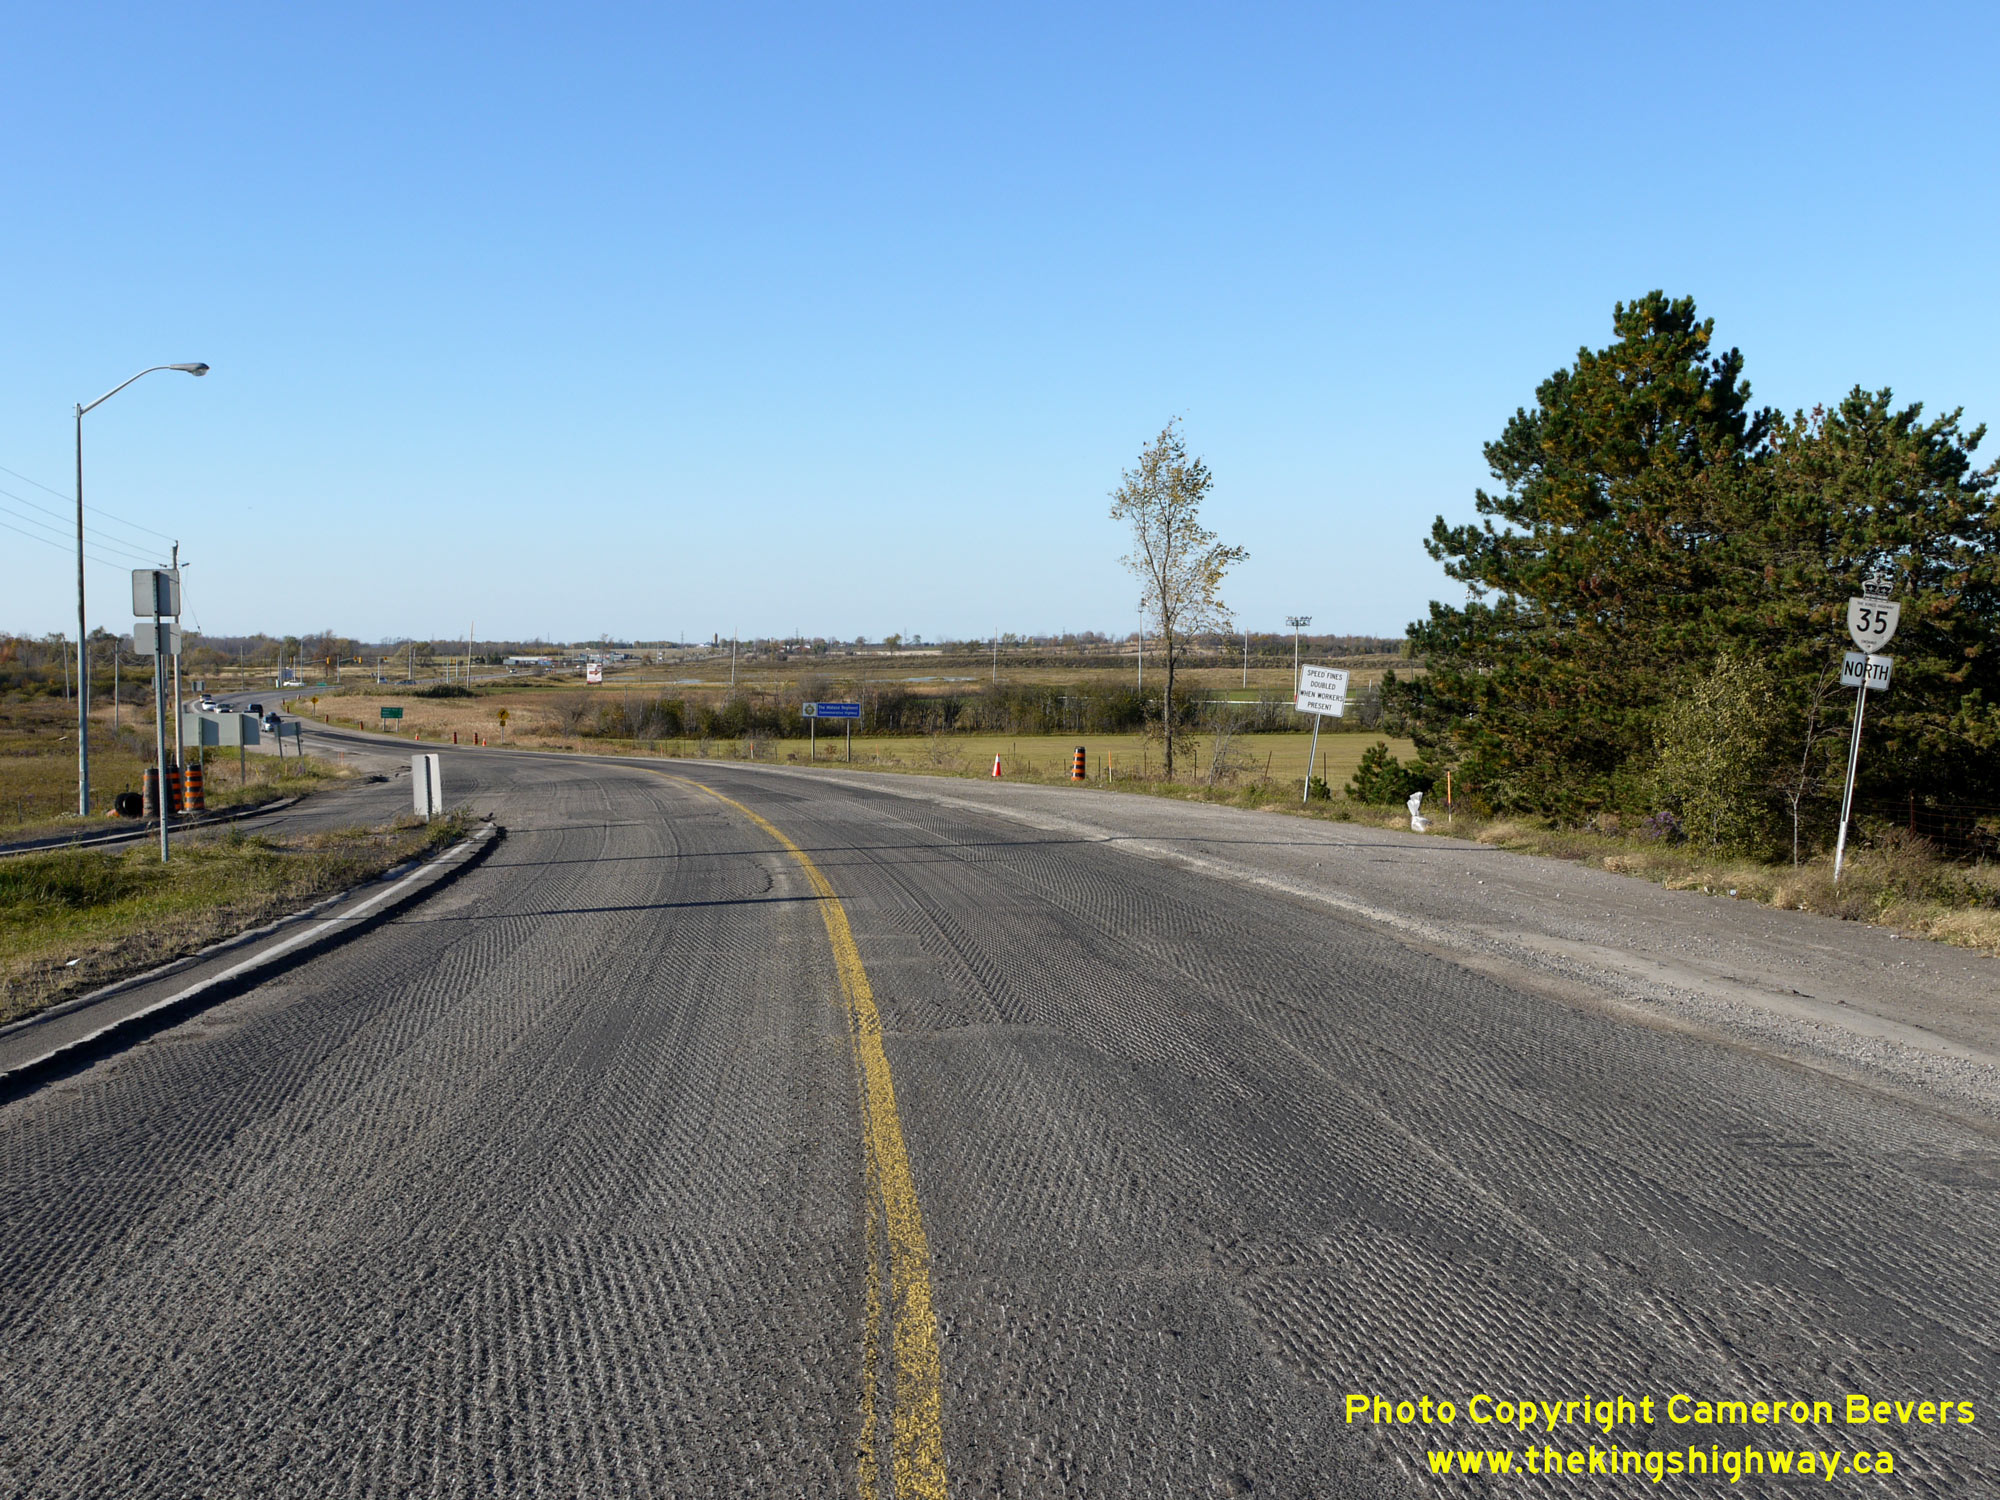

Left - Facing north along Hwy 35 from the Hwy 7B & Hwy 35B Junction in Lindsay. See an
Enlarged Photo Here. (Photograph taken on October 10, 2010 - © Cameron Bevers) Right - Midland Regiment Commemorative Highway sign on Northbound Hwy 35 in Lindsay. (Photograph taken on October 10, 2010 - © Cameron Bevers) 
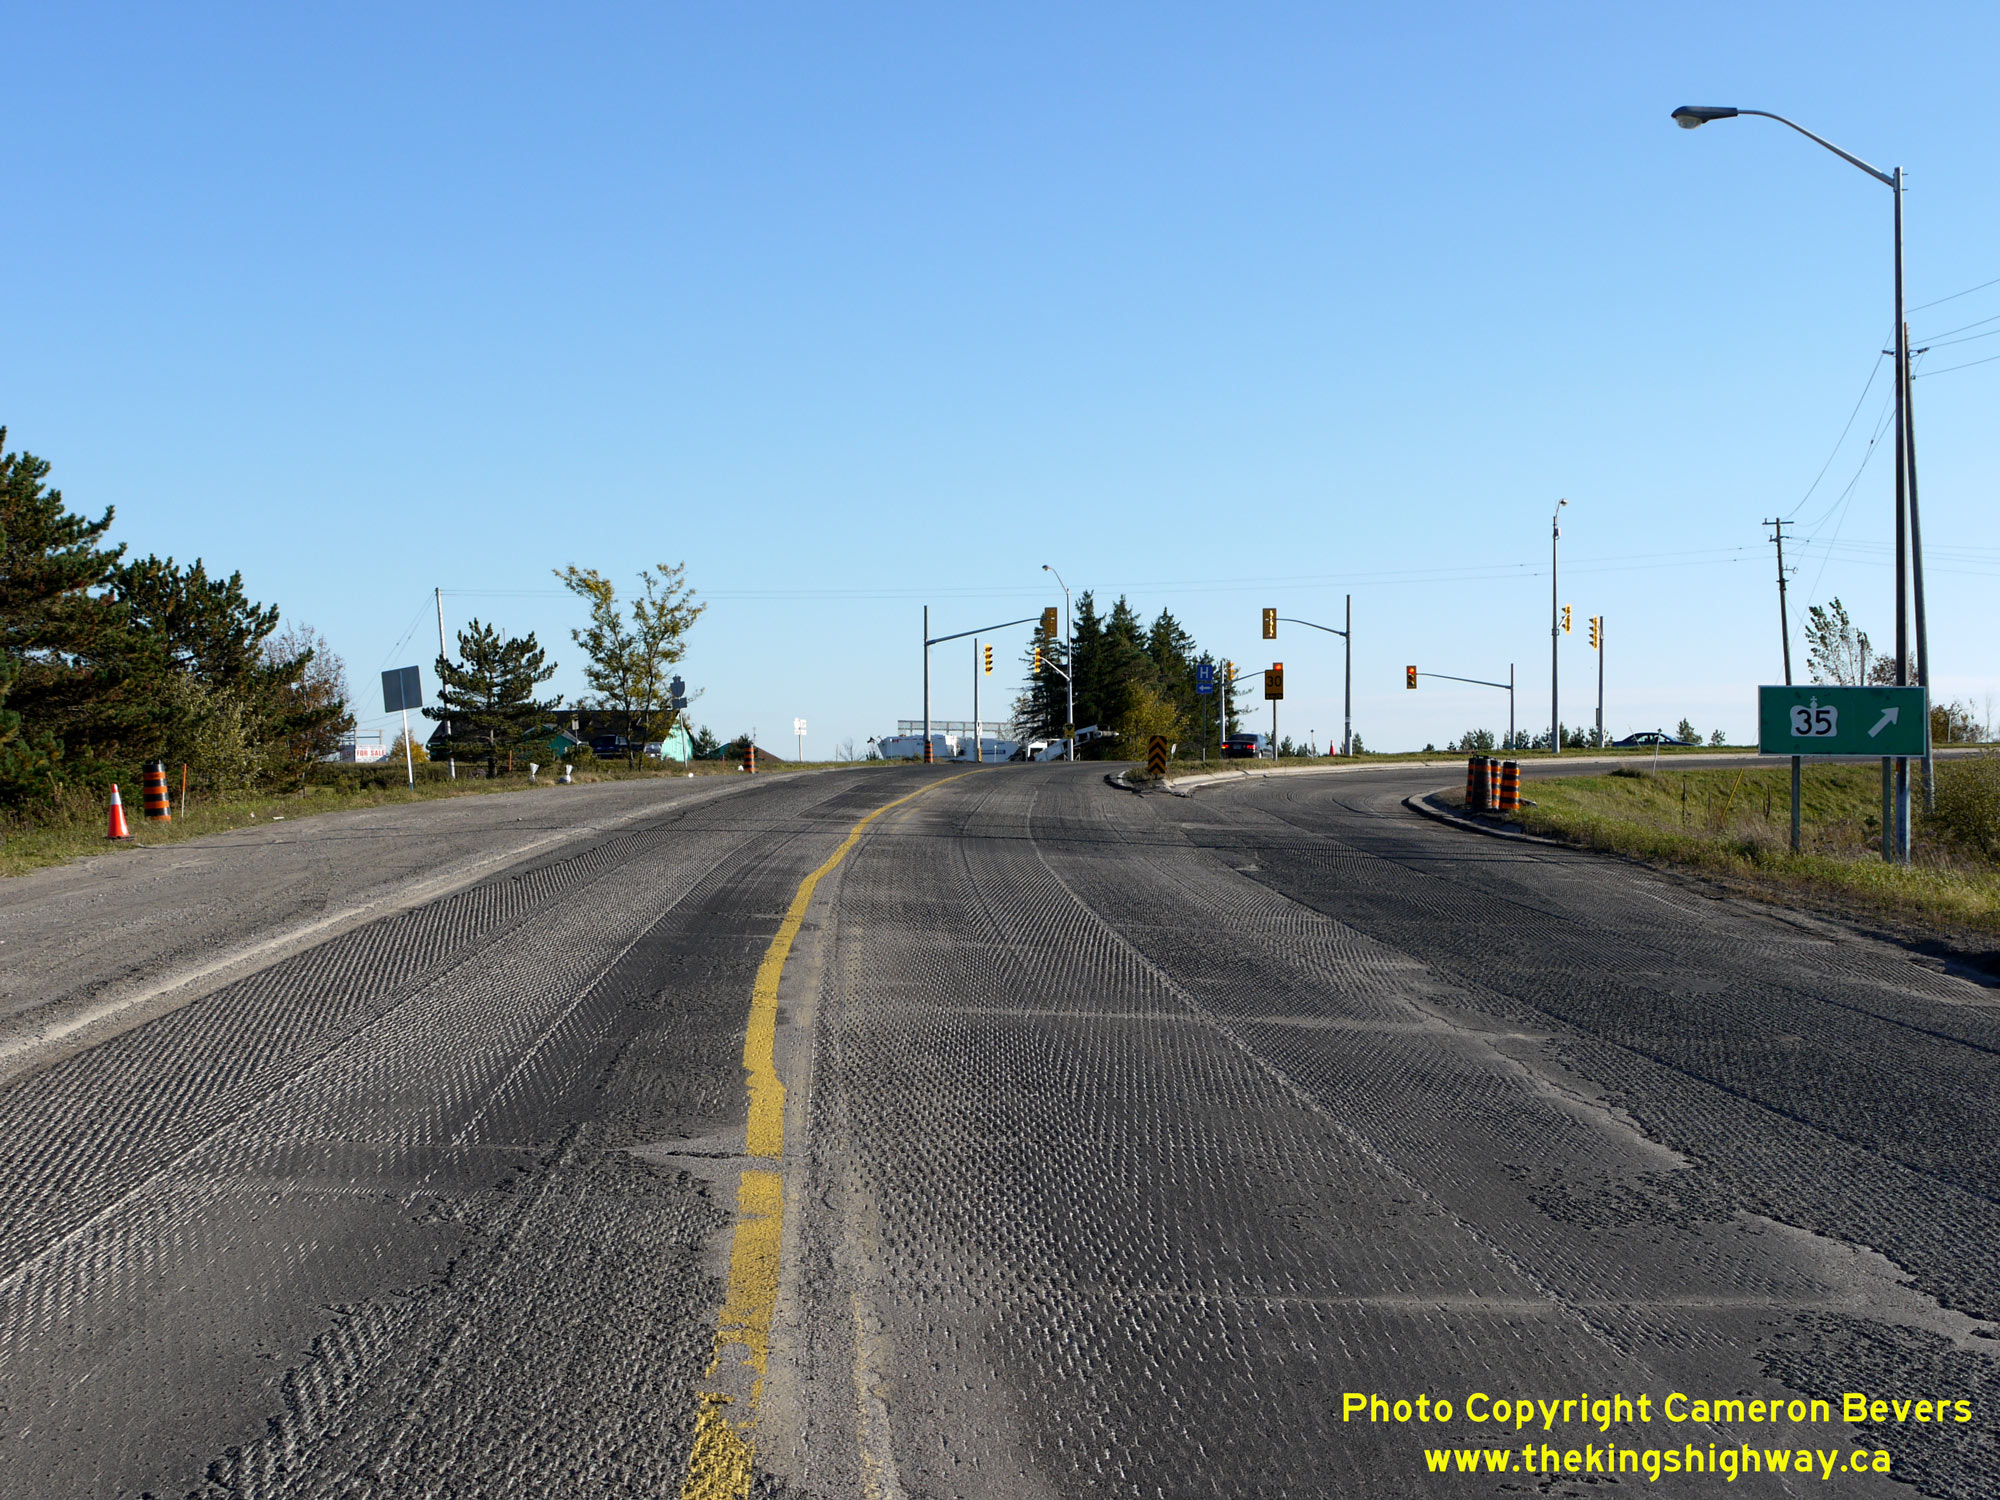
Left - Close-up of the Midland Regiment Commemorative Highway sign. This is one of several commemorative highway dedications made in recent years. (Photograph taken on October 10, 2010 - © Cameron Bevers) Right - Facing south along Hwy 35 towards the Kent Street Junction (Hwy 7B & Hwy 35B) in Lindsay. A right-turn channelization carries Southbound Hwy 35 traffic out to the nearby Lindsay Bypass (Hwy 7 & Hwy 35). See an Enlarged Photo Here. (Photograph taken on October 10, 2010 - © Cameron Bevers) 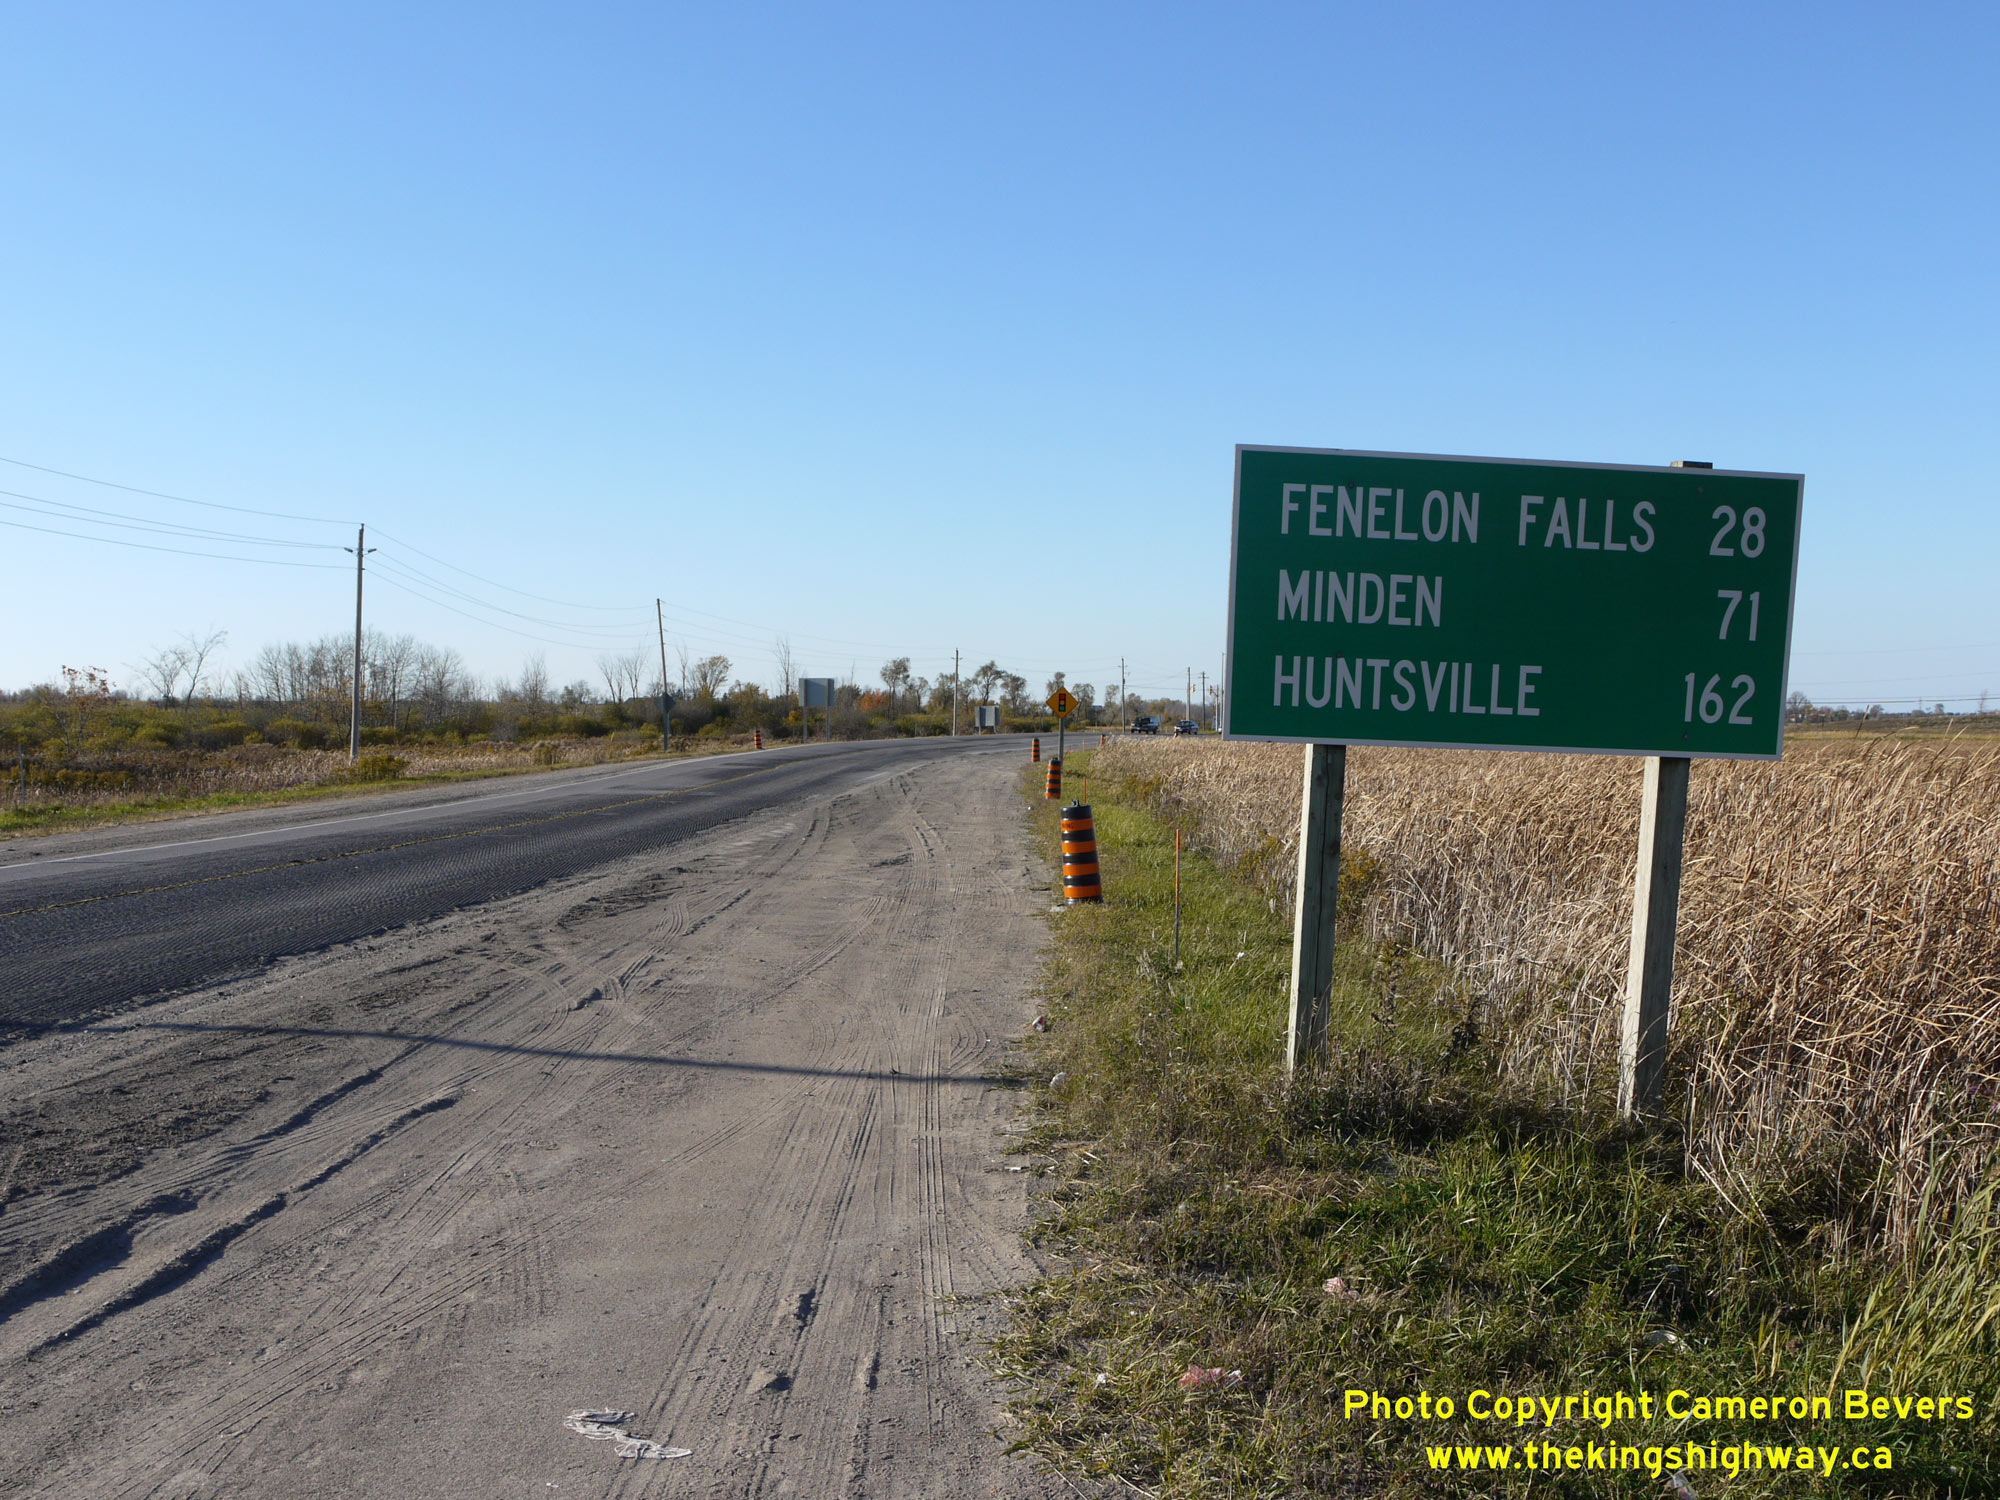
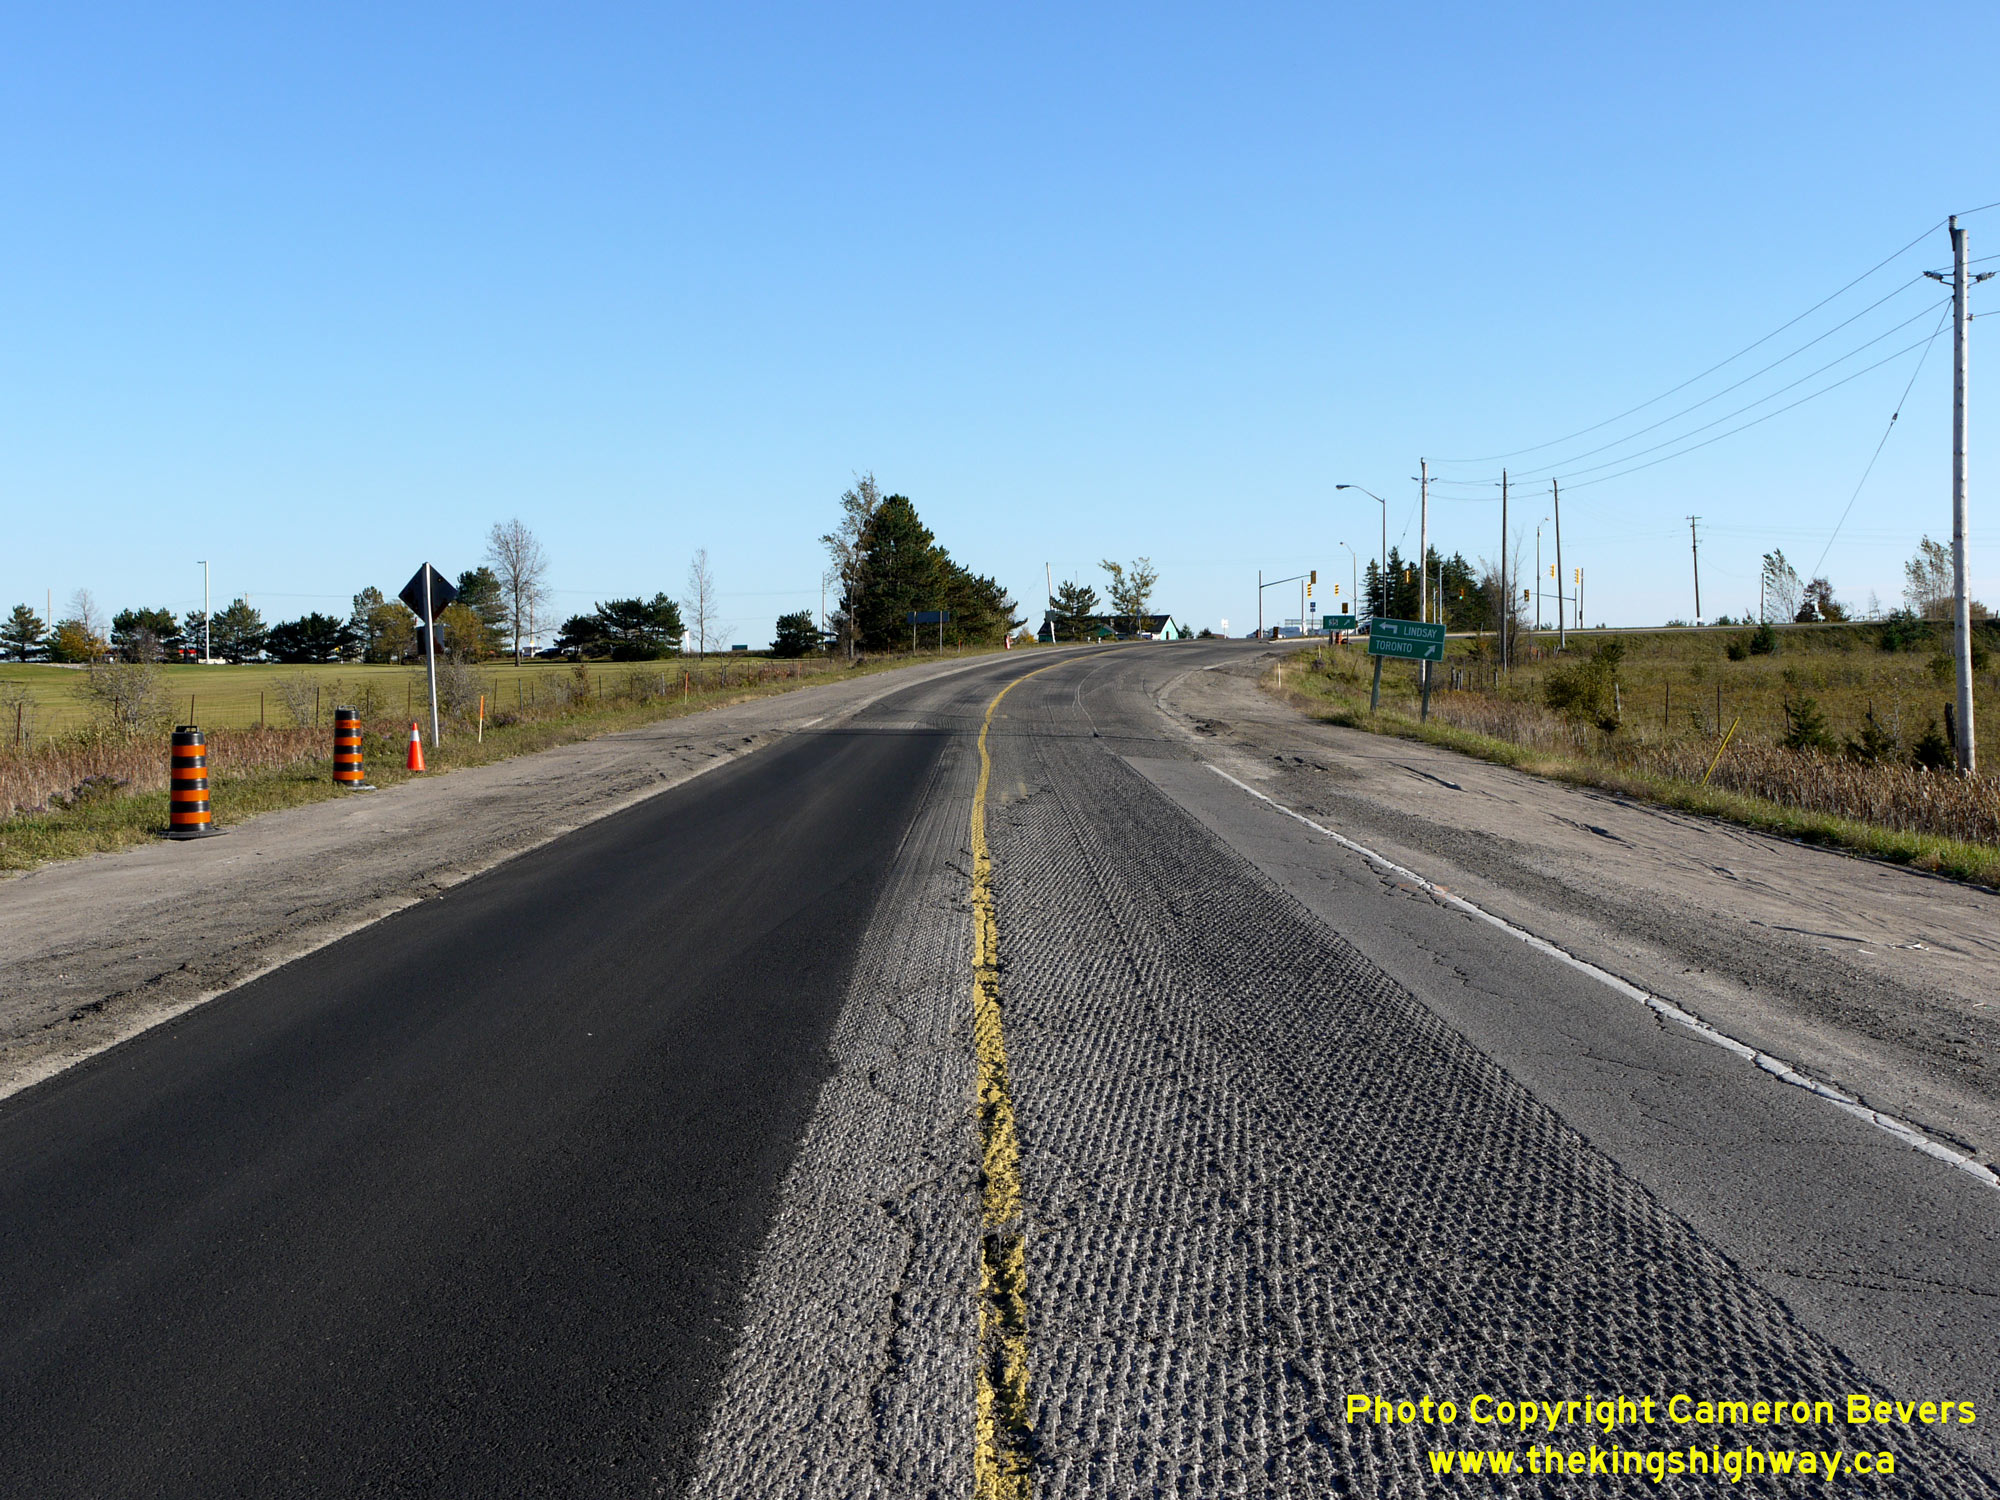
Left - Distance sign on Northbound Hwy 35, north of the Kent Street Junction (Hwy 7B & Hwy 35B) in Lindsay. See an
Enlarged Photo Here. (Photograph taken on October 10, 2010 - © Cameron Bevers) Right - Approaching the Kent Street Junction (Hwy 7B & Hwy 35B) on Southbound Hwy 35 in Lindsay. See an Enlarged Photo Here. (Photograph taken on October 10, 2010 - © Cameron Bevers) 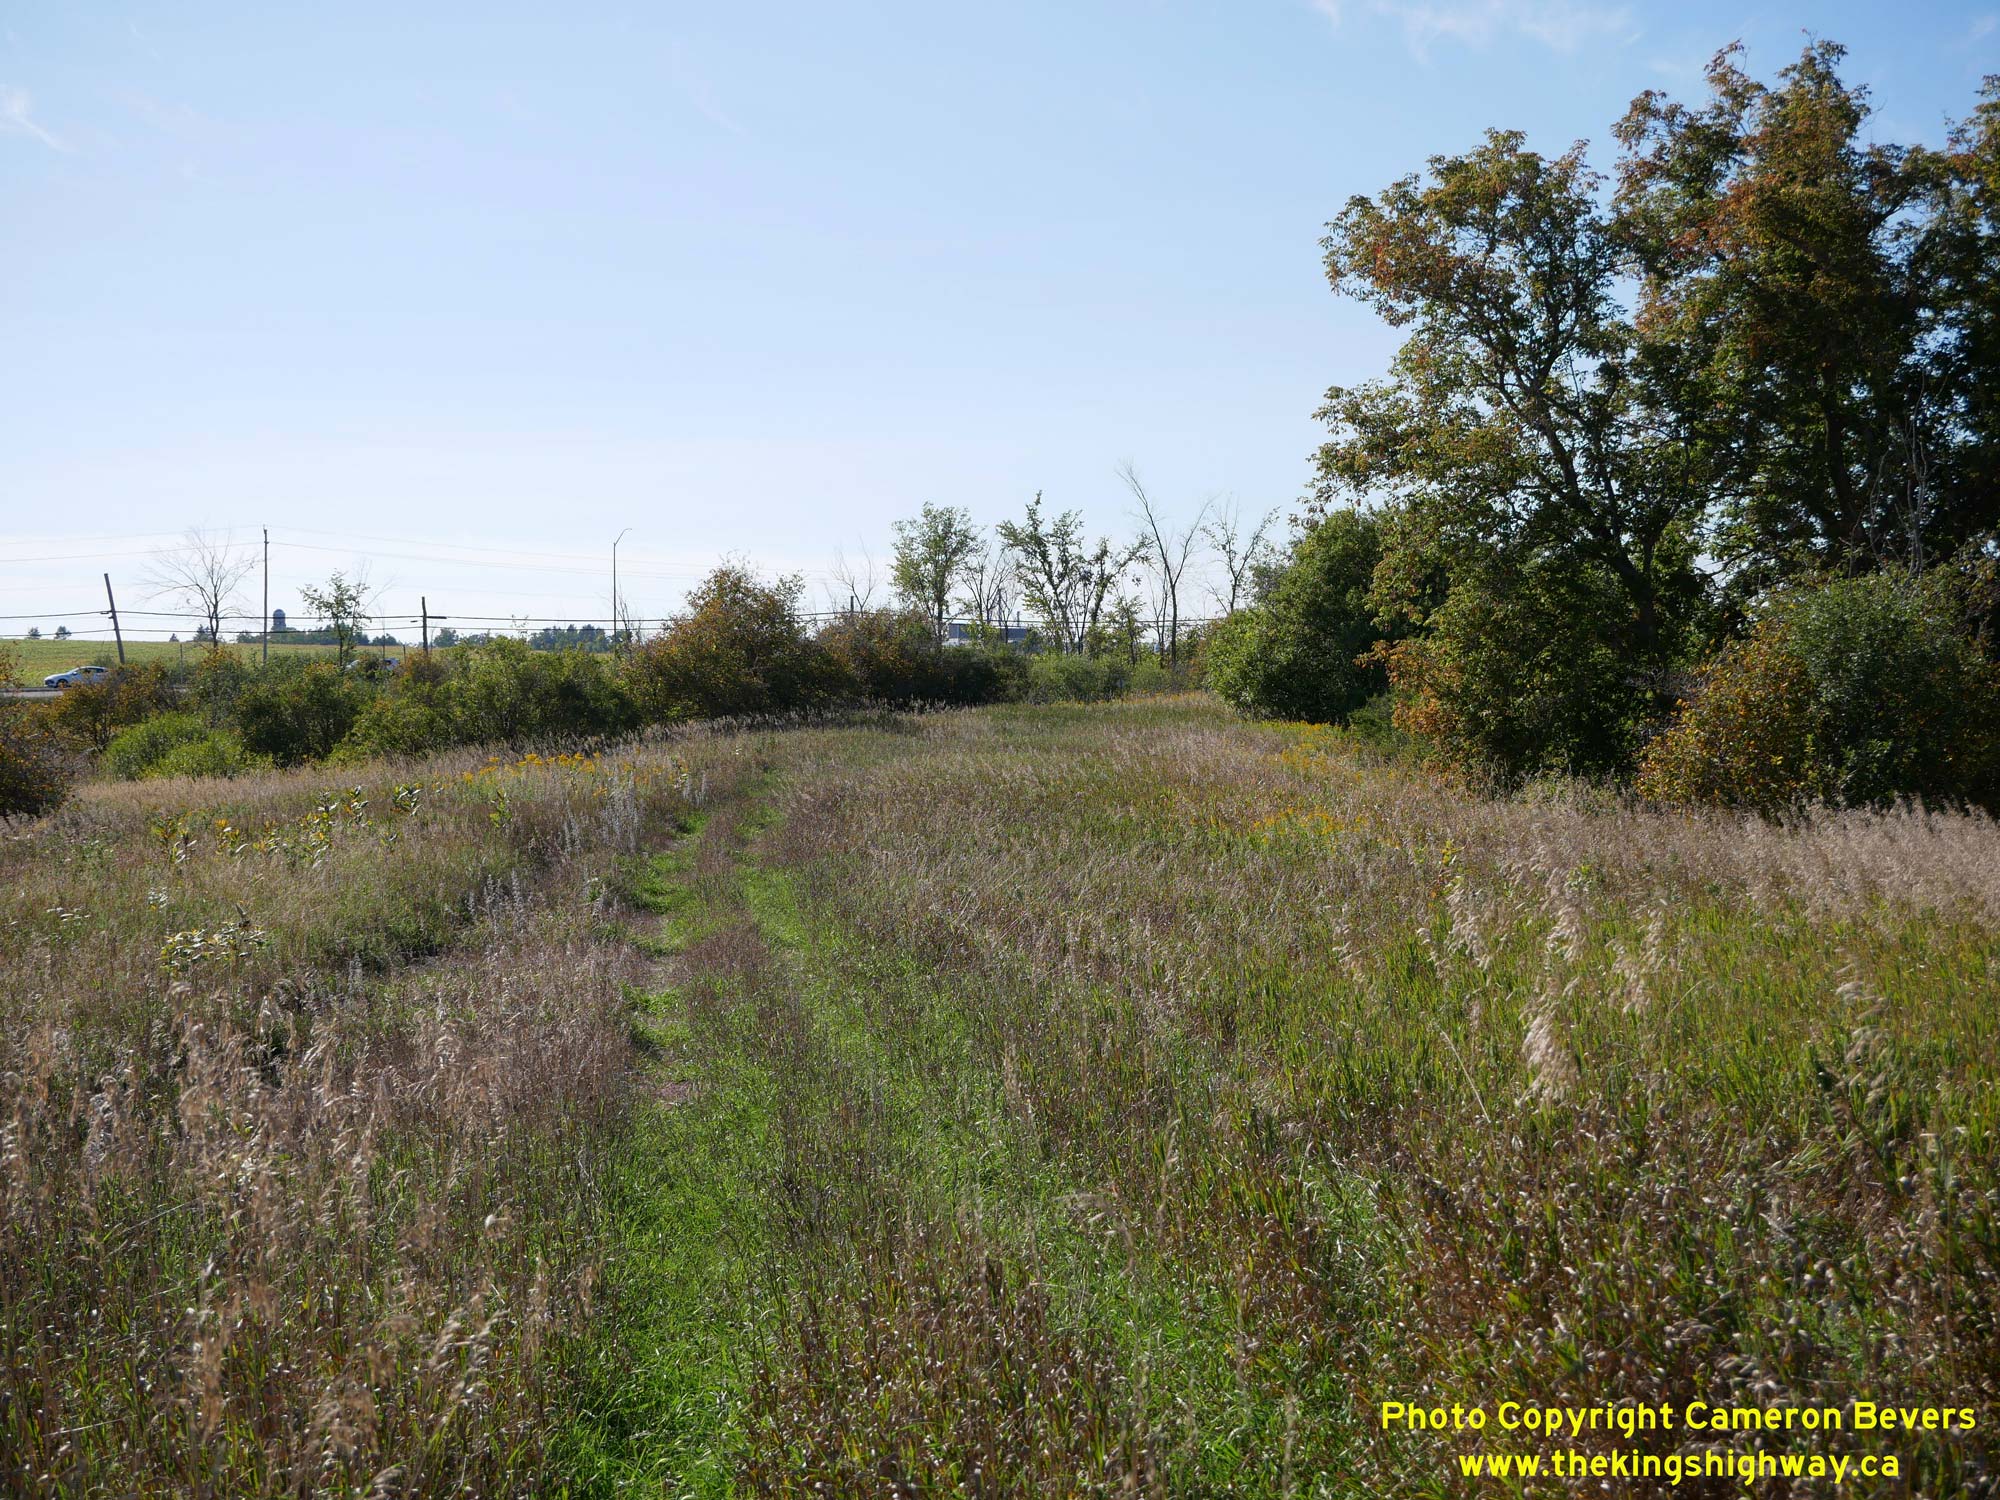
Above - Site of an abandoned highway curve near Hwy 35 and Thunder Bridge Road (Old Hwy 35B). This was one of two large curves constructed along Hwy 35 north
of Lindsay as part of a highway improvement project in 1938. Unlike a similar curve located a short distance to the east, this curve was abandoned altogether. Today,
only faint traces of the curve's location remain. The original highway pavement was buried in 1975 underneath surplus earth fill material excavated for a nearby
highway construction project. Traffic can be seen using the relocated Hwy 35 at far left. See an
Enlarged Photo Here. (Photograph taken on September 16, 2025 - © Cameron Bevers) 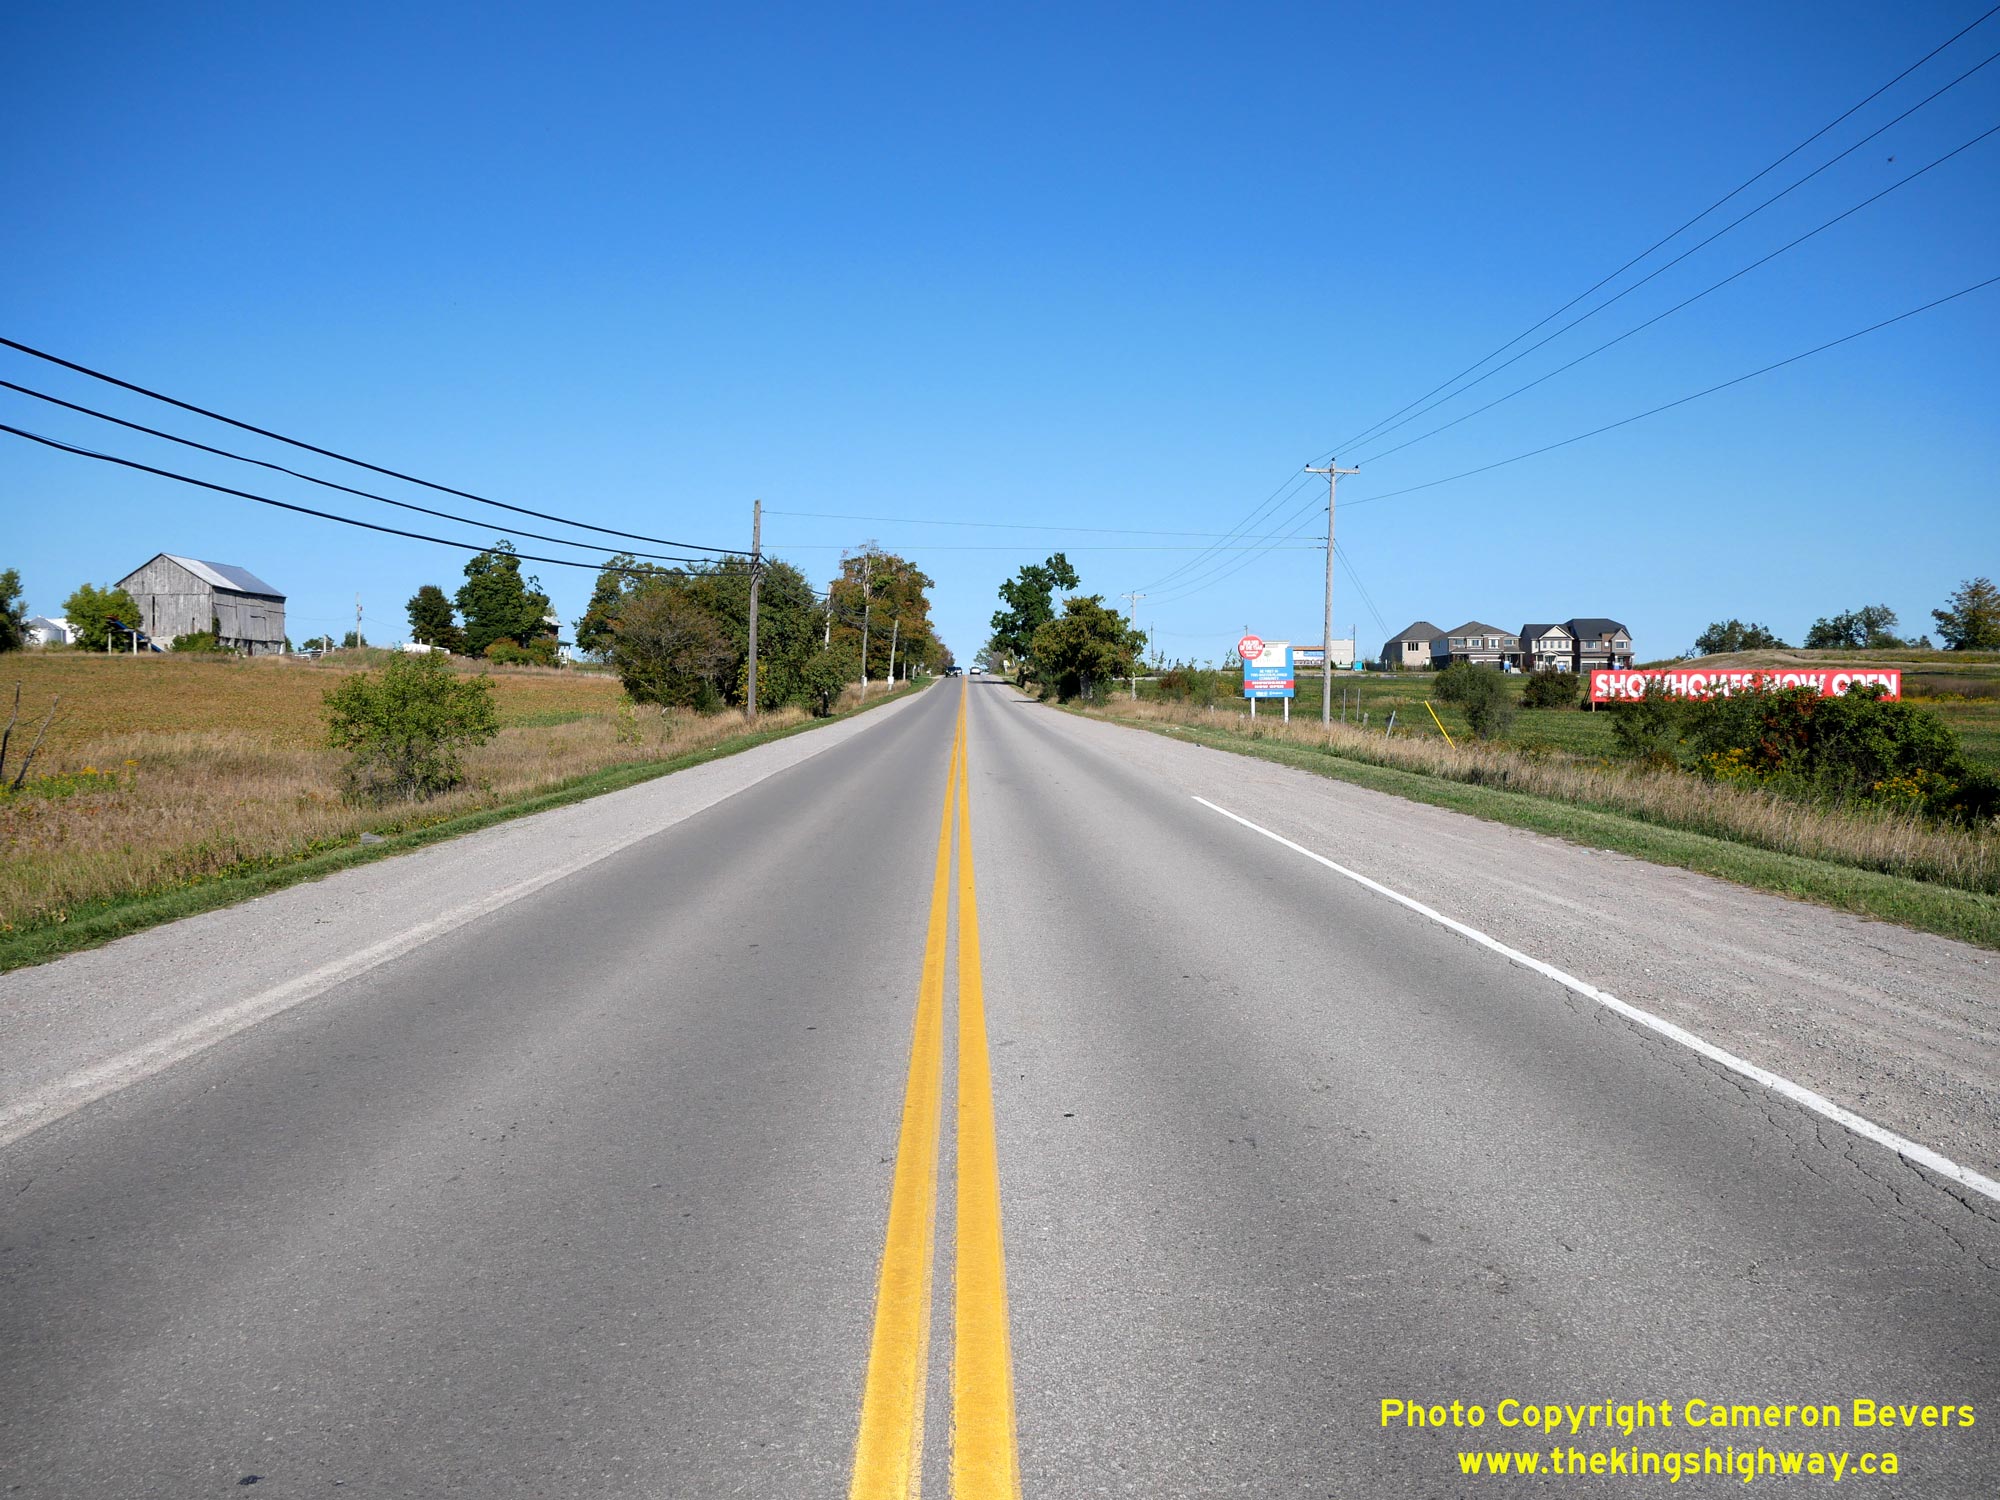
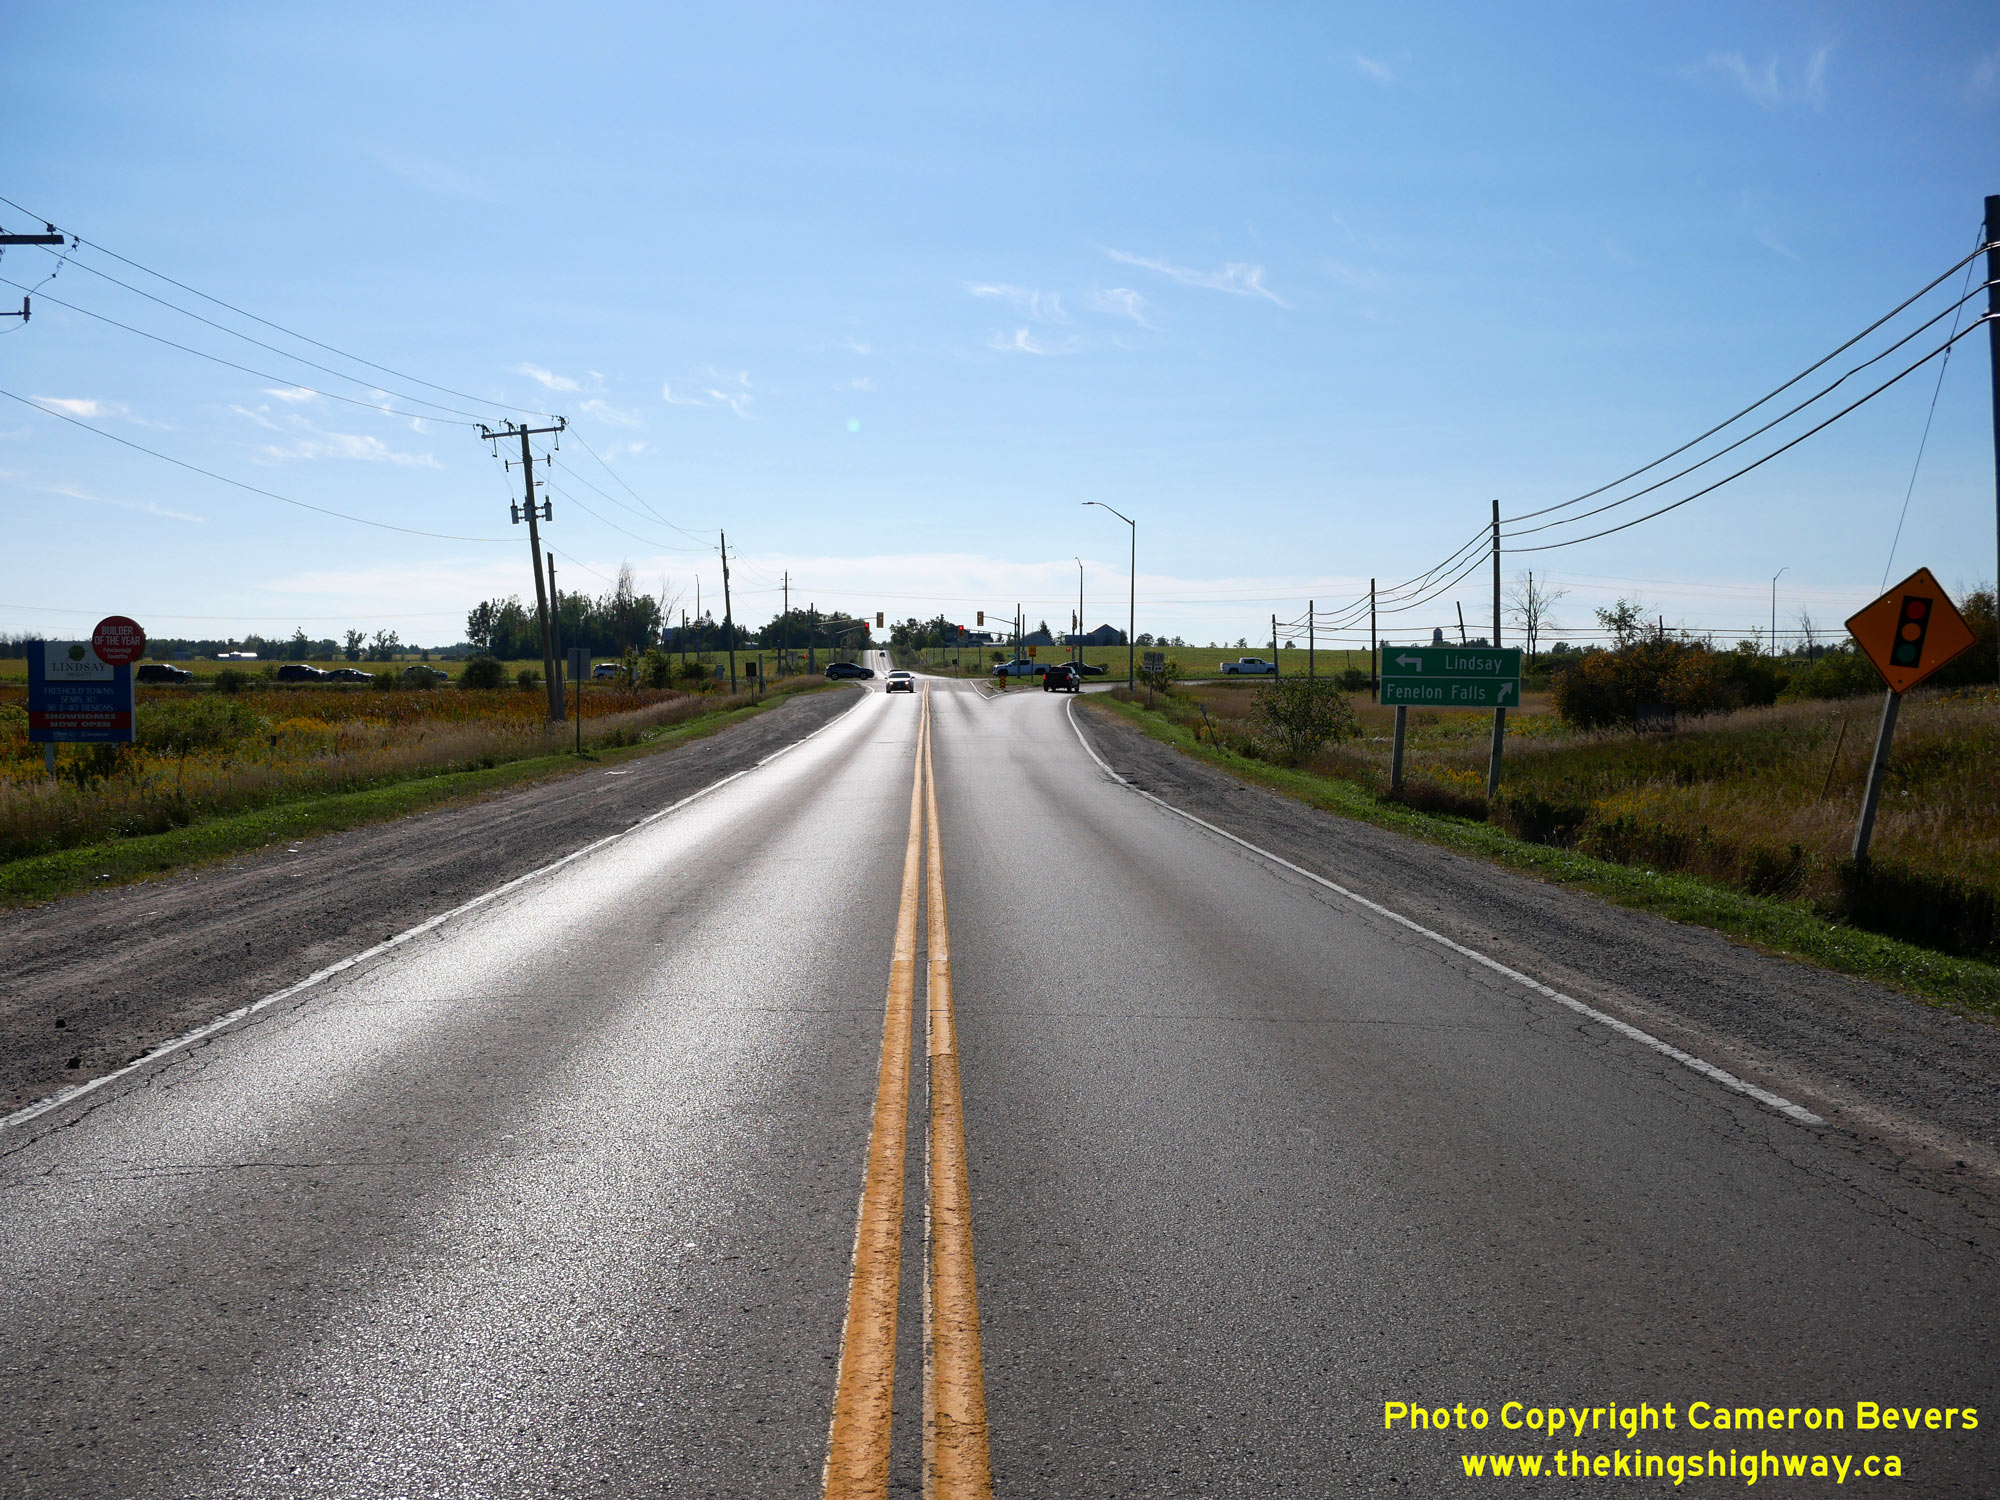
Left - Facing west along Thunder Bridge Road (Old Hwy 35B) from the Hwy 35 Junction. Here, a rural farm scene along the north side of Old Hwy 35B contrasts
with newer suburban residential development to the south. Lindsay is situated within the commuter belt of the Greater Toronto Area and has seen large residential
subdivisions developed in recent years. See an Enlarged Photo Here. (Photograph taken on September 16, 2025 - © Cameron Bevers) Right - Approaching the Hwy 35 Junction on Thunder Bridge Road (Old Hwy 35B) north of Lindsay, facing west. Historically, Hwy 35B ended at this junction. The destination guide signs at right are typically only used at the junction of two provincial highways, which provides careful observers with a hint that this intersecting road was once a King's Highway as well. At this junction, motorists can either turn left and head south along Hwy 35 towards Lindsay and Newcastle or turn right and head north along Hwy 35 towards Fenelon Falls and Minden. See an Enlarged Photo Here. (Photograph taken on September 16, 2025 - © Cameron Bevers) 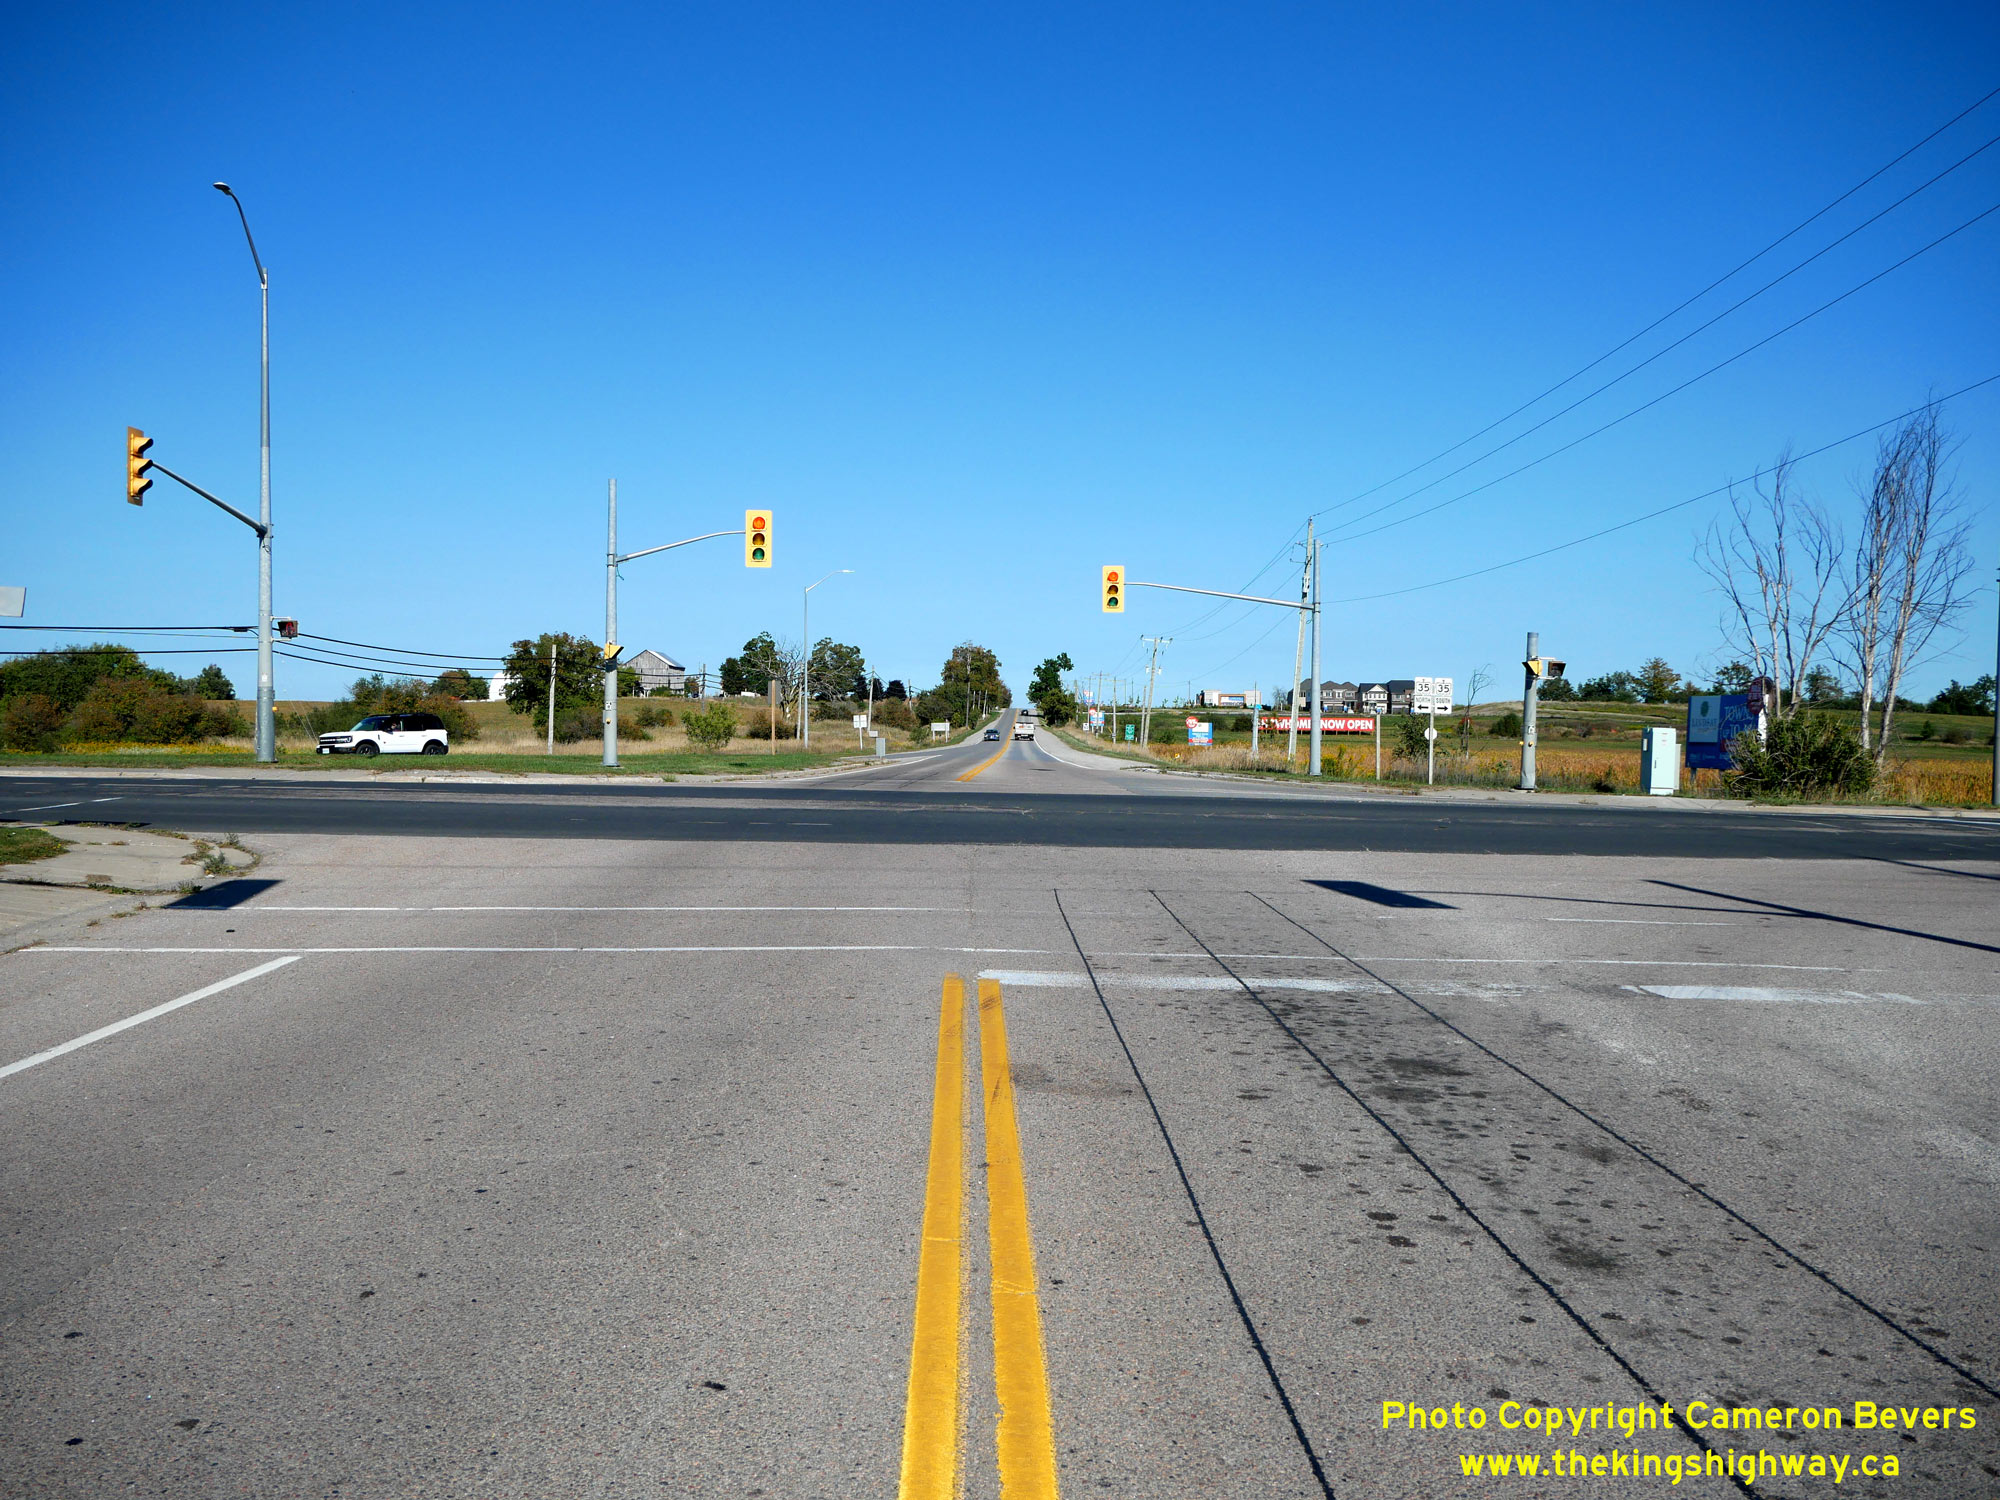
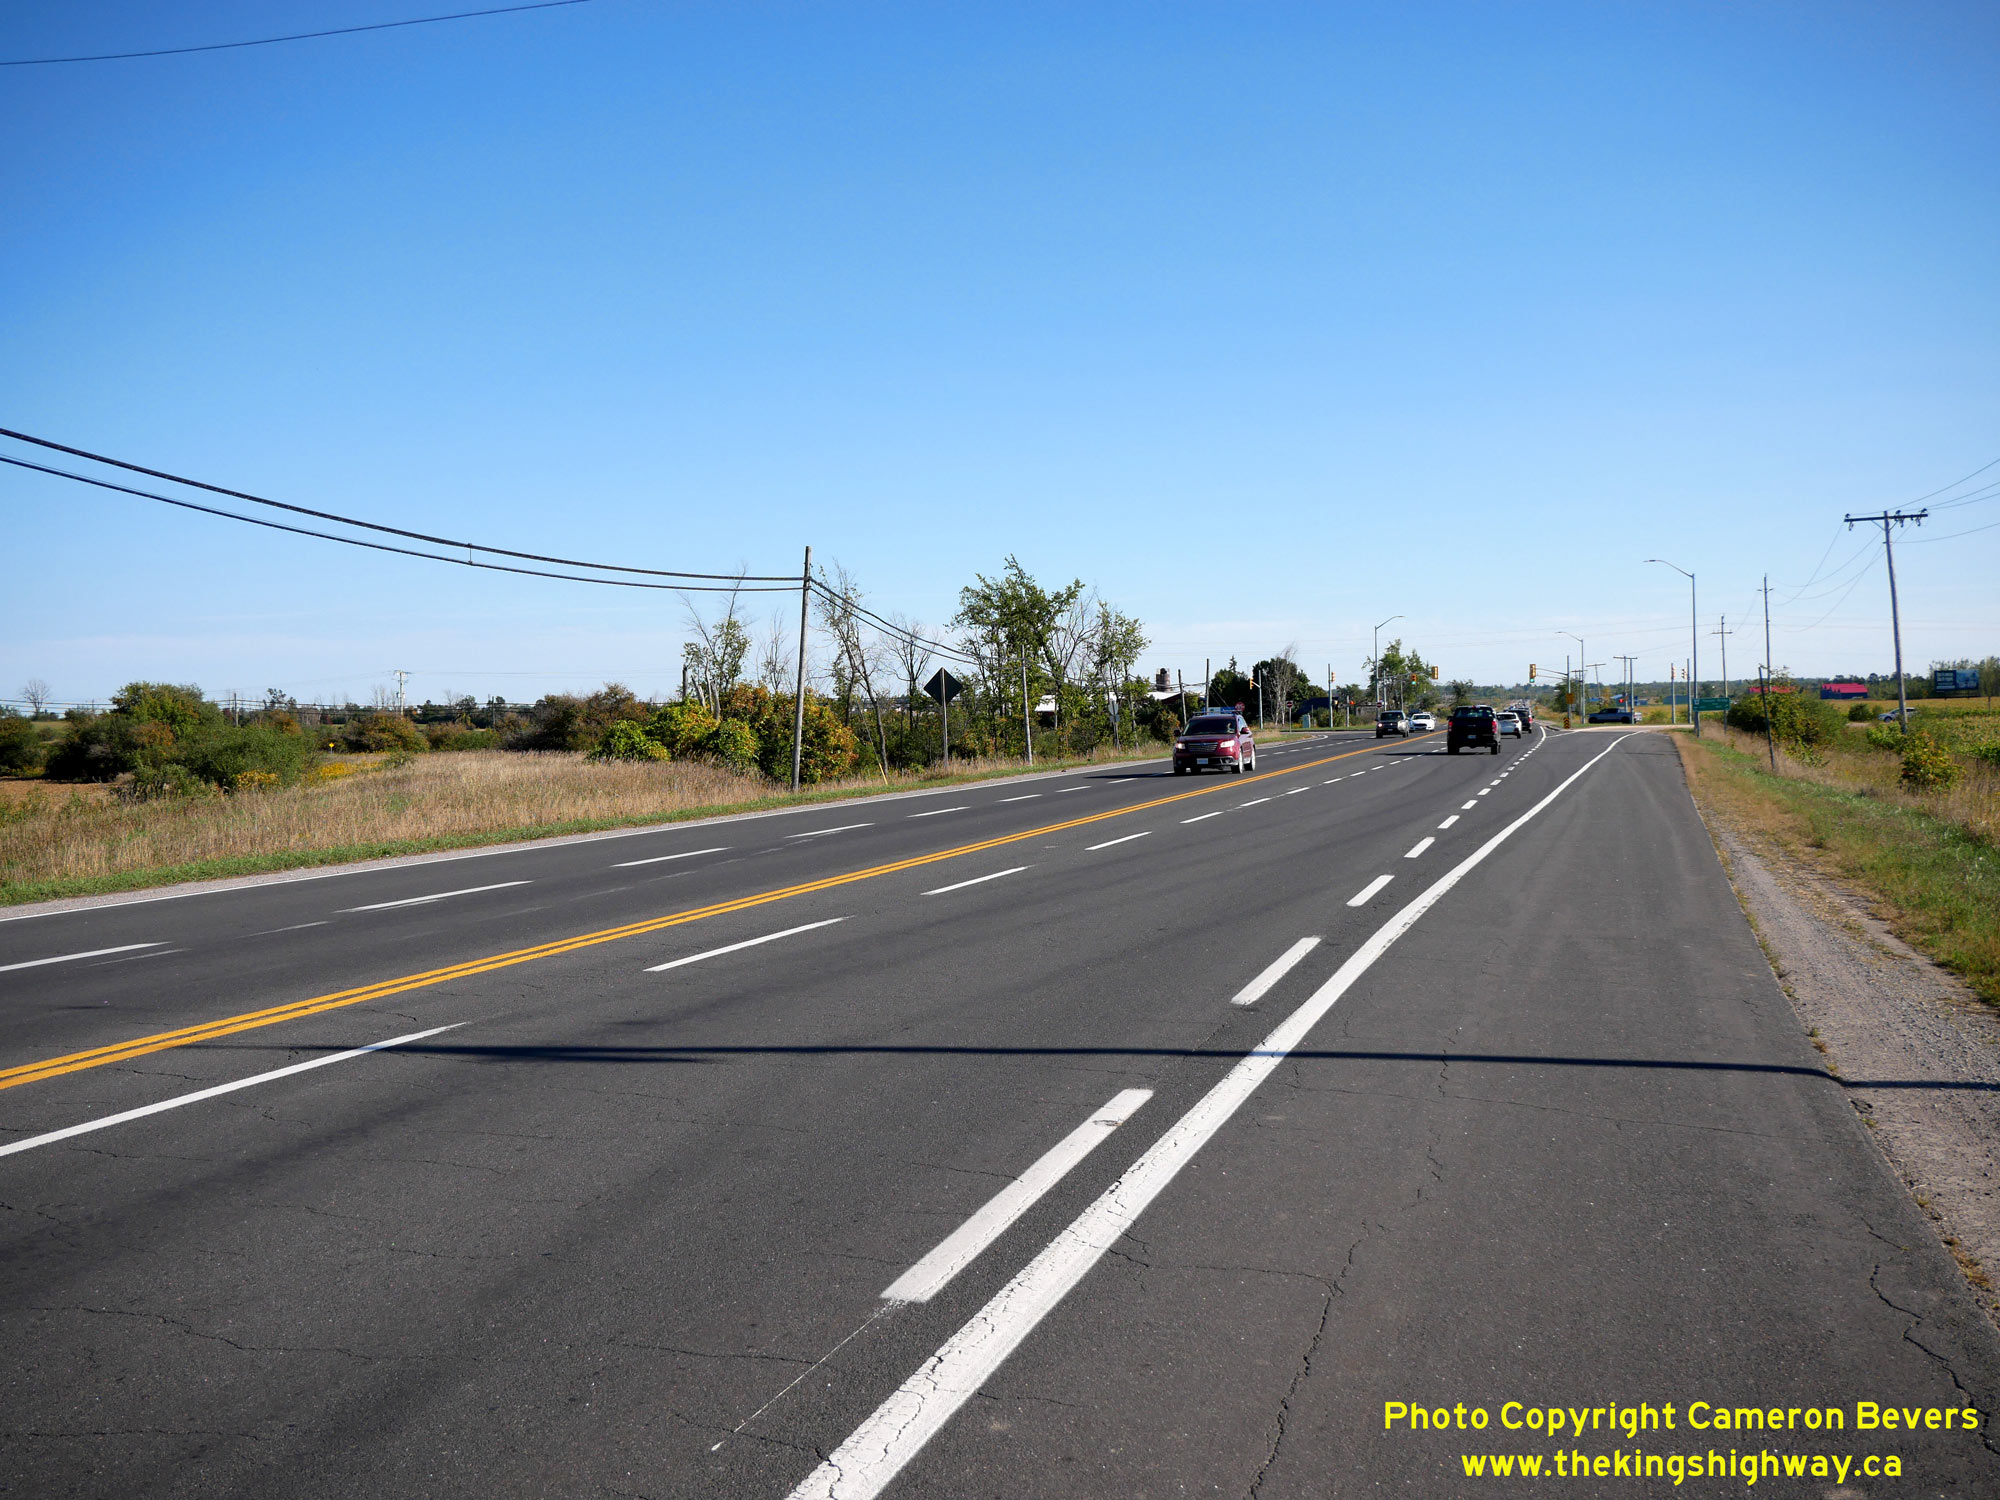
Left - Facing east along Thunder Bridge Road at the Hwy 35 Junction. Historically, Hwy 35B began at this intersection and continued for almost 5 1/2 miles
through Lindsay. The Lindsay Business Route reconnected with Hwy 35 at the southern entrance to Lindsay. In the late 1960s, the route of Hwy 35B was shortened so that
it followed Kent Street into the town centre. The old route of Hwy 35B was subsequently transferred to the County of Victoria. See an
Enlarged Photo Here. (Photograph taken on September 16, 2025 - © Cameron Bevers) Right - View of the relocated Hwy 35 approaching Lindsay, facing south from Thunder Bridge Road (Old Hwy 35B). This diversion of Hwy 35 was built in conjunction with the Lindsay Bypass in the 1950s. Grading for the Hwy 35 relocation took place under Contract #1957-35, with final paving performed under Contract #1958-122. See an Enlarged Photo Here. (Photograph taken on September 16, 2025 - © Cameron Bevers) 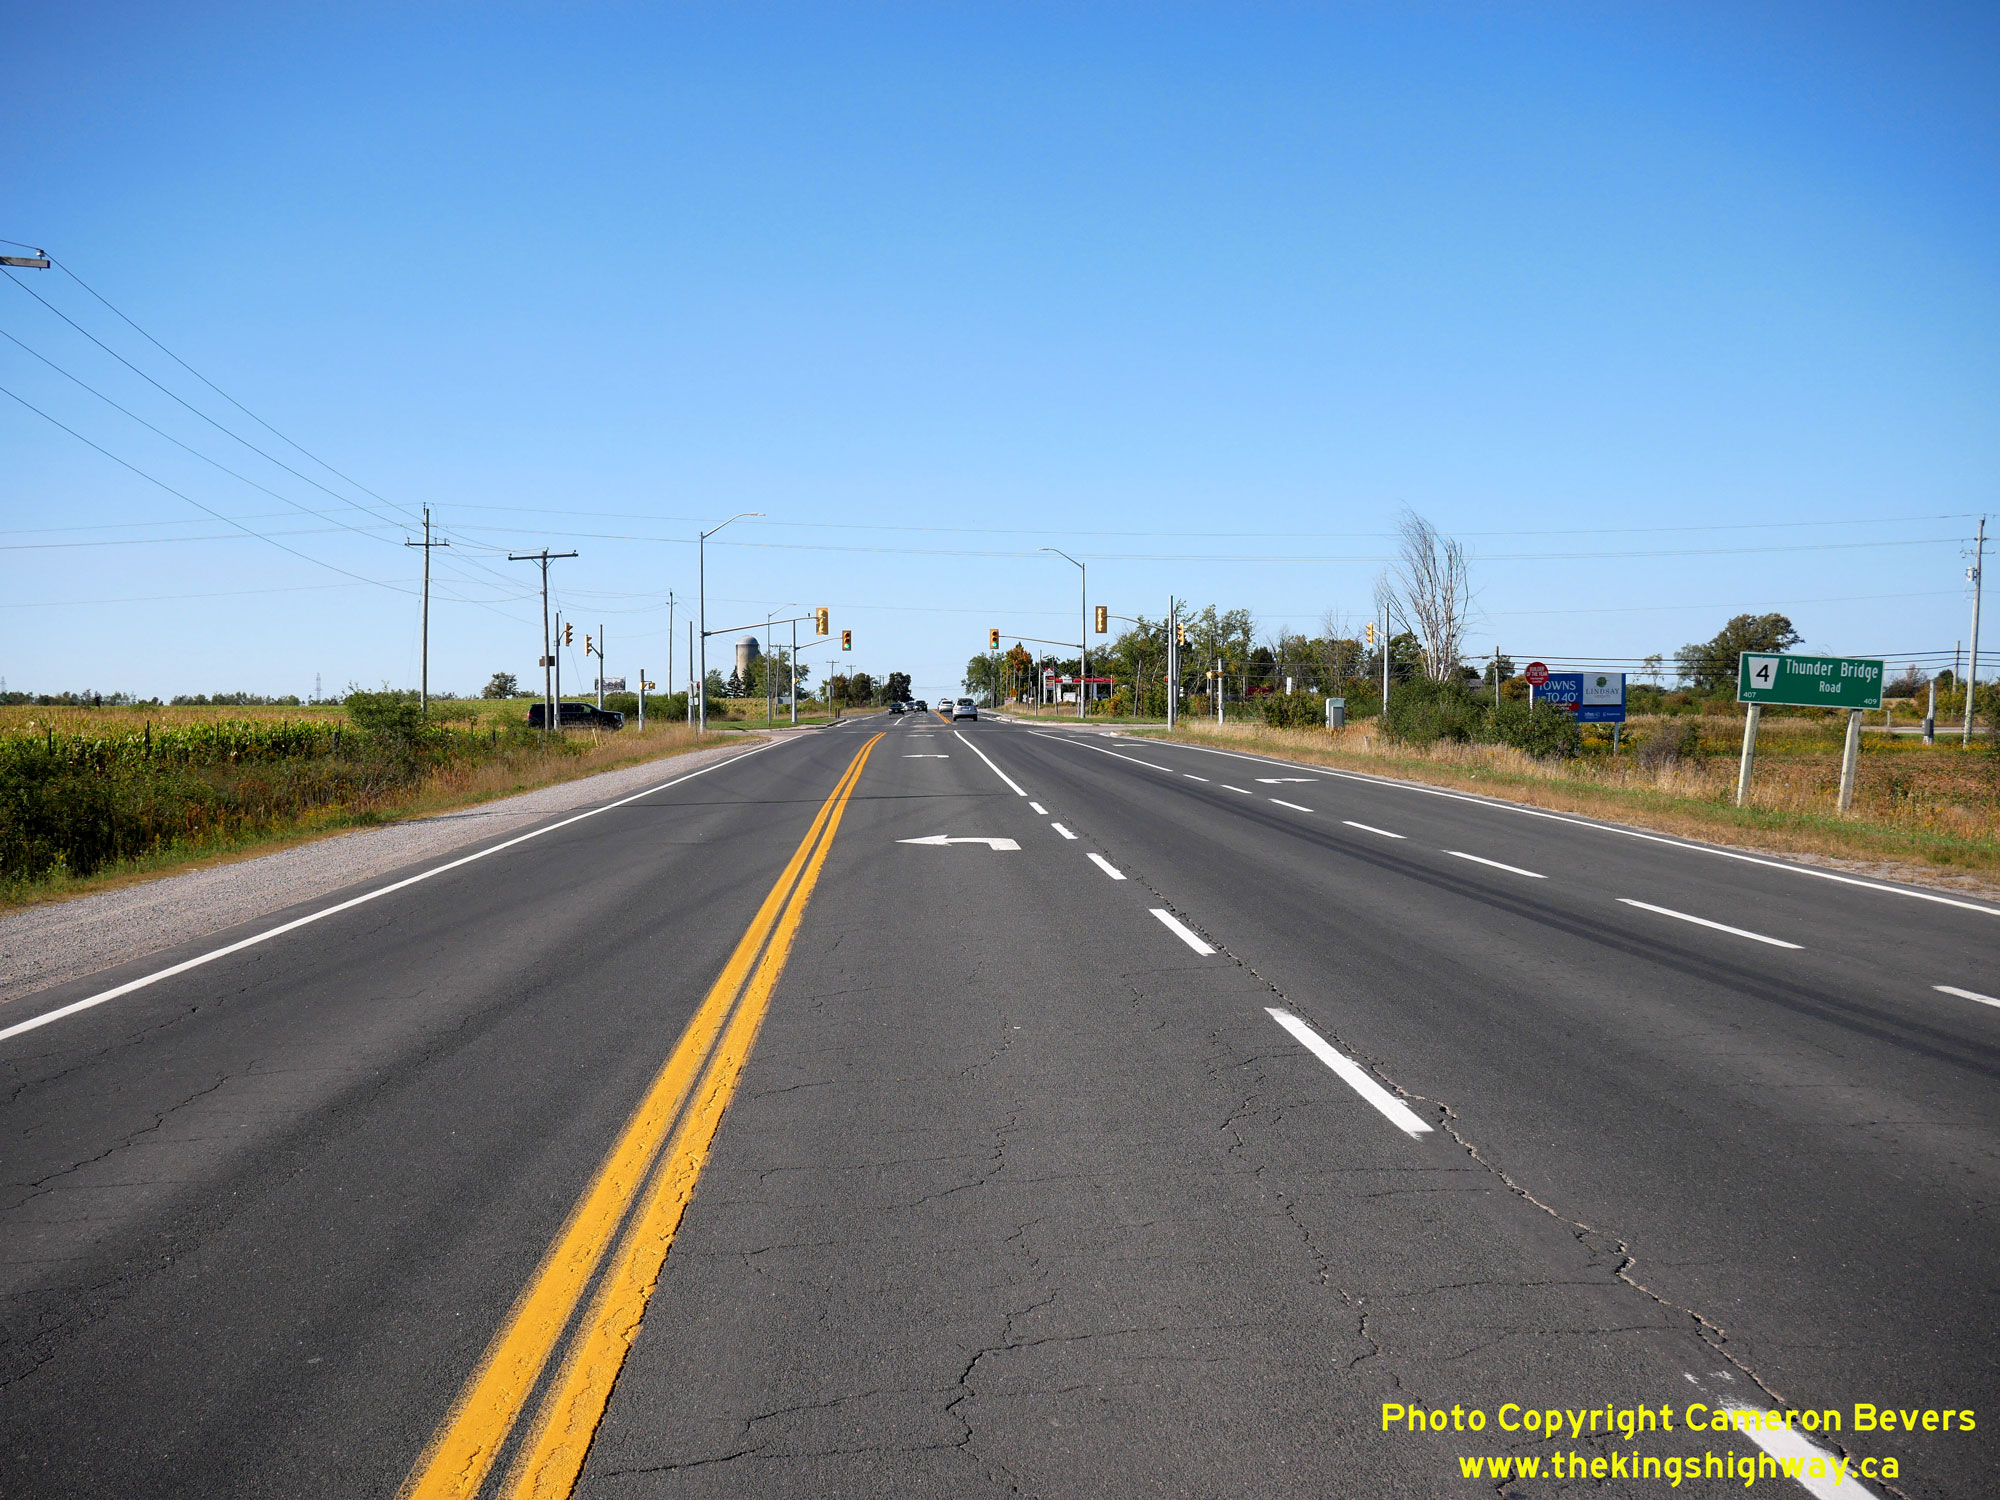

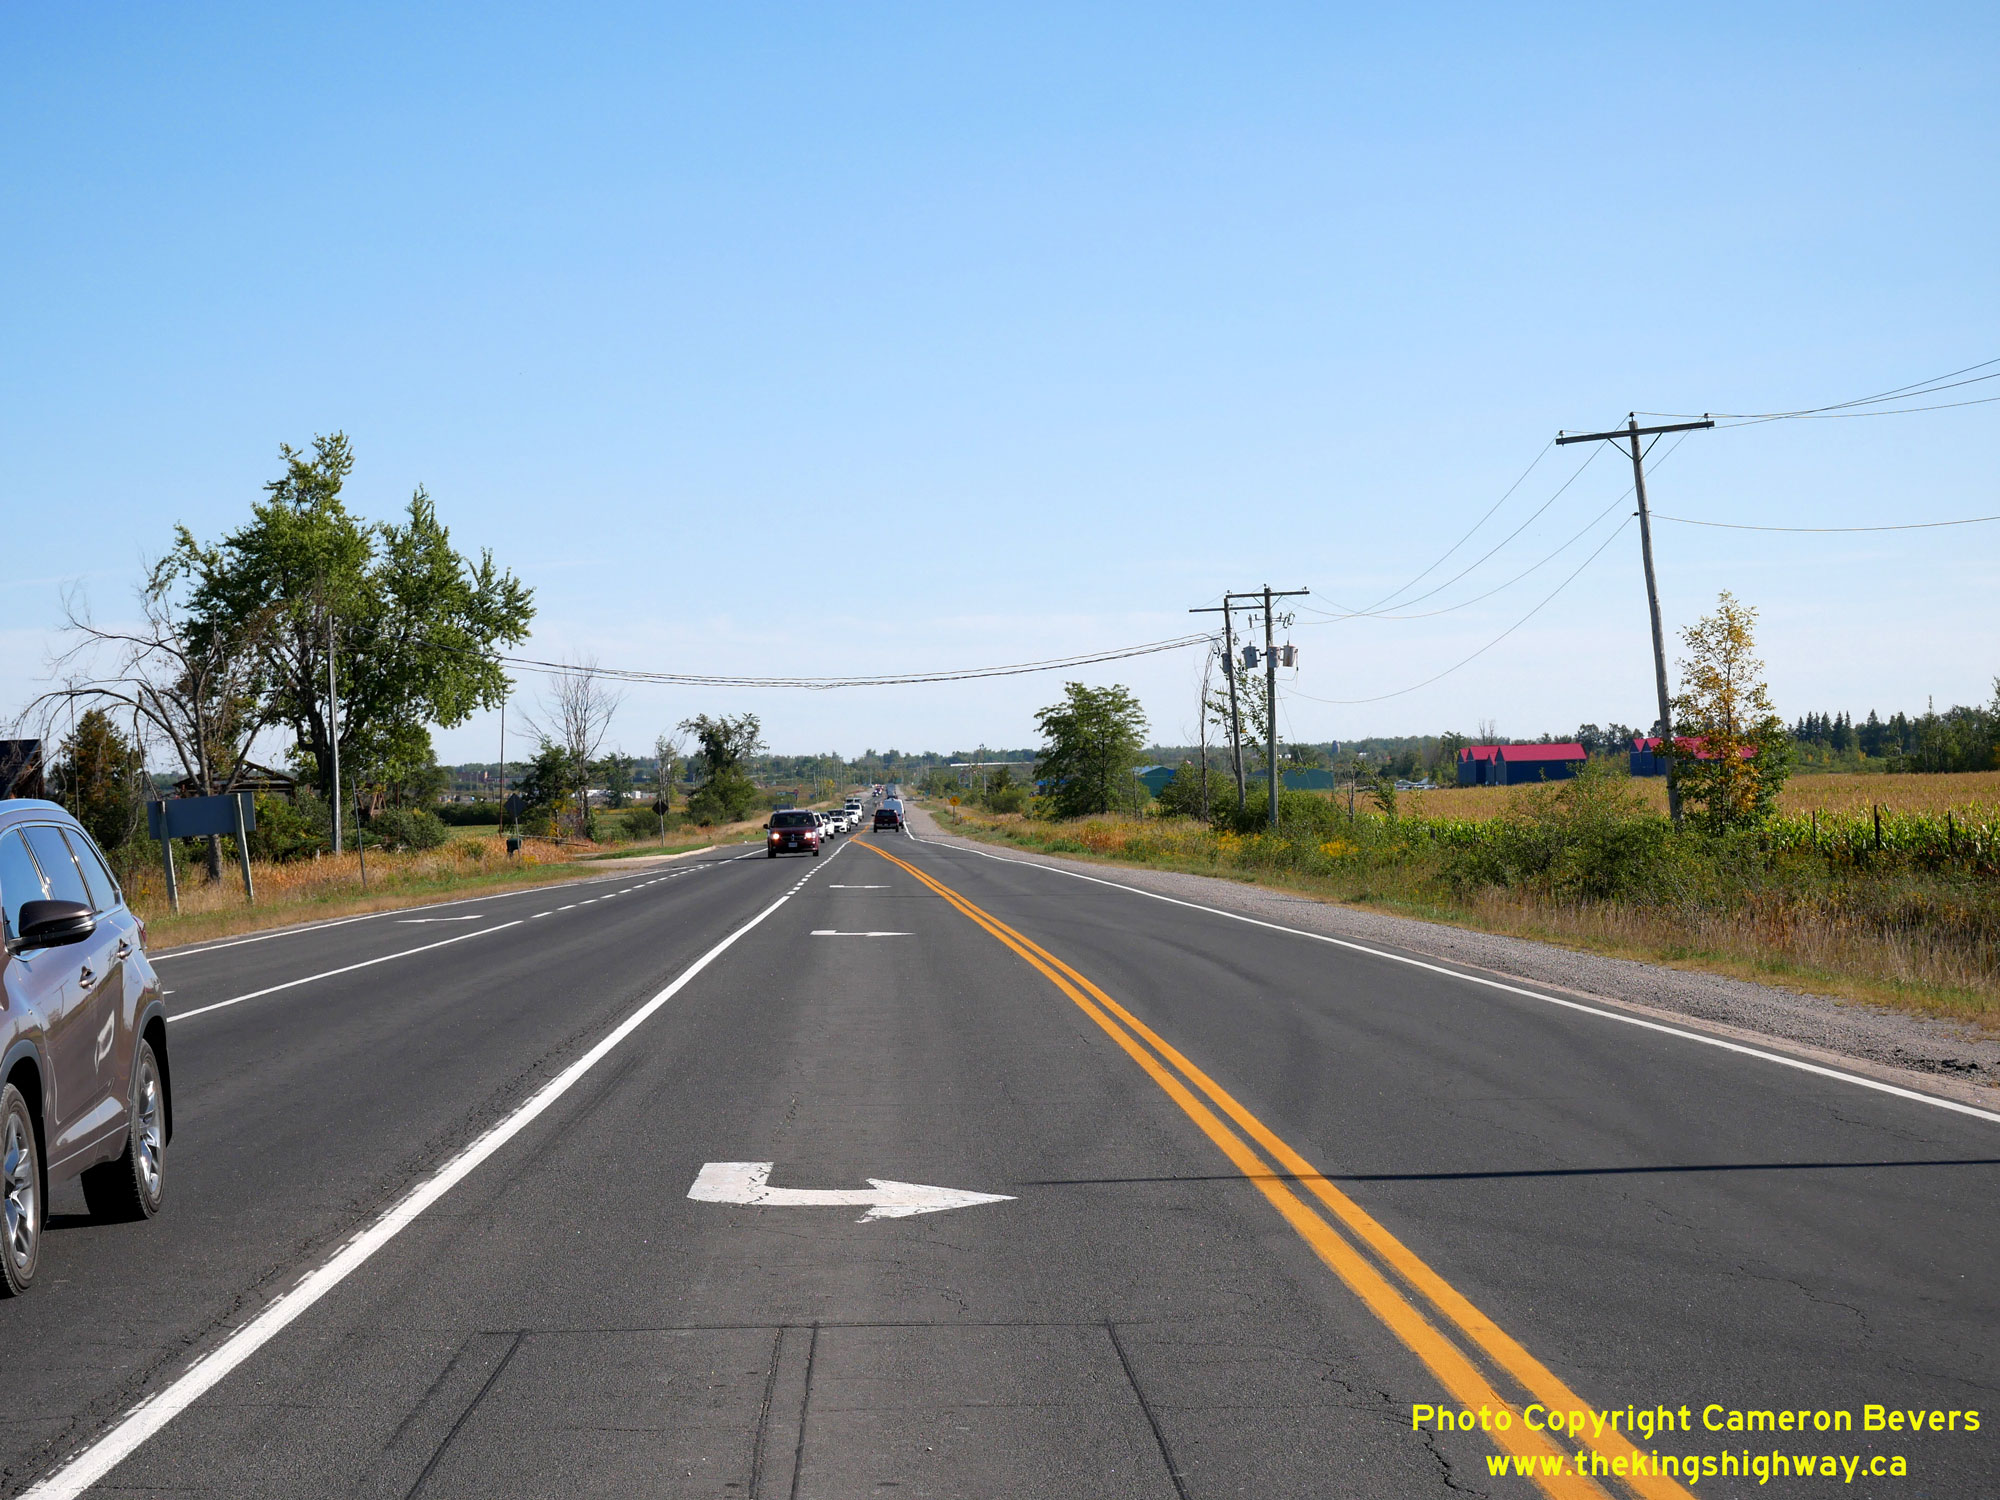
Left - Approaching Thunder Bridge Road on Hwy 35, facing north towards Fenelon Falls. Historically, Hwy 35B followed Thunder Bridge Road into Lindsay. The
diversion of Hwy 35 which was built around the western side of Lindsay during the 1950s comes to an end at this intersection. An old curved diversion once existed at
these corners, but the curve was abandoned as part of the relocation of Hwy 35. See an
Enlarged Photo Here. (Photograph taken on September 16, 2025 - © Cameron Bevers) Right - Facing north along Hwy 35 from Thunder Bridge Road (Old Hwy 35B). From this point northerly to Powles Corners, today's route of Hwy 35 fairly closely follows the original highway route established back in the 1930s. The DHO assumed jurisdiction over the Lindsay-Fenelon Falls Road as a new King's Highway, effective July 1, 1931. See an Enlarged Photo Here. (Photograph taken on September 16, 2025 - © Cameron Bevers) 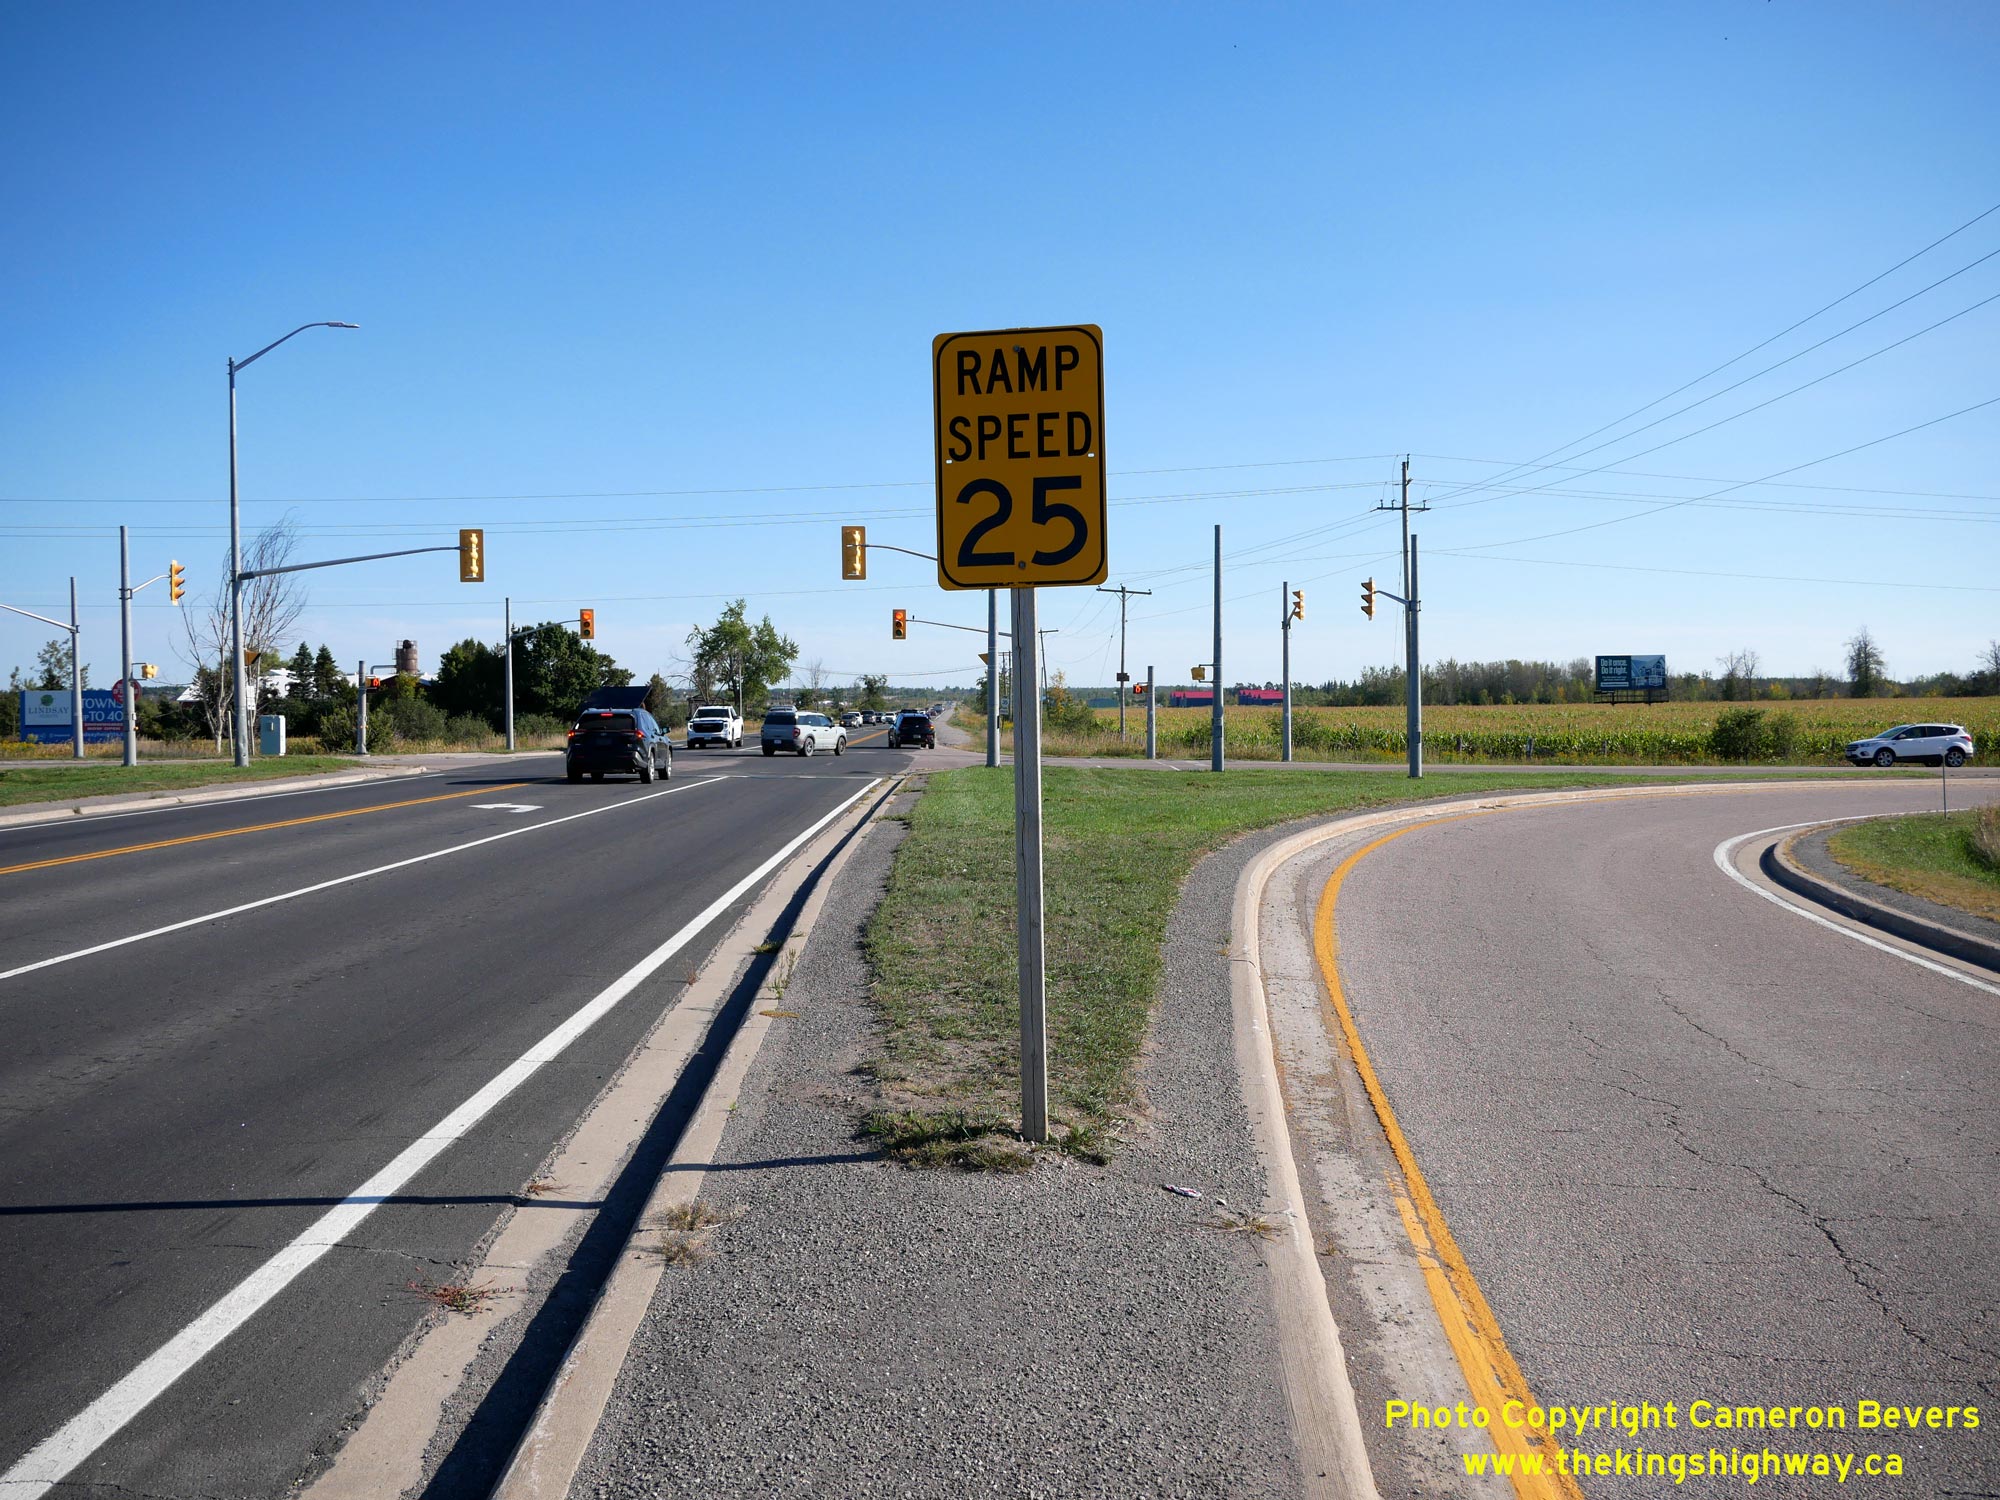
Left - An older "Ramp Speed 25" sign on Hwy 35 at the Old Hwy 35B Junction north of Lindsay. These signs are being phased out by the MTO and replaced with new
plain yellow signs which just post the numerical advisory speed only. See an
Enlarged Photo Here. (Photograph taken on September 16, 2025 - © Cameron Bevers) Right - Facing south along Hwy 35 approaching Thunder Bridge Road (Old Hwy 35B) north of Lindsay. At left, faint traces of the old highway curve into Lindsay can be seen. Traffic has not used this old highway curve for many decades. The curve was closed once the relocated Hwy 35 opened to traffic in 1958. See an Enlarged Photo Here. (Photograph taken on September 16, 2025 - © Cameron Bevers) 

Left - Distance guide sign on southbound Hwy 35 at Powles Corners. See an
Enlarged Photo Here. (Photograph taken on September 17, 2017 - © Cameron Bevers) Right - Facing north along Hwy 35 at Powles Corners, approaching the relocated Hwy 35 & Hwy 121 Junction. Until fairly recently, Hwy 121 intersected Hwy 35 a short distance south of the current intersection. This highway junction was fully rebuilt to improve the overall intersection geometry. The original highway junction intersected with Hwy 35 on a skew. The earth berm at right marks the point where the old route of Hwy 121 curved northeasterly towards Fenelon Falls. See an Enlarged Photo Here. (Photograph taken on September 17, 2017 - © Cameron Bevers) 

Left - Junction of Hwy 35 & Hwy 121 at Powles Corners, facing north. The revised intersection of Hwy 35 & Hwy 121 has a new channelized right-turn
ramp. Up until 1997, Hwy 121 from Powles Corners to Fenelon Falls was a provincially-owned King's Highway. Today, it is a municipal
road, known officially as Kawartha Lakes Road 121. However, most motorists simply refer to this road as "Highway 121". See an
Enlarged Photo Here. (Photograph taken on September 17, 2017 - © Cameron Bevers) Right - Facing south along Hwy 35 from the revised Hwy 121 Junction at Powles Corners. The original highway junction was located at this point, prior to reconstruction. Today, there is little evidence visible from Hwy 35 that there ever was once a highway junction here. The earth berm at left conceals the balance of the former Hwy 121 alignment leading into Fenelon Falls, which was bypassed during the intersection reconstruction project. See an Enlarged Photo Here. (Photograph taken on September 17, 2017 - © Cameron Bevers) 

Left - Approaching the southern terminus of Hwy 121 at the Hwy 35 Junction at Powles Corners. See an
Enlarged Photo Here. (Photograph taken on September 17, 2017 - © Cameron Bevers) Right - Junction sign assembly at the Hwy 35 & Hwy 121 Junction at Powles Corners. The entire route of Hwy 121 through Victoria County was decommissioned as a King's Highway in 1997-1998. Today, the road is officially known as Kawartha Lakes Road 121. It is interesting to note that when Hwy 121 was still a King's Highway, it connected to Hwy 35 no fewer than three times - once here at Powles Corners and twice in the Minden area. Coincidentally, Hwy 121 also intersected Former Secondary Highway 503 three times as well - twice in Kinmount and once at Tory Hill. Given its bizarre, meandering route through Victoria and Haliburton Counties, it is little wonder that most of Hwy 121 was transferred to municipalities during the mass 1997-1998 highway downloading spree. See an Enlarged Photo Here. (Photograph taken on September 17, 2017 - © Cameron Bevers) 

Left - Facing north along the Fenelon Falls Bypass (Hwy 35) from the Hwy 121 Junction at Powles Corners. Up until the mid-1950s, Hwy 35 used to go into
Fenelon Falls. A new bypass was established for Hwy 35 west of town in 1955, in order to provide a more direct through route to the north. The old route of Hwy 35
through town became Hwy 35A and a portion of Hwy 121. The original 1930s route of Hwy 35 through Fenelon Falls was meandering and far less direct. This revised route
of Hwy 35 via the Fenelon Falls Cut-Off shortened the highway distance between Lindsay and Minden by nearly 4 miles. See an
Enlarged Photo Here. (Photograph taken on September 17, 2017 - © Cameron Bevers) Right - Distance guide sign on northbound Hwy 35 at Powles Corners. See an Enlarged Photo Here. (Photograph taken on September 17, 2017 - © Cameron Bevers) 

Left - Facing north along Hwy 121 towards Fenelon Falls from the Hwy 35 Junction at Powles Corners. The realignment of Hwy 121 at Powles Corners extends for
about 400 metres east from Hwy 35 before meeting the original route of Hwy 121. At one time, Hwy 121 extended almost all the way to Bancroft, via Fenelon Falls,
Kinmount, Minden and Haliburton Village. Jurisdiction over the section of Hwy 121 between Powles Corners and Fenelon Falls was transferred from the province to the
County of Victoria in 1997. See an Enlarged Photo Here. (Photograph taken on September 17, 2017 - © Cameron Bevers) Right - Distance guide sign on northbound Hwy 121 at Powles Corners. See an Enlarged Photo Here. (Photograph taken on September 17, 2017 - © Cameron Bevers) 

Left - Facing south along Hwy 35 at the Hwy 121 Junction at Powles Corners. See an
Enlarged Photo Here. (Photograph taken on September 17, 2017 - © Cameron Bevers) Right - Diversion of Hwy 121 approaching the Hwy 35 Junction at Powles Corners. Originally, Hwy 121 curved to the left along Ranchers Road. See an Enlarged Photo Here. (Photograph taken on September 17, 2017 - © Cameron Bevers) 

Left - Former Hwy 35 alignment at Isaacs Glen north of Fenelon Falls, approaching the Pearns Creek Bridge. (Photograph taken on September 30, 2007 - © Cameron Bevers) Right - The old Pearns Creek Bridge at Isaacs Glen is a concrete bowstring arch bridge. (Photograph taken on September 30, 2007 - © Cameron Bevers) 

Left - The old Hwy 35 bridge over Pearns Creek has been closed to vehicular traffic for decades. However, the bridge still serves as a pedestrian
path. (Photograph taken on September 30, 2007 - © Cameron Bevers) Right - The Pearns Creek Bridge carried Hwy 35 traffic up until 1949, when it was bypassed by a new highway alignment along the shores of Cameron Lake. The current route of Hwy 35 is visible in the background. See an Enlarged Photo here. (Photograph taken on September 30, 2007 - © Cameron Bevers) 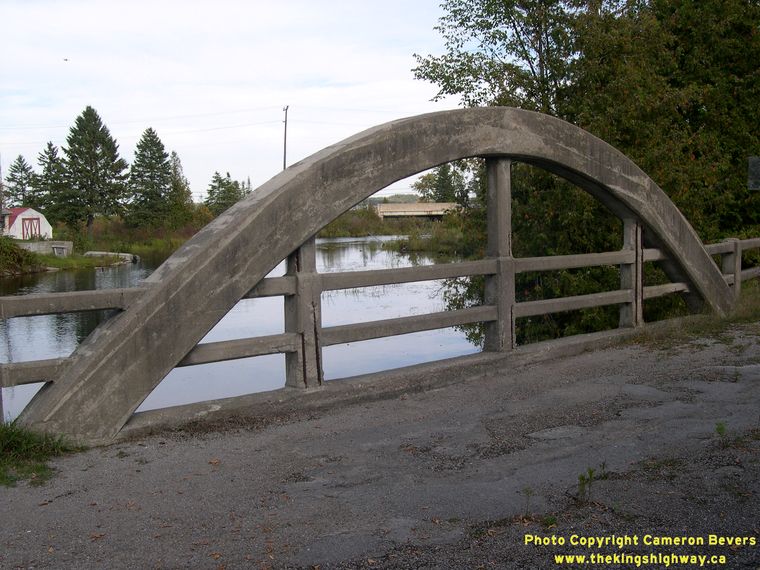

Left - The old Pearns Creek Bridge at Isaacs Glen was built by the County of Victoria, before the Fenelon Falls-Rosedale County Road was assumed as
an extension of Hwy 35 by the province in 1934. This concrete bowstring arch bridge likely dates from the mid-1920s. (Photograph taken on September 30, 2007 - © Cameron Bevers) Right - Facing south along the old alignment of Hwy 35 at the Pearns Creek Bridge at Isaacs Glen. (Photograph taken on September 30, 2007 - © Cameron Bevers) 

Left - High-level bridge carrying Hwy 35 over the Trent-Severn Waterway at Rosedale. Structure completed in 1963. (Photograph taken on September 30, 2007 - © Cameron Bevers) Right - Facing north along Hwy 35 towards Coboconk at the Rosedale Bridge. (Photograph taken on September 30, 2007 - © Cameron Bevers) 

Left - Facing south along Hwy 35 towards Lindsay at the Rosedale Bridge. (Photograph taken on September 30, 2007 - © Cameron Bevers) Right - Steel handrail design on the Rosedale Bridge on Hwy 35. (Photograph taken on September 30, 2007 - © Cameron Bevers) 

Left - Decorative lines on the concrete parapet wall on the Rosedale Bridge on Hwy 35. (Photograph taken on September 30, 2007 - © Cameron Bevers) Right - The Rosedale Bridge on Hwy 35 allows marine traffic to pass uninterrupted below Hwy 35. The high-level bridge seen here replaced an earlier swing bridge. The swing bridge forced marine traffic and highway traffic to alternate flows. See an Enlarged Photo here. (Photograph taken on September 30, 2007 - © Cameron Bevers) 

Left - Eastern side of the Rosedale Bridge on Hwy 35. (Photograph taken on September 30, 2007 - © Cameron Bevers) Right - The Rosedale Bridge is a seven-span steel girder structure. (Photograph taken on September 30, 2007 - © Cameron Bevers) 

Left - Trent-Severn Waterway, as seen from the Hwy 35 Bridge at Rosedale. See an
Enlarged Photo here. (Photograph taken on September 30, 2007 - © Cameron Bevers) Right - Facing north along Hwy 35 towards Coboconk from the Rosedale Bridge. (Photograph taken on September 30, 2007 - © Cameron Bevers) 

Left - Facing north along Hwy 35 between Rosedale and Coboconk. See an
Enlarged Photo here. (Photograph taken on September 30, 2007 - © Cameron Bevers) Right - This magnificent White Pine beside Hwy 35 near Rosedale was somehow spared from being cut down during earlier highway construction projects. This beautiful wind-swept tree is a prominent landmark along Hwy 35, providing a very fitting gateway feature to the northern Kawartha Lakes District. It is very fortunate that the tree was saved. Sadly, most roadside trees in Ontario have been cut down over the years, in an effort to improve highway safety. In this particular instance, a steel beam guide rail was installed beside the highway so that the tree does not pose any collision risk for highway traffic. (Photograph taken on September 30, 2007 - © Cameron Bevers) 

Left - Facing south along Hwy 35 between Coboconk and Rosedale. (Photograph taken on September 30, 2007 - © Cameron Bevers) Right - Facing south across the Gull River Bridge on Hwy 35 in Coboconk. (Photograph taken on September 30, 2007 - © Cameron Bevers) 

Left - Gull River Bridge on Hwy 35 at Coboconk. Structure completed in 1965. (Photograph taken on September 30, 2007 - © Cameron Bevers) Right - Facing north along Hwy 35 at the Gull River Bridge in Coboconk. (Photograph taken on September 30, 2007 - © Cameron Bevers) 

Left - Eastern side of the Gull River Bridge on Hwy 35 at Coboconk. (Photograph taken on September 30, 2007 - © Cameron Bevers) Right - Date stamp (1965) on the Gull River Bridge on Hwy 35. (Photograph taken on September 30, 2007 - © Cameron Bevers) 

Left - Facing north across the North Gull River Bridge on Hwy 35 in Coboconk. (Photograph taken on September 30, 2007 - © Cameron Bevers) Right - Steel handrail design of the North Gull River Bridge on Hwy 35 in Coboconk. (Photograph taken on September 30, 2007 - © Cameron Bevers) 

Left - Facing south along Hwy 35 at the North Gull River Bridge in Coboconk. (Photograph taken on September 30, 2007 - © Cameron Bevers) Right - North Gull River Bridge on Hwy 35 in Coboconk. Structure completed in 1965. (Photograph taken on September 30, 2007 - © Cameron Bevers)
Continue on to King's Highway 35 Photos: Coboconk to Minden
|
|---|
Links to Adjacent King's Highway Photograph Pages:
Back to King's Highway 34 Photos /
King's Highway 35 History /
Back to King's Highway 36 Photos
Ontario Highway History - Main Menu / Back to List of Highways Website contents, photos & text © 2002-2026, Cameron
Bevers (Webmaster) - All Rights Reserved / Contact Me
|
|---|