
| 
| |
|
|
This page contains historical and present day photos of Ontario's King's Highway 65, arranged by location from the
Ontario-Quebec Boundary westerly to New Liskeard. All photographs displayed on this page were taken by the Webmaster (Cameron Bevers), unless specifically noted
otherwise. Historical photographs are arranged in approximate chronological order, while present day photographs (Year 2000 to date) are arranged by location from
east to west. Click on any thumbnail to see a larger image!
Please note that all photographs displayed on this
website are protected by copyright. These photographs must not be reproduced, published,
electronically stored or copied, distributed, or posted onto other websites without
my written permission. If you want to use photos from this website, please
email me first for permission. Thank-you!
|
|---|
|
Page 1: Historical King's Highway 65 Photographs

Left - Postcard view of the Hwy 11B and Hwy 65 Junction in Downtown New Liskeard in 1970. See an
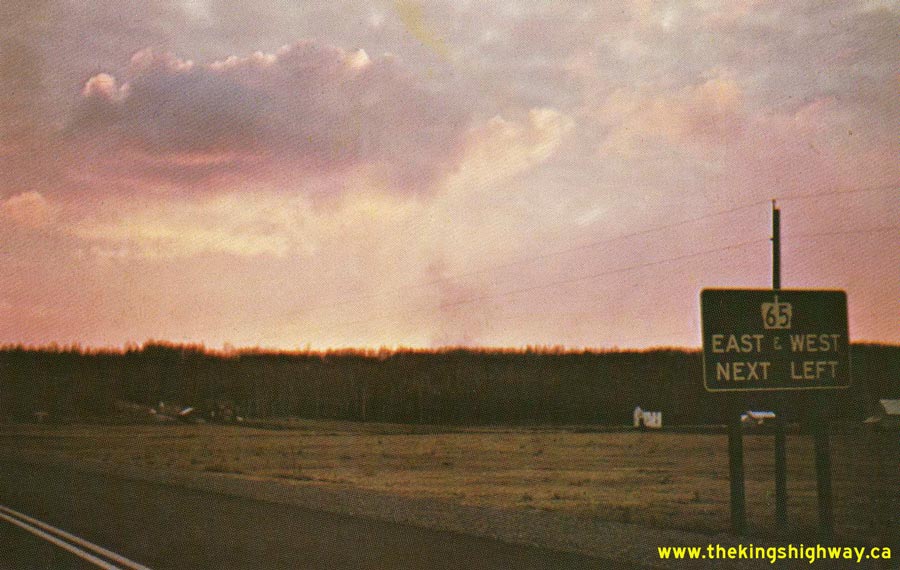
Enlarged Photo Here. Photograph courtesy of Len Leiffer Right - Circa 1970 postcard view of a sunset over Hwy 11 at the Hwy 65 Junction near New Liskeard. See an Enlarged Photo Here. Photograph courtesy of Len Leiffer 
Above - Circa 1980 view of a structural load test being performed on the Sydney Creek Bridge on Hwy 65, located about 18 km north of Elk Lake. This creosoted
timber truss bridge was built in 1936, and was one of many bridges of this type built on the Ontario provincial highway system. These bridges were constructed using
Douglas fir timbers imported from British Columbia. They were originally designed for a standard 20 ton load limit, but as the bridges aged, the recommended maximum
load on many bridges was reduced to 15 tons as a precaution. However, this photo demonstrates just how incredibly strong these timber truss bridges actually were. The
bridge did not show any signs of failure, even though the combined load of the two transport trucks parked on the bridge weighed in at a whopping 204 tons - more than
10 times the bridge's original 20 ton design load! Although it no longer carries highway traffic due to a road realignment, the Sydney Creek Bridge still stands
beside Hwy 65 to this day. See an Enlarged Photo Here. (Photo courtesy of Ontario Ministry of Transportation - © King's Printer for Ontario, 1981) |
|---|
|
Present Day King's Highway 65 Photographs (Quebec Boundary to New Liskeard)

Above - King's Highway 65 Ends route marker at the Ontario-Quebec Boundary. See an
Enlarged Photo Here. (Photograph taken in June, 2001 - © Cameron Bevers) 

Left - Eastern terminus of Hwy 65 at the Ontario-Quebec Boundary, facing east towards Notre-Dame-du-Nord, Quebec. From here, the road continues east for
another 2 km through Quebec before reaching Notre-Dame-du-Nord. Motorists have the option of going north to Rouyn-Noranda on Quebec's Hwy 101 North from
Notre-Dame-du-Nord, or returning back to Ontario on Quebec's Hwy 101 South via Temiscaming. See an
Enlarged Photo Here. (Photograph taken on September 1, 2007 - © Cameron Bevers) Right - Beginning of Hwy 65 at the Ontario-Quebec Boundary, facing west towards New Liskeard. The first intersection along Hwy 65 at the boundary line is appropriately named "Frontiere Road" (Border Road). See an Enlarged Photo Here. (Photograph taken on September 1, 2007 - © Cameron Bevers) 

Left - Facing west along Hwy 65 from the highway's eastern terminus at the Ontario-Quebec Boundary. New Liskeard lies roughly 22 km to the west. See an
Enlarged Photo Here. (Photograph taken on September 1, 2007 - © Cameron Bevers) Right - Facing east across the Wright Creek Bridge on Hwy 65. This structure is located just west of the Ontario-Quebec Boundary. See an Enlarged Photo Here. (Photograph taken on September 1, 2007 - © Cameron Bevers) 

Left - Northern side of the Wright Creek Bridge on Hwy 65 near the Ontario-Quebec Boundary. See an
Enlarged Photo Here. (Photograph taken on September 1, 2007 - © Cameron Bevers) Right - Wright Creek Bridge on Hwy 65, facing west towards New Liskeard. See an Enlarged Photo Here. (Photograph taken on September 1, 2007 - © Cameron Bevers) 

Left - Southern side of the Wright Creek Bridge on Hwy 65 near the Ontario-Quebec Boundary. Structure completed in 1960. See an
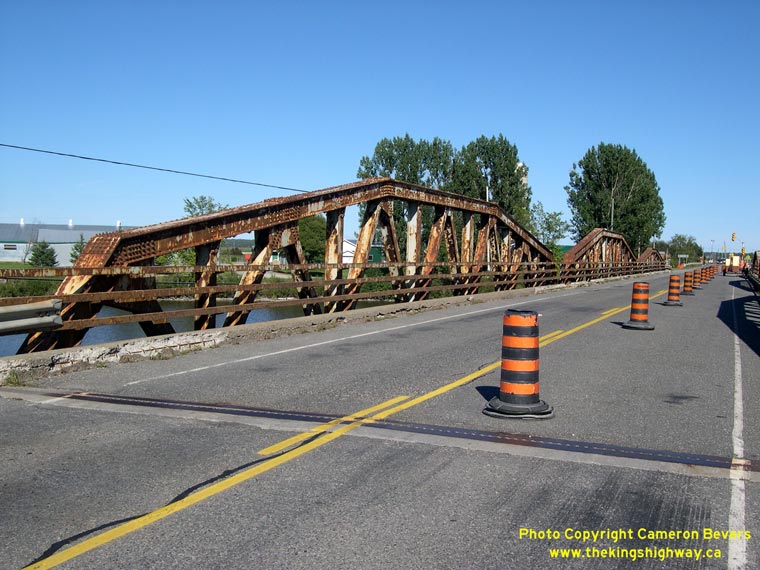
Enlarged Photo Here. (Photograph taken on September 1, 2007 - © Cameron Bevers) Right - The Wright Creek Bridge is a single span steel truss bridge (Warren type). Both the Wright Creek and adjacent Blanche River steel truss bridges on Hwy 65 are "pony truss" structures. Pony truss structures are characterized by an absence of any transverse overhead truss members spanning across the roadway. Bridges which have transverse overhead truss members spanning across the roadway are called "through truss" structures. See an Enlarged Photo Here. (Photograph taken on September 1, 2007 - © Cameron Bevers) 

Left - The Blanche River Bridge is a Warren-type steel pony truss structure. It was one of the last bridges of this design ever built on an Ontario
Highway. By the early 1960s, significant advances had been made in concrete bridge construction techniques. Since concrete was often more economical to use than
structural steel, the number of new steel truss bridges constructed on Ontario's highways dropped precipitously after 1960. The very last steel pony truss bridge
constructed on an Ontario provincial highway was built on Hwy 21 south of Grand Bend in 1963. See an
Enlarged Photo Here. (Photograph taken on September 1, 2007 - © Cameron Bevers) Right - Northern side of the Blanche River Bridge on Hwy 65. This impressive three-span steel pony truss structure was one of the only examples of its kind ever built on Ontario's King's Highways. This structure was completed in 1960. See an Enlarged Photo Here. (Photograph taken on September 1, 2007 - © Cameron Bevers) 
Left - Facing west along Hwy 65 towards New Liskeard at the Blanche River Bridge. See an
Enlarged Photo Here. (Photograph taken on September 1, 2007 - © Cameron Bevers) Right - Two of the Blanche River Bridge spans are approximately 120 feet in length, but the easternmost span is only 100 feet in length. Presumably, the one span was designed shorter than the other two spans in an effort to optimize the locations of the bridge's foundations. See an Enlarged Photo Here. (Photograph taken on September 1, 2007 - © Cameron Bevers) 

Left - The Blanche River drains into Lake Timiskaming a few kilometres downstream of the Hwy 65 structure. See an
Enlarged Photo Here. (Photograph taken on September 1, 2007 - © Cameron Bevers) Right - Facing east along Hwy 65 towards the Ontario-Quebec Boundary at the Blanche River Bridge. See an Enlarged Photo Here. (Photograph taken on September 1, 2007 - © Cameron Bevers) 

Left - Close-up of the steel-beam handrails on the Blanche River Bridge on Hwy 65. See an
Enlarged Photo Here. (Photograph taken on September 1, 2007 - © Cameron Bevers) Right - Southern side of the Blanche River Bridge on Hwy 65. Only a handful of three-span steel truss bridges were ever built by the Ontario Department of Highways (DHO), and even fewer of these bridges are still in existence today. A nearly identical three-span pony truss structure once spanned the Nottawasaga River on Hwy 26 west of Barrie. However, the Hwy 26 structure no longer exists today. The Nottawasaga River Bridge was replaced during a highway reconstruction project in 1998. One surviving example can be found along Hwy 17 in the Ottawa area. Another example was recently replaced along Hwy 569 southeast of Englehart, which coincidentally also spans the Blanche River. However, these three-span examples consist of one "through truss" span and two "pony truss" approach spans, so their designs differ somewhat from the Blanche River Bridge. See an Enlarged Photo Here. (Photograph taken on September 1, 2007 - © Cameron Bevers) 

Left - Traces of the old timber bents from the original Blanche River Bridge can still be seen in the water just south of the current Hwy 65 structure. See an
Enlarged Photo Here. (Photograph taken on September 1, 2007 - © Cameron Bevers) Right - Southern side of the Blanche River Bridge on Hwy 65 east of New Liskeard. The eastern approach to the bridge was built on a short fill. See an Enlarged Photo Here. (Photograph taken on September 1, 2007 - © Cameron Bevers) 

Left - A scenic rural scene appears as Hwy 65 rounds this curve about 9 km east of New Liskeard. See an
Enlarged Photo Here. (Photograph taken on September 1, 2007 - © Cameron Bevers) Right - Facing east along Hwy 65 (Formerly Hwy 11B) approaching New Liskeard. This short 1 km section of the highway is quite urbanized. The commercial development along this corridor is a significant change from the predominantly rural environment along the remainder of Hwy 65. In 2003, the old route of Hwy 65 through Downtown New Liskeard was decommissioned. As a result, Hwy 65 was relocated from its former route through Downtown New Liskeard to a new route along the Tri-Town Bypass. The northern section of Hwy 11B north of New Liskeard was renumbered as Hwy 65. The route renumbering provided a more efficient route for Hwy 65 through the New Liskeard area. See an Enlarged Photo Here. (Photograph taken on August 3, 2012 - © Cameron Bevers) 

Left - Facing south along the Tri-Town Bypass (Hwy 11 & Hwy 65) from the north entrance to New Liskeard (Hwy 65 East). See an
Enlarged Photo Here. (Photograph taken on August 3, 2012 - © Cameron Bevers) Right - Approaching the Hwy 65 East Junction on the Tri-Town Bypass. At this junction, Hwy 11 & Hwy 65 part ways after sharing a short concurrent route along the Tri-Town Bypass. The route of Hwy 65 turns right at this junction and heads east towards New Liskeard and Notre-Dame-du-Nord, Quebec, while Hwy 11 continues straight ahead towards Cochrane. See an Enlarged Photo Here. (Photograph taken on August 3, 2012 - © Cameron Bevers) 

Left - Green guide sign marking the Hwy 65 Junction on northbound Hwy 11 near New Liskeard. The northbound turn lane to Hwy 65 East is channelized. Up until
2003, the intersecting road was known as Hwy 11B. The old route of Hwy 11B and Hwy 65 through Downtown New Liskeard was discontinued in 2003. The current route of
Hwy 65 follows the Tri-Town Bypass concurrently with Hwy 11 and a short section of Former Hwy 11B at the northern entrance to New Liskeard. See an
Enlarged Photo Here. (Photograph taken on August 3, 2012 - © Cameron Bevers) Right - Green guide sign for Hwy 11 at the Hwy 65 East Junction in New Liskeard. There are no signs at the intersection guiding traffic to the western leg of Hwy 65, even though Hwy 65 continues west from this junction via a short concurrent routing with Hwy 11 South. See an Enlarged Photo Here. (Photograph taken on August 3, 2012 - © Cameron Bevers) 

Left - Approaching the Hwy 11 Junction on Hwy 65 (Formerly Hwy 11B) in New Liskeard. See an
Enlarged Photo Here. (Photograph taken on August 3, 2012 - © Cameron Bevers) Right - Junction of Hwy 65 East (Formerly Hwy 11B) at the Tri-Town Bypass. From here, traffic can turn right and follow Hwy 11 North towards Cochrane or turn left and follow Hwy 11 South towards North Bay. Although unmarked, the route of Hwy 65 turns left and briefly follows the Tri-Town Bypass on its route west towards Elk Lake. This is the first signalized intersection along Hwy 11 since the highway departed from North Bay nearly 160 km to the south. See an Enlarged Photo Here. (Photograph taken on August 3, 2012 - © Cameron Bevers) 

Left - General view of the Hwy 11 & Hwy 65 East Junction on the Tri-Town Bypass in New Liskeard, facing south. The Tri-Town Bypass can be seen curving away
in the distance. Historically, the route of Hwy 11 went right through Downtown New Liskeard, as well as nearby Haileybury and Cobalt. The old route of Hwy 11 was very
awkward and had numerous intersections and turns which were difficult for trucks to negotiate. A new 19 km bypass around the three towns was built in the early 1960s.
The new Tri-Town Bypass was officially opened to traffic on September 16, 1963. The new bypass shortened the highway distance between North Bay and Cochrane by about
7 km. The old route of Hwy 11 through the three towns was renumbered as Hwy 11B, although the northernmost part of Hwy 11B was recently renumbered as Hwy 65. See an
Enlarged Photo Here. (Photograph taken on August 3, 2012 - © Cameron Bevers) Right - Green guide sign marking the Hwy 65 Junction on southbound Hwy 11 near New Liskeard. See an Enlarged Photo Here. (Photograph taken on August 3, 2012 - © Cameron Bevers) 

Left - Facing south along Hwy 11 towards the start of the Tri-Town Bypass at the Hwy 65 East Junction in New Liskeard. Prior to the construction of the
Tri-Town Bypass in the early 1960s, Hwy 11 continued straight ahead into Downtown New Liskeard. The original highway alignment followed the hydro pole line
seen at left. See an Enlarged Photo Here. (Photograph taken on August 3, 2012 - © Cameron Bevers) Right - Facing north along Hwy 11 towards Englehart from the Hwy 65 East Junction. See an Enlarged Photo Here. (Photograph taken on August 3, 2012 - © Cameron Bevers) 
Above - Distance guide sign on the Tri-Town Bypass (Hwy 11 & Hwy 65) heading south from New Liskeard. See an
Enlarged Photo Here. (Photograph taken on August 3, 2012 - © Cameron Bevers) 
Above - Hwy 11B & Hwy 65 King's Highway route markers along Armstrong Street in New Liskeard. See an
Enlarged Photo Here. (Photograph taken on January 19, 2003 - © Cameron Bevers)
Continue on to King's Highway 65 Photos: New Liskeard to Elk Lake
|
|---|
Links to Adjacent King's Highway Photograph Pages:
Back to King's Highway 64 Photos /
King's Highway 65 History /
Back to King's Highway 66 Photos
Ontario Highway History - Main Menu / Back to List of Highways Website contents, photos & text © 2002-2026, Cameron
Bevers (Webmaster) - All Rights Reserved / Contact Me
|
|---|