
| 
| |
|
|
Please note that the highway between Elmira and Kitchener was briefly known as King's Highway 86 from 1981 until 2003. For
the purposes of organization, all photos pertaining to the Elmira to Kitchener highway will be listed under the
Hwy 85 Photos Page, regardless of age.
This page contains present day photos (Year 2000 to date) of Ontario's King's Highway 86, arranged by location from Amberley easterly to Wingham. All photographs displayed on this page were taken by the Webmaster (Cameron Bevers), unless specifically noted otherwise. Click on any thumbnail to see a larger image! Please note that all photographs displayed on this
website are protected by copyright. These photographs must not be reproduced, published,
electronically stored or copied, distributed, or posted onto other websites without
my written permission. If you want to use photos from this website, please
email me first for permission. Thank-you!
|
|---|
|
Page 2: Present Day King's Highway 86 Photographs (Amberley to Wingham)


Left - Facing south along Hwy 21 towards Goderich from the Hwy 86 Junction in Amberley. See an
Enlarged Photo Here. (Photograph taken on April 7, 2012 - © Cameron Bevers) Right - Approaching Amberley on northbound Hwy 21. In the background, the route of Hwy 86 can be seen intersecting with Hwy 21. These two highways have met at this junction ever since Hwy 86 was first established as a King's Highway in 1937. As a result of the mass provincial highway downloading of 1997-1998, Hwy 86 is no longer a provincially-owned highway between Amberley and Waterloo. See an Enlarged Photo Here. (Photograph taken on April 7, 2012 - © Cameron Bevers) 

Left - Guide signs on northbound Hwy 21 at the Hwy 86 Junction in Amberley. The right-turn movements from northbound Hwy 21 to eastbound Hwy 86 and from
westbound Hwy 86 to northbound Hwy 21 are channelized. See an Enlarged Photo Here. (Photograph taken on April 7, 2012 - © Cameron Bevers) Right - Approaching the western terminus of Hwy 86 at the Hwy 21 Junction in Amberley. The eastern terminus of Hwy 86 is in Kitchener-Waterloo, which lies approximately 120 km southeast of Amberley. The majority of Hwy 86 was transferred from the province to local municipalities as a cost-cutting measure in 1997-1998. The remaining provincially-controlled section of Hwy 86 in Kitchener-Waterloo was renumbered as Hwy 85 in 2003. See an Enlarged Photo Here. (Photograph taken on April 7, 2012 - © Cameron Bevers) 

Left - Route and destination guide signs for the upcoming Hwy 21 Junction, approaching the western terminus of Hwy 86 in Amberley. See an
Enlarged Photo Here. (Photograph taken on April 7, 2012 - © Cameron Bevers) Right - Start of Hwy 86 at the Hwy 21 Junction at Amberley, facing east towards Wingham. See an Enlarged Photo Here. (Photograph taken on April 7, 2012 - © Cameron Bevers) 

Left - Facing south along Hwy 21 in Amberley approaching the Hwy 86 Junction. See an
Enlarged Photo Here. (Photograph taken on April 7, 2012 - © Cameron Bevers) Right - Facing north along Hwy 21 towards Kincardine from the Hwy 86 Junction in Amberley. See an Enlarged Photo Here. (Photograph taken on April 7, 2012 - © Cameron Bevers) 

Left - Bruce County and Huron County route markers on Hwy 86 in Amberley. The downloading of Hwy 86 by the province in 1998 created a jurisdictional problem
for Huron and Bruce Counties, since the transferred highway straddled the boundary between the two counties. As this signpost suggests, the two counties share
ownership of this former King's Highway. See an Enlarged Photo Here. (Photograph taken on April 7, 2012 - © Cameron Bevers) Right - Facing east along Hwy 86 towards Wingham from the Hwy 21 Junction in Amberley. See an Enlarged Photo Here. (Photograph taken on April 7, 2012 - © Cameron Bevers) 

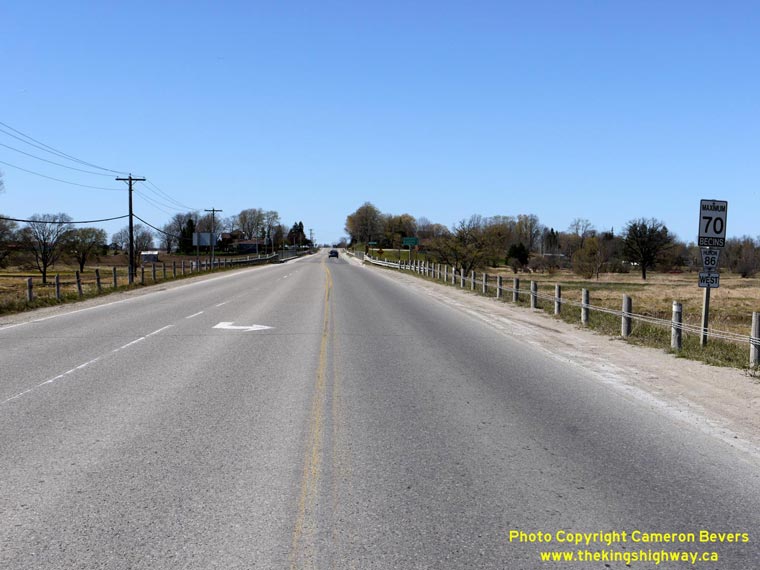
Left - Distance guide sign on eastbound Hwy 86 departing Amberley. See an
Enlarged Photo Here. (Photograph taken on April 7, 2012 - © Cameron Bevers) Right - Approaching Amberley on Hwy 86. The western terminus of the highway can be seen in the background at Hwy 21. See an Enlarged Photo Here. (Photograph taken on April 7, 2012 - © Cameron Bevers) 

Left - Boyd Creek Bridge on Hwy 86 east of the Hwy 21 Junction. This 24-foot single span concrete barrel arch bridge was completed in 1948. See an
Enlarged Photo Here. (Photograph taken on April 7, 2012 - © Cameron Bevers) Right - Facing west along Hwy 86 towards Amberley from the Boyd Creek Bridge. See an Enlarged Photo Here. (Photograph taken on April 7, 2012 - © Cameron Bevers) 

Left - Southern side of the Boyd Creek Bridge on Hwy 86 east of the Hwy 21 Junction. See an
Enlarged Photo Here. (Photograph taken on April 7, 2012 - © Cameron Bevers) Right - Facing east along Hwy 86 towards Wingham from the Boyd Creek Bridge. See an Enlarged Photo Here. (Photograph taken on April 7, 2012 - © Cameron Bevers) 
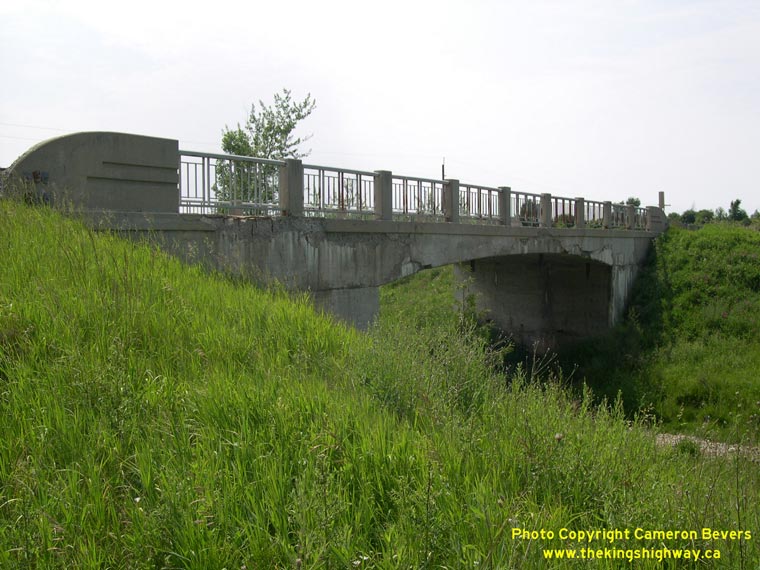
Left - Facing west along Hwy 86 towards Amberley at the Eighteen Mile River Bridge. See an
Enlarged Photo Here. (Photograph taken on June 26, 2005 - © Cameron Bevers) Right - Northern side of the Eighteen Mile River Bridge on Hwy 86 west of Lucknow. This single-span concrete rigid frame structure was completed in 1949. See an Enlarged Photo Here. (Photograph taken on June 26, 2005 - © Cameron Bevers) 

Left - Facing east along Hwy 86 towards Lucknow at the Eighteen Mile River Bridge. See an
Enlarged Photo Here. (Photograph taken on June 26, 2005 - © Cameron Bevers) Right - Southern side of the Eighteen Mile River Bridge near Lucknow. This structure was completed in 1949 and demolished in 2007. During the construction of the new bridge, a section of scaffolding allegedly failed during a concrete pour causing the entire structure to collapse. Six members of the bridge construction crew were injured in the November 10, 2007 incident. Fortunately, the highway was closed to traffic at the time of the accident. See an Enlarged Photo Here. (Photograph taken on June 26, 2005 - © Cameron Bevers) 

Left - Close-up of unusual concrete parapet of the Eighteen Mile River Bridge on Hwy 86. The rounded parapet, combined with the embossed scoring, gives this
bridge a beautiful streamlined appearance that is quite different from other Ontario bridges built in the late 1940s. See an
Enlarged Photo Here. (Photograph taken on June 26, 2005 - © Cameron Bevers) Right - Close-up of the embossed concrete stanchions on the Eighteen Mile River Bridge on Hwy 86 near Lucknow. See an Enlarged Photo Here. (Photograph taken on June 26, 2005 - © Cameron Bevers) 
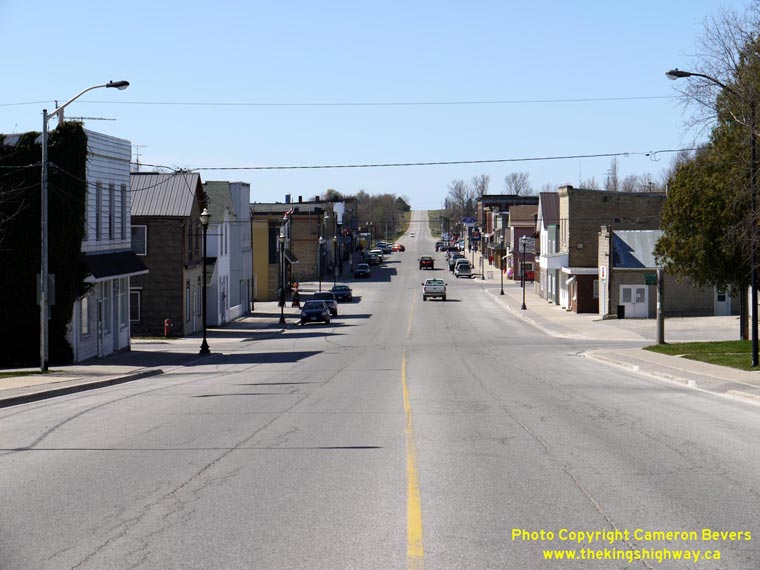
Left - Campbell Street (Hwy 86) in Downtown Lucknow, facing east. Lucknow is the first major community along Hwy 86 heading east from the Hwy 21 Junction. See
an Enlarged Photo Here. (Photograph taken on April 7, 2012 - © Cameron Bevers) Right - Facing west along Campbell Street (Hwy 86) in Lucknow. See an Enlarged Photo Here. (Photograph taken on April 7, 2012 - © Cameron Bevers) 

Left - Departing Lucknow on Hwy 86, facing east towards Wingham. See an
Enlarged Photo Here. (Photograph taken on April 7, 2012 - © Cameron Bevers) Right - Northern side of the Maitland River Bridge on Hwy 86 west of Wingham. This three-span welded steel plate girder structure was completed in 1963. See an Enlarged Photo Here. (Photograph taken on April 7, 2012 - © Cameron Bevers) 

Left - Facing east along Hwy 86 towards Wingham at the Maitland River Bridge. See an
Enlarged Photo Here. (Photograph taken on April 7, 2012 - © Cameron Bevers) Right - Facing west along Hwy 86 towards Amberley at the Maitland River Bridge west of Wingham. See an Enlarged Photo Here. (Photograph taken on April 7, 2012 - © Cameron Bevers) 

Left - Southern side of the Maitland River Bridge on Hwy 86 west of Wingham. See an
Enlarged Photo Here. (Photograph taken on April 7, 2012 - © Cameron Bevers) Right - Facing east along Old Hwy 86 towards Wingham. This awkward alignment of Hwy 86 leading into downtown Wingham along MacIntosh Street was bypassed in the late 1960s. For many years, the old alignment of Hwy 86 through Wingham was known as Hwy 86B. (Photograph taken on April 15, 2007 - © Cameron Bevers) 

Left - Facing east along the Wingham Bypass (Hwy 86) towards Listowel from the Hwy 4 Junction in Wingham. See an
Enlarged Photo Here. (Photograph taken on April 7, 2012 - © Cameron Bevers) Right - Approaching the Hwy 4 Junction on Hwy 86 in Wingham, facing west. See an Enlarged Photo Here. (Photograph taken on April 7, 2012 - © Cameron Bevers) 

Left - Junction of Hwy 4 & Hwy 86 in Wingham, facing west. When Hwy 86 was first established as a King's Highway in 1937, the route of Hwy 4 & Hwy 86
met in Downtown Wingham at Josephine Street and Victoria Street. In the late 1960s, a new bypass was constructed around the south side of Wingham. As a result of the
construction of the new Wingham Bypass, the route of Hwy 86 was relocated onto a new straighter alignment. Since 1967, the routes of Hwy 4 & Hwy 86 have met at
this intersection just south of Wingham. See an Enlarged Photo Here. (Photograph taken on April 7, 2012 - © Cameron Bevers) Right - Facing north along Hwy 4 towards the Hwy 86 (Wingham Bypass) Junction in Wingham. Downtown Wingham can be seen on the hill in the background. The original 1937 junction of Hwy 4 & Hwy 86 lies about 550 metres to the north at Victoria Street. See an Enlarged Photo Here. (Photograph taken on April 7, 2012 - © Cameron Bevers) 
Left - Facing south along Hwy 4 towards Clinton from the Hwy 86 Junction in Wingham. See an
Enlarged Photo Here. (Photograph taken on April 7, 2012 - © Cameron Bevers) Right - Facing west along the Wingham Bypass (Hwy 86) towards Lucknow from the Hwy 4 Junction. The Wingham Bypass was completed in 1967. The new route bypassed the very awkward 1937 route of Hwy 86 through Downtown Wingham, which proved to be very difficult for trucks to negotiate. See an Enlarged Photo Here. (Photograph taken on April 7, 2012 - © Cameron Bevers) 

Left - Junction of Hwy 4 & Hwy 86 in Wingham, facing east towards Listowel. See an
Enlarged Photo Here. (Photograph taken on April 7, 2012 - © Cameron Bevers) Right - Facing north along Hwy 4 towards Downtown Wingham from the Hwy 86 Junction. See an Enlarged Photo Here. (Photograph taken on April 7, 2012 - © Cameron Bevers) 

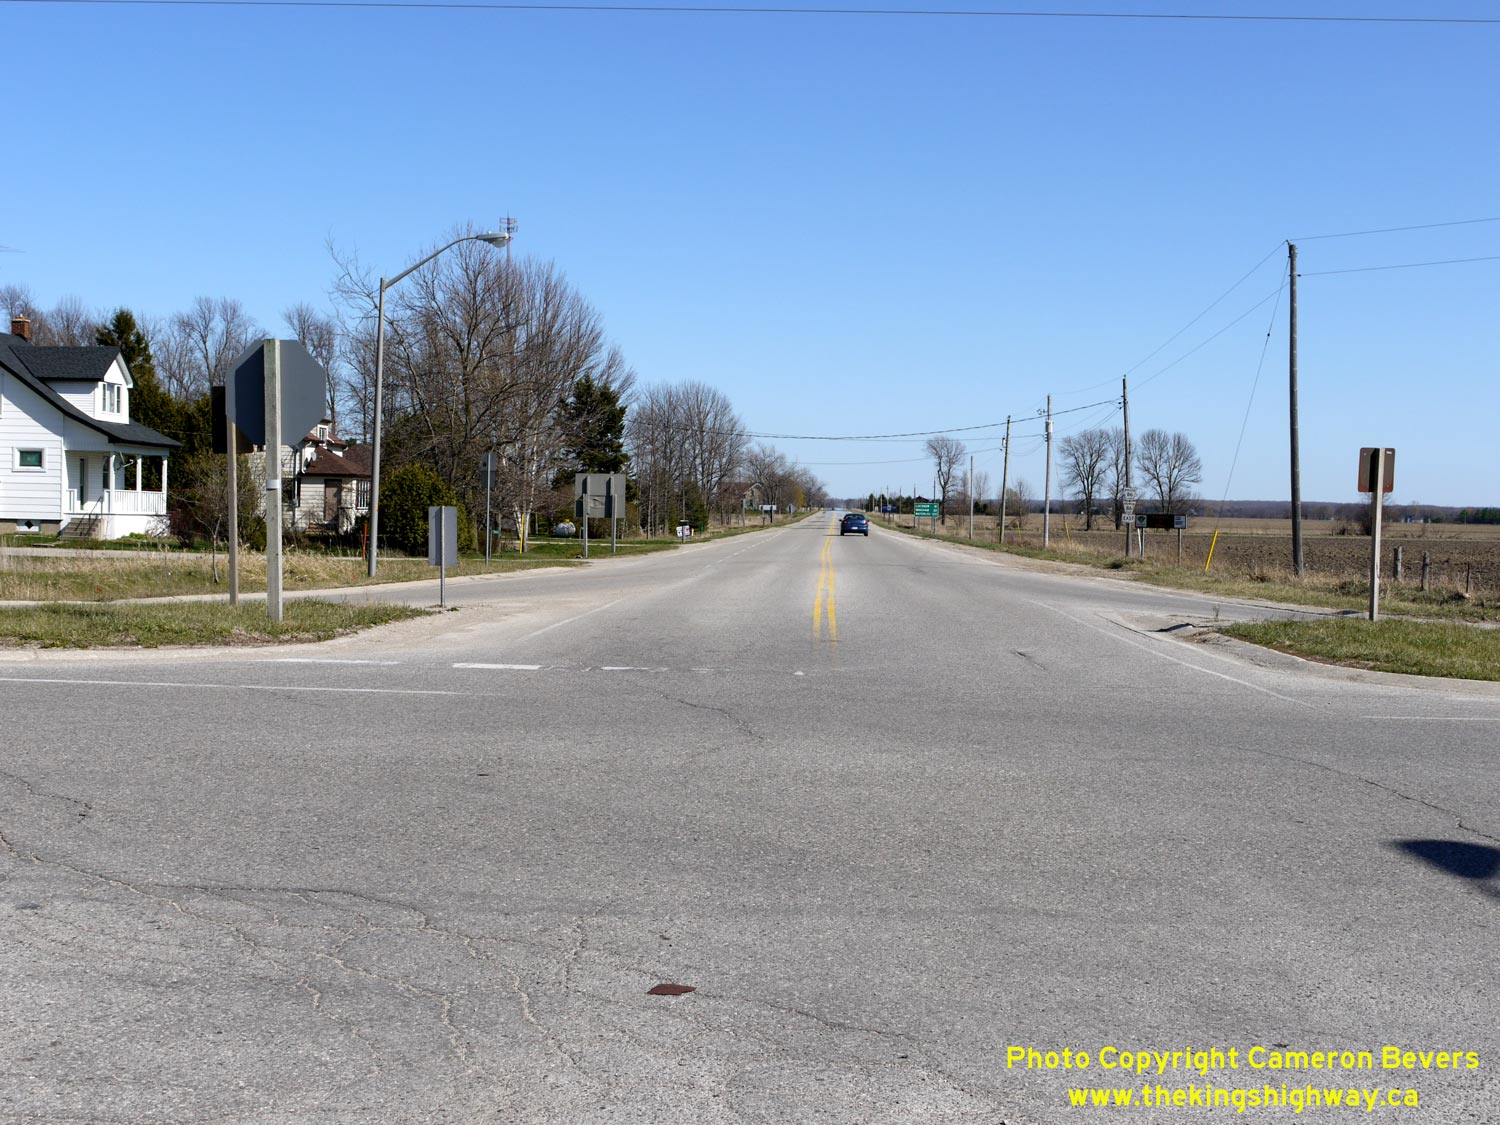
Left - Approaching the junction of Hwy 4 & Hwy 86 in Wingham, facing south. See an
Enlarged Photo Here. (Photograph taken on April 7, 2012 - © Cameron Bevers) Right - Facing north along Josephine Street (Hwy 4) from Victoria Street (Old Hwy 86) in Downtown Wingham. See an Enlarged Photo Here. (Photograph taken on April 7, 2012 - © Cameron Bevers)
Continue on to King's Highway 86 Photos: Wingham to Elmira
|
|---|
Links to Adjacent King's Highway Photograph Pages:
Back to King's Highway 85 Photos /
King's Highway 86 History /
On to King's Highway 87 Photos
Ontario Highway History - Main Menu / Back to List of Highways Website contents, photos & text © 2002-2026, Cameron
Bevers (Webmaster) - All Rights Reserved / Contact Me
|
|---|