
| 
| |
|
|
This page contains present day photos (Year 2000 to date) of Ontario's King's Highway 8, arranged by location from Mitchell
easterly to Stratford. All photographs displayed on this page were taken by the Webmaster
(Cameron Bevers), unless specifically noted otherwise. Click on any thumbnail to see a larger image!
Please note that all photographs displayed on this
website are protected by copyright. These photographs must not be reproduced, published,
electronically stored or copied, distributed, or posted onto other websites without
my written permission. If you want to use photos from this website, please
email me first for permission. Thank-you!
|
|---|
|
Page 5: Present Day King's Highway 8 Photographs (Mitchell to Stratford)


Left - Facing west along Hwy 8 towards Seaforth from the Hwy 23 South Junction in Mitchell. See an
Enlarged Photo Here. (Photograph taken on October 9, 2017 - © Cameron Bevers) Right - Approaching the Hwy 23 South Junction (Blanchard Street) on Hwy 8, facing east towards Downtown Mitchell. See an Enlarged Photo Here. (Photograph taken on October 9, 2017 - © Cameron Bevers) 

Left - An old destination guide sign at the Hwy 8 & Hwy 23 South Junction in Mitchell. See an
Enlarged Photo Here. (Photograph taken on October 9, 2017 - © Cameron Bevers) Right - Facing north along Hwy 23 approaching the Hwy 8 Junction in Mitchell. Interestingly, this highway junction is not controlled by traffic signals. Although it is a fairly busy highway junction overall, the prevailing traffic conditions are such that most vehicles are able to find gaps without significant delay. See an Enlarged Photo Here. (Photograph taken on October 9, 2017 - © Cameron Bevers) 

Left - Facing south along Blanchard Street (Hwy 23) from the Hwy 8 Junction in Mitchell. From Mitchell, Hwy 23 continues south towards the London area. At
Elginfield, Hwy 23 reaches its southern terminus at Hwy 7. Traffic continuing south to London from Elginfield must then use Hwy 4. See an
Enlarged Photo Here. (Photograph taken on October 9, 2017 - © Cameron Bevers) Right - Junction sign assembly at the Hwy 8 & Hwy 23 South Junction. As the signpost indicates, Hwy 8 & Hwy 23 share a short concurrent route through Mitchell. See an Enlarged Photo Here. (Photograph taken on October 9, 2017 - © Cameron Bevers) 
Above - King's Highway 8 & King's Highway 23 route markers at the Hwy 23 South Junction on westbound Hwy 8 in Mitchell. See an
Enlarged Photo Here. (Photograph taken on October 7, 2006 - © Cameron Bevers) 

Left - Junction sign assemblies in Mitchell. The Hwy 8 & Hwy 23 South Junction was resigned a number of years ago. See an
Enlarged Photo Here. (Photograph taken on October 9, 2017 - © Cameron Bevers) Right - Facing west towards the Hwy 23 South Junction in Mitchell. From this highway junction, Hwy 8 continues straight ahead towards Goderich, while Hwy 23 turns left and heads south towards Elginfield. See an Enlarged Photo Here. (Photograph taken on October 9, 2017 - © Cameron Bevers) 

Left - Facing east towards Downtown Mitchell at the Thames River Bridge on Hwy 8 & Hwy 23. See an
Enlarged Photo Here. (Photograph taken on October 9, 2017 - © Cameron Bevers) Right - Southern side of the Thames River Bridge on Hwy 8 & Hwy 23 in Mitchell. See an Enlarged Photo Here. (Photograph taken on October 9, 2017 - © Cameron Bevers) 

Left - Northern side of the Thames River Bridge on Hwy 8 & Hwy 23 in Mitchell. This single-span concrete rigid frame structure was completed in 1952. See
an Enlarged Photo Here. (Photograph taken on October 9, 2017 - © Cameron Bevers) Right - Facing west across the Thames River Bridge on Hwy 8 & Hwy 23 in Mitchell. See an Enlarged Photo Here. (Photograph taken on October 9, 2017 - © Cameron Bevers) 

Left - Approaching the Hwy 8 & Hwy 23 North Junction in Downtown Mitchell, facing east. The routes of Hwy 8 & Hwy 23 part ways again after sharing a
concurrent route for approximately 175 metres across the Thames River Bridge. Straight ahead, Hwy 8 continues east towards Stratford, while Hwy 23 turns left and
resumes its route north towards Listowel. See an Enlarged Photo Here. (Photograph taken on October 9, 2017 - © Cameron Bevers) Right - A lone King's Highway 23 route marker points the way north towards Listowel via St. George Street from the Hwy 8 Junction in Mitchell. See an Enlarged Photo Here. (Photograph taken on October 9, 2017 - © Cameron Bevers) 

Left - Facing north along St. George Street (Hwy 23) from the Hwy 8 Junction in Downtown Mitchell. See an
Enlarged Photo Here. (Photograph taken on October 9, 2017 - © Cameron Bevers) Right - Approaching the Hwy 23 North Junction (St. George Street) on Hwy 8 in Downtown Mitchell, facing west. See an Enlarged Photo Here. (Photograph taken on October 9, 2017 - © Cameron Bevers) 

Left - Facing east along Hwy 8 towards Stratford from the Hwy 23 North Junction in Downtown Mitchell. See an
Enlarged Photo Here. (Photograph taken on October 9, 2017 - © Cameron Bevers) Right - Facing south along Hwy 23 approaching the Hwy 8 Junction. The route of Hwy 23 turns right at the traffic signals and follows a short concurrent route with Hwy 8 across the Thames River Bridge. For several years after it was first assumed in 1927, Hwy 23 reached its southern terminus at this intersection. It was not until 1934 that Hwy 23 was extended south from Mitchell to Elginfield, which provided improved access to the London area. See an Enlarged Photo Here. (Photograph taken on October 9, 2017 - © Cameron Bevers) 

Left - Junction assembly on southbound Hwy 23 approaching the Hwy 8 Junction in Mitchell. See an
Enlarged Photo Here. (Photograph taken on October 9, 2017 - © Cameron Bevers) Right - Southern side of the Whirl Creek Bridge on Hwy 8 between Sebringville and Mitchell. This single-span concrete rigid frame structure was completed in 1957. See an Enlarged Photo Here. (Photograph taken on October 7, 2006 - © Cameron Bevers) 

Left - View of the concrete handrail design on the Whirl Creek Bridge. The single bar-and-post concrete handrail was employed on numerous Ontario provincial
highway bridges built between the early 1940s and the mid-1960s. See an Enlarged Photo Here. (Photograph taken on October 7, 2006 - © Cameron Bevers) Right - Close-up of the concrete rigid frame girder superstructure of the Whirl Creek Bridge. By the 1950s, bridge engineers had discovered that the use of a series of longitudinal concrete or steel girders instead of a solid cast-in-place concrete rigid frame span resulted in significant cost and material savings, in addition to reducing the dead load of the structure. See an Enlarged Photo Here. (Photograph taken on October 7, 2006 - © Cameron Bevers) 

Left - Facing west along Hwy 8 towards Mitchell at the Whirl Creek Bridge. This route of Hwy 8 is actually a relocation of the original 1920 highway alignment,
which existed a short distance to the north along today's Perth Line 35. The Whirl Creek Diversion seen here was completed and opened to traffic in 1957. See an
Enlarged Photo Here. (Photograph taken on October 7, 2006 - © Cameron Bevers) Right - Facing east along Hwy 8 at the Whirl Creek Bridge, located about 4 km east of Mitchell. See an Enlarged Photo Here. (Photograph taken on October 7, 2006 - © Cameron Bevers) 

Left - Northern side of the Whirl Creek Bridge on Hwy 8 east of Mitchell. See an
Enlarged Photo Here. (Photograph taken on October 7, 2006 - © Cameron Bevers) Right - Facing east along an old bypassed section of Hwy 8 (now Perth Line 35) east of Mitchell. Roughly 2 km of Hwy 8 was relocated onto a new alignment near Whirl Creek between Sebringville and Mitchell as part of a highway improvement project carried out during the 1950s. See an Enlarged Photo Here. (Photograph taken on October 7, 2006 - © Cameron Bevers) 

Left - This former Hwy 8 alignment (Perth Line 35) located about 4 km east of Mitchell was bypassed by a newer and much-improved highway alignment during the
1950s. Several dangerous horizontal curves were removed from Hwy 8 as a result of this highway improvement project, including the curve shown here. See an
Enlarged Photo Here. (Photograph taken on October 7, 2006 - © Cameron Bevers) Right - An old 1920s-era concrete culvert sits on a former alignment of Hwy 8 near Whirl Creek, east of Mitchell. See an Enlarged Photo Here. (Photograph taken on October 7, 2006 - © Cameron Bevers) 

Left - Facing east along the former Hwy 8 alignment towards the old Whirl Creek Bridge. Nearly 2 km of the original route of Hwy 8 was bypassed in the 1950s.
See an Enlarged Photo Here. (Photograph taken on October 7, 2006 - © Cameron Bevers) Right - Whirl Creek Bridge on Old Hwy 8 (Perth Line 35), located about 5 km east of Mitchell. This single-span steel pony truss structure was completed in 1921. See an Enlarged Photo Here. (Photograph taken on October 7, 2006 - © Cameron Bevers) 

Left - The old Whirl Creek Bridge on the former alignment of Hwy 8 is a Warren-type steel pony truss structure with a span length of 70 feet (21.3 metres).
The Department of Public Highways of Ontario (DPHO) constructed about 50 steel truss bridges similar to this one across Southern, Central and Eastern Ontario during
the first half of the 1920s. These structures were quite narrow by modern standards, and were gradually replaced during the 1950s and 1960s as the highways were
widened. Had the Whirl Creek Bridge not been bypassed by a new highway in 1957, it too would have had a similar fate. Surviving examples of these early DPHO-built
bridges are now quite rare. See an Enlarged Photo Here. (Photograph taken on October 7, 2006 - © Cameron Bevers) Right - Inscription on the concrete wingwall of the Whirl Creek Bridge on Old Hwy 8 - "ONTARIO PROVINCIAL HIGHWAY 1921". See an Enlarged Photo Here. (Photograph taken on October 7, 2006 - © Cameron Bevers) 

Left - Close-up of the steel lattice handrail on the old Whirl Creek Bridge on the former alignment of Hwy 8. Note the old reflector housing mounted to the top
of the handrail. The reflectors themselves are long gone, but the reflector housing provides some insight into early roadside hazard warning devices used by the
Department of Highways of Ontario (DHO). As night driving became more common in the 1930s, the DHO invested heavily into roadside safety devices to warn motorists of
roadside hazards while driving the highways at night. This particular reflector housing was likely a retrofit to the bridge, installed years after the bridge's
construction in 1921. Typically, the reflectors in these housings were made from plastic, but some of the earliest reflectors were made from shaped glass. When
vehicle headlights illuminated the reflectors, motorists would know that there was a roadside hazard of some sort ahead. See an
Enlarged Photo Here. (Photograph taken on October 7, 2006 - © Cameron Bevers) Right - Northern side of the Whirl Creek Bridge on Old Hwy 8 (Perth Line 35). It is believed that the Whirl Creek Bridge is now the oldest surviving bridge built by the DPHO left in the province. A similar DPHO-built steel truss bridge dating from 1920 used to stand on Old Hwy 16 in Spencerville, but that structure was replaced with a new bridge several years ago. See an Enlarged Photo Here. (Photograph taken on October 7, 2006 - © Cameron Bevers) 

Left - Old Whirl Creek Bridge on a former Hwy 8 alignment (now Perth Line 35) west of Sebringville. Structure completed in 1921. See an
Enlarged Photo Here. (Photograph taken on October 7, 2006 - © Cameron Bevers) Right - Whirl Creek Bridge on Old Hwy 8, facing west. A 3 Tonne load restriction was in place on this bridge, but it has since been totally closed to vehicular traffic. See an Enlarged Photo Here. (Photograph taken on October 7, 2006 - © Cameron Bevers) 

Left - Approaching the old Whirl Creek Bridge on the former alignment of Hwy 8, facing west. See an
Enlarged Photo Here. (Photograph taken on October 7, 2006 - © Cameron Bevers) Right - Facing west along Old Hwy 8 (Perth Line 35) towards the old Whirl Creek Bridge. Jurisdiction over the former Hwy 8 alignment seen here was transferred from the DHO to the Township of Logan in 1960, a few years after the new highway alignment at Whirl Creek was completed. See an Enlarged Photo Here. (Photograph taken on October 7, 2006 - © Cameron Bevers) 

Left - Autumn colours along Hwy 8 at the west entrance to Sebringville. See an
Enlarged Photo Here. (Photograph taken on October 7, 2006 - © Cameron Bevers) Right - Facing west along Hwy 8 towards Mitchell at Sebringville. This road shows the typical urban curb and gutter cross section used by the Ministry of Transportation on provincial highways which pass through smaller towns and built-up areas. Note the mountable curb and paved shoulder, which can be used by pedestrians or for on-street parking, where permitted. See an Enlarged Photo Here. (Photograph taken on October 7, 2006 - © Cameron Bevers) 

Left - Facing east along Hwy 8 towards Stratford at Sebringville. See an
Enlarged Photo Here. (Photograph taken on October 7, 2006 - © Cameron Bevers) Right - Facing west towards Mitchell along Huron Street (Hwy 8) in Stratford from the Avon River Bridge. See an Enlarged Photo Here. (Photograph taken on October 21, 2007 - © Cameron Bevers) 

Left - Huron Street Bridge over the Avon River in Stratford. This beautiful two-span stone arch bridge is one of the most attractive highway
bridges in Ontario. The bridge carries Hwy 8 traffic between Stratford and Mitchell. The bridge has been in service for over 125 years. See an
Enlarged Photo Here. (Photograph taken on October 7, 2006 - © Cameron Bevers) Right - Northern side of the Huron Street Bridge (Hwy 8) over the Avon River in Stratford. See an Enlarged Photo Here. (Photograph taken on October 21, 2007 - © Cameron Bevers) 

Left - Close-up of the stone arches of the Huron Street Bridge on Hwy 8 in Stratford. This historic stone arch bridge was completed in 1885. Sadly, there are
relatively few arch bridges still standing in Ontario. Most of the province's surviving arch bridges are reinforced concrete structures, making this 19th Century
bridge in Stratford particularly valuable from a heritage perspective. The Huron Street Bridge is one of Ontario's most photogenic bridges, thanks to its tranquil
setting in a city park along the Avon River. The bridge provides us with a rare opportunity to look back to a time when bridge building was a true art and overall
aesthetics were absolutely essential. See an Enlarged Photo Here. (Photograph taken on October 7, 2006 - © Cameron Bevers) Right - The parapets of the Huron Street Bridge on Hwy 8 are also made of stone, with decorative pillars at each end. See an Enlarged Photo Here. (Photograph taken on October 7, 2006 - © Cameron Bevers) 

Left - Heritage plaque on the Huron Street Bridge. This structure is on the Ministry of Culture's Heritage Bridge List. See an
Enlarged Photo Here. (Photograph taken on October 7, 2006 - © Cameron Bevers) Right - Builder's plaque on the Huron Street Bridge on Hwy 8 in Stratford. The plaque reads "J. CORRIE. BUILDER 1885". See an Enlarged Photo Here. (Photograph taken on October 7, 2006 - © Cameron Bevers) 

Left - The attractive stone pillars flanking the Huron Street Bridge resemble castle turrets. See an
Enlarged Photo Here. (Photograph taken on October 7, 2006 - © Cameron Bevers) Right - Close-up of the decorative elements of the stone pillars on the Huron Street Bridge. See an Enlarged Photo Here. (Photograph taken on October 7, 2006 - © Cameron Bevers) 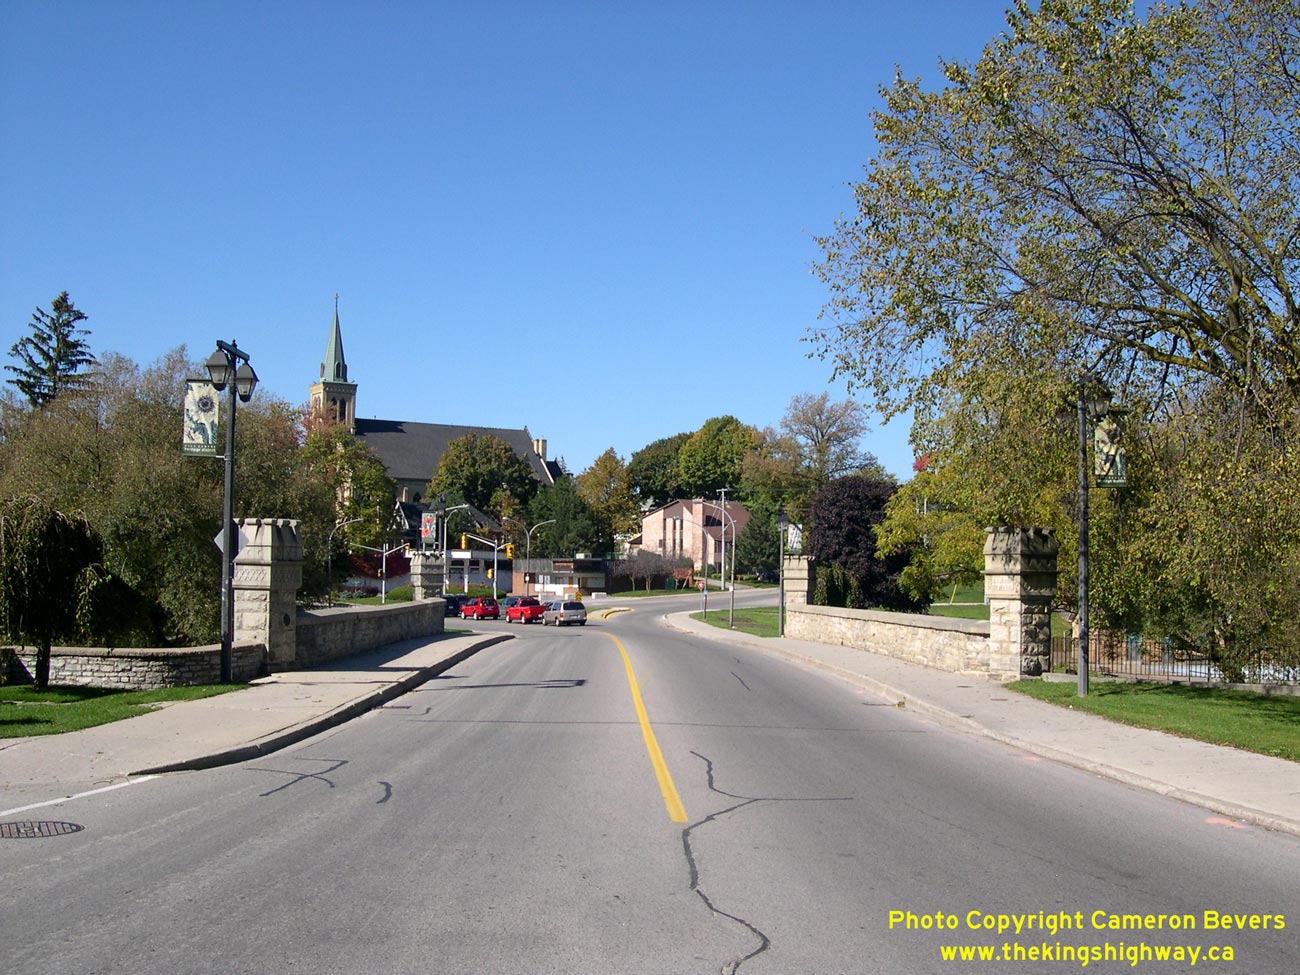

Left - Facing west towards the Avon River Bridge along Huron Street (Hwy 8) in Stratford. See an
Enlarged Photo Here. (Photograph taken on October 7, 2006 - © Cameron Bevers) Right - Avon River Bridge on Huron Street (Hwy 8), facing east towards the Hwy 7 Junction in Stratford. See an Enlarged Photo Here. (Photograph taken on October 7, 2006 - © Cameron Bevers)
Continue on to King's Highway 8 Photos: Stratford to Kitchener
|
|---|
Links to Adjacent King's Highway Photograph Pages:
Back to King's Highway 7 Photos /
King's Highway 8 History /
On to King's Highway 9 Photos
Ontario Highway History - Main Menu / Back to List of Highways Website contents, photos & text © 2002-2026, Cameron
Bevers (Webmaster) - All Rights Reserved / Contact Me
|
|---|